
Related Manuals for Sun Microsystems Sun StorEdge 5310 NAS


Summary of Contents for Sun Microsystems Sun StorEdge 5310 NAS
- Page 1 Sun StorEdge 5310 NAS ™ Troubleshooting Guide Sun Microsystems, Inc. www.sun.com Part No. 817-7513-11 August 2004, Revision A Submit comments about this document at: http://www.sun.com/hwdocs/feedback...
- Page 2 Copyright 2004 Sun Microsystems, Inc., 4150 Network Circle, Santa Clara, Californie 95054, Etats-Unis. Tous droits réservés. Sun Microsystems, Inc. a les droits de propriété intellectuels relatants à la technologie qui est décrit dans ce document. En particulier, et sans la limitation, ces droits de propriété...
-
Page 3: Table Of Contents
Contents Troubleshooting Overview 1 How to Use This Manual 1 Important Notices and Information on the Sun StorEdge 5310 NAS 2 Troubleshooting Tools 3 Troubleshooting Procedures 4 Troubleshooting Flow Charts 6 Diagnostic Information Sources 8 StorEdge Diagnostic Email 8 Data Collection for Escalations 10 Log Error Messages 19 SYSLOG 19 Error Codes from the Sun StorEdge 5310 NAS LCD Display and syslog 20... - Page 4 POST Error Beep Codes 27 POST Progress Code LED Indicators 30 OS Operations 36 Filesystem Check (fsck) Procedure 36 StorEdge Network Capture Utility 37 Upgrades 38 Cacls - Access Control List 38 Proc filesystem 39 Sun StorEdge 5310 NAS Troubleshooting Guide • December 2004...
- Page 5 FTP Server 40 Updating the OS on the Sun StorEdge 5310 NAS 40 Sun StorEdge 5310 NAS Firmware 40 Operating System 40 Common Problems Encountered on the Sun StorEdge 5310 NAS 42 CIFS/SMB/Domain 43 NFS Issues 61 Network Issues 66 NIC speed and duplex negotiation issues.
- Page 6 Replacing One Drive at a Time 39 Relocation Considerations 43 Raid Storage Manager (RSM) 44 Updating Firmware and NVSRAM on the Array 95 Updating ESM Firmware 99 StorEdge File Replicator 1 Overview 1 Real-time Mirroring 3 Sun StorEdge 5310 NAS Troubleshooting Guide • December 2004...
- Page 7 Pseudo Real-time Mirroring 3 StorEdge File Replicator 3 Mirroring Variations 7 Operational State 9 Mirror Creation 10 Mirror Replication 11 Mirror Sequencing 12 Link Down and Idle Conditions 12 Cracked and Broken Mirrors 12 Cannot perform first-time synchronization of mirror system: 13 Filesystem errors, such as run check, directory broken, etc.: 13 Error messages, panics or hang condition when enabling mirror: 13 Clustering 1...
- Page 8 Array FRU replacement Procedures 23 Replacing a Controller 23 Replacing a Controller Battery 29 Replacing a Drive 36 Replacing a Fan 39 Replacing a Power Supply 41 Replacing an SFP Transceiver 44 viii Sun StorEdge 5310 NAS Troubleshooting Guide • December 2004...
- Page 9 Tables List of Adapters 16 TABLE 1-1 Routing Table 16 TABLE 1-2 UPS Error Messages 22 TABLE A-3 File System Errors 24 TABLE A-4 PEMS Error Messages 24 TABLE A-5 Index to Problems 4 TABLE 2-1 Bootup Beep Codes 6 TABLE 2-2 Server LEDs 11 TABLE 2-3...
- Page 10 RAID Level Configurations 58 TABLE 3-9 Mappings View Tab 69 TABLE 3-10 Volume-to-LUN Terminology 69 TABLE 3-11 Storage Array Status Icon Quick Reference 86 TABLE 3-12 Standard Terms 2 TABLE 4-1 Sun StorEdge 5310 NAS Troubleshooting Guide • December 2004...
- Page 11 Figures Front Panel Pushbuttons and LEDs 13 FIGURE 2-1 Rear Panel LEDs 16 FIGURE 2-2 Location of Front-Panel System Status LED 18 FIGURE 2-3 Location of Rear-Panel Power Supply Status LEDs 20 FIGURE 2-4 Fault and Status LEDs on the Server Board 21 FIGURE 2-5 Location of Front-Panel ID Pushbutton and LED 23 FIGURE 2-6...
- Page 12 Status Changes During an Example Recovery Operation 94 FIGURE 3-41 Status Changes When The Example Recovery Operation is Completed 95 FIGURE 3-42 The lifecycle of a transaction in StorEdge File Replicator 4 FIGURE 4-1 Sun StorEdge 5310 NAS Troubleshooting Guide • December 2004...
- Page 13 Write ordering on the Mirror 5 FIGURE 4-2 Lost transaction handling on the Mirror 6 FIGURE 4-3 The Mirror Log and Primary Journal 7 FIGURE 4-4 Physical and Logical Volume Relationship 2 FIGURE 6-1 The Copy-On-Write Mechanism for Checkpoints 4 FIGURE 6-2 Mappings for Block n Before Modification 5 FIGURE 6-3...
- Page 14 Drive Link, Host Link, Battery, and Fault Lights 36 FIGURE 7-20 Replacing a Drive 38 FIGURE 7-21 Replacing a Fan 40 FIGURE 7-22 Replacing a Power Supply 43 FIGURE 7-23 Replacing an SFP Transceiver 45 FIGURE 7-24 Sun StorEdge 5310 NAS Troubleshooting Guide • December 2004...
- Page 15 Preface This Troubleshooting Guide provides information on how to identify, isolate, and fix problems with the Sun StorEdge 5310 NAS. It also explains how to remove and replace certain key server components. Topics in this chapter include: “Who Should Use This Book” on page -xvi “How This Manual is Organized”...
- Page 16 You must be root to do this; Variables that you replace with a real value; To delete a file, type rm filename. boldface courier font What you type machine_name% su xvi Sun StorEdge 5310 NAS Troubleshooting Guide • December 2004...
-
Page 17: Related Documentation
Sun StorEdge 5310 NAS Setup Poster Ordering Sun Documents The SunDocsSM program provides more than 250 manuals from Sun Microsystems, Inc. If you are in the United States, Canada, Europe or Japan, you can purchase documentation sets or individual manuals by using this program. -
Page 18: Sun Welcomes Your Comments
Sun is interested in improving its documentation and welcomes your comments and suggestions. You can email your comments to Sun at: docfeedback@sun.com Please include the part number (8xx-xxxx-xx) of your document in the subject line of your email. xviii Sun StorEdge 5310 NAS Troubleshooting Guide • December 2004... -
Page 19: Troubleshooting Overview
C H A P T E R Troubleshooting Overview This chapter provides an overview of diagnostic functions and tools needed for troubleshooting the Sun StorEdge 5310 NAS. This chapter contains the following sections: “How to Use This Manual” on page 1-1 “Important Notices and Information on the Sun StorEdge 5310 NAS”... -
Page 20: Important Notices And Information On The Sun Storedge 5310 Nas
Refer to “StorEdge Web Admin does not work properly through a firewall.” on page 2-80 for more details. Note – There is a line of tape that must be removed to be able to remove the fan tray. Sun StorEdge 5310 NAS Troubleshooting Guide • December 2004... -
Page 21: Troubleshooting Tools
Troubleshooting Tools 1.3.0.1 Storage Automated Diagnostic Environment (StorAde) If you have the Storage Automated Diagnostic Environment installed in the host, check the internal status of the array with this tool. See the documentation for this tool for further information. All that you need to use the Storage Automated Diagnostic Environment is web browser access to the host where it is installed. -
Page 22: Troubleshooting Procedures
“event log” from the Sun StorEdge 5310 NAS /var/adm/messages file at the host system CIFS clients messages 2. Determine the extent of the problem by using one or more of the following methods: Sun StorEdge 5310 NAS Troubleshooting Guide • December 2004... - Page 23 Use the Troubleshooting Guide procedures documentation to help isolate FRU failures Note – These tests isolate the problem to a FRU that must be replaced. Follow the instructions in the Sun StorEdge 5310 NAS Troubleshooting Guide for proper FRU replacement procedures. 5. Replace the failed FRU.
-
Page 24: Troubleshooting Flow Charts
Host-generated message, found in the /var/adm/messages file, CIFS clients may have errors on their monitor or in the event log. Troubleshooting Flow Charts Use the flow charts below to diagnose problems. Sun StorEdge 5310 NAS Troubleshooting Guide • December 2004... - Page 25 Follow the steps below to diagnose hardware problems. Chapter 1 Troubleshooting Overview...
-
Page 26: Diagnostic Information Sources
The diagnostics are a primary tool for checking configuration and troubleshooting. Before you can send email diagnostics from the StorEdge, SMTP (email) must be configured. Please see the FAQ, “How do I set up SMTP (email)?” Sun StorEdge 5310 NAS Troubleshooting Guide • December 2004... - Page 27 To collect diagnostics, proceed as follows: 1. Access the StorEdge via Telnet or serial console. 2. Press enter at the [menu] prompt and enter the administrator password. 3. Press the spacebar until “Diagnostics” is displayed under “Extensions” at the lower right. 4.
-
Page 28: Data Collection For Escalations
1.6.2.4 Collect specific data Based on the above data, additional information may be required. This document will help you to tailor this data collection. Here are some examples: 1-10 Sun StorEdge 5310 NAS Troubleshooting Guide • December 2004... - Page 29 Version(s) of software on client system(s) Version(s) of software on server system(s) Network topology Steps and/or sequence of events leading to the failure What was the user doing or attempting to do when the failure occurred? Problem symptom (error codes, failed operation, crash) Syslog data Network traces Diagnostic email...
-
Page 30: Security Issues
Domain Admin account. These are very useful in locating the source of the problem. When escalating a security issue collect the following data: 1-12 Sun StorEdge 5310 NAS Troubleshooting Guide • December 2004... - Page 31 Cacls For issues with access to a file or directory, collect the output of the cacls command. This command is available from the CLI. At the CLI, enter “cacls <full pathname>”. The full pathname should begin with the volume name, as in this example: “cacls /vol1/testfile.txt”.
- Page 32 1. To access the StorEdge CLI, connect to the StorEdge via Telnet or serial console, and type “admin” at the [menu] prompt and enter the administrator password. 2. At the CLI, enter “load netm”. Then type “menu” to configure capture and capture packets. 1-14 Sun StorEdge 5310 NAS Troubleshooting Guide • December 2004...
- Page 33 3. Press the spacebar until “Packet Capture” is displayed under “Extensions” at the lower right. 4. Select the letter corresponding to “Packet Capture”. 5. Select option “1”, Edit Fields. The available options are as follows: Capture FileWhere to save the capture file. </volumename/directory/filename> Frame Size (B)Size in bytes of each frame to capture.
-
Page 34: Table 1-1 List Of Adapters
Check for modified gateways. A “d” or “m” in the flags column indicates a dynamically added or dynamically modified route. If an important route is modified, it may no longer be able to send packets to the desired destination. 1-16 Sun StorEdge 5310 NAS Troubleshooting Guide • December 2004... -
Page 35: Performance Issues
These are the result of an ICMP message from another router or firewall, typically due to mis-configuration of that device. It is also possible to configure StorEdge to ignore ICMP requests to change the default gateway. Check the “Use” statistic in the routing table. This statistic indicates how many times a route has been used. - Page 36 This can determine if issue is disk or network related. usage: ratewrite FILENAME [+OFFSET] TOTALKB [BLOCKSIZE] example: support > ratewrite /vol1/testfile 1000000 4096 1024000000 bytes (976.5M) in 36.844 seconds 26.50MB/sec 1-18 Sun StorEdge 5310 NAS Troubleshooting Guide • December 2004...
-
Page 37: Log Error Messages
rateread: read contents of a file, report performance. The file read does not use network connection. This can determine if issue is disk or network related and also if problem is in reading or writing data. usage: rateread FILENAME [+OFFSET] TOTALKB [BLOCKSIZE] example: support >... -
Page 38: Error Codes From The Sun Storedge 5310 Nas Lcd Display And Syslog
This section details the specific error messages sent through e-mail, SNMP notification, the LCD panel, and the system log to notify the administrator in the event of a system error. SysMon, the monitoring thread in the Sun StorEdge 5310 1-20 Sun StorEdge 5310 NAS Troubleshooting Guide • December 2004... -
Page 39: About Sysmon Error Notification
NAS, monitors the status of RAID devices, UPSs, file systems, head units, enclosure subsystems, and environmental variables. Monitoring and error messages vary depending on model and configuration. In the tables in this section, table columns with no entries have been deleted. About SysMon Error Notification SysMon, the monitoring thread in the Sun StorEdge 5310 NAS, captures events generated as a result of subsystem errors. -
Page 40: Ups Subsystem Errors
Abnormal abnormal temperature temperature or detected in the system. ambient and/or humidity humidity detected. Action: 1. Check UPS unit installation, outside acceptable 2. Contact technical support. thresholds Severity = Error 1-22 Sun StorEdge 5310 NAS Troubleshooting Guide • December 2004... - Page 41 UPS Error Messages TABLE A-3 Event E-Mail Subject: Text SNMP Trap LCD Panel Write-back cache Controller Cache Disabled: Cache write-back cache is disabled. Either AC power or UPS is not charged Disabled for ctrl x disabled completely. Action: 1 - If AC power has failed, restore system power.
-
Page 42: File System Errors
Action: The system will shut down in 10 seconds to protect the CPU from damage. You should replace the CPU fan before turning the system back on. Severity = Critical 1-24 Sun StorEdge 5310 NAS Troubleshooting Guide • December 2004... - Page 43 PEMS Error Messages TABLE A-5 Event E-Mail Subject: Text SNMP Trap LCD Panel Fan Error Fan Failure: envFanFail trap P11 Fan xx Blower fan Blower fan xx has failed. Fan speed = xx failed xx has failed! RPM. Action: The fan must be replaced as soon as possible.
-
Page 44: Maintenance Precautions
2. Turn the Sun StorEdge 5310 NAS off. 3. Disconnect the power cord from the power source, then from the Sun StorEdge 5310 NAS server. 4. Shut down the storage enclosure and remove its power cords. 1-26 Sun StorEdge 5310 NAS Troubleshooting Guide • December 2004... -
Page 45: Static Electricity Precautions
5. Disconnect the all other external peripheral devices from the Sun StorEdge 5310 NAS server if applicable. 6. Disconnect all optical fibre and network interface cables from the Sun StorEdge 5310 NAS server and the storage enclosure. 7. Remove the Sun StorEdge 5310 NAS and the storage enclosure from the rack. Static Electricity Precautions 1.8.0.1 Grounding Procedure... - Page 46 This power source disconnect must be readily accessible, and it must be labeled as controlling power to the entire unit, not just to the server(s). 1-28 Sun StorEdge 5310 NAS Troubleshooting Guide • December 2004...
-
Page 47: Nas Head
C H A P T E R NAS Head This chapter addresses frequently asked questions for the Sun StorEdge 5310 NAS. The chapter contains these sections: “Hardware” on page 2-1 “OS Operations” on page 2-36 “Updating the OS on the Sun StorEdge 5310 NAS” on page 2-40 “Sun StorEdge 5310 NAS Firmware”... -
Page 48: Problems With Initial System Startup
NEMA 5-15R outlet for 100-120 V or a NEMA 6-15R outlet for 200-240V? Is AC power available at the wall outlet? Are there any POST LEDs illuminated? If so check “Power-On Self-Test (POST)” on page 2-7. Sun StorEdge 5310 NAS Troubleshooting Guide • December 2004... -
Page 49: Resetting The Server
Are there any POST beep codes? If so check “POST Error Beep Codes” on page 2- 2.2.2 Resetting the Server Quite often, a problem can be solved merely be resetting the server or shutting it down and powering it back up. You may restart or shut down the Sun StorEdge 5310 NAS using software or hardware. -
Page 50: Preparing The System For Diagnostic Testing
“Power LED Does Not Light” page 2-8 “System Cooling Fans Do Not Rotate Properly” page 2-8 “Cannot Connect to a Server” page 2-9 “Problems with Network” page 2-9 Try the solutions in the order given. Sun StorEdge 5310 NAS Troubleshooting Guide • December 2004... -
Page 51: Server Does Not Power On
Problems Starting Up If the server does not start up properly, use the information in this section to diagnose problems. Server Does Not Power On If the server does not power on, check the following: Does the main server board have power? Open the chassis lid and check the 5V Standby LED on the baseboard to see if it is illuminated. -
Page 52: Table 2-2 Bootup Beep Codes
Test for unexpected interrupts. 1-5-1-1 FRB failure (processor failure) 1-5-2-2 No processors installed 1-5-2-3 Processor configuration error (for example, mismatched VIDs). 1-5-2-4 Front-side bus select configuration error (for example, mismatched BSELs) Sun StorEdge 5310 NAS Troubleshooting Guide • December 2004... -
Page 53: Server Starts Booting Automatically At Power On
Bootup Beep Codes TABLE 2-2 Beeps Reason 1-5-4-2 Power fault 1-5-4-3 Chipset control failure 1-5-4-4 Power control failure Server Starts Booting Automatically at Power On The server board saves the last known power state in the event of a power failure. If you remove power before powering down the system using the power switch on the front panel, your system might automatically attempt to restore itself back to the state it was in after you restore power. -
Page 54: Power Led Does Not Light
If the system cooling fans are not operating properly, system components could be damaged. Check the following: Is AC power available at the wall outlet? Is the system power cord properly connected to the system and the wall outlet? Sun StorEdge 5310 NAS Troubleshooting Guide • December 2004... -
Page 55: Cannot Connect To A Server
Did you press the power button? Is the power on light illuminated? Have any of the fan motors stopped (use the server management subsystem to check the fan status)? Are the fan power connectors properly connected to the server board? Is the cable from the front panel board connected to the server board? Are the power supply cables properly connected to the server board? Are there any shorted wires caused by pinched cables or power connector plugs... -
Page 56: Troubleshooting The Server Using Built-In Tools
“Contacting Technical Support” on page 2-1 Diagnosing System Errors Use the following tools to help you isolate server problems: “LEDs” on page 2-11 “Beep Codes” on page 2-11 “POST Screen Messages” on page 2-11 2-10 Sun StorEdge 5310 NAS Troubleshooting Guide • December 2004... -
Page 57: Leds
2.4.1 LEDs You can use the diagnostic LED indications to isolate faults. See “LEDs and Pushbuttons” on page 2-11. 2.4.2 Beep Codes A built-in server speaker indicates failures with audible beeps. See “POST Error Beep Codes” on page 2-27. 2.4.3 POST Screen Messages For many failures, the BIOS sends error codes and message to the screen. -
Page 58: Front Panel Leds And Pushbuttons
On = power is on server 2.5.1 Front Panel LEDs and Pushbuttons The front panel contains the pushbuttons and LEDs shown in Figure 2-1. Note that the illustration has the bezel removed. 2-12 Sun StorEdge 5310 NAS Troubleshooting Guide • December 2004... -
Page 59: Front Panel Leds
NIC1 and NIC2 Activity LEDs Power/Sleep Pushbutton Power/Sleep LED System Status LED ID LED ID Pushbutton Hard Disk Status LED Reset Pushbutton NMI Pushbutton Front Panel Pushbuttons and LEDs FIGURE 2-1 2.5.1.1 Front Panel LEDs The front panel LEDs are summarized in Table 2-4. Front Panel LEDs TABLE 2-4 Color... -
Page 60: Table 2-4 Front Panel Leds
LED turns off after a timeout period. The timeout period is configurable, with a default of 15 seconds. An additional blue System ID LED on the Main Board is visible through the rear panel. It mirrors the operation of the front panel LED. 2-14 Sun StorEdge 5310 NAS Troubleshooting Guide • December 2004... -
Page 61: Table 2-5 Front Panel Pushbuttons
2.5.1.2 Front Panel Pushbuttons The front panel pushbuttons are summarized in Table 2-5. Front Panel Pushbuttons TABLE 2-5 Switch Function Power/Sleep This pushbutton is used to toggle the system power on and off. This button is also used as a sleep button for operating systems that follow the ACPI specification. -
Page 62: Rear Panel Leds
Each of the four LEDs can have one of four states: Off, Green, Red, or Amber. For detailed information on these LEDs, see “POST Progress Code LED Indicators” on page 2-30. 2-16 Sun StorEdge 5310 NAS Troubleshooting Guide • December 2004... - Page 63 Rear Panel LEDs TABLE 2-6 Color Function System ID Blue This LED is located on the Main Board and is visible through holes in the rear panel. It can provide a mechanism for identifying one system out of a group of identical systems. This can be particularly useful if the server is used in a rack- mount chassis in a high-density, multiple-system application.
-
Page 64: Front-Panel System Status Led
Critical Condition A critical condition or non-recoverable threshold crossing is indicated with a continuous amber status LED and is associated with the following events: Temperature, voltage, or fan critical threshold crossing. 2-18 Sun StorEdge 5310 NAS Troubleshooting Guide • December 2004... - Page 65 Power subsystem failure. The Baseboard Management Controller (BMC) asserts this failure whenever it detects a power control fault (for example, the BMC detects that the system power is remaining on even though the BMC has deasserted the signal to turn off power to the system). The system is unable to power up due to incorrectly installed processor(s), or processor incompatibility.
-
Page 66: Rear Panel Power Supply Status Led
Both LEDs solid green = server is fully powered on and power supplies are good. One LED solid green and one LED amber = AC power missing from one of the power supplies. 2-20 Sun StorEdge 5310 NAS Troubleshooting Guide • December 2004... -
Page 67: Server Main Board Fault Leds
2.5.5 Server Main Board Fault LEDs There are several fault and status LEDs built into the server board (see Figure 2-5). Some of these LEDs are visible only when the chassis cover is removed. The LEDs are explained in this section. POST ID LED LEDs... - Page 68 System ID LED. This blue LED can be illuminated to identify the server when it is part of a large stack of servers. See “System ID LEDs” on page 2-23 for details. 2-22 Sun StorEdge 5310 NAS Troubleshooting Guide • December 2004...
-
Page 69: System Id Leds
2.5.6 System ID LEDs A pair of blue LEDs, one at the rear of the server, and one on the front panel, can be used to easily identify the server when it is part of a large stack of servers. A single blue LED located at the back edge of the server board next to the backup battery is visible through the rear panel. -
Page 70: Power-On Self Test (Post)
Table 2-9 and Table 2-10 contain the POST error messages and error codes. Standard POST Error Messages and Codes TABLE 2-9 Error Code Error Message Pause On Boot Timer Channel 2 error Master Interrupt Controller Slave Interrupt Controller CMOS battery failure 2-24 Sun StorEdge 5310 NAS Troubleshooting Guide • December 2004... - Page 71 Standard POST Error Messages and Codes (Continued) TABLE 2-9 Error Code Error Message Pause On Boot CMOS options not set CMOS checksum failure CMOS display error Insert key pressed Keyboard locked message Keyboard stuck key Keyboard interface error System memory size error External cache failure Hard disk 0 error Hard disk 1 error...
-
Page 72: Table 2-10 Extended Post Error Messages And Codes
8196 Processor models are different 8197 CPU speed mismatch 8198 Failed to load processor microcode 8300 Baseboard Management Controller (BMC) failed to function 8301 Front panel controller failed to function 2-26 Sun StorEdge 5310 NAS Troubleshooting Guide • December 2004... -
Page 73: Post Error Beep Codes
Extended POST Error Messages and Codes (Continued) TABLE 2-10 Error Code Error Message Pause On Boot 8305 Hotswap controller failed to function 8420 Intelligent System Monitoring chassis opened 84F1 Intelligent System Monitoring forced shutdown 84F2 Server Management Interface failed 84F3 BMC in update mode 84F4 Sensor Data Record (SDR) empty... -
Page 74: Table 2-12 Bios-Generated Boot Block Post Beep Codes
This is not a fatal error. ROM checksum error System BIOS ROM checksum error Shutdown register error Shutdown CMOS register read/write error detected Invalid BIOS General BIOS ROM error 2-28 Sun StorEdge 5310 NAS Troubleshooting Guide • December 2004... -
Page 75: Table 2-13 Memory 3-Beep And Led Post Error Codes
Memory 3-Beep and LED POST Error Codes TABLE 2-13 Debug Port 80h Error Diagnostic LED Decoder Beep Code Indicator (G = green, R = red, A = amber) Meaning No memory was found in the system Memory mixed type detected EDO is not supported First row memory test failure Mismatched DIMMs in a row... -
Page 76: Post Progress Code Led Indicators
LEDs are lit, resulting in an amber color. Likewise, if both bits are clear, the red and green LEDs are off. Figure 2-7 shows examples of how the POST LEDs are coded. 2-30 Sun StorEdge 5310 NAS Troubleshooting Guide • December 2004... -
Page 77: Table 2-15 Boot Block Post Progress Led Code Table (Port 80H Codes)
POST LEDs (as viewed from back of server) = upper nibble bits = lower nibble bits POST Code = 95h AMBER GREEN upper nibble = 1001 = 9h lower nibble = 0101 = 5h high bits low bits (on left) (on right) POST Code = CAh AMBER... -
Page 78: Table 2-16 Post Progress Led Code Table (Port 80H Codes)
Uncompress various BIOS modules. Verify password checksum. Verify CMOS checksum. Read microcode updates from BIOS ROM. Initializing the processors. Set up processor registers. Select least featured processor as the BSP. 2-32 Sun StorEdge 5310 NAS Troubleshooting Guide • December 2004... - Page 79 POST Progress LED Code Table (Port 80h Codes) (Continued) TABLE 2-16 POST Diagnostic LED Decoder Code (G = green, R = red, A = amber) Description Go to Big Real mode. Decompress INT13 module. Keyboard controller test: the keyboard controller input buffer is free.
- Page 80 Clearing the output buffer and checking for stuck keys. Issuing the keyboard reset command next Keyboard interface test: A keyboard reset error or stuck key was found. Issuing the keyboard controller interface test command next. 2-34 Sun StorEdge 5310 NAS Troubleshooting Guide • December 2004...
- Page 81 POST Progress LED Code Table (Port 80h Codes) (Continued) TABLE 2-16 POST Diagnostic LED Decoder Code (G = green, R = red, A = amber) Description Check stuck key enable keyboard: the keyboard controller interface test is complete. Writing the command byte and initializing the circular buffer next.
-
Page 82: Os Operations
LAN connected client or a serial console. Using a dial-up or WAN connected client is not recommended, as this can extend the run time of the procedure. 2-36 Sun StorEdge 5310 NAS Troubleshooting Guide • December 2004... -
Page 83: Storedge Network Capture Utility
At the CLI, enter “fsck <volumename>”. You will then be prompted whether repairs should be made if errors are found. Generally, the answer should be “y” for “yes”. The other potentially useful option is “n” for “no”. This will run a check against the volume without writing the repairs. -
Page 84: Upgrades
In this case, we can see that the item is a directory, with 750 permissions: Read/write/execute (7) for the owner (UID 34), Read/write for members of the owner’s group (GID 22), and no permissions (0) for everyone else. 2-38 Sun StorEdge 5310 NAS Troubleshooting Guide • December 2004... -
Page 85: Proc Filesystem
Listed next are Creation time, FS Creation time, and FS mtime. These are timestamps associated with the file and the filesystem, generally only useful for troubleshooting timestamp issues. Next is the Windows security descriptor. In its simplest form, it will read “No security descriptor”. -
Page 86: Ftp Server
“.img”. This file should be stored locally on the client from which the software upgrade will be done. The operating system upgrade requires a system reboot which should be done immediately after copying new OS to the system. 2-40 Sun StorEdge 5310 NAS Troubleshooting Guide • December 2004... -
Page 87: Figure 2-8 The Update Software Panel
Important – After the reboot, the system may take as long as five minutes to complete the software upgrade and return to service. There is no visual indication that this process is taking place. The StorEdge LCD displays “…booting…” during this process. -
Page 88: Common Problems Encountered On The Sun Storedge 5310 Nas
“StorEdge Features and Utilities” on page 2-82 “Hardware Warning Messages” on page 2-84 “Backup Issues” on page 2-88 “Direct Attached Tape Libraries” on page 2-90 “StorEdge File Replicator Issues” on page 2-152 2-42 Sun StorEdge 5310 NAS Troubleshooting Guide • December 2004... -
Page 89: Cifs/Smb/Domain
2.11 CIFS/SMB/Domain Changes to Windows group membership do not take effect. Changes to user mapping do not take effect. Windows clients use a device called an access token to assign user data and group membership. This token is assigned when the client connects to the StorEdge. Any changes to this token are not implemented until the next time the user connects. - Page 90 6. Page through the log with the space bar, scrolling to the approximate time and date that you made the most recent attempt to join the domain. 7. Look again for the messages related to joining the domain. 2-44 Sun StorEdge 5310 NAS Troubleshooting Guide • December 2004...
- Page 91 8. If no applicable messages are found, repeat the attempt to join the domain, and check the log again. The system log is also available through the StorEdge Web Admin. To access it, log in, and navigate to: Notification and Monitoring/View System Log. You can scroll through the log, or save it as a file.
- Page 92 Domain Controller, though this does not address the larger browsing problem. If these solutions have been attempted to no avail, also see the following solution. 2-46 Sun StorEdge 5310 NAS Troubleshooting Guide • December 2004...
- Page 93 Multiple subnets connected to StorEdge: Care must be taken when StorEdge is connected to multiple subnets, particularly when the subnets are disjoint, i.e. not connected to one another. A common example of this is a direct connection to a backup or database server. The problem created by the disjoint subnets is that StorEdge registers each of its IP addresses via NetBIOS broadcast and/or WINS.
- Page 94 PDC <1B>, or a BDC <1C>. 3. After setting the variable, retry the attempt to join the domain. Check the system log to ensure success. 2-48 Sun StorEdge 5310 NAS Troubleshooting Guide • December 2004...
- Page 95 Assuming that the difficulty connecting to the Domain Controller is temporary, and related to network load, it should not be necessary to save this variable with the savevars command. Doing so will limit the ability of StorEdge to find an alternate Domain Controller in the case that this one fails.
- Page 96 The StorEdge security implementation allows only for securing files and directories. The effective security of a CIFS/SMB share is always the security of the directory to which it points. 2-50 Sun StorEdge 5310 NAS Troubleshooting Guide • December 2004...
- Page 97 StorEdge has same files in 2 different shares. This is caused by creating multiple share names that point to the same directory or volume. Shares always point to a directory. Root level shares will always contain all files on the volume, regardless of how many shares are created to this volume. View shares as pointers, with the understanding that many of these pointers may exist to a single location.
- Page 98 If a Windows security descriptor is present, the following information is displayed: Security Descriptor:The type of security descriptor. This can be disregarded. Owner:The user name or SID of the owner. 2-52 Sun StorEdge 5310 NAS Troubleshooting Guide • December 2004...
- Page 99 Primary Group: The group name or SID of the group owner. Discretionary Access Control List (DACL):A list of users who have access to the file, by SID. A SID is a number that uniquely identifies a user or group. The data to the right of the final dash identifies the user within the domain;...
- Page 100 1. To access the StorEdge CLI, connect to the StorEdge via Telnet, and type “admin” at the [menu] prompt and enter the administrator password. 2. At the CLI, enter set smb.dir_symlink.disable yes 2-54 Sun StorEdge 5310 NAS Troubleshooting Guide • December 2004...
- Page 101 3. After setting any variables on the StorEdge, i.e. anytime the “set” command is used, the command savevars must be entered at the command line in order for the settings to persist though future server reboots. CIFS/SMB share created to /cvol is not visible or accessible. StorEdge does not allow the export of /cvol by default.
- Page 102 1. To access the StorEdge CLI, connect to the StorEdge via Telnet, and type “admin” at the [menu] prompt and enter the administrator password. 2. At the CLI, enter “cat /proc/cifs/pdc”. The response will be in the form: Domain: 2-56 Sun StorEdge 5310 NAS Troubleshooting Guide • December 2004...
- Page 103 Server: Ipaddr: 3. To force the StorEdge to a preferred domain controller, set the smb.pdc variable to the IP address of your preferred DC and (re)join the domain. From the command line interface type in set smb.pdc 192.168.200.136 (IP address of domain controller) savevars menu 4.
- Page 104 In the cases we investigated, the problem was caused by the clients using non- standard ports for CIFS/SMB access. StorEdge only supports NetBIOS/SMB traffic on the standard ports of 137 through 139. The specific port assignments are as follows: 2-58 Sun StorEdge 5310 NAS Troubleshooting Guide • December 2004...
- Page 105 137/tcp NETBIOS Name Service 137/udp NETBIOS Name Service 138/tcp NETBIOS Datagram Service 138/udp NETBIOS Datagram Service 139/tcp NETBIOS Session Service 139/udp NETBIOS Session Service Windows local groups cannot be added to Access Control List. Windows Local Groups cannot be used to assign security on remote systems. Local groups are not stored in the Domain SAM database.
- Page 106 The StorEdge will perform a copy & delete operation rather than a rename operation. This takes much more time. 2-60 Sun StorEdge 5310 NAS Troubleshooting Guide • December 2004...
-
Page 107: Nfs Issues
2.12 NFS Issues NFS root user doesn't have appropriate access. StorEdge implements a feature known as “root squash”. When a user connects as root (UID 0) from an NFS client, StorEdge causes the UID to be mapped to UID 60001, the “nobody” account. In order for an NFS client to have root access to StorEdge, you must create a trusted hosts entry, or explicitly define root access for a particular export. - Page 108 This backs up the current file with a .bak extension. 3. Next, type “cp /cvol/nf0/approve <active approve file and path>”. This overwrites the current approve file with a default copy. 2-62 Sun StorEdge 5310 NAS Troubleshooting Guide • December 2004...
- Page 109 4. Finally, type “approve update”. This causes the new file to become active. Now, you should be able to mount StorEdge from a trusted host via NFS. Local NIS files are no longer updating. The first step is to check the system log. This will tell us if there is a problem connecting to the NIS server.
- Page 110 1. To use the Web Admin, connect with a Web browser to http://<hostname or IP address of your StorEdge>. 2. Click “Grant” or “Yes” to accept any Java software authorization windows and you will reach the login screen. 2-64 Sun StorEdge 5310 NAS Troubleshooting Guide • December 2004...
- Page 111 3. Type the administrator password to access the administration interface. 4. Navigate to System Operations/Assign Language. Select the desired language, and click the “Apply” button. GID for new NFS objects is incorrect. StorEdge doesn’t recognize the set GID bit. The StorEdge software supports three ways of setting the group ID of new files and directories.
-
Page 112: Network Issues
NIC will be used as the gateway for this route. Note – The list of routes displayed in this menu are only the user-defined static routes. The 2-66 Sun StorEdge 5310 NAS Troubleshooting Guide • December 2004... -
Page 113: Nic Speed And Duplex Negotiation Issues
8. Select option 7, “Save Changes” 9. Press [Esc] to return to the menu, or proceed as above to define another route. 2.13.1 NIC speed and duplex negotiation issues. StorEdge is reporting Ethernet transmit and receive errors on a switched network. By default, the StorEdge Ethernet driver is set to auto-negotiate speed and duplex. - Page 114 StorEdge, it may be desirable in some cases to disable RIP on StorEdge. This functionality is only available at the StorEdge CLI (command line interface). 2-68 Sun StorEdge 5310 NAS Troubleshooting Guide • December 2004...
- Page 115 1. To access the StorEdge CLI, connect to the StorEdge via Telnet, and type “admin” at the [menu] prompt and enter the administrator password. 2. To disable RIP, enter “set routed.active no” at the CLI. Press the [Enter] key. After setting any variables on the StorEdge, i.e. anytime the “set” command is used, the command "savevars"...
-
Page 116: File System Issues
This causes a “mount failure” flag to be set on the volume. When StorEdge encounters this flag upon boot, it does not mount the volume, and logs the following message: /vol1 not mounted, previous mount did not complete. 2-70 Sun StorEdge 5310 NAS Troubleshooting Guide • December 2004... - Page 117 Before making this diagnosis, it is very important to ensure that you are checking the bootlog containing the first unsuccessful mount attempt. Regardless of what the original problem is, the second attempt and all subsequent unsuccessful attempts to mount the volume will always log the “previous mount did not complete” message. If you are 100% certain that the problem is an interrupted mount attempt, you should be able to correct the problem by entering “mount –f <volumename>”...
- Page 118 If syslogd logging was enabled, these results should be included as well. Find out whether remote access is available to the site, and if appropriate, provide the necessary details to accomplish this. 2-72 Sun StorEdge 5310 NAS Troubleshooting Guide • December 2004...
- Page 119 After reviewing the case, engineering may make specific recommendations and modifications, or they may recommend that you proceed with the filesystem repair. For instructions on how to complete a filesystem repair, see “Filesystem check procedure” under Diagnostic Procedures at the end of this document. Reoccurrence of filesystem related error messages / mount problems after repair If you have run a filesystem check until no errors were reported, or recreated a...
-
Page 120: Drive Failure Messages
A red light may or may not exist on this type of error. Verify location via the log or email message. The message will state what slot the drive that is failing is located at (drive failure slot 9). Controller alarm may be beeping Replace the drive immediately. 2-74 Sun StorEdge 5310 NAS Troubleshooting Guide • December 2004... - Page 121 A drive has failed how do I replace it? Failed drives are usually evident by the following: Red light is on the drive. Log will display “Failed drive at slot #”. Diagnostic email will list drive as failed. LUN will be reported as degraded in the log and in the diagnostic email. Controller alarm may be beeping.
-
Page 122: File And Volume Operations
This must be done for each volume that requires the change. It is not necessary to delete the directory, but it is permissible to delete the files within the directory to reclaim the disk space. 2-76 Sun StorEdge 5310 NAS Troubleshooting Guide • December 2004... - Page 123 After deleting files, volume free space remains the same. The most likely cause of this is the checkpoint feature. Checkpoints store deleted and changed data for a defined period of time so that customers can retrieve deleted files and prior versions for data security. This means that the data is not removed from disk until the checkpoint is expired, a maximum of two weeks.
-
Page 124: Administration Interfaces
This is usually a problem after a StorEdge operating system upgrade, as outdated pages may be saved in cache. Check whether workstation is on same subnet as StorEdge. 2-78 Sun StorEdge 5310 NAS Troubleshooting Guide • December 2004... - Page 125 Verify Java client version. Version 1.3.1.1 or newer of the Java client is required. If no Java Client is installed on the client connecting to the StorEdge, you will normally be prompted for installation. If not, the client can be found at http://www.java.com. If you receive error messages related to the Java Client (or JRE), uninstall and reinstall the client.
- Page 126 If only Windows clients are available, a third party rpcinfo utility will be required. Run rpcinfo and search for program number 805898577. The program number is the left most column. Example: 2-80 Sun StorEdge 5310 NAS Troubleshooting Guide • December 2004...
- Page 127 PROMPT> rpcinfo -p <StorEdge-hostname> programversprotoport 1000002tcp111portmapper 1000002udp111portmapper 8058985771udp693webadmin In the above example, UDP port 693 would have to be opened. The port is always in the range 600 to 1023 but may vary based on system parameters. The keyboard arrows keys do not respond properly when using telnet to the StorEdge The arrow keys generally do not work within StorEdge Telnet menus, and often cause an immediate exit from the current screen.
-
Page 128: Storedge Features And Utilities
As a rough guideline, you should consider 70% the maximum file volume utilization. It may be necessary to consider adding storage earlier than this in a performance sensitive environment. 2-82 Sun StorEdge 5310 NAS Troubleshooting Guide • December 2004... - Page 129 Once a StorEdge volume reaches 90% disk space utilization, StorEdge will cease to create scheduled checkpoints. Once the volume reaches 95% disk space utilization, StorEdge will delete checkpoints, beginning with the oldest. Another possible reason for checkpoint creation failure is that the checkpoint limit for a particular volume has been reached.
-
Page 130: Hardware Warning Messages
AC power loss that could last for some time, client systems should be disconnected and shut down. If AC power has failed, the condition corrects itself after AC power is restored. 2-84 Sun StorEdge 5310 NAS Troubleshooting Guide • December 2004... - Page 131 If AC power has been restored for 30 minutes, and the UPS is not charged completely, check the UPS battery. Log message: Low Battery. After StorEdge receives the Low Battery notification from the UPS, this message is logged and the shutdown process is initiated in order to protect customer data. Log message: Controller write-back cache is enabled.
- Page 132 Reseat the power cord in the power supply. Replace the power cord if reseating does not fix the problem. Replace the power supply if power cord replacement does not work. 2-86 Sun StorEdge 5310 NAS Troubleshooting Guide • December 2004...
- Page 133 What do the Status LED Indicators on front panel indicate? LED Status indicators at the front panel signal current activities taking place in the system.. Status LED Indicators TABLE 2-17 Power LED A continuous green LED indicates the system is powered on. No light indicates the system is off.
-
Page 134: Backup Issues
This must be done for each volume that is to be used with this backup software. It is not necessary to delete the directory, but it is permissible to delete the files within the directory. 2-88 Sun StorEdge 5310 NAS Troubleshooting Guide • December 2004... - Page 135 NDMP backup fails: access denied message. NDMP software must authenticate to the StorEdge in order to backup files and directories. Each NDMP software solution has a place to configure a username and password for a device. For StorEdge, the username is “administrator”, and should be accompanied by the console password.
-
Page 136: Direct Attached Tape Libraries
Each NDMP software solution has a place to configure a username and password for a device. For StorEdge, the username is ?administrator?, and should be accompanied by the console password. 2-90 Sun StorEdge 5310 NAS Troubleshooting Guide • December 2004... - Page 137 Local backup or restore fails with ?PNReduce error? in log. This message indicates that StorEdge could not read the pathname (PN) provided for backup or restore. The local backup and restore utilities require a full path, they are case sensitive, and they do not allow the use of wildcards (?*? or ???). Specifying a directory causes it to be backed up in its entirety.
-
Page 138: Frequently Asked Questions
2. Press [Enter] at the [menu] prompt and enter the administrator password. 3. Press the spacebar until “CIFS/SMB Configuration” is displayed under “Extensions” at the lower right. 4. Select the letter corresponding to “CIFS/SMB Configuration”. 2-92 Sun StorEdge 5310 NAS Troubleshooting Guide • December 2004... - Page 139 5. Select the letter corresponding to “Local Groups”. 6. This takes you to a menu where you will see a list of all currently configured groups. By default, in Domain mode, the “Administrators”, “Power Users” and “Backup Operators” local groups exist. To add a group, press “8”, Add a Group, from this screen.
- Page 140 Read-only—In Workgroup mode, this password allows read/only access. User ID—In Workgroup mode, files written via this share are owned by this UID. Group ID—In Workgroup mode, files written via this share are owned by this UID. 2-94 Sun StorEdge 5310 NAS Troubleshooting Guide • December 2004...
- Page 141 Umask—In Workgroup mode, these NFS permission bits will be cleared. (when creating new files.) Workgroup mode settings are ignored when Windows Domain Security is enabled. Workgroup mode on the Sun StorEdge 5310 NAS also implies use of what Microsoft calls “Share-level Security.” This functionality is also available through the StorEdge Web Admin.
- Page 142 StorEdge>. 2. Click “Grant” or “Yes” to accept any Java software authorization windows and you will reach the login screen. 3. Type the administrator password to access the administration interface. 2-96 Sun StorEdge 5310 NAS Troubleshooting Guide • December 2004...
- Page 143 4. Navigate to Windows Configuration/Manage SMB CIFS Mapping/Configure User Mapping. There you will see radio buttons for each of three user mapping options and each of three group mapping options. The user mapping options are as follows: No mapping: This is the default setting. When a new user connects, a new UID is generated by StorEdge.
- Page 144 Windows username, domain and RID on the left side of the screen. The RID is roughly equivalent to the NFS UID or GID. RID information is stored in a database 2-98 Sun StorEdge 5310 NAS Troubleshooting Guide • December 2004...
- Page 145 on the Windows Domain Controllers. Note that changing a user’s RID in the StorEdge administration interface is not possible. Modifying the value collected from the Domain Controller will simply invalidate the mapping. On the right side of the screen, you will see the NFS username, which may or may not have been automatically generated based on the defined mapping rule.
- Page 146 How do I configure StorEdge to authenticate to a Windows Domain? StorEdge is capable of providing pass-through authentication to existing Windows domains. To configure this support, proceed as follows: 1. Access the StorEdge via Telnet or serial console. 2-100 Sun StorEdge 5310 NAS Troubleshooting Guide • December 2004...
- Page 147 2. Press [Enter] at the [menu] prompt and enter the administrator password. 3. Press the spacebar until “CIFS/SMB Configuration” is displayed under “Extensions” at the lower right. 4. Select the letter corresponding to “CIFS/SMB” Configuration”. 5. Select the letter corresponding to “Domain Configuration”. Therein, you will see a list of options as follows: Domain—Name of Windows domain.
- Page 148 6. Select option “Y”, “Yes” to enable Dynamic DNS. 7. Enter a username and password with sufficient rights to perform secure DNS updates. 8. After configuring desired options, select option “7”, “Save Changes”. 2-102 Sun StorEdge 5310 NAS Troubleshooting Guide • December 2004...
- Page 149 After you have successfully configured these settings, you will be able to publish shares to ADS using the SMB/CIFS shares menu. Please refer to the FAQ “How do I create SMB shares?” for details on this procedure. This functionality is also available through the StorEdge Web Admin. This functionality is also available through the StorEdge Web Admin.
-
Page 150: Nis/Nis+ Issues
3. Select option “I”, “NIS & NIS+”. A list of options for both NIS and NIS+ is displayed, as follows: Network Information Services (NIS) Enable—Enables or disable NIS. NIS Domain—Defines the NIS domain. 2-104 Sun StorEdge 5310 NAS Troubleshooting Guide • December 2004... - Page 151 Broadcast—Enables or disables broadcast search for NIS servers. Server—IP address of NIS server. Files Hosts Users Groups Netgroups—Select which files should be imported from NIS with “Y”. Check Rate minutes—How often to check the NIS server for changes. Network Information Services (NIS+) Enable—Enables or disable NIS+.
-
Page 152: Tcp/Ip And Network Configuration
StorEdge switches over to the backup port that is first on the list of "high availability" bonded ports. If that port also fails, the port next on the list is used and so on. 2-106 Sun StorEdge 5310 NAS Troubleshooting Guide • December 2004... - Page 153 Any type of switch may be used for High Availability port bonding. Each NIC can be connected to a separate switch, and the switch hardware need not be similar. The only requirement is that all switches used for the HA bond are connected to the same subnet.
- Page 154 9. Continue to enter alias IP addresses. If no more aliases are required, simply press the [Enter] key. 10. System will return to setup screen. 11. Navigate to the end of the menu with [Tab] or [Enter]. 12. Select option “7”, “Save changes”. 2-108 Sun StorEdge 5310 NAS Troubleshooting Guide • December 2004...
-
Page 155: Quota Configuration
How do I configure Jumbo Frames support? Currently this is not supported by the StorEdge software. Can I set more than one default gateway? No. The default gateway is the gateway used when a TCP/IP client needs to send data to a network to which it does not have a specific route. After checking the destination network against the routing table and finding no match, the data is sent to the default gateway. - Page 156 If both hard and soft quotas are used, the soft quota must be smaller than the hard quota. Files Used: Number of files currently owned by this user or group. 2-110 Sun StorEdge 5310 NAS Troubleshooting Guide • December 2004...
- Page 157 Hard Limits/Soft Limits: Same as KB Limits above, but applies to the number of files rather than their size. To define a quota, locate the desired user on the list, and double click the user entry. This will pop up a window which will allow you to define hard and soft KB limits, as well as hard and soft file limits.
- Page 158 Directory Tree Quotas are assigned on sub-directory trees within a volume to limit the amount of space and/or the number of files created under each sub-directory. There is no relationship between directory tree quotas and user/group quotas. 2-112 Sun StorEdge 5310 NAS Troubleshooting Guide • December 2004...
- Page 159 Note – The DTQ creation interface only allows the creation of a DTQ on a new directory. The primary interface for configuring DTQs is the StorEdge Web Admin. 1. To use the Web Admin, connect with a Web browser to http://<hostname or IP address of your StorEdge>.
- Page 160 3. Type the administrator password to access the administration interface. 4. Navigate to File Volume Operations/Edit Properties. Select the desired volume and clear the “Enable Quotas” checkbox. 2-114 Sun StorEdge 5310 NAS Troubleshooting Guide • December 2004...
-
Page 161: Checkpoint Configuration
Important – This will delete all previously defined quotas. If quotas are enabled in the future, all quotas must be redefined. Note – Deleting directories also deletes the DTQ set for that directory. This functionality is also available from the StorEdge CLI. 1. - Page 162 9. Select option “Y”, “Yes” to enable checkpoints on the selected volume 10. Pseudo volume checkpoint name is forced to “Yes” 11. Select option “Y”, “Yes” to make the checkpoint volume visible. 2-116 Sun StorEdge 5310 NAS Troubleshooting Guide • December 2004...
- Page 163 Checkpoints can be set up automatically or manually. If an automatic schedule is selected then day and time information must be configured for these checkpoints to occur. Checkpoints have a negative effect on system performance. This effect increases as checkpoints are added. Use them judiciously. To create automatic checkpoints, select “Yes”...
- Page 164 3. Select option “D”, “Disks & Volumes” in the configuration Section to set up Checkpoints 4. Enter letter of system disk that contains volume that requires checkpoints to be disabled 2-118 Sun StorEdge 5310 NAS Troubleshooting Guide • December 2004...
- Page 165 5. Enter the number of the volume that contains the checkpoints no longer required. 6. Select option “6”, “Checkpoints” to configure checkpoints on the selected volume 7. Select option “1”, “Edit fields”. 8. Select option “N”, “No” to disable checkpoints on the selected volume 9.
-
Page 166: Volume Creation And Expansion
7. StorEdge will format the volume. 8. When creation is complete hit the [Esc] key to return to the menu. This functionality is also available through the StorEdge Web Admin. 2-120 Sun StorEdge 5310 NAS Troubleshooting Guide • December 2004... - Page 167 To access these settings, log in, and navigate to File Volume Operations/Create File Volumes. All of the options described above are available. How do I extend the size of an existing volume? A primary file volume is limited to 256GB; however, its size can be extended by attaching segments to it.
- Page 168 Properties. Simply change the name and click “Apply”. How do I delete an existing volume? 1. Access the StorEdge via Telnet or serial console. 2. Press [Enter] at the [menu] prompt and enter the administrator password. 2-122 Sun StorEdge 5310 NAS Troubleshooting Guide • December 2004...
-
Page 169: Reserved Filesystems And Directories
3. Select option “D”, “Disks and Volumes”. 4. Enter number of volume that is to be deleted. 5. Select option “8”, “Delete”. 6. As a sanity check, the system will prompt for the volume name. This is case sensitive and it must be typed in exactly as it was entered when the volume was created. -
Page 170: Nfs Issues
5. Choose the general access for /volumename 1. Read/write 2. Read only 3. None 6. Select the desired access. You will then be prompted to save changes “7”, or cancel “0”. 2-124 Sun StorEdge 5310 NAS Troubleshooting Guide • December 2004... - Page 171 Note – This screen provides access to the host group @general, which by default includes everyone who can reach the StorEdge. To provide NFS access in a more limited and secure way, see the following FAQs: How do I authorize a trusted host? How do I authorize an entire subnet as trusted hosts? How do I manage NFS exports via the StorEdge Web Admin? How do I manage NFS exports via the configuration files?
- Page 172 There is also a text box, in which you can type an IP address or resolvable hostname for a previously unknown host. 5. After filling these fields, click the apply button to save the new export. 2-126 Sun StorEdge 5310 NAS Troubleshooting Guide • December 2004...
- Page 173 Selecting an export and clicking the remove button will remove the export. Selecting an export and clicking the edit button, or double clicking an existing export will bring up the edit screen. Only the “access” field may be changed in this screen. Other changes must be made by deleting the export and recreating it, or by editing the configuration files manually.
-
Page 174: Administration Interfaces And Utilities
4. Select “1”, “Edit Fields”. 5. Select “Y”, “Yes” to enable password protection. 6. Type a new admin password in the text box. 7. Type it again for verification purposes. 2-128 Sun StorEdge 5310 NAS Troubleshooting Guide • December 2004... - Page 175 8. Select option “7”, “Save Changes”. This functionality is also available through the StorEdge Web Admin. 1. To use the Web Admin, connect with a Web browser to http://<hostname or IP address of your StorEdge>. 2. Click “Grant” or “Yes” to accept any Java software authorization windows and you will reach the login screen.
- Page 176 5. Otherwise, select option “1”, “Edit fields”. 6. Press [Tab] or [Enter] to move through fields. 7. In the DNS Domain field, enter the Domain name for the StorEdge. 2-130 Sun StorEdge 5310 NAS Troubleshooting Guide • December 2004...
- Page 177 8. Select option “7”, “Save Changes”. This will return you to the menu. 9. Access the StorEdge via Telnet or serial console. 10. Press [Enter] at the [menu] prompt and enter the administrator password. 11. Press the space bar until the “Email Configuration” option is displayed under “Extensions”...
- Page 178 Size (KB) - of files to save, KB is the size of each. 10. Select option “7”, “Save Changes” This functionality is also available through the StorEdge Web Admin. 2-132 Sun StorEdge 5310 NAS Troubleshooting Guide • December 2004...
- Page 179 1. To use the Web Admin, connect with a Web browser to http://<hostname or IP address of your StorEdge>. 2. Click “Grant” or “Yes” to accept any Java software authorization windows and you will reach the login screen. 3. Type the administrator password to access the administration interface. 4.
- Page 180 (command line interface). 1. To access the StorEdge CLI, connect to the StorEdge via Telnet or serial console. 2. Type “admin” at the [menu] prompt and enter the administrator password. 2-134 Sun StorEdge 5310 NAS Troubleshooting Guide • December 2004...
- Page 181 3. At the CLI, enter “load netm”. Then type “menu” to configure capture and capture packets. 4. Press the spacebar until “Packet Capture” is displayed under “Extensions” at the lower right. 5. Select the letter corresponding to “Packet Capture”. 6. Select option “1”, Edit Fields. The available options are as follows: Capture File - Where to save the capture file.
- Page 182 If the matching object is a directory a / will be appended, otherwise a space will be appended. If there are multiple potential matches a list will be displayed and the command line will be redisplayed. Examples: 2-136 Sun StorEdge 5310 NAS Troubleshooting Guide • December 2004...
- Page 183 To repeat the last command, enter [Ctrl] + p. To back up and edit the current line, use [Ctrl] + b. To delete the character under the cursor, enter [Ctrl] + d. How do I delete files from the StorEdge administration utilities? The operating system has some CLI commands available to perform advanced system administration.
- Page 184 2. Type “admin” at the [menu] prompt and enter the administrator password. 3. At the CLI, enter “load rdel.nsm”. 4. Enter “rdel <pathname>”. The pathname must be a full path including volume name. 2-138 Sun StorEdge 5310 NAS Troubleshooting Guide • December 2004...
- Page 185 Currently, the rdel utility cannot be unloaded from memory, and therefore will not be removed from memory until the next reboot. How do I set up an FTP server on StorEdge? StorEdge has a built-in FTP server. Before using it, you must load it via the CLI (command line interface).
- Page 186 In order to allow rsh access without a password, StorEdge system variables are used. 2-140 Sun StorEdge 5310 NAS Troubleshooting Guide • December 2004...
- Page 187 Users allowed explicit access by one of the following environment variables will not be prompted for a password. Variables are set at the StorEdge CLI (command line interface). 1. To access the StorEdge CLI, connect to the StorEdge via Telnet or serial console. 2.
-
Page 188: Backup And Migration Issues
To determine the location of this file, access the StorEdge CLI (command line interface). 1. To access the StorEdge CLI, connect to the StorEdge via Telnet or serial console. 2. Type “admin” at the [menu] prompt and enter the administrator password. 2-142 Sun StorEdge 5310 NAS Troubleshooting Guide • December 2004... - Page 189 3. At the CLI, enter “show file.hosts”. This will return the location of the active hosts file. You can safely assume that the active passwd and group file are located in the same directory. 4. Next, run the following commands from the CLI: “cleari /<volumename>/etc/hosts”, “cleari /<volumename>/etc/passwd”, and “cleari/<volumename>/etc/group”.
- Page 190 3. Select option “D”, “Disks & Volumes” in the configuration Section to set up Checkpoints. 4. Enter the letter corresponding to the system disk that contains volume that requires checkpoints. 2-144 Sun StorEdge 5310 NAS Troubleshooting Guide • December 2004...
- Page 191 5. Enter the number corresponding to the volume that requires checkpoints. 6. Select option “6”, “Checkpoints”. 7. Select option “1”, “Edit fields”. 8. Use [Tab] or [Enter] to navigate through fields. 9. Select option “Y”, “Yes” to enable checkpoints on the selected volume. 10.
-
Page 192: Macintosh Connectivity
The Desktop DB Calls option allows the StorEdge to access and set Macintosh desktop database information. It speeds up Macintosh client file access and allows non-Macintosh clients to access Macintosh files on the StorEdge. 2-146 Sun StorEdge 5310 NAS Troubleshooting Guide • December 2004... -
Page 193: Miscellaneous Log Messages
2.34 Miscellaneous Log Messages Why can’t I see system log information prior to most recent reboot? By default, the system log is stored only in memory. Therefore, it is lost upon reboot. StorEdge offers the option to save syslog data locally, or to send it to a syslogd server. -
Page 194: Direct Attached Tape Libraries
Disconnect settings. Set the Enable Disconnect setting to NO (the default is YES). In cases where the settings need to be changed in the field, you must connect a monitor and keyboard to the Sun StorEdge 5310 NAS to change the settings. 2-148 Sun StorEdge 5310 NAS Troubleshooting Guide • December 2004... -
Page 195: Storedge File Replicator
2.36 StorEdge File Replicator This section provides the following information: How does File Replicator work? The applications for File Replicator How do I set up File Replicator? How Does File Replicator work? Replicating allows you to duplicate any or all of the file volumes of one StorEdge server onto another StorEdge server. -
Page 196: Data Distribution
1. Access the StorEdge via Telnet, serial console, or keyboard console. 2. Press [Enter] at the [menu] prompt and enter the administrator password. 3. Select option "A", "Host Name & Network." 2-150 Sun StorEdge 5310 NAS Troubleshooting Guide • December 2004... - Page 197 4. Select option "1", "Edit fields." 5. Navigate through the fields with [Tab] or [Enter] until the "Role" field of the NIC that will be used for mirror is highlighted. 6. Select option "4", "Mirror" to change the role to mirror. To create Host File (both systems), do the following: 1.
-
Page 198: Storedge File Replicator Issues
Also check that a host entry exists in both systems to provide a path to mirror and master. 2-152 Sun StorEdge 5310 NAS Troubleshooting Guide • December 2004... - Page 199 Mirror Promoted on host Once a volume has been promoted, the mirror cannot continue. Once a volume has been promoted it can not be a mirror again; however it can function as a master. Waiting on host, link is down This is typically a connection problem between the two system.
- Page 200 The key data on this page are the third and fourth entries in the SIZE column. Adding these two numbers returns the largest mirror buffer that can be created on this volume. This is the total size of the fragments larger than 32 pages. 2-154 Sun StorEdge 5310 NAS Troubleshooting Guide • December 2004...
-
Page 201: Storage Arrays
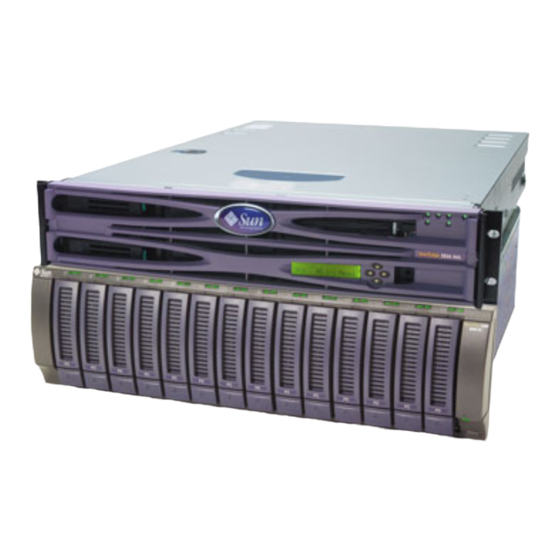
C H A P T E R Storage Arrays This chapter instructs you on how to solve specific Storage Array problems with the Sun StorEdge 5310 NAS. It contains the following sections: “Array Overview” on page 3-1 “Using the Array” on page 3-8 “Troubleshooting and Recovery”... - Page 202 The battery performs a self-test at startup and every 25 hours thereafter. If needed, the battery will begin recharging at that time. Data caching starts after the battery completes its startup tests. Sun StorEdge 5310 NAS Troubleshooting Guide • December 2004...
-
Page 203: Figure 3-2 Label Locations On The Controller
The Battery Charging/Charged light flashes during the startup self-test and when the battery is charging. It turns on and does not flash when the battery is fully charged, and turns off if the battery fails. Figure 3-2 shows the controller labels. Each controller has a media access control (MAC) address label, located on the top or the front of the controller, and a battery label, located on top of the controller, which lists the battery installation and expiration dates. -
Page 204: Figure 3-3 Battery Charging/Charged And Cache Active Lights
Figure 3-5 array shows the physical locations of the drives, which are numbered 1 through 14, from left to right. When a drive is installed, the drive/tray slot designation is set automatically. Drives and Lights FIGURE 3-4 Sun StorEdge 5310 NAS Troubleshooting Guide • December 2004... -
Page 205: Figure 3-5 Drive Numbering - Rackmount Module
Drive Numbering – Rackmount Module FIGURE 3-5 3.1.1.6 Fans Each module has two removable fan housings. Each fan housing contains two fans. The fans provide redundant cooling, which means that if one of the fans in either fan housing fails, the remaining fans will continue to provide sufficient cooling to operate the command module. -
Page 206: Figure 3-7 Power Supplies
Figure 3-8 shows an SFP transceiver and a fibre optic cable. Note that the SFP transceiver shown may look different from those shipped with your unit. The differences will not affect transceiver performance. Sun StorEdge 5310 NAS Troubleshooting Guide • December 2004... -
Page 207: Figure 3-8 Sfp Transceiver And Fibre Optic Cable
SFP Transceiver and fibre Optic Cable FIGURE 3-8 3.1.1.9 Tray ID Switch Note – IMPORTANT Each module in the storage array must have a unique tray ID. The Tray ID switch is located between the power supplies. The Tray ID switch lets you assign each module a unique tray ID, which is required for proper operation of the storage array. -
Page 208: Using The Array
Figure 3-10 illustrates the procedure. Sun StorEdge 5310 NAS Troubleshooting Guide • December 2004... -
Page 209: Figure 3-10 Removing And Replacing A Deskside Module
Removing and Replacing a Deskside Module Back Cover FIGURE 3-10 1. Remove the back cover. Push the back cover up from the bottom, and pull the cover away from the module. 2. Replace the back cover. a. Hold the back cover next to the back of the command module, and carefully route all cables through the opening at the bottom of the cover.If the opening is too small for all cabling, route some cables through the gap between the bottom of the module and the floor. -
Page 210: Figure 3-11 Power Supply Switches
During this time, the green and amber lights on the front and the back of the respective module flash intermittently. Power Supply Switches FIGURE 3-11 6. Check the status of each module and it components. 3-10 Sun StorEdge 5310 NAS Troubleshooting Guide • December 2004... - Page 211 a. Note the status of the lights on the front and the back of each module. A green light indicates a normal status; an amber light indicates a hardware fault. b. Open the Array Management Window for the storage array. c.
- Page 212 Before turning off power to the modules, always wait until the Cache Active light turns off and all drive Active lights stop flashing. 3-12 Sun StorEdge 5310 NAS Troubleshooting Guide • December 2004...
-
Page 213: Figure 3-12 Lights On The Back Of A Command Module
6. Check the lights on the front and the back of each drive module, and verify that all drive Active lights are on but not flashing. If one or more drive Active lights are flashing, then data is being written to or from the disks. -
Page 214: Table 3-1 Lights On The Back Of A Command Module
On - 100BaseTX 100Base TX connection Applicable indicator Off - 10BaseT (or inactive) Battery Green On -battery charged “Replacing Charging/ Flashing - battery Charged Controller charging Battery” on page 7- 3-14 Sun StorEdge 5310 NAS Troubleshooting Guide • December 2004... - Page 215 Lights on the Back of a Command Module TABLE 3-1 Component Problem Location Light Color Normal Status Status Procedure Cache Green Off (if “Replacing Active cache a Power enabled) Supply” on page 7-41 Fault Amber Drive Link Green Expansion Amber Port Bypass Fan Fault...
- Page 216 4. Does each module display green lights only, and is the status Optimal on each module component? Yes - Go to step 6. No - Go to step 5. 5. Diagnose and correct the fault. 3-16 Sun StorEdge 5310 NAS Troubleshooting Guide • December 2004...
- Page 217 a. To run the Recovery Guru, select the Recovery Guru toolbar button in the Array Management Window. b. Complete the recovery procedure. If the Recovery Guru directs you to replace a failed component, use the individual lights on the modules to locate the failed component. For troubleshooting procedures, refer to “Troubleshooting and Recovery”...
- Page 218 Caution – Potential data loss or corruption. Ensure that all module power switches are turned off before resetting the circuit breakers. Failure to do so can cause data loss or corruption. 3-18 Sun StorEdge 5310 NAS Troubleshooting Guide • December 2004...
- Page 219 3. Verify that both power switches on all modules in the cabinet are turned off. 4. Are the main circuit breakers in the cabinet turned off? Yes -Turn on the main circuit breakers in the cabinet. No - Reset the main circuit breakers in the cabinet. 5.
-
Page 220: Figure 3-13 Alarm Mute Button
Small Form-factor Pluggable (SFP) transceivers and the interface cables. The alarm does not affect the operation of the indicator lights or the ability of the module to report errors to the host. 3-20 Sun StorEdge 5310 NAS Troubleshooting Guide • December 2004... - Page 221 Use the following procedure to turn off the alarm and to identify the problem that caused the alarm to sound. 1. Locate the module with the alarm sounding and the amber Global Fault light illuminated. 2. Press the Mute button to turn off the alarm. If another fault occurs, the alarm will sound again.
-
Page 222: Troubleshooting And Recovery
5. Check the lights on the front of the module. A green light indicates a normal status; an amber light indicates a hardware fault. 6. Are any amber lights on? Yes - Go to step 7. 3-22 Sun StorEdge 5310 NAS Troubleshooting Guide • December 2004... - Page 223 No - You are finished with this procedure. If you are still experiencing a problem with this storage array, go to step 10. 7. Remove the cover. 8. If needed, turn off the alarm. 9. Check all of the lights on the front and the back of each module. Figure 3-14 and Figure 3-15 show the locations of indicator lights.
-
Page 224: Table 3-2 Lights On The Front Of A Command Module
Lights on the Back of a Command Module FIGURE 3-15 Lights on the Back of a Command Module TABLE 3-3 Component Problem Location Light Color Normal Status Status Procedure Controller 3-24 Sun StorEdge 5310 NAS Troubleshooting Guide • December 2004... - Page 225 Lights on the Back of a Command Module TABLE 3-3 Component Problem Location Light Color Normal Status Status Procedure Host Green “Replacing Connector a Drive” 1 Link on page 7- Indicator Host Green On - 2 Gb/s data rate Connector Applicable Off - 1 Gb/s data rate 1 Speed...
-
Page 226: Recovering From An Overheated Power Supply
If a fan failure has caused the overheating, the fan Fault lights and the power supply Fault lights turn on. If the module temperature exceeds 45° C (113° F), the storage management software displays a Needs Attention icon in the Array Management Window. 3-26 Sun StorEdge 5310 NAS Troubleshooting Guide • December 2004... - Page 227 If event monitoring is enabled, and if event notification is configured, the software also issues one or both of the following critical problem notifications: If one power supply shuts down, the storage management software will display a Needs Attention status in the Array Management Window. If both power supplies shut down, the module will shut down, and the storage management software will display a Not Responding status in the Array Management Window.
-
Page 228: Figure 3-16 Power Supply Switches
11. Does each module display green lights only and is the status Optimal on each module component? Yes - Go to step 13. No - Go to step 12. 12. Diagnose and correct the fault. 3-28 Sun StorEdge 5310 NAS Troubleshooting Guide • December 2004... -
Page 229: Setting The Tray Id Switch
a. To run the Recovery Guru, select the Recovery Guru toolbar button in the Array Management Window. b. Complete the recovery procedure. If the Recovery Guru directs you to replace a failed component, use the individual lights on the modules to locate the specific failed component. Figure 3-14 on page 3-23 and Figure 3-15 on page 3-24 show the locations of indicator lights. -
Page 230: Verifying The Link Rate Setting
3. Verify that the Link Rate Switch is set to 2 Gb/s. The Link Rate switch is not active. This switch is pre-set to 2 Gb/s at the factory, and defaults to 2 Gb/s. 3-30 Sun StorEdge 5310 NAS Troubleshooting Guide • December 2004... -
Page 231: Relocating A Command Module
4. Replace the switch cover and tighten the screw to secure it into place. 5. If applicable, repeat for all other modules in the storage array. End of Procedure Verifying the Link Rate Setting FIGURE 3-18 Relocating a Command Module This chapter provides procedures for upgrading an E2600 command module for greater storage capacity and guidelines for relocating an E2600 command module. -
Page 232: Upgrade Methods
The method you choose will depend on the RAID level you are using on the storage 3-32 Sun StorEdge 5310 NAS Troubleshooting Guide • December 2004... -
Page 233: Adding New Drives To Empty Slots
array, the amount of time you can afford to keep the command module offline, and the method that most closely matches the upgrade procedure recommended in the storage management software and this guide. Replace All Drives at the Same Time If you are upgrading drives containing RAID 0 volumes, you must use this method. - Page 234 5. Slide the new drive all the way into the empty slot and close the drive lever. As the drive spins up, the Fault lights may flash intermittently. A flashing Active light indicates that data is being restored to the new drive. 3-34 Sun StorEdge 5310 NAS Troubleshooting Guide • December 2004...
-
Page 235: Figure 3-19 Removing And Installing A Drive
6. Repeat step 4 and step 5 to install each new drive. Removing and Installing a Drive FIGURE 3-19 7. Based on the status of the Active and Fault lights, choose one of the following steps: Active lights are on while Fault lights are off - Go to step 9. Active lights are off while Fault lights are off - The drive may be installed incorrectly. -
Page 236: Replacing All Drives At The Same Time
2. Unpack the new drives. Set the new drives on a dry, level surface, away from magnetic fields. Save all packing materials in case you need to return the drives. 3-36 Sun StorEdge 5310 NAS Troubleshooting Guide • December 2004... - Page 237 3. Read all information provided in “Replace Existing Drives with Greater Capacity Drives” on page 3-32, particularly the paragraphs explaining the differences between the two possible upgrade procedures. 4. Compare the SANtricity Storage Manager Product Release Notes with this procedure to determine if you need to modify this procedure, based on more recent information.
-
Page 238: Figure 3-20 Power Supply Switches
As the drives spin up, the Fault lights may flash intermittently. If the Active light begins to flash, data is being restored to the new drive. 16. Choose one of the following steps, based on the status of the Active and Fault lights: 3-38 Sun StorEdge 5310 NAS Troubleshooting Guide • December 2004... -
Page 239: Replacing One Drive At A Time
Active lights are on while Fault lights are off - Go to step 18. Active lights are off while Fault lights are off - The drive may be installed incorrectly. Remove the drive, wait 30 seconds, and then reinstall it. Go to step 17. Fault lights are on - The new drive may be defective. - Page 240 Drives” on page 3-32, particularly the paragraphs explaining the differences between the two possible upgrade procedures 4. Read the SANtricity Storage Manager Product Release Notes to determine if you need to modify these procedures based on more recent information. 3-40 Sun StorEdge 5310 NAS Troubleshooting Guide • December 2004...
- Page 241 5. Determine the status of all modules and their components in the storage array. Note the status of the indicator lights on the front and the back of each module. A green light indicates a normal status; an amber light indicates a hardware fault. d.
-
Page 242: Figure 3-22 Removing And Installing A Drive
No - Select the Recovery Guru toolbar button in the Array Management Window and complete the recovery procedure. If the problem persists, contact technical support. 14. Check the status of the command module using the storage management software. 3-42 Sun StorEdge 5310 NAS Troubleshooting Guide • December 2004... -
Page 243: Relocation Considerations
15. To view the status of its components, select the appropriate component button for each module in the Physical View of the Array Management Window. The status for each component will be either Optimal or Needs Attention. Do all module components have an Optimal status? Yes - Go to step 17. -
Page 244: Raid Storage Manager (Rsm)
Storage Management Concept, "Introducing the Enterprise Management Window" in the Enterprise Management Window online help, and Learn About Storage Management Software, "Using the Array Management Window" in the Array Management Window online help. 3-44 Sun StorEdge 5310 NAS Troubleshooting Guide • December 2004... -
Page 245: Figure 3-23 Enterprise Management Window
3.3.6.1 Client Software Windows The client software has two main windows: the Enterprise Management Window (Figure 3-23) and the Array Management Window (Figure 3-24). Enterprise Management Window FIGURE 3-23 Array Management Window FIGURE 3-24 Chapter 3 Storage Arrays 3-45... -
Page 246: Figure 3-25 Enterprise Management Window
Enterprise Management Window, starting an Array Management Window for the affected storage array displays detailed information about the storage array condition. Enterprise Management Window FIGURE 3-25 3-46 Sun StorEdge 5310 NAS Troubleshooting Guide • December 2004... -
Page 247: Figure 3-26 Device Tree Example
Device Tree The Enterprise Management Window Device Tree provides a hierarchical view of all the host-agent and directly managed storage arrays (Figure 3-26). The storage management station node is the root node and sends the storage management commands. When storage arrays are added to the Enterprise Management Window, they are shown in the Device Tree as child nodes of the storage management station node. -
Page 248: Table 3-4 Enterprise Management Window Menus
Script Editor to perform batch management tasks, or load a saved configuration file. Help Presents options to display the Enterprise Management Window Help system and to view the software version and copyright information. 3-48 Sun StorEdge 5310 NAS Troubleshooting Guide • December 2004... -
Page 249: Enterprise Management Window Toolbar Buttons
Enterprise Management Window Toolbar The Enterprise Management Window toolbar buttons are described in Table 3-5. Enterprise Management Window Toolbar Buttons TABLE 3-5 Toolbar Button Description Automatically detect Activates the Automatic Discovery option that detects hosts and new devices storage arrays on the local subnetwork and adds them to the Enterprise Management Window. - Page 250 Also displayed in the Array Management Window are the toolbar, menu bar, components buttons, premium feature status area, and the storage partition status area. 3-50 Sun StorEdge 5310 NAS Troubleshooting Guide • December 2004...
- Page 251 Array Management Window FIGURE 3-27 Chapter 3 Storage Arrays 3-51...
-
Page 252: Table 3-6 Array Management Window Tabs
See Figure 3-27 on page 3-51 for an example of the Array Management Window menus. 3-52 Sun StorEdge 5310 NAS Troubleshooting Guide • December 2004... - Page 253 Array Management Window Menus (1 of 2) TABLE 3-7 Menu Description Storage Array Contains options to perform the following storage array management operations: locating functions (locating the storage array or a specific drive channel by flashing indicator lights), configuring the storage array, enabling premium features, starting Recovery Guru, monitoring performance, downloading firmware and NVSRAM files, changing various settings, setting controller clocks, redistributing volumes, running Read Link Status...
-
Page 254: Table 3-7 Array Management Window Menus (1 Of 2)
Unconfigured Capacity Node in the Logical View before this option is available. View diagnostic Starts the Event Log Viewer which displays a detailed list of events event log that occur in a storage array. 3-54 Sun StorEdge 5310 NAS Troubleshooting Guide • December 2004... -
Page 255: Protecting Your Data
Array Management Window Toolbar Buttons TABLE 3-8 Toolbar Button Description Monitor Opens the Performance Monitor which provides information about performance how the storage array is functioning. Recover from Initiates the Recovery Guru which is used to help troubleshoot failures storage array problems. Note If the storage array is in a Needs Attention state, the icon on the Recovery Guru toolbar button flashes. - Page 256 RAID is an acronym for Redundant Array of Independent Disks. It is a storage solution in which the same data or information about the data (parity) is stored in different places on multiple hard disks. By placing data on multiple disks, I/O 3-56 Sun StorEdge 5310 NAS Troubleshooting Guide • December 2004...
- Page 257 operations overlap and performance improves. If a disk drive in a volume group fails, the redundant or parity data can be used to regenerate the user data on replacement disk drives. RAID relies on a series of configurations, called levels, to determine how user and redundancy data is written and retrieved from the drives.
-
Page 258: Table 3-9 Raid Level Configurations
• Not recommended for high data availability needs. RAID 0 is better for non-critical data. • A single drive failure causes all associated volumes to fail and data loss can occur. 3-58 Sun StorEdge 5310 NAS Troubleshooting Guide • December 2004... - Page 259 RAID Level Configurations TABLE 3-9 RAID Level Short Description Detailed Description RAID Striping/ • Also called RAID 10 or 0+1. Mirroring • A minimum of two drives is required for RAID 1;one for the Mode user data and one for the mirrored data. •...
- Page 260 3-60 Sun StorEdge 5310 NAS Troubleshooting Guide • December 2004...
-
Page 261: Background Media Scan
to the cache memory of both controllers. It is, therefore, important to change the command module and array module batteries at the recommended time intervals. The controllers in the storage array keep track of the age (in days) of the battery. After replacing the battery, the age must be reset so that you will receive an accurate critical alert notification when the battery is nearing expiration and when it has expired. - Page 262 I/O requests to the volume. If a problem along the data path (such as a component failure) causes an I/O to fail, the multi-path driver will issue the I/O to the alternate controller. 3-62 Sun StorEdge 5310 NAS Troubleshooting Guide • December 2004...
-
Page 263: Password Protection
When AVT is enabled and used in conjunction with a host multi-path driver, it helps ensure an I/O data path is available for the storage array volumes. The AVT feature changes the ownership of the volume receiving the I/O to the alternate controller. After the I/O data path problem is corrected, the preferred controller will automatically reestablish ownership of the volume as soon as the multi-path driver detects the path is normal again. -
Page 264: Configuring Storage Arrays
The storage management software identifies several distinct volumes: standard, snapshot, snapshot repository, primary, secondary, mirror repository, source, and target. 3-64 Sun StorEdge 5310 NAS Troubleshooting Guide • December 2004... - Page 265 Standard volume - A logical structure created on a storage array for data storage. A standard volume is created using the Create Volume Wizard. If the premium feature is not enabled for snapshot volumes or Remote Volume Mirroring, then only standard volumes will be created. Standard volumes are also used in conjunction with creating snapshot volumes and remote mirror volumes.
-
Page 266: Figure 3-28 Unconfigured And Free Capacity Nodes
During the volume creation process, the Wizard prompts you to select the capacity to allocate for the volumes and to define basic and optional advanced volume parameters for the volume. Each Wizard screen has context-sensitive help. 3-66 Sun StorEdge 5310 NAS Troubleshooting Guide • December 2004... - Page 267 Specifying Volume Parameters from Free Capacity Note – IMPORTANT The free capacity, unconfigured capacity, or unassigned drives selected when starting the Wizard determine the default initial capacity selections. After the Wizard begins, the capacity can be changed by selecting a different free capacity node location for the volume, or by selecting different unassigned drives for the volume group.
-
Page 268: Figure 3-29 Mappings View Window
Partitioning and heterogeneous host information. The Mappings View has two views, Topology View and Defined Mappings View, shown in Figure 3-29 on page 3- 68 and described in Table 3-10. Mappings View Window FIGURE 3-29 3-68 Sun StorEdge 5310 NAS Troubleshooting Guide • December 2004... -
Page 269: Mappings View Tab
Mappings View Tab TABLE 3-10 View Description Topology Shows defined topological elements (host groups, hosts, and host ports), undefined mappings (volumes that have been created but do not have a defined volume-to-LUN mapping), and the Default Group. Defined Mappings Displays the volume-to-LUN mappings in a storage array in table form. -
Page 270: Table 3-11 Volume-To-Lun Terminology
If a host port is moved, any volume-to-LUN mappings must be re- mapped. Access to your data will be lost until this is done. 3-70 Sun StorEdge 5310 NAS Troubleshooting Guide • December 2004... - Page 271 Volume-to-LUN Terminology TABLE 3-11 Term Description Logical Unit The number a host uses to access a volume on a storage array. Each Number (LUN) host has its own LUN address space. Therefore, the same LUN may be used by different hosts to access different volumes on the storage array.
- Page 272 In the example shown in Figure 3-30 on page 3-73, four hosts (Omaha A and B, and KC-A and B) are connected to Storage Array Midwest. Three storage partitions have been created, allowing these hosts to share access to the volumes on the storage array. 3-72 Sun StorEdge 5310 NAS Troubleshooting Guide • December 2004...
-
Page 273: Figure 3-30 Sanshare Storage Partitioning Example
The first partition is composed of Volume Financial. This volume is accessed by Host KC-B using LUN 5. Even though Host KC-B is part of the logical Host Group Kansas City, Host KC-A cannot access this volume because the volume-to-LUN mapping was created with Host KC-B rather than the Host Group Kansas City. - Page 274 Windows NT - non-clustered. By specifying a host type, you are defining how the controllers in the storage array will work with the particular operating system on the hosts that are connected to it. 3-74 Sun StorEdge 5310 NAS Troubleshooting Guide • December 2004...
-
Page 275: Figure 3-31 Host Port Definitions Dialog
Heterogeneous Hosts Example Note – IMPORTANT Heterogeneous host settings are only available with SANshare Storage Partitioning enabled. In Figure 3-32 on page 3-76, the SANshare Storage Partitioning feature is enabled. In a heterogeneous environment, you must set each host type to the appropriate operating system during host port definition (Figure 3-31 on page 3-75). -
Page 276: Figure 3-32 Heterogeneous Hosts Example
When a snapshot volume is created, the controller suspends I/O to the base volume for a few seconds while it creates a physical volume, called the snapshot repository volume, to store the snapshot volume metadata and copy-on-write data. Because the 3-76 Sun StorEdge 5310 NAS Troubleshooting Guide • December 2004... - Page 277 only data blocks that are physically stored in the snapshot repository volume are those that have changed since the time the snapshot volume was created, the snapshot volume uses less disk space than a full physical copy. The storage management software provides a warning message when the snapshot repository volume nears a user-specified threshold (a percentage of its full capacity;...
- Page 278 For information on supported operating systems, refer to the SANtricity Storage Manager Product Release Notes shipped with the storage management software. 3-78 Sun StorEdge 5310 NAS Troubleshooting Guide • December 2004...
-
Page 279: Figure 3-33 Dve Modification Operation In Progress
Dynamic Volume Expansion (DVE) is a modification operation used to increase the capacity of standard or snapshot repository volumes. The increase in capacity can be achieved by using any free capacity available on the volume group of the standard or snapshot repository volume. Data will be accessible on volume groups, volumes, and disk drives throughout the entire modification operation. -
Page 280: Chapter 3, "Storage Arrays
When you create the mirror repository volumes, you specify the location of the volumes. You can either use existing free capacity or you can create a volume group for the volumes from unconfigured capacity and then specify the RAID level. 3-80 Sun StorEdge 5310 NAS Troubleshooting Guide • December 2004... -
Page 281: Data Replication
Data Replication Data replication between the primary volume and the secondary volume is managed by the controllers and is transparent to host machines and applications. When the controller owner of the primary volume receives a write request from a host, the controller first logs information about the write to a mirror repository volume, then writes the data to the primary volume. - Page 282 The status of a volume copy can be viewed in the Copy Manager. Also, if you need to find out what volumes are involved in a volume copy, use the Copy Manager or the Storage Array Profile. 3-82 Sun StorEdge 5310 NAS Troubleshooting Guide • December 2004...
-
Page 283: Figure 3-34 Persistent Reservations Dialog
3.3.6.16 Managing Persistent Reservations Caution – The Persistent Reservations option should be used only under the guidance of a technical support representative. The Persistent Reservations option enables you to view and clear volume reservations and associated registrations. Persistent reservations are configured and managed through the cluster server software, and prevent other hosts from accessing particular volumes. - Page 284 Appropriate status indicators will be shown in the Device Tree, the Device Table, and in the health summary status area in the lower-left corner of the Enterprise Management Window (Figure 3-35). 3-84 Sun StorEdge 5310 NAS Troubleshooting Guide • December 2004...
-
Page 285: Figure 3-35 Monitoring Storage Array Health Using The Enterprise Management Window
Monitoring Storage Array Health Using the Enterprise Management Window FIGURE 3-35 Storage Array Status Icons Table 3-12 provides information about the storage array status icons that display: In the Device Tree, Device Table, and Overall Health Status area in the Enterprise Management Window As the Root Node in the Logical View Tree in the Array Management Window Chapter 3 Storage Arrays... -
Page 286: Table 3-12 Storage Array Status Icon Quick Reference
If the event monitor detects any critical problems, it can notify a remote system using e-mail and/or simple network management protocol (SNMP) trap messages whenever the Enterprise Management Window is not running. 3-86 Sun StorEdge 5310 NAS Troubleshooting Guide • December 2004... -
Page 287: Figure 3-36 Event Monitor Configuration
The event monitor is a separate program bundled with the client software and must be installed with the storage management software. The client/event monitor is installed on a storage management station or host connected to the storage arrays. For continuous monitoring, install the event monitor on a computer that runs 24 hours a day. -
Page 288: Figure 3-37 Event Monitor Example
Alert notification settings must be configured to receive e-mail or SNMP notifications if a critical event occurs on a storage array. The notification displays a summary of the critical event and details about the affected storage array, including: 3-88 Sun StorEdge 5310 NAS Troubleshooting Guide • December 2004... - Page 289 Name of the affected storage array Host IP address (only for a storage array managed through a host-agent) Host name/ID (shown as directly managed if the storage array is managed through each controller's Ethernet connection) Event error type related to an Event Log entry Date and time when the event occurred Brief description of the event Note –...
- Page 290 The hardware fault lights display. In Figure 3-38 on page 3-91, the Array Management Window for Storage Array Engineering indicates a components problem and a Needs Attention status in the Logical/Physical View. 3-90 Sun StorEdge 5310 NAS Troubleshooting Guide • December 2004...
-
Page 291: Figure 3-38 Problem Notification In The Array Management Window
Problem Notification in the Array Management Window FIGURE 3-38 Storage Array Problem Recovery When you suspect a storage array problem, launch the Recovery Guru. The Recovery Guru is a component of the Array Management Window that will diagnose the problem and provide the appropriate procedure to use for recovery. The Recovery Guru can be displayed by selecting the Recovery Guru toolbar button in the Array Management Window, shown in Figure 3-39 on page 3-92. -
Page 292: Figure 3-39 Displaying The Recovery Guru Window
3, slot 7. The Recovery Procedure window explains the cause of the selected problem (seen in the Summary view), and describes the appropriate procedures needed to recover from this failure. 3-92 Sun StorEdge 5310 NAS Troubleshooting Guide • December 2004... -
Page 293: Figure 3-40 Recovery Guru Window Example
Recovery Guru Window Example FIGURE 3-40 As you follow the recovery procedure to replace the failed drive, the storage array status changes to Fixing, the associated volume (HResources) status changes from failed to Degraded-Copyback in Progress, and the replaced drive status changes to Replaced. -
Page 294: Figure 3-41 Status Changes During An Example Recovery Operation
Status Changes During an Example Recovery Operation FIGURE 3-41 When the copyback operation is finished, the status change to reflect the optimal status of the components, as shown in Figure 3-42 on page 3-95. 3-94 Sun StorEdge 5310 NAS Troubleshooting Guide • December 2004... -
Page 295: Updating Firmware And Nvsram On The Array
Status Changes When The Example Recovery Operation is Completed FIGURE 3-42 After you replace the failed drive in the drive module: The storage array status in the Logical View returns to Optimal. The storage array status in the Enterprise Management Window changes from Needs Attention to Optimal. - Page 296 A window similar to the one below is displayed after a short delay. If the storage array does display in the client window, also known as the Enterprise Management Window (EMW), do the following: 3-96 Sun StorEdge 5310 NAS Troubleshooting Guide • December 2004...
- Page 297 a. Select Edit>>Add Device and add the storage array by entering the IP address for the A controller and then click Add. b. When the Add Device window returns, enter the IP address for the B controller and click Add. c.
- Page 298 NVSRAM file is located. (Example, c:\temp\rsmfw\) Select N2882-610843-5xx.dlp. 6. Make sure the checkbox marked "Transfer files but don't activate them (activate later)" is clear. 3-98 Sun StorEdge 5310 NAS Troubleshooting Guide • December 2004...
-
Page 299: Updating Esm Firmware
7. After selecting the firmware and NVSRAM files click OK and then Yes to begin the firmware upgrade. The downloading screen is displayed. Updating ESM Firmware To update the ESM (CSM100_E_FC_S) firmware, do the following: 1. Select Advanced>>Maintenance>>Download>>ESM firmware. 2. Select the drive tray(s) to upgrade. 3. - Page 300 5. Select Start to begin the upgrade. 3-100 Sun StorEdge 5310 NAS Troubleshooting Guide • December 2004...
-
Page 301: Storedge File Replicator
C H A P T E R StorEdge File Replicator This chapter provides an overview of the StorEdge File Replicator. Overview The Sun StorEdge 5310 NAS data appliances provide fault-tolerant features such as redundant hardware devices, extensive monitoring and notification of both software and hardware components, checkpointing and controller and server Failover. - Page 302 It should not be confused with QoS, which is a standard for controlling data/packet flow on an IP network. Transaction A confirmation from the storage subsystem to the client that a write Complete transaction has been committed to disk. Sun StorEdge 5310 NAS Troubleshooting Guide • December 2004...
-
Page 303: Real-Time Mirroring
4.1.1 Real-time Mirroring Real-time mirroring is the simplest to describe, and the most difficult and expensive to implement. The requirement and guarantee of real-time mirroring is that data is committed in a persistent manner on both the Master and Mirror prior to reflecting transaction complete to the client. -
Page 304: Figure 4-1 The Lifecycle Of A Transaction In Storedge File Replicator
This approach guarantees the integrity of the filesystem on the Mirror; at anytime, the Mirror can be promoted and given a network link of suitable quality, the Mirror will be at most a small number of transactions behind the Master. This Sun StorEdge 5310 NAS Troubleshooting Guide • December 2004... -
Page 305: Figure 4-2 Write Ordering On The Mirror
architecture provides clear advantages over Checkpoint or Snapshot Mirroring, in that the state of the Mirror's data is typically only seconds behind that of the Master's filesystem. Extensive effort has gone into ensuring not only that the performance of the Mirror does not lag that of the Master, thereby maintaining the Mirror in a high state of synchronization with the Master, but that data integrity - including write ordering - is preserved (Figure 4-2 on page 4-5). -
Page 306: Figure 4-3 Lost Transaction Handling On The Mirror
Mirror Log (Figure 4-4 on page 4-7). The Mirror Log tracks write transactions, serving as a repository for those transactions until they can be committed to the Mirror system. Sun StorEdge 5310 NAS Troubleshooting Guide • December 2004... -
Page 307: Mirroring Variations
The Mirror Log and Primary Journal FIGURE 4-4 The Primary Journal floats through the Mirror Log functioning in a similar manner to that in which it does now. Sun StorEdge 5310 NAS maintains hints in the filesystem that enable it to quickly locate its position in both the Primary Journal and Mirror Log if an outage (e.g., a complete power loss, component failure, etc.) is experienced. - Page 308 Mirroring, whereby a Master system mirrors to a Mirror, which in turn mirrors to another Mirror system (Los Angeles mirrors to Houston, and Houston mirrors to San Francisco). Sun StorEdge 5310 NAS does not currently support Piggyback or Cascading mirroring. Sun StorEdge 5310 NAS Troubleshooting Guide • December 2004...
-
Page 309: Operational State
4.1.4.4 Bi-directional Mirroring Bi-directional Mirroring refers to the ability for systems at sister locations to mirror to each other. For instance, a system in Los Angeles may be configured to mirror its volumes to a sister system in Houston, which in turn and simultaneously mirrors its volumes to the Los Angeles system. -
Page 310: Mirror Creation
After a connection is set up between the master and mirror systems, the mirror enters the MAKEPARTS state. During this state, a replica of the volume on the master system is created on the mirror system. The volume on the mirror system is 4-10 Sun StorEdge 5310 NAS Troubleshooting Guide • December 2004... -
Page 311: Mirror Replication
constituted with the same structure as that on the master system. File system segments, or extents, are created on the mirror system in numbers and sizes matching those on the master system. In the case of a master reboot, this state consists of simply validating each extent on the mirror system. -
Page 312: Mirror Sequencing
If the mirror buffer is not large enough to store all file system changes made before it finishes syncing to the mirror, it will continue in an endless OUTOFSYNC- CRACKED-OUTOFSYNC cycle. 4-12 Sun StorEdge 5310 NAS Troubleshooting Guide • December 2004... -
Page 313: Cannot Perform First-Time Synchronization Of Mirror System
To stop mirroring on a volume, the user must "break" the mirror. The mirror can be broken from either the master or mirror system. When the mirror is broken, it enters the BREAKING state until the last file system transactions in transit have been acknowledged, and the break request has been communicated to both master and mirror. - Page 314 4-14 Sun StorEdge 5310 NAS Troubleshooting Guide • December 2004...
-
Page 315: Clustering
C H A P T E R Clustering This chapter Overview This section will be updated when the information is available. - Page 316 Sun StorEdge 5310 NAS Troubleshooting Guide • December 2004...
-
Page 317: Checkpoints/Snapshots
C H A P T E R Checkpoints/Snapshots This chapter provides an insight on how checkpoints are created, maintained and deleted. Overview The goal of the checkpoints is to minimize the number of copies when creating a checkpoint. This document discusses what happens to a checkpoint from the time it is created to when it is removed. -
Page 318: Figure 6-1 Physical And Logical Volume Relationship
It then uses the cpid (stored in the corresponding file-handle of the object) as index to the entry array to find the proper real block address. Sun StorEdge 5310 NAS Troubleshooting Guide • December 2004... -
Page 319: Checkpoint Lifecycle
6.1.2 Checkpoint Lifecycle Checkpoints are created and managed using the fs_chkpntcl( ) function of filesystem which is sfs2_chkpntctl( ) for SFS2 filesystem. The checkpoint management interfaces use this call to create, delete and deactivate checkpoints and checkpointing on sfs2 filesystems. Checkpoints have three states: Active: while checkpoints are active, they can be accessed for most of the read- only file system operations. -
Page 320: Figure 6-2 The Copy-On-Write Mechanism For Checkpoints
As soon as a new checkpoint is created, the checkpoint entry becomes available and can be used for all read-only file system operations. There is no partial state visible from other file system users. Sun StorEdge 5310 NAS Troubleshooting Guide • December 2004... -
Page 321: Figure 6-3 Mappings For Block N Before Modification
Figure 6-2 shows part of array of mappings for block n. In this example, ckpti+1 is the most recent checkpoint and thus, the last entry in the mappings and ckpti-2 is the oldest checkpoint (in this example). Assume a filesystem operation on checkpoint ckpti-2, and block n is accessed. The mapping function first checks the mapping for ckpti-2 and given it is empty, it moves forward and checks the mapping for ckpti-1. -
Page 322: Figure 6-4 Mappings For Block N After Modification
If there is a mapping, it frees the block. Otherwise, it puts the address of block into the mapping for it, creating a one to one mapping for that block. This is called page stealing of CFS from LFS. Sun StorEdge 5310 NAS Troubleshooting Guide • December 2004... - Page 323 6.1.2.3 Translation of File System Objects in Checkpoints As previously discussed, because the checkpointing mechanism is applied to filesystem blocks rather than filesystem objects, there is no special consideration for the type of object that is checkpointed. Hardlinks and symlinks in checkpoints will continue to have the same semantics they had in the live filesystem at the time the checkpoint is created.
-
Page 324: Figure 6-5 Creating A Hardlink When A Volume Is Checkpointed And Has Active Checkpoints
= 1 nlink = 2 directory entry entry x entry x checkpoint block directory entry entry y Creating a hardlink when a volume is checkpointed and has active FIGURE 6-5 checkpoints Sun StorEdge 5310 NAS Troubleshooting Guide • December 2004... - Page 325 Another example is when a hard-link is created in a directory named dst to a file residing in a directory called src. First, a new directory is inserted in dst. However, since volume is checkpointed, a copy of corresponding disk block is made first, and then the disk block is modified.
-
Page 326: Figure 6-6 Mappings For Block N After Deleting Ckpti-1
(described above). When a checkpoint is deleted, it will be removed from stack of active checkpoints in the mode page. After Deleting ckpti+1. FIGURE 6-7 6-10 Sun StorEdge 5310 NAS Troubleshooting Guide • December 2004... - Page 327 6.1.2.5 Checkpoint Scheduling Checkpoints can be created in two ways: automatic and manual. If the user selects the automatic checkpoints, checkpoints are created and removed based on the scheduling that user specifies for the checkpoints. This scheduling is enforced by a checkpoint manager thread.
- Page 328 .chkpnt directory in its parent directory, d2. In the example inFigure 6-8, cp1 is the name of a checkpoint that contains the desired version of the d2 directory. 6-12 Sun StorEdge 5310 NAS Troubleshooting Guide • December 2004...
-
Page 329: Figure 6-8 Accessing .Chkpnt In Unix
Accessing .chkpnt in UNIX FIGURE 6-8 In order to access the ".chkpnt" directory, UNIX clients use standard file system commands (as shown in Figure 6-8). The operation from a Windows client is similarly simple; Windows clients can either provide the complete explicit path name or use the "Go to"... -
Page 330: Compatibility Issues
Once the virtual checkpoint directory name is set with the chkpnt vname command, StorEdge will disallow the creation of objects with the same name as that specified by the user for the virtual checkpoint directories. Accessing .chkpnt Using Windows Explorer 6-14 Sun StorEdge 5310 NAS Troubleshooting Guide • December 2004... -
Page 331: Figure 6-9 Accessing ".Chkpnt" In Windows Explorer
Accessing ".chkpnt" in Windows Explorer FIGURE 6-9 Chapter 6 Checkpoints/Snapshots 6-15... -
Page 332: Object Checkpoint Restore
The data is copied twice - from StorEdge to the client and from the client back to StorEdge. Precious network bandwidth is used. Client resources (CPU, network, memory) are used to effect the copy operation and not available for other purposes. 6-16 Sun StorEdge 5310 NAS Troubleshooting Guide • December 2004... -
Page 333: Storedge Cp Command
Overhead is imposed at each layer of the operation The copy operation is a block-for-block operation because the client system is not cognizant of the structure of the StorEdge filesystem, and therefore of the underlying relationship between the blocks in the live and checkpointed versions of the filesystem. - Page 334 Similarly, a Windows NT user may see one of the errors shown in Figure 6-12 or Figure 6-13 when attempting to access a file when a checkpoint restore operation is underway against that same file. 6-18 Sun StorEdge 5310 NAS Troubleshooting Guide • December 2004...
-
Page 335: Figure 6-12 Windows File Copy Error Message During A Checkpoint Restore Operation
Windows File Copy Error Message During a Checkpoint Restore Operation FIGURE 6-12 Windows Excel Open Error Message During a Checkpoint Restore Operation FIGURE 6-13 The CLI copy (cp) command is a general command and can be used to copy files on StorEdge whether or not the intention is to restore a checkpointed version of an object to the live filesystem. - Page 336 Finally, should a checkpoint restore operation be interrupted for any reason, e.g., a power failure - the operation will be resumed automatically on restart. Other checkpoint-related operations are also suspended for the duration of the checkpoint restore. 6-20 Sun StorEdge 5310 NAS Troubleshooting Guide • December 2004...
-
Page 337: Fru/Cru Replacement Procedures
C H A P T E R FRU/CRU Replacement Procedures This chapter describes how to replace components in the Sun StorEdge 5310 NAS after they have been set up. It contains the following sections: “Tools and Supplies Needed” on page 7-1 “Determining a Faulty Component”... -
Page 338: Determining A Faulty Component
1. While pressing the blue latch button (A) with your left thumb, push down on the top cover and slide it back using the heel of your right hand on the blue pad (see Figure 7-1). Sun StorEdge 5310 NAS Troubleshooting Guide • December 2004... -
Page 339: Figure 7-1 Removing The Cover
Removing the Cover FIGURE 7-1 2. Set the cover aside and away from the immediate work area. Note – A non-skid surface or a stop behind the chassis may be needed if attempting to remove the top cover on a flat surface. Sliding the server chassis on a wooden surface may mar the surface (there are no rubber feet on the bottom of the chassis). -
Page 340: Field Replaceable Unit (Fru) Procedures
System FRU - Super FRU Sun StorEdge 5310 NAS Expansion Unit base chassis Environmental Monitor Unit (EMU) IO Module Power Supply/Fan Module SCSI Cables (1 or 1.5 feet) NAS Head FRU Replacement Procedures Sun StorEdge 5310 NAS Troubleshooting Guide • December 2004... -
Page 341: Opening The Front Bezel
7.6.1 Opening the Front Bezel To access the system controls and peripherals when a front bezel is installed, grasp the bezel at the finger hole on the left side and gently pull it towards you, unhinging it at the right, until it unsnaps from the chassis. Replace the bezel using the reverse process (see Figure 7-2). -
Page 342: Memory
When a multiple-bit memory error is detected, a non-maskable interrupt (NMI) is issued that instructs the system to shut down to avoid data corruption. Multiple-bit errors are very rare. Note – NMI is not currently supported. Sun StorEdge 5310 NAS Troubleshooting Guide • December 2004... -
Page 343: Power Supply Unit
Memory scrubbing: Error correction is performed on data being read from memory. The correction is then passed to the requestor and at the same time the error is “scrubbed” (corrected) in main memory. Memory scrubbing prevents the accumulation of single-bit errors in main memory that would then become unrecoverable multiple-bit errors. -
Page 344: Figure 7-4 Replacing The Power Supply
6. When the module is nearly all of the way in, the handle will rotate up. At this time, push firmly on the front of the handle to lock the latch. Replacing the Power Supply FIGURE 7-4 Sun StorEdge 5310 NAS Troubleshooting Guide • December 2004... -
Page 345: Fan Module
7.6.4 Fan Module Caution – Before touching or replacing any component inside the Sun StorEdge 5310 NAS, disconnect all external cables and follow the instructions in “Safety: Before You Remove the Cover” on page 7-2 and “Removing and Replacing the Cover”... -
Page 346: Figure 7-5 Removing The Fan Module
Front panel USB Ribbon Cable Cable Retention Clip Floppy/FP/IDE Cable Reverse view to DIMM fan Removing the Fan Module FIGURE 7-5 7-10 Sun StorEdge 5310 NAS Troubleshooting Guide • December 2004... - Page 347 7.6.4.2 Sun StorEdge 5310 NAS Fan Module Replacement Replacing the fan module is essentially the reverse of the procedure described in “Sun StorEdge 5310 NAS Fan Module Removal” on page 7-9. 1. Note the raised tabs on the chassis floor and the corresponding notches in the bottom of the fan module.
-
Page 348: High Profile Riser Pci Cards
9. Firmly press the riser assembly straight down until it is seated in the server board slot. 10. Replace the chassis cover if you have no additional work to do inside the chassis. 7-12 Sun StorEdge 5310 NAS Troubleshooting Guide • December 2004... -
Page 349: Gigabit Ethernet Card
7.6.6 Gigabit Ethernet Card Note – Add-in cards must be replaced while the riser board is removed from the chassis. The server supports 3V only and Universal PCI cards. It does not support 5V only cards. Alternately, a 10/100 Ethernetcard may be used for Cluster HeartBeat . The procedure to replace the 10/100 Ethernet is the same as the fibre Ethernet card. -
Page 350: Figure 7-6 The Gigabit Ethernet Card In The Low Profile Riser Slot
11. Replace the chassis cover if you have no additional work to do inside the chassis. The Gigabit Ethernet Card in the Low Profile Riser Slot FIGURE 7-6 7-14 Sun StorEdge 5310 NAS Troubleshooting Guide • December 2004... -
Page 351: Low Profile Riser Pci Cards
7.6.7 Low Profile Riser PCI Cards Note – Add-in cards must be replaced while the riser board is removed from the chassis. The server supports 3V only and Universal PCI cards. It does not support 5V only cards. Caution – Before touching or replacing any component inside the Sun StorEdge 5310 NAS, disconnect all external cables and follow the instructions in “Safety: Before You Remove the Cover”... -
Page 352: Qlogic Hba Removal And Replacement
8. Firmly press the riser assembly straight down until it is seated in the server board slot. 9. Replace the chassis cover if you have no additional work to do inside the chassis. 7-16 Sun StorEdge 5310 NAS Troubleshooting Guide • December 2004... -
Page 353: Lcd Display Module
7.6.9 LCD Display Module Note – The LCD Display must be replaced while the cover is removed from the chassis. Caution – Before touching or replacing any component inside the Sun StorEdge 5310 NAS, disconnect all external cables and follow the instructions in “Safety: Before You Remove the Cover”... -
Page 354: Flash Disk Module
(The destination directory must already exist, and should be empty.) 4. Check the output of the cp command to ensure that all files were successfully copied. 7-18 Sun StorEdge 5310 NAS Troubleshooting Guide • December 2004... - Page 355 7.6.10.2 Replacing the Flash Disk Note – The Flash Disk must be replaced while the cover is removed from the chassis. Caution – Before touching or replacing any component inside the Sun StorEdge 5310 NAS, disconnect all external cables and follow the instructions in “Safety: Before You Remove the Cover”...
-
Page 356: Figure 7-8 The Flash Disk
3. Connect to the upgrade page on the server. The upgrade page is used to send the latest OS image to the server. The URL for the upgrade page is (please note the dot before BUILT-IN): 7-20 Sun StorEdge 5310 NAS Troubleshooting Guide • December 2004... - Page 357 http://<server-IP-address>/.BUILT-IN/upgrade/ 4. Ensure that the model field reads “NOMODEL”. 5. Enter 0 (zero) for the serial number field. (A blank serial number may NOT be used, and may cause this procedure to fail.) 6. Download the full version of the operating system to the local workstation. Contact Technical Support to obtain this file.
-
Page 358: System Fru (Super Fru)
RAID Card TBBU DIMMS The System FRU is supplied with glue to install the Flash Disk. The items listed above must be installed into the Super FRU to restore the system. 7-22 Sun StorEdge 5310 NAS Troubleshooting Guide • December 2004... -
Page 359: Array Fru Replacement Procedures
Array FRU replacement Procedures This chapter provides procedures for replacing failed components in an array command module. Before using the procedures in this chapter, perform the appropriate troubleshooting steps described in Chapter 3, "Troubleshooting and Recovery" and in the Recovery Guru. The replacement procedures described in this chapter can be performed as hot swap procedures. - Page 360 Caution – Potential data loss or degraded performance. To prevent data loss or damage to a cable, do not twist, fold, pinch, or step on a fibre optic cable, and do not bend a cable tighter than a 2-inch radius. 7-24 Sun StorEdge 5310 NAS Troubleshooting Guide • December 2004...
-
Page 361: Figure 3-1 Controller
8. Disconnect the SFP transceivers and all attached interface cables from the failed controller. Label all cables such that you can reconnect them correctly to the new controller. Removing an SFP Transceiver and fibre Optic Cable FIGURE 7-9 Removing and Replacing a Controller FIGURE 7-10 9. -
Page 362: Figure 7-11 Removing The Controller Cover (Upside Down View)
Connect the battery harness on the replacement battery to the connector on the controller board in the new controller. Figure 7-12 illustrates this connection. b. Position the battery inside the new controller. 7-26 Sun StorEdge 5310 NAS Troubleshooting Guide • December 2004... -
Page 363: Figure 7-12 Replacing The Controller Battery
c. Replace the controller cover and secure the screws. Figure 7-11 on page 7-26 shows these screws. Replacing the Controller Battery FIGURE 7-12 14. Update the following information on the controller labels. Figure 7-13 on page 7- 28 shows the location of the labels. Date of Installation - Enter today's date. -
Page 364: Figure 7-13 Label Locations For The Controller
Reinstall the controller, and then go to step 21. All Link lights are on and the Fault light is off - Go to step 22. 7-28 Sun StorEdge 5310 NAS Troubleshooting Guide • December 2004... -
Page 365: Replacing A Controller Battery
21. Is the problem corrected? Yes - Go to step 22. No - Contact technical support. 22. Remove the antistatic protection. 23. If needed, replace the back cover. 24. Use the Array Management Window to check the status of each module. 25. - Page 366 Caution – Potential data loss or degraded performance. To prevent data loss or damage to a cable, do not twist, fold, pinch, or step on a fibre optic cable, and do not bend a cable tighter than a 2-inch radius. 7-30 Sun StorEdge 5310 NAS Troubleshooting Guide • December 2004...
-
Page 367: Figure 7-15 Removing The Sfp Transceiver And Fibre Optic Cable
8. Disconnect the SFP transceivers and all attached interface cables from the failed controller. Label all cables such that you can reconnect them correctly to the new controller. Figure 7-15 illustrates disconnecting a cable. Removing the SFP Transceiver and fibre Optic Cable FIGURE 7-15 9. - Page 368 11. Update the following information on the new controller labels and attach the labels to the replacement controller. Figure 7-19 shows the locations of the labels. Date of Installation - Enter today's date. 7-32 Sun StorEdge 5310 NAS Troubleshooting Guide • December 2004...
-
Page 369: Figure 7-17 Removing The Controller Cover (Upside Down View)
Replacement Date - If a new battery is used, enter the date two years from now. If the battery from the old controller is used, copy the date from the battery label on the old controller. Removing the Controller Cover (Upside Down View) FIGURE 7-17 Removing and Installing the Controller Battery FIGURE 7-18... -
Page 370: Figure 7-19 Label Locations On The Controller
All Link lights are off or the Fault light is illuminated - Verify that the controller has been installed correctly. Reinstall the controller, and then go to step17. All Link lights are on and the Fault light is off - Go to step 18. 7-34 Sun StorEdge 5310 NAS Troubleshooting Guide • December 2004... - Page 371 17. Is the problem corrected? Yes - Go to step 18. No - Contact technical support. 18. Remove the antistatic protection and replace the back cover, if needed. 19. Check the status of all modules. 20. Do any components have a Needs Attention status? Yes - Select the Recovery Guru toolbar button in the Array Management Window and complete the recovery procedure.
-
Page 372: Replacing A Drive
Inserting a drive with the incorrect firmware level may cause data loss or data corruption. For information on supported drive firmware levels, contact technical support. 7-36 Sun StorEdge 5310 NAS Troubleshooting Guide • December 2004... - Page 373 Caution – Mixed configurations speed requirements. In configurations involving various models of command modules, command modules, or drive modules, all modules must be operating at the same speed. Refer to the Product Release Notes for any model-specific restrictions. Caution – Risk of data loss and permanent damage. Magnetic fields will destroy all data on a disk drive and cause irreparable damage to its circuitry.
-
Page 374: Figure 7-21 Replacing A Drive
This increases the time required to complete this procedure. 7-38 Sun StorEdge 5310 NAS Troubleshooting Guide • December 2004... -
Page 375: Replacing A Fan
10. Choose one of the following steps, based on the status of the Active and Fault lights: Active light is off - The drive may be installed incorrectly. Remove the drive, wait 30 seconds, and then reinstall it. When finished, go to step 12. Fault light is illuminated - The new drive may be defective. -
Page 376: Figure 7-22 Replacing A Fan
11. If you turned off the power in step 7, turn it on again. 12. Based on the status of the fan Fault light, choose one of the following steps: 7-40 Sun StorEdge 5310 NAS Troubleshooting Guide • December 2004... -
Page 377: Replacing A Power Supply
Fault light is illuminated - The fan may be installed incorrectly. Reinstall the fan and then go to step 13. Fault light is off - Go to step 14. 13. Is the problem corrected? Yes - Go to step 14. No - Contact technical support. - Page 378 If it does not, move the lever to the other pivot post. 11. Slide the new power supply into the empty slot and close the lever. 12. Plug in the power cord and turn on the power. 7-42 Sun StorEdge 5310 NAS Troubleshooting Guide • December 2004...
-
Page 379: Figure 7-23 Replacing A Power Supply
13. Check the Power and Fault light on the new power supply. Replacing a Power Supply FIGURE 7-23 14. Choose one of the following steps, based on the status of the Power and Fault lights: Power light is off or Fault light is illuminated - The power supply may be installed incorrectly. -
Page 380: Replacing An Sfp Transceiver
Save all packing materials in case you need to return the SFP transceiver. 6. Check the Fault lights to locate the failed SFP transceiver. If a transceiver has a fault, its light will be illuminated and amber. 7-44 Sun StorEdge 5310 NAS Troubleshooting Guide • December 2004... -
Page 381: Figure 7-24 Replacing An Sfp Transceiver
Caution – Potential data loss or degraded performance. To prevent data loss or damage to a cable, do not twist, fold, pinch, or step on a fibre optic cable, and do not bend a cable tighter than a 2-inch radius. Caution –... -
Page 382: Array Management Window
If the problem persists, contact technical support. No - Go to step 18. 18. Create, save, and print a new storage array profile. End Of Procedure 7-46 Sun StorEdge 5310 NAS Troubleshooting Guide • December 2004...
Need help?
Do you have a question about the Sun StorEdge 5310 NAS and is the answer not in the manual?
Questions and answers