
Related Manuals for Holy Stone X401H-V2


Summary of Contents for Holy Stone X401H-V2
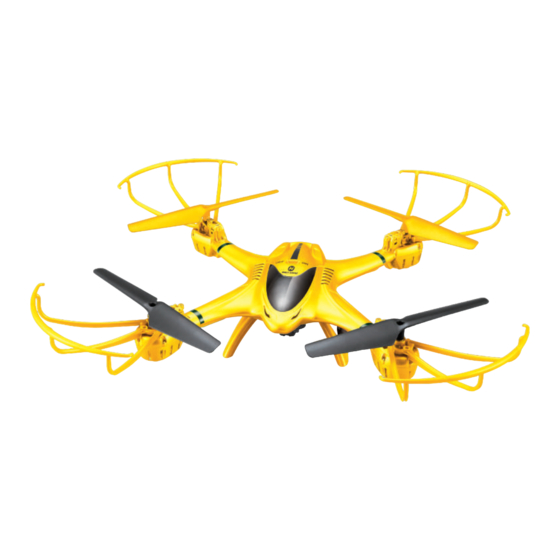
- Page 1 ® ITEM NO.X401H-V2 MOBILE PHONE APP CONTROL BAROMETER HOLD ALTITUDE & A KEY START/LANDING FPV REAL-TIME HD IMAGES TRANSMISSION 6-AXIS GYRO QUADCOPTER...
- Page 2 Content 1. Safety Guidelines........................1 2. The LCD Remote Controller....................1 2.1 Sketch of the Remote Controller.................. 2 2.2 Functions of the Remote Controller................2 3. Battery Assembly........................4 4. Four Control Modes Switch....................4 5. Speed Modes Switch....................... 6. Major Parts on the Drone...................... 7.
- Page 3 Technical parameter of the model Fuselage Length:298mm Gross Weight: about 128g Motor: Brushless motor Overall Height: 76mm Battery: Li-polymer 7.4V 350mAh Main Rotor Diameter: 135mm Charging Time: about 40 minutes Introduction ●Quad-rotor design insures more stable and powerful performance and make all kinds of 3D action easier.
- Page 4 Safety guidelines ●This product is not a toy. It is not applicable for children who are under 14 years old. ●Please read this instruction manual carefully before playing and operate the product according to the manual. ●The users are in full charge of proper operating the model. The manufacturer and dealers disclaim all responsibility for the damage caused by misuse.
- Page 5 Sketch and function switches of the remote controller 1.Power switch 12. Power indicator Mode switch(Long Press)/ 11. 3D Flips A key Start/Landing(Short press) Light switch/ 10.H/L speed switch Headless Mode/A Key Back switch 4. Left stick 9. Right stick 5. Trimmer A 8.
- Page 6 Function switch Function description STICK MODE 2:upward/downward,turn left/turn right; STICK MODE 4:upward/downward,leftward/rightward. Left stick STICK MODE 1:forward/backward,turn left/turn right; STICK MODE 3:forward/backward,leftward/rightward. In stick Mode 2 and 4, this button is null. Trimmer A In stick Mode 1 and 3, it helps to tune the model's forward and backward flight.
- Page 7 How to install the battery of remote controller Pic.1 Pic.2 Pic.3 How to remove and insert batteries. 1. Unscrew counter clockwise to open the battery compartment cover. ( Pic.1 ) 2. Install 4 X AA batteries into the battery compartment according to the given polarity.
- Page 8 Forward / Forward / Backward Throttle Throttle Backward control control control control Left/Right Leftward/ Left/Right Leftward/ turning Rightward turning Rightward control control control control STICK MODE:3 STICK MODE:4 Flight speed selection There are 2 flight speeds available: low speed and high speed. Player can select the flight speed by pressing the H/L speed button.
- Page 9 Protection frame and landing gear installation Pic.4 Pic.5 Pic.6 1.There are 3 interfaces on each motor cabinet. Insert the frame plugs into the interfaces and fix it.(Pic.4) 2.Fix the protection frame by screwing clockwise.(Pic.5) 3.There are 4 interfaces at the bottom of the model, insert the landing gear plugs into the interfaces and fix them.
- Page 10 The method of the Li-Po battery charging Turn off the switch, plug the battery to the power wire which is connected to Plug the power cord connection the jack-plug. The charging plug of Charger USB charger is connected to the (5V 0.5-1A) Three wire plug Not included...
- Page 11 The model ●Make sure that the battery (at the bottom of the drone) is well installed and connected with power wire of drone. The model is OFF. ●Then turn on the drone; the flash LED light will keep flashing quickly, the gyro of the drone will be in signal detecting condition.
- Page 12 ●The blue LED lights are at the front of the model; The orange LED lights are at the back of the model. ●When the model is on, checking the rotation direction of the rotor blades; The front-left and right-back rotor blades(Motor 2, 4) should be rotating in clockwise direction;...
- Page 13 STICK MODE 2 or 4: If the model keeps drifting forward, push down Trimmer D until it gains balance. If the model keeps drifting backward, push up Trimmer D until it gains balance. 2. If the model keeps drifting leftward/rightward, users may adjust the aileron trimmer buttons to keep the model balanced.
- Page 14 3. If the model keeps rotating even there is no control signal sent out, users may adjust the trimmer buttons to keep the model balanced. STICK MODE 1 or 2: If the model keeps rotating counterclockwise in the air, turn right of Trimmer B until it gains balance.
- Page 15 Push down the throttle control stick, the rotation speeds of the Downward mains rotors are decreasing and the model descends accordingly. Turn the left/right turning control stick to the left,the model will turn Turn left left. Turn the left/right turning control Turn right stick to the right,the model will turn right.
- Page 16 Landing and emergency stop Short-press the one key landing button or push the throttle control stick to make the drone gently land to the ground. About 2 seconds later, the drone will thoroughly stop flying. When the drone is flying lower than 1 meter height above the ground, and you need to stop the drone urgently, please hold the left control stick of the remote control to the bottom left and the right control stick to the bottom right at the same time to cease the flight.
- Page 17 Headless mode: Enter into headless mode: Once signal between the model and the remote control is successfully connected, press the function button at top right of the remote control for 2 seconds. The remote control will send out two beep sounds and there will be letters of “Stick Mod”...
- Page 18 Flight direction control in headless mode: ●When checking up on the flight direction of the model, set the head of model right ahead and face forward, the tail face the player; The direction where the head points at will be constantly considered as “forward”, it could also be put in this way, the player’s straight front side is defined as “forward”;...
- Page 19 A KEY BACK: When the model is flying in headless mode, press A Key Back button, the model will fly back to player. Press the A Key Back button again or operate the forward /backward control stick, the model will exit the A Key Back function but headless mode is still active.
- Page 20 Motor 1 Motor 2 Receiver board Motor 3 Motor 4 Camera Interface 1.Motor 1 should be connected with interface 1. 2.Motor 2 should be connected with interface 2. 3.Motor 3 should be connected with interface 3. 4.Motor 4 should be connected with interface 4. How to replace the motor Pic.11 Pic.12...
- Page 21 Install the mobile phone holder: Pic.17 Pic.18 Pic.19 1.Connect the 2.Adjust the fixing 3.Set the mobile stand bar to the component upward phone holder to mobile phone or downward the top of the fixing component. according to the remote control. size of the mobile phone.
- Page 22 There are two modes of the “HOLY STONE ”APP ●Real-time images transmission mode Pic.27 Pic.28...
- Page 23 Android system, please visit our website WWW.HOLYSTONE.COM to download the from the product accordingly. You can also scan the QR Code to download the apk for android system. android (QR CODE) Apple IOS system, please go to the APP store to download the “HOLY STONE”.
- Page 24 APP “HOLY STONE”control functions 5.Gravity Sensor 1. Hide the Control Mode 7. One Key Back interface 3. 360° Flips 6. Headless 2. 180° Eversion 4.H/L Speed 8. Light Switch mode 9.Control Modes Switches 10.Low-level/ medium-level throttle switch 24.Flight route 20. Trimmer A 12.Photo...
- Page 25 Function switch Function description Turn on the remote control. Touch this icon to enter Headless mode into headless mode and adjust the drone. Touch this icon while the drone is in headless mode. One Key Back The drone will return with rear heading back. Light Switch Touch this icon to turn on or turn off the light.
- Page 26 Function switch Function description Turn on the APP control, touch this icon to rotate the Start Switch drone in low speed. Touch this button, the icon will be in red color while the mobile phone is sending out connection signal. App control Once the drone’s WIFI signal is successfully connected, the drone indicate will be constant “on”.
- Page 27 WIFI signal “MJX H****” from the WIFI signal list and connect the signal. Exit the Setting, once the mobile phone is connected with “MJX H ****”. Open the APP “HOLY STONE” on the mobile phone; click “MONITOR” to enter into real-time images transmission interface to take photo/video.
- Page 28 Recalibrate the Gyro When the model is in headless mode, flight direction proof is needed. Set the head of the model ahead of the player, turn both of the two control sticks to the lower right corner for about 2 seconds, the model’s indicator light will turn from slowly flashing to quick flashing and the recalibration is completed.
- Page 29 Customer Support: USA@HOLYSTONE.COM (America) CA@HOLYSTONE.COM (Canada) JP@HOLYSTONE.COM (Japan) EU@HOLYST ONE.COM (Europe) +1(626)465-7134 WWW.HOLYSTONE.COM...
Need help?
Do you have a question about the X401H-V2 and is the answer not in the manual?
Questions and answers