Table of Contents
Troubleshooting

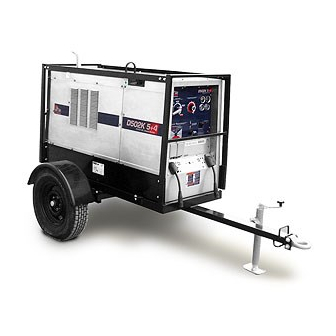
Related Manuals for Red-D-Arc D502K 5+4


Summary of Contents for Red-D-Arc D502K 5+4
- Page 1 TM-4412 March 2002 Eff. w/Serial Number LC110463 Processes Stick (SMAW) Welding TIG (GTAW) Welding MIG (GMAW) Welding Flux Cored (FCAW) Welding Air Carbon Arc (CAC-A) Cutting and Gouging Description Engine Driven Welding Generator...
-
Page 2: Table Of Contents
TABLE OF CONTENTS SECTION 1 – SAFETY PRECAUTIONS FOR SERVICING ........1-1. - Page 3 TABLE OF CONTENTS SECTION 11 – DISASSEMBLY AND REASSEMBLY ........11-1.
-
Page 5: Section 1 - Safety Precautions For Servicing
D Do not tip battery. shield during servicing. D Replace damaged battery. D Be careful not to short metal tools, parts, or D Flush eyes and skin immediately with water. wires together during testing and servicing. D502K 5+4 TM-4412 Page 1... -
Page 6: Emf Information
About Pacemakers: welding or cutting. To reduce magnetic fields in the workplace, use the following Pacemaker wearers consult your doctor first. If cleared by your doctor, procedures: then following the above procedures is recommended. TM-4412 Page 2 D502K 5+4... -
Page 7: Section 2 - Definitions
MIG (GMAW) TIG (GTAW) Welding (CC) Welding Time Hours Seconds Single Phase Read Operator’s Do Not Switch Three Phase Circuit Breaker Manual While Welding Engine-Driven, Electrode Three-Phase Work Connection Hertz Connection Alternator With Rectifier Contactor On D502K 5+4 TM-4412 Page 3... -
Page 8: Section 3 - Specifications
9/16 in (14 mm) Dia. Front Panel End 4 Holes * With mounting brackets in center position. Dimensions vary with loca- tion of mounting brackets. Weight 802 161-A 802 161-A 803 122 No fuel: 1808 lb (820 kg) TM-4412 Page 4 D502K 5+4... -
Page 9: Volt-Ampere Curves
85 – 250 55 – 125 900 1000 DC AMPERES B. MIG Mode 900 1000 DC AMPERES C. TIG Mode Ranges 60–450 40–330 30–220 20–110 DC AMPERES 208 135 / 203 415 / 208 136 D502K 5+4 TM-4412 Page 5... -
Page 10: Fuel Consumption
Duty Cycle is percentage of 10 min- 100% Duty Cycle At 500 Amperes utes that unit can weld at rated load without overheating. Y Exceeding duty cycle can damage unit void warranty. Continuous Welding 202 356 TM-4412 Page 6 D502K 5+4... -
Page 11: Ac Auxiliary Power Curve
The ac power curve shows the aux- iliary power in amperes available at the 120 and 240 volt receptacles. AC AMPERES IN 240V MODE AC AMPERES IN 120V MODE 193 018 3-7. Manufacturer’s Rating Label D502K 5+4 TM-4412 Page 7... -
Page 12: Section 4 - Installation
Y Stop engine and let cool. Point exhaust pipe in desired di- rection but always away from front panel and direction of travel. Tools Needed: 1/2 in 803 122 / Ref. 802 169 / Ref. 202 705 TM-4412 Page 8 D502K 5+4... -
Page 13: Mounting Welding Generator
803 122 / Ref. 802 169-B 4-4. Connecting The Battery Reinstall cover after connecting battery. Y Connect Negative (–) Cable Last. – Tools Needed: 1/2 in 802 168-E / Ref. 202 705 / 802 313 / S-0756-C D502K 5+4 TM-4412 Page 9... -
Page 14: Engine Prestart Checks
(see level was low, check coolant level in radiator Use correct grade oil for cold weather engine maintenance label for fuel specifica- (see Section 4-6). (see Section 7-1). TM-4412 Page 10 D502K 5+4... -
Page 15: Adding Coolant To Radiator
Reinstall air bleed screw and radia- tor cap. Check coolant level in re- covery tank (see Section 4-5). Tools Needed: 3/8 in Full Capacity: w/Overflow Tank 10 qt (9.5 L) 803 123-A / 206 580 D502K 5+4 TM-4412 Page 11... -
Page 16: Connecting To Weld Output Terminals
Positive minal on left and work cable to Work termi- For Direct Current Electrode Negative (+) terminal on left and work cable to Nega- nal on right. TM-4412 Page 12 D502K 5+4... -
Page 17: Selecting Weld Cable Sizes
**Weld cable size (AWG) is based on either a 4 volts or less drop or a current density of at least 300 circular mils per ampere. ( ) = mm for metric use S-0007-E ***For distances longer than those shown in this guide, call a factory applications representative. D502K 5+4 TM-4412 Page 13... -
Page 18: Connecting To Remote 14 Receptacle Rc14
CB13. 115 VOLTS AC Contact closure to I completes 115 volt ac contactor control circuit. Chassis common. 803 122 NEUTRAL Circuit common for 24 and 115 volt ac circuit. *The remaining sockets are not used. TM-4412 Page 14 D502K 5+4... - Page 19 Notes D502K 5+4 TM-4412 Page 15...
-
Page 20: Section 5 - Operating Welding Generator
SECTION 5 – OPERATING WELDING GENERATOR 5-1. Front Panel Controls (See Section 5-2) 206 212-A / 803 122 TM-4412 Page 16 D502K 5+4... -
Page 21: Description Of Front Panel Controls (See Section 5-1)
To read gauges with engine off, turn Start/ With Process/Contactor Control switch in any Preheat switch to Preheat position. Stick or TIG setting, use control to adjust am- Ammeter displays amperage output of the unit. D502K 5+4 TM-4412 Page 17... -
Page 22: Process/Contactor Control Switch
Electrode Hot Stick (SMAW), Weld Terminals Always On – CC Stick Electrode Hot Air Carbon Arc (CAC-A) Cutting And Gouging Weld Terminals Always On – CC Scratch Start TIG Scratch Start TIG (GTAW) Electrode Hot TM-4412 Page 18 D502K 5+4... -
Page 23: Remote Voltage/Amperage Control
Max = About 185 A DC (50% of 40 to 300) Max (185 A DC) Min (40 A DC) Set V/A Set Remote Set Range Set Control Adjust Optional Remote Control Adjust Switch Process 0774 / Ref. 192 895-A / 802 311-A D502K 5+4 TM-4412 Page 19... -
Page 24: Section 6 - Operating Auxiliary Equipment
4 kVA/kW. EXAMPLE: If 13 A is drawn from RC1, only 7 A is available at GFCI1: (240 V x 13 A) + (120 V x 7 A) = 4.0 kVA/kW 191 624 TM-4412 Page 20 D502K 5+4... -
Page 25: Section 7 - Maintenance
SECTION 7 – MAINTENANCE 7-1. Maintenance Label D502K 5+4 TM-4412 Page 21... -
Page 26: Routine Maintenance
Tension. Clean And Tighten Battery Connections. 200 h Change Oil Filter. Change Oil. See See Section 7-6. Section 7-6. Service More Often In Dirty Conditions. Check Radiator Hoses And Clamps. 250 h Replace Unreadable Labels. TM-4412 Page 22 D502K 5+4... - Page 27 In Dirty Conditions.* Blow Out Or Vacuum Inside. During Heavy Service, Clean Monthly. 1500 h Clean/Set Injectors.* 1 Year Replace Air Filter Element(s). See Section 7-3. 2 Years Replace Radiator Coolant And Hoses. See Section 7-7. D502K 5+4 TM-4412 Page 23...
-
Page 28: Servicing Air Cleaner
2 in (51 mm) from inside of element. Replace primary ele- ment if it has holes or damaged gaskets. Reinstall primary element and cap (dust ejector down). aircleaner1 9/00 – ST-153 929-B / ST-153 585 / Ref. S-0698-B TM-4412 Page 24 D502K 5+4... -
Page 29: Inspecting/Cleaning Optional Spark Arrestor
If nothing blows out of hole, briefly cover end of exhaust pipe with fireproof material. Y Stop engine and let cool. Reinstall cleanout plug. Tools Needed: 3/8 in Ref. 206 212-A / 803 122 Notes D502K 5+4 TM-4412 Page 25... -
Page 30: Adjusting Engine Speed
Do not set engine speed higher than specified. Engine Shutdown Lever Use lever to stop engine if Engine Shutdown switch does not work. Y Stop engine. Close door. 1850 rpm Max. (61.6 Hz) Tools Needed: 803 123-A TM-4412 Page 26 D502K 5+4... -
Page 31: Servicing Fuel And Lubrication Systems
See engine manual and engine container under drain, and use screwdriver See engine manual. maintenance label for oil/filter change in- to open sludge drain valve. Close valve formation. Close doors. when sludge has drained. Remove hose. D502K 5+4 TM-4412 Page 27... -
Page 32: Servicing Engine Cooling System
RAdiator Air Bleed Screw Radiator Drain Cock Drain engine coolant according to procedure in engine manual. Add engine coolant according to procedure in Section 4-6. Tools Needed: 3/8 in Ref. 803 123-A / 803 136 TM-4412 Page 28 D502K 5+4... -
Page 33: Overload Protection
115 volt output to RC14 stops. If CB13 continues to open, check re- mote controls connected to RC14, and circuit board PC6 (see Section 10-5). Press button to reset breaker. 803 123-A / 802 170-D / Ref. 802 313 D502K 5+4 TM-4412 Page 29... -
Page 34: Section 8 - Theory Of Operation
12 Process/Contactor Control Switch S6 Selects weld process and weld out- put on/off control (Weld Terminals Al- ways On or Weld Terminals Remote- ly Controlled). Integrated Rectifiers SR4, SR5 Figure 10-1. Functional Diagram D502K 5+4 TM-4412 Page 30... - Page 35 (dig) circuit. Circuit Breakers CB1, CB2 HF Filter Board PC4 HF Filter HF Filter Board PC4 Board PC5 Receptacles RC1, GFCI1 Electrode Work Weld Output Weld Output Terminal Terminal Electrode Work D502K 5+4 TM-4412 Page 31...
-
Page 36: Section 9 - Explanation Of Electrical Parts
(sometimes referred to as a wiper). Their primary purpose is to give the operator VARIABLE a way to adjust welding parameters such as wire speed, preflow time, voltage, inductance, etc. TM-4412 Page 32 D502K 5+4... - Page 37 When the inductor is placed in an AC circuit it is referred to as a reactor where it now acts to restrict the flow of current. A “tapped reactor” is used to create current ranges for welding. D502K 5+4 TM-4412 Page 33...
- Page 38 (Notice the “jumper link” connecting terminals A and B together.) SWITCH A mechanical device that completes or SPST SPDT breaks the path of the current or sends it over a different path. DPST DPDT TM-4412 Page 34 D502K 5+4...
- Page 39 The primary winding is in series with the circuit carrying the current to be measured. Its main use in engine-driven equipment is to activate the “Automatic Idle” circuit by sensing welding current or auxiliary power current. D502K 5+4 TM-4412 Page 35...
-
Page 40: Section 10 - Troubleshooting
Be sure connection to work piece is clean and tight. Remove excessive coils from weld cables. Check and tighten connections inside and outside unit. Clean slip rings, and install new brushes if necessary (see Section 10-11). Check main rectifier SR3, and replace if necessary. D502K 5+4 TM-4412 Page 36... - Page 41 B. Auxiliary Power Trouble Remedy No auxiliary power output; weld output Reset receptacle circuit breakers. okay. Check resistance of auxiliary power windings between leads 81 and 84. Replace exciter stator (aux. sta- tor) if necessary. D502K 5+4 TM-4412 Page 37...
- Page 42 Replace CR2 if necessary. Check fuel solenoid FS1 for proper coil voltage and connections. Check continuity of coils. Replace FS1 if necessary. Check fuel pump (see engine manual). Air in fuel system. See engine manual. D502K 5+4 TM-4412 Page 38...
- Page 43 Clean top of battery with baking soda and water solution; rinse with clear water. Recharge or replace battery if necessary. Periodically recharge battery (approximately every 3 months). Engine uses oil during run-in period; Dry engine (see Section 13). wetstacking occurs. D502K 5+4 TM-4412 Page 39...
-
Page 44: Troubleshooting Circuit Diagram For Welding Generator (Use With Section 10-3)
V1, R1 V2, R2 V4, R4 Adjust R3 according to V8, R7 Section 10-12 V9, R8 See Section 10-5 for PC6 data V5, R5 See Section 4-9 for RC14 V6, R6 information V14, Timer Relay T TM-4412 Page 40 D502K 5+4... - Page 45 V10, V13, Waveforms A and B V11, R10 Section 10-4 for waveforms See Section 8 for PC4, PC5 information Engine oil pressure Engine temp. latching latching relay relay CR1 PC1 power supply relay 206 628-A D502K 5+4 TM-4412 Page 41...
-
Page 46: Troubleshooting Values For Circuit Diagram (Use With Section 10-2)
0 to +10 volts dc from min to max of R1 +12 volts dc +12 volts dc 258 volts ac with Process/Contactor Controlswitch S6 in Stick position V23, 18 volts ac with Process/Contactor Control switch S6 in Stick position D502K 5+4 TM-4412 Page 42... -
Page 47: Waveforms For Section 10-2
1 ms 50 V A. DC/CC Open-Circuit Voltage, Voltage/ B. DC/CC Output, 28 Volts DC, 200 Amperes, Amperage Adjust Control R1 At Maximum Amperage Range Switch S3 At 125-400 Position (Resistive Load) Test Equipment Needed: D502K 5+4 TM-4412 Page 43... -
Page 48: Filter Board Pc6 Testing Information
10-5. Filter Board PC6 Testing Information Y Stop engine. See Section 10-6 for specific val- ues during testing. Voltage read- ± ings tolerance 10%. Test Equipment Needed: 803 208 / 192 998 D502K 5+4 TM-4412 Page 44... -
Page 49: Filter Board Pc6 Test Point Values
Remote command signal output, 0 to +10 volts dc input from min to max of remote voltage/amperage control Circuit common for 24 and 115 volt ac contactor control circuits Circuit common for 24 and 115 volt ac circuits D502K 5+4 TM-4412 Page 45... -
Page 50: Field Current Regulator Board Pc1 Testing Using Led Board Pc9
Be sure plugs are secure. See Sec- tion 10-8 for diagnostic information and specific values during testing. Field Current Regulator Board PC1 Module LED Board PC9 Diagnostic LED’s (See Sec- tion 10-8) Test Equipment Needed: 802 421-C / 192 226-A D502K 5+4 TM-4412 Page 46... -
Page 51: Using Diagnostic Led's On Led Board Pc9
Indicates + 175 volts ac input from field excitation circuit. Dim or Off If LED is off, power LED is on, and normal ac voltage is present at ac receptacles (see Section 10-2): Check fuse F2, and replace if open. Reset circuit breaker CB12. D502K 5+4 TM-4412 Page 47... -
Page 52: Led Board Pc9 Testing
10-9. LED Board PC9 Testing Be sure plugs are secure. See Sec- tion 10-10 for specific values during testing. LED Board PC9 Test Equipment Needed: 803 208 / 192 226-A D502K 5+4 TM-4412 Page 48... -
Page 53: 10-10.Diagnostic Led's On Led Board Pc9
AC Input LED, +1.85 volts dc input with respect to pin PLG13-5 when weld exciter voltage is present. To test ac input LED, apply +1.85 volts dc to PLG13-10 and connect negative (–) side of power sup- ply to PLG13-5. LED lights if okay. D502K 5+4 TM-4412 Page 49... -
Page 54: Replacing Brushes And Cleaning Slip Rings
Remove as little material as possible. Reinstall auxiliary power panel. Y Stop engine. Minimum Length: 5/8 in (16 mm) New Length: 1-1/4 in (32 mm) Tools Needed: Replace Damaged Brushes 803 209 D502K 5+4 TM-4412 Page 50... -
Page 55: 10-12.Checking Unit Output After Servicing
Test Equipment Needed: Tools Needed: Check fuel and oil (see Section 4-5). Check and correct any fluid leaks. Clean weld output and battery terminals. Tighten connections. Clean outside of entire unit. 803 210 / 803 201 D502K 5+4 TM-4412 Page 51... -
Page 56: Section 11 - Disassembly And Reassembly
1 x 3 x 30 in (25 x 76 x 762 mm) metal bar. Do not support engine on fuel tank or under oil pan. Remove front generator mounts. Go to Section 11-2. 802 431-C D502K 5+4 TM-4412 Page 52... -
Page 57: Disassembly Of Generator
Remove the following Reconnect negative (–) battery cable. Rein- Reinstall engine and generator parts as stall panels, door, and exhaust pipe. parts as needed: needed using torque values in table. Endbell Exciter Stator D502K 5+4 TM-4412 Page 53... - Page 58 Notes TM-4412 Page 54 D502K 5+4...
-
Page 59: Section 12 - Electrical Diagrams
The following is a list of all diagrams for models covered by this manual. To order a copy, proceed as follows: Circuit Wiring Model Serial Or Style Number Diagram Diagram D502K 5+4 LC110463 and following 206 628-A See Table 12-1 Circuit Board PC4, PC5 LC110463 and following 189 746... - Page 60 Figure 12-1. Circuit Diagram For D502K 5+4 Effective With Serial No. LC110463 And Following D502K 5+4 TM-4412 Page 56...
- Page 61 206 628-A D502K 5+4 TM-4412 Page 57...
- Page 62 189 746 Figure 12-2. Circuit Board PC4, PC5 (HF Filter) Effective With Serial No. LC110463 And Following 188 607 Figure 12-3. Circuit Board PC3 (HF Filter) Effective With Serial No. LC110463 And Following TM-4412 Page 58 D502K 5+4...
- Page 63 192 997 Figure 12-4. Circuit Board PC6 (HF Filter) Effective With Serial No. LC110463 And Following 192 227-A Figure 12-5. Circuit Board PC9 (LED) Effective With Serial No. LC110463 And Following D502K 5+4 TM-4412 Page 59...
- Page 64 Table 12-1. Lead List Summary For D502K 5+4 Eff w/LC110463 And Following Table shows physical lead connections and should be used with circuit diagram (table replaces wiring diagram). Apply small amount of dielectric grade, nonconductive electric grease (Miller Part No. 146 557) to connectors where factory-applied grease had been present.
- Page 65 Table 12-1. Lead List Summary For D502K 5+4 Models Eff w/LC110463 And Following (Continued) Lead Connections Lead Connections 0061M TIMER (C) TO D8 (NEG) 0104B RC1 (6) TO F2 0061N D8 (–) TO CR2 (86) 0105A BRUSH (CENTER) – PLG1 (2) 0061P TIMER (POS) TO TIMER ”C”...
-
Page 66: Section 13 - Run-In Procedure
If exhaust pipe is coated with a wet, black, tar-like substance, dry the engine using one of the following run-in procedures. See the engine manual for addition- al engine run-in information. TM-4412 Page 62 D502K 5+4... -
Page 67: Run-In Procedure Using Load Bank
Run engine several minutes at no load. Y Stop engine and let cool. Engine Exhaust Pipe Repeat procedure if wetstacking is present. S-0683 D502K 5+4 TM-4412 Page 63... -
Page 68: Run-In Procedure Using Resistance Grid
A/V control in minimum position, then shut down grid to remove load. Run engine several minutes at no load. Y Stop engine and let cool. Engine Exhaust Pipe Repeat procedure if wetstacking is present. S-0684 TM-4412 Page 64 D502K 5+4... - Page 69 TM-4412 March 2002 Processes Stick (SMAW) Welding TIG (GTAW) Welding MIG (GMAW) Welding Flux Cored (FCAW) Welding Air Carbon Arc (CAC-A) Cutting and Gouging Description Engine Driven Welding Generator Eff w/LC110463 And Following For OM-4412 (206 995)
-
Page 70: Section 14 - Parts List
SECTION 14 – PARTS LIST FOR LC110463 AND FOLLOWING Hardware is common and not available unless listed. 109 (Fig. 14-5) 101 (FIG. 14-2) 107 (FIG. 14-3) Figure 14-1. Main Assembly TM-4412 Page 66 D502K 5+4... - Page 71 Eff w/LC110463 And Following 62 61 72 (Fig 14-4) 803 201 D502K 5+4 TM-4412 Page 67...
- Page 72 ....206999 Label, Maintenance D502k 5+4 Kubota ......
- Page 73 ....206998 Label, Manufacturing Rating D502k 5+4 Kubota ....
- Page 74 ♦Optional To maintain the factory original performance of your equipment, use only Manufacturer’s Suggested Replacement Parts. Model and serial number required when ordering parts from your local distributor. 803 203 Figure 14-2. Control Box Assembly TM-4412 Page 70 D502K 5+4...
- Page 75 ......... D9/C9 D10/C10 *Recommended Spare Parts. To maintain the factory original performance of your equipment, use only Manufacturer’s Suggested Replacement Parts. Model and serial number required when ordering parts from your local distributor. D502K 5+4 TM-4412 Page 71...
- Page 76 Pot, Cp Flat 1t 2. W 1k Ohm Linear ....... TM-4412 Page 72 D502K 5+4...
- Page 77 ....097924 Knob, Pointer 1.625 Dia X .250 Id W/Set Screwsplstc ....D502K 5+4 TM-4412 Page 73...
- Page 78 To maintain the factory original performance of your equipment, use only Manufacturer’s Suggested Replacement Parts. Model and serial number required when ordering parts from your local distributor. Hardware is common and not available unless listed. 18 19 803 204-A Figure 14-4. Generator TM-4412 Page 74 D502K 5+4...
- Page 79 Label Kit 206 993. *Recommended Spare Parts. ♦Optional To maintain the factory original performance of your equipment, use only Manufacturer’s Suggested Replacement Parts. Model and serial number required when ordering parts from your local distributor. D502K 5+4 TM-4412 Page 75...
- Page 80 ........D2, D4, D6 To maintain the factory original performance of your equipment, use only Manufacturer’s Suggested Replacement Parts. Model and serial number required when ordering parts from your local distributor. Base Group TM-4412 Page 76 D502K 5+4...
- Page 82 Owner’s Record Please complete and retain with your personal records. Model Name Serial/Style Number Purchase Date (Date which equipment was delivered to original customer.) Distributor Address City State Contact the Delivering Carrier for: File a claim for loss or damage during shipment.
Need help?
Do you have a question about the D502K 5+4 and is the answer not in the manual?
Questions and answers