
Related Manuals for Teac LCD2033A


Summary of Contents for Teac LCD2033A
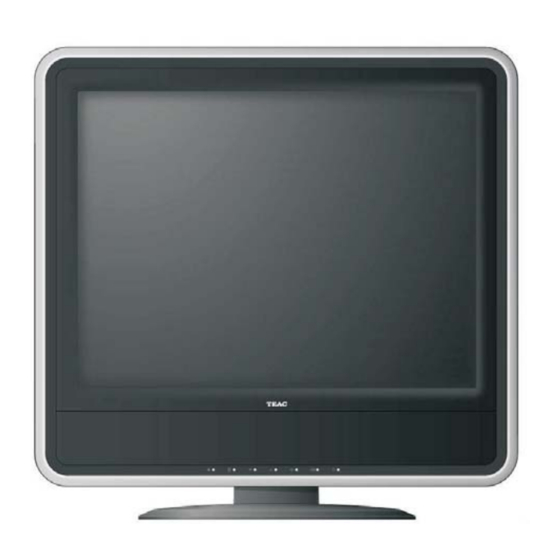
- Page 1 LCD2033A 20 LCD TV " USER MANUAL IMPORTANT! WARRANTY INFORMATION INSIDE. PLEASE READ WWW.TEAC.COM.AU...
- Page 2 *Your nearest Authorised TEAC Service Centre is listed in your Owners Manual 6. In the event that this unit or any defective parts must be returned to TEAC Service Centres, a copy of this warranty certificate and of your purchase receipt must be enclosed to be a valid warranty. Such equipment or parts must be sent freight prepaid to the nearest authorised TEAC Service Centre.
- Page 3 Dealer’s Address Postcode 4 Please ensure that your product is packed appropriately upon return to the service centre. If you have any other queries regarding service or warranty please contact the TEAC National Service Centre below. service@teac.com.au www.teac.com.au 1800 656 700...
-
Page 4: Table Of Contents
Contents Safety Precautions Important Safety Instructions Stand Uninstallation Important User Guidance Information Accessory List Overview of TV i. Front Panel Description ii.Back Panel Description Remote Control Overview (All Functions Except Teletext) Remote Control Overview (Teletext Functions) Remote Control Operation Connection i. -
Page 5: Safety Precautions
CAUTION: unit. refer servicing to qualified service personnel. Do not attempt to modify this product in any way without written authorization from TEAC DON’T PLACE TO WET LOCATION Unauthorized modification, warranty will be Apparatus shall not be exposed to dripping or void. -
Page 6: Important Safety Instructions
Important Safety Instructions 12.Use only with the cart, stand, tripod, bracket, 1.Read These Instructions All the safety and operating instructions should be or table specified by the manufacturer, or sold read before the product is operated. with the apparatus. When a cart is used, please take caution when moving the cart to avoid injury 2.Keep These Instructions from tip-cover. - Page 7 Important Safety Instructions 17.Power Lines 23.Outdoor Antenna Grounding An outside antenna system should not be located If an outside antenna or cable system is connected in the vicinity of overhead power lines or other to the product, be sure the antenna or cable electric light or power circuits, or where it can fall system is grounded so as to provide some into such power lines or circuits.
-
Page 8: Stand Uninstallation
Stand Uninstallation Please follow the instructions given. 1.Lay the LCD TV/Monitor face-down on a flat surface with a cushion or other soft materials to protect the screen. 2.Remove all cables connected on the TV/Monitor. 3.Remove the four screws and then remove the stand from the LCD TV/Monitor. 4.Now you are ready to install Wall/Arm mounting device. -
Page 9: Important User Guidance Information
To ensure correct installation, experienced and qualified experts must install the unit. TEAC will not be held responsible for accident or damage caused by the use of parts and accessories manufactured by other companies. To avoid malfunction and overheating, make sure that the vents on the main unit are not blocked when installing to ensure proper heat emission: •... -
Page 10: Accessory List
Accessory List Please check the accessories and ask the local dealer for help when they are lost or damaged. Power Cord (×1) Adapter (×1) User’s manual (×1) Remote control (×1) NOTE: Please use the power cord which includes the ground wire. This TV set shall be connected to a main socket outlet with a protective grounded AC power outlet. -
Page 11: Front Panel Description
Front Panel Description Bottom speaker Remote control sensor Standby indicator SOURCE Press it to display the menu of the available viewing source. MENU Press it to display the OSD menu. CH+/- Press it to choose the channel. The two buttons also act as direction buttons VOL+/- Press it to adjust volume . -
Page 12: Back Panel Description
Back Panel Description VGA AUDIO IN Component In(HDTV/DVD) UPDATE AV1 Input Power AV2 Input AV Output Headphone Output SERVICE ONLY SERVICE ONLY Antenna... -
Page 13: Remote Control Overview (All Functions Except Teletext)
Remote Control Overview (All Functions Except Teletext) Standard Remote Control Power button MUTE Display status Numberical buttons Return to previous channel Exit To select different viewing signals Picture mode Sound mode Enter OSD setup mode Enter Next/previous channel Volume up/down To set sleep power off time Dual sound selection To freeze current image... -
Page 14: Remote Control Overview (Teletext Functions)
Remote Control Overview (Teletext Functions) Teletext Cancel Teletext PageUp Teletext Index Teletext PageDown Teletext Store Teletext Display/Mix Teletext Reveal Teletext List/Flof Teletext Hold Teletext Size Teletext SubPage -10-... -
Page 15: Remote Control Operation
Push as the arrow shows sensor. to take off the back cover. Insert the batteries with correct polarity. TEAC Put the cover back as the arrow shows. Don't place the remote control Signal from the remote con - Make sure there are no... -
Page 16: Connection
Connection Antenna Connection Indoor Antenna Connection Typical Wall antenna jack used in apartment buildings, connect the antenna cable as shown below (Please use the correct type of antenna cable according to the type of wall antenna jack). 75 ohm Round Cable Bronze Wire 300 ohm Flat Wire Apartment buildings... -
Page 17: Ii.ypbpr/Ycbcr (Component) Connection
Connection YPbPr/YCbCr (Component) Connection DVD, etc Pb Cb Pr Cr AUDIO(L) AUDIO(R) Audio Cable Component Cable Note: Please refer to the illustration above to connect the TV with DVD player or other component signal sources. Connect YPbPr/YCbCr Cable and Audio Cable to corresponding jacks of DVD player or other component signal sources. -
Page 18: Iii.rear Video (Composite) Connection
Connection Rear Video (Composite) Connection S-Video or composite signal output POWER AUDIO(R) AUDIO(L) VIDEO AV Cable Note: Connect composite video cable and audio cable to corresponding jacks of DVD player or other composite signal sources. Please choose "AV1" in the source menu when you connect DVD player or other source. -
Page 19: Vga Connection
Connection VGA Connection AUDIO VGA Audio Cable VGA AUDIO IN VGA Cable Note: 1.Please refer to the illustration above on how to connect the LCD TV with PC or DVD player. Connect VGA Cable and Audio Cable to the corresponding jacks of PC and select the signal source as "VGA". 2.If you connect VGA Cable to disc player or Set Top Box, please select "VGA"... -
Page 20: Basic Operation
Basic Operation Power On /Off 1.Connect the adapter with power cord. 2.Connect the adapter to the power input port on TV. Plug the power cable into the Power Socket, make sure the output voltage and frequency of the power is consistent with this machine. 4.Press the "POWER"... -
Page 21: Button Instruction
Button Instruction Aspect ● ASPECT Press "ASPECT" button on the remote control to select your favorite mode. (Full Screen/Zoom/Normal/16:9). Sound mode adjustment ● SOUND Press "Sound" button to select your favorite mode (Four options: Standard/ Music/Cinema/User Image effect adjustment PICTURE ●... -
Page 22: Menu
Menu Picture Setting You can adjust the Picture to get your desired picture effect. Press the ''MENU'' button to enter Picture menu. Picture Press '' '' buttons to select ''Picture Mode''. User Picture Mode Press '' '' buttons to adjust the "Picture mode". Brightness Contrast (Four options : Standard... -
Page 23: Channel Menu
Menu Current Channel Press "MENU" button to select "Channel menu. " Channel Press " " buttons to select " Current Channel item " Current Channel Press " " buttons to select channels. Sound System Channel Preset Press ''EXIT'' button to exit. Exchange Channel Blue Screen... - Page 24 Menu Exchange Channel You can exchange the current channel with another channel. Press the "MENU" button to select "Channel" menu. Channel Press the " " buttons to select Exchange Channel ''. " Current Channel Press the " " button to enter this menu. Sound System Channel Preset Input the Channel Exchange number (the maximum number...
-
Page 25: Window Menu
Menu Skip Channel If you'd like to skip a channel automatically when you browse programs by pressing "CH+/CH-" button, please use this function. Press the "MENU button to select " Channel menu Channel Current Channel Press buttons to select " Skip Channel ". -
Page 26: Setting Menu
Setting Menu OSD Language Setting Press "MENU" button to select "Setting" menu. Press " " buttons to select " OSD Language " Setting English Press " " buttons to change the setting. OSD Language Top Left OSD Position Press ''EXIT'' button to exit. OSD Background Opaque Color Temperature... - Page 27 Setting Menu Color Temperature Press "MENU" button to select "Setting" menu. Press " " buttons to select "Color Temperature Setting Press " " buttons to enter the sub menu. English OSD Language Top Left OSD Position Press " " buttons to change the setting. OSD Background Opaque Color Temperature...
-
Page 28: Teletext
Teletext Teletext is an information system broadcast by certain channels which can be consulted like newspaper. It also offers access to subtitles for viewers with auditive problems or those who are not familiar with the transmission language (cable networks, satellite channels, etc.). Teletext Language Selection. -
Page 29: Troubleshooting And Maintenance
Please read this user's manual before using the TV set. If you have any troubles in using this TV set, try to solve it by the suggestions mentioned below. If you can not remove the trouble after adopting corresponding suggestions, please contact the TEAC service center or dealer authorized by us. -
Page 30: Display Mode
Display Mode Both screen position and size will vary depending on the type of PC monitor and its resolution. The table below shows all of the display modes that are supported: VGA: Horizontal Frequency Vertical Frequency Resolution Sync Polarity ( )... -
Page 31: Specifications
Specifications MODEL LCD2033A Screen Size: 20-inch TFT LCD TV Native Resolution: 800 600 Pixels Brightness: 450 cd/m Contrast Ratio: 500:1 Colour System: PAL/NTSC Sound System: BG/I/DK/M Tuner: VHF/UHF:48.25~863.25MHz Ω VHF/UHF input Antenna: Stereo: NICAM/A2 VIDEO INPUT: AV1 input Video:1 Vp-p, negative sync, 75 Ω... - Page 32 Between Monday to Friday EST 9AM to 5PM 3-7-3, Nakacho, Musashino-shi, Tokyo 180-8550, Japan TEAC CORPORATION Phone: (0422) 52-5081 TEAC AUSTRALIA PTY.,LTD. A.B.N.: 11 113 998 048 30 Tullamarine Park Road, Tullamarine, VIC 3043 Phone : (03)8336 6500 HEAD OFFICE...
- Page 33 This electrical and electronic equipment indicates that this product shall not be treated as household wast. instead its shall be handed over to applicable collection point for recycling of electrical and electronic equipment. By ensuring this product is disposed of correctly, you will help prevent potential negative consequences for the environment and human health, which could otherwise be cause by inappropriate waste handling.
Need help?
Do you have a question about the LCD2033A and is the answer not in the manual?
Questions and answers