Yamaha F4 Owner's Manual
Hide thumbs
Also See for F4:
- Service manual (308 pages) ,
- Owner's manual (174 pages) ,
- Brochure & specs (4 pages)

Related Manuals for Yamaha F4


Summary of Contents for Yamaha F4
- Page 1 OWNER’S MANUAL U.S.A.Edition Read this manual carefully before operating this LIT-18626-08-90 outboard motor. 6BV-F8199-11...
- Page 2 ZMU01690 Read this manual carefully before operating this outboard motor. Keep this manual onboard in a waterproof bag when boating. This manual should stay with the outboard motor if it is sold.
-
Page 3: Important Manual Information
If there is any EMU31284 To the owner question concerning this manual, please con- Thank you for selecting a Yamaha outboard sult your Yamaha dealer. motor. This Owner’s Manual contains infor- TIP: mation needed for proper operation, mainte- The F4MHA, F6MHA and the standard acces- nance and care. -
Page 4: Table Of Contents
Table of contents Safety information......1 Propeller selection ......13 Outboard motor safety ....1 Start-in-gear protection ....14 Engine oil requirements ....14 Propeller ..........1 Rotating parts ........1 Fuel requirements ......14 Hot parts..........1 Gasoline ........... 14 Electric shock ........ - Page 5 IMPORTANT WARRANTY Cruising in shallow water....45 Cruising in other conditions ... 46 INFORMATION IF YOU USE Maintenance........47 YOUR YAMAHA OUTSIDE Transporting and storing outboard THE USA OR CANADA ..... 72 motor .......... 47 Dismounting the outboard motor ..47 Storing outboard motor.....
-
Page 6: Safety Information
Safety information running away under power and leaving peo- EMU33622 Outboard motor safety ple stranded, or running over people or ob- Observe these precautions at all times. jects. EMU36501 Always attach the engine shut-off cord to a Propeller secure place on your clothing or your arm or People can be injured or killed if they come in leg while operating. -
Page 7: Modifications
Have an approved personal flotation device distribution can compromise the boats han- (PFD) on board for every occupant. Yamaha dling and lead to an accident, capsizing or recommends that you must wear a PFD swamping. whenever boating. At a minimum, children... -
Page 8: Weather
Safety information Avoid sharp turns or other maneuvers that You may also want to consider an Internet- make it hard for others to avoid you or un- based program for basic boater education. derstand where you are going. The Online Boating Safety Course provided Avoid areas with submerged objects or by the BoatU.S. -
Page 9: Boating Organizations
Safety information Contact the U.S. Coast Guard, the National Marine Retailers Association of America Association of State Boating Law Administra- 155 N. Michigan Ave. Chicago, tors, or your local Power Squadron for a com- IL 60304 plete set of rules governing the waters in http://www.mraa.com/ which you will be using your boat. -
Page 10: Rules When Encountering Vessels
Safety information slow down or change directions briefly and pass behind the other vessel. You should al- ways move in such a way that the operator of the other vessel can see what you are doing. “ The general prudential rule ” This rule is called Rule 2 in the International Rules and says, “... -
Page 11: Other Special Situations
Safety information Fishing vessel right-of-way All vessels that are fishing with nets, lines or trawls are considered to be “fishing vessels” under the International Rules. Vessels with trolling lines are not considered fishing ves- sels. Fishing vessels have the right-of-way re- gardless of position. - Page 12 Safety information Many bodies of water used by boaters are en- white with black letters and orange boarders. tirely within the boundaries of a particular They signify speed zones, restricted areas, state. The Uniform State Waterway Marking danger areas, and general information. System has been devised for these waters.
-
Page 13: General Information
Record your outboard motor serial number in the spaces provided to assist you in ordering spare parts from your Yamaha dealer or for reference in case your outboard motor is sto- len. ZMU06705... -
Page 14: Read Manuals And Labels
Read any manuals supplied with the boat. Read all labels on the outboard motor and the boat. If you need any additional information, contact your Yamaha dealer. EMU33831 Warning labels If these labels are damaged or missing, contact your Yamaha dealer for replacements. F4, F6 ZMU06709... - Page 15 General information ZMU06860...
- Page 16 General information Electrical hazard EMU35132 Symbols The following symbols mean as follows. Notice/Warning ZMU05666 ZMU05696 Read Owner’s Manual ZMU05664 Hazard caused by continuous rotation ZMU05665...
-
Page 17: Specifications And Requirements
Specifications and requirements Engine: EMU38090 Specifications Type: TIP: 4-stroke S “(AL)” stated in the specification data below Displacement: represents the numerical value for the alumi- 139.0 cm³ Bore × stroke: num propeller installed. 62.0 × 46.0 mm (2.44 × 1.81 in) TIP: Ignition system: “*”... -
Page 18: Installation Requirements
Engine oil drain bolt: propriate. 18.0 Nm (1.84 kgf-m, 13.3 ft-lb) Your Yamaha dealer can help you select the EMU33554 Installation requirements right propeller for your boating needs. Select a propeller that will allow the engine to reach... -
Page 19: Start-In-Gear Protection
Recommended engine oil group 2 3. Type of propeller (propeller mark) EMU39190 Start-in-gear protection Yamaha outboard motors are equipped with start-in-gear protection device. This feature permits the engine to be started only when it is in neutral. Always select neutral before starting the engine. -
Page 20: Ring Free Fuel Additive
10% and the fuel While many additives available may reduce meets the minimum octane ratings. E85 is a deposits, Yamaha recommends the use of fuel containing 85% ethanol and must not be Ring Free Fuel Additive, available from your used in your outboard motor. -
Page 21: Emission Control Information
Specifications and requirements Waterproof flashlight with extra batteries. An extra engine shut-off cord (lanyard) with clip. Spare parts, such as an extra set of spark plugs. Consult your Yamaha dealer for details. EMU25221 Emission control information EMU25230 North American models ZMU06712 This engine conforms to U.S. - Page 22 Specifications and requirements EMU25280 EMU25300 One Star—Low Emission Three Stars—Ultra Low Emission The one-star label identifies engines that The three-star label identifies engines that meet the Air Resources Board’s 2001 ex- meet the Air Resources Board’s 2008 ex- haust emission standards. Engines meeting haust emission standards.
-
Page 23: Components
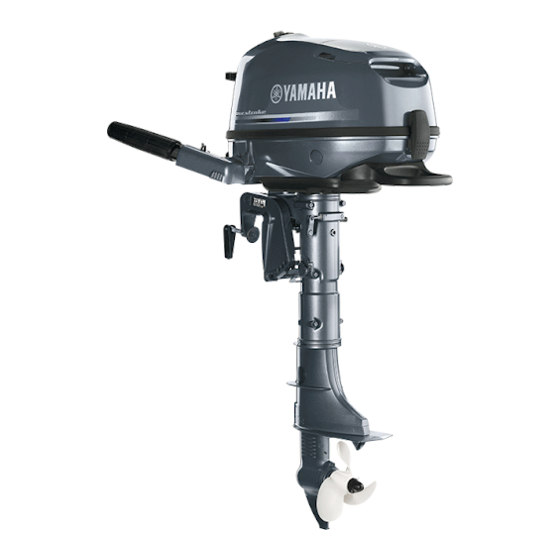
Components EMU2579R Components diagram TIP: * May not be exactly as shown; also may not be included as standard equipment on all models. F4, F6 21 19 ZMU06715 1. Top cowling 17.Fuel joint cap 2. Cowling lock lever 18.Fuel cock 3. -
Page 24: Fuel Tank (Portable Fuel Tank)
Components Fuel tank cap This cap seals the fuel tank. When removed, the tank can be filled with fuel. To remove the cap, turn it counterclockwise. Air vent screw This screw is on the fuel tank cap. To loosen the screw, turn it counterclockwise. ZMU01992 1. -
Page 25: Tiller Handle
Components 3. Built-in fuel tank position 2. Built-in fuel tank position 4. Portable fuel tank position 3. Portable fuel tank position EMU39210 EMU25912 Close Tiller handle To stop the fuel flow from the fuel tank to the To change direction, move the tiller handle to carburetor, align the fuel cock with the closed the left or right as necessary. -
Page 26: Throttle Indicator
Components ZMU06808 ZMU06723 1. Throttle grip 1. Start mark “ ” 2. Notch EMU39711 Throttle indicator EMU39242 Throttle friction adjuster The throttle indicator shows the throttle posi- The throttle friction adjuster provides adjust- tion. When the 100% position of the throttle in- able resistance when the throttle grip is dicator is aligned with the notch in the tiller turned, and can be set according to operator... -
Page 27: Engine Shut-Off Cord (Lanyard) And Clip
Components EMU25994 Engine shut-off cord (lanyard) and clip The clip must be attached to the engine shut- off switch for the engine to run. The cord should be attached to a secure place on the operator’s clothing, or arm or leg. Should the operator fall overboard or leave the helm, the cord will pull out the clip, stopping ignition to the engine. -
Page 28: Manual Starter Handle
Components ZMU06868 ZMU06729 1. Steering friction adjuster 1. Fuel joint cap To increase resistance, turn the steering fric- EMU26073 Manual starter handle tion adjuster clockwise. The manual starter handle is used to crank To decrease resistance, turn the steering fric- and start the engine. -
Page 29: Tilt Support Bar
Components ZMU06838 ZMU06731 1. Gear shift lever 1. Tilt support bar 2. Reverse position 2. Tilted up position 3. Shallow water cruising position EMU39261 Cowling lock lever The cowling lock lever is used to secure the top cowling. ZMU06839 1. Tilt lock When the gear shift lever is moved to the neu- tral position or forward position, the outboard motor can be tilted up. - Page 30 Components ZMU06787 1. Carrying handle...
-
Page 31: Installation
If you are not able to mount the outboard motor properly, consult a Yamaha dealer. ZMU06836 EMU39562 Hold the carrying handle and the hand-... - Page 32 Installation ZMU06834 1. Steering friction adjuster EMU39740 Mounting height To run your boat at optimum efficiency, the ZMU06835 water resistance (drag) of the boat and out- board motor must be made as little as possi- Mount the outboard motor on the center ble.
-
Page 33: Clamping The Outboard Motor
Test runs at different heights can help determine the optimum mounting height. Consult your Yamaha dealer or boat manufacturer for further information on determining the prop- er mounting height. For instructions on setting the trim angle of the outboard motor, see page 41. -
Page 34: Operation
Operation For the first hour of operation: EMU36381 First-time operation Run the engine at varying speeds up to EMU36391 2000 r/min or approximately half throttle. Fill engine oil For the second hour of operation: The engine is shipped from the factory without Run the engine at 3000 r/min or at ap- engine oil. -
Page 35: Removing Top Cowling
Operation EMU39840 EMU39851 Removing top cowling Controls For the following checks, remove the top Move the tiller handle fully to the left and cowling from the bottom cowling. right to check that operation is smooth. To remove the top cowling, pull the cowling Turn the throttle grip from the fully closed lock lever up and lift up the top cowling. -
Page 36: Engine Shut-Off Cord (Lanyard)
Operation ZMU06874 ZMU06769 1. Oil filler cap EMU36483 Engine shut-off cord (lanyard) 2. Oil lubrication check window Inspect the engine shut-off cord and clip for TIP: damage, such as cuts, breaks, and wear. The oil lubrication check window does not in- dicate the engine oil level. -
Page 37: Engine
EMU39861 Installing top cowling Check the rubber seal for damage. If the rubber seal is damaged, have it replaced by a Yamaha dealer. Align the fuel tank cap and manual starter handle with their respective holes in the top cowling. - Page 38 Operation EWM01830 WARNING Gasoline and its vapors are highly flam- mable and explosive. Always refuel ac- cording to this procedure to reduce the risk of fire and explosion. Gasoline is poisonous and can cause in- jury or death. Handle gasoline with care. Never siphon gasoline by mouth.
-
Page 39: Operating Engine
Operation Wipe up any spilled gasoline immediately with dry rags. Dispose of rags properly according to local laws or regulations. If you use a portable container to store and dispense fuel, only use a locally ap- proved GASOLINE container. EMU27452 Operating engine EWM00420 WARNING... - Page 40 Operation Sending fuel for portable fuel tank (optional) Loosen the air vent screw on the portable fuel tank by 2 or 3 turns. ZMU06740 1. Air vent screw Align the fuel cock with the built-in fuel tank position. 1. Air vent screw If there is fuel in the built-in fuel tank, loos- en the air vent screw by 1 or 2 turns to prevent pressure from increasing inside...
-
Page 41: Starting Engine
Operation sure to keep the portable fuel tank hori- zontal. Otherwise, fuel cannot be drawn from the fuel tank. ZMU06743 1. Fuel hose 2. Fuel joint cap 1. Arrow EMU27493 Starting engine EWM01600 WARNING Before starting the engine, make sure that the boat is tightly moored and that you can steer clear of any obstructions. - Page 42 Operation boat could slow rapidly. This could cause people and objects in the boat to be thrown forward. Move the gear shift lever to the neutral position. ZMU06808 1. Start mark “ ” 2. Notch TIP: If the ambient temperature is -15°C or less, turn the throttle grip so that the engine start ZMU06749 mark “...
-
Page 43: Checks After Starting Engine
Stop the engine and check whether the cooling water inlet on the lower case or the cooling water pilot hole is blocked. Consult your Yamaha dealer if the prob- ZMU06746 lem cannot be located and corrected. After the engine starts, slowly return the manual starter handle to its original posi- tion before releasing it. -
Page 44: Checks After Engine Warm Up
Operation or less. After the engine has warmed up, push ECM02220 NOTICE the choke knob in fully. Failure to do so will Before shifting the outboard motor, turn shorten engine life. the throttle grip to the fully closed position TIP: and let the engine speed return to idle If the choke knob is left pulled out after the speed. -
Page 45: Stopping Boat
Operation EMU39881 Stopping boat EWM02321 WARNING Do not use the reverse function to slow down or stop the boat as it could cause you to lose control, be ejected, or impact the load or other parts of the boat. This could increase the risk of serious injury. -
Page 46: Trimming Outboard Motor
Operation The trim angle of the outboard motor helps determine the position of the bow of the boat in the water. The correct trim angle is affected by variables, such as the load in the boat, sea conditions, and running speed. ZMU06871 1. -
Page 47: Adjusting Boat Trim
Operation There are 5 holes provided in the clamp bracket to adjust the outboard motor trim an- gle. Stop the engine. Tilt the outboard motor up, and then re- move the trim rod from the clamp bracket. Bow Up Too much trim-out puts the bow of the boat too high in the water. -
Page 48: Tilting Up And Down
Operation and fuel tank cap and align the fuel cock with the closed position. Otherwise, fuel may leak. ECM02161 NOTICE Before tilting the outboard motor up, fol- low the procedure under “Stopping en- gine” in this chapter. Never tilt the outboard motor up while the engine is running. -
Page 49: Procedure For Tilting Down
Operation install the fuel joint cap. Otherwise, in- jury could result from striking the fuel joint accidentally. [EWM02411] ZMU06749 1. Neutral position To prevent steering movement, turn the ZMU06753 steering friction adjuster clockwise. 1. Fuel hose 2. Fuel joint cap Hold the rear of the top cowling and fully tilt the outboard motor up. -
Page 50: Shallow Water
Operation When cruising in shallow water, do not operate in reverse. Reverse thrust can cause the outboard motor to lift out of the water, increasing the chance of an accident and personal injury. ECM00260 NOTICE Do not tilt the outboard motor up so that the cooling water inlet on the lower unit is ZMU06833 above the surface of the water when set-... -
Page 51: Cruising In Other Conditions
Operation Hold the rear of the top cowling and slightly tilt the outboard motor up until the tilt support bar automatically locks. The outboard motor can be operated in this position for shallow water cruising. The outboard motor is equipped with 3 shal- low water cruising positions. -
Page 52: Maintenance
When not using a portable fuel tank, outboard motor cannot be trailered in the fully make sure to install the fuel joint cap. tilted down position, consult a Yamaha dealer. Otherwise, injury could result from EMU39422 Dismounting the outboard motor striking the fuel joint accidentally. - Page 53 Maintenance Hold the carrying handle and the hand- grip on the front side of the bottom cowl- ing and lift up the outboard motor using two people to dismount it from the boat. ZMU06753 1. Fuel hose 2. Fuel joint cap To prevent steering movement, turn the ZMU06821 steering friction adjuster clockwise.
-
Page 54: Storing Outboard Motor
It is advisable to have your outboard motor serviced by an authorized Yamaha dealer pri- or to storage. However, the following proce- dures can be performed by the owner. -
Page 55: Procedure
The use of “Yamaha Fuel Conditioner and Stabilizer” eliminates the need to drain the fuel system. Consult a Yamaha dealer or oth- er qualified mechanic if the fuel system is to be drained instead. When using a portable fuel tank, discon-... - Page 56 52. will smoke excessively and stop. Fill the built-in fuel tank with fresh fuel and add “Yamaha Fuel Conditioner and Sta- bilizer”. Remove the top cowling and fog- ging hole cap. For further information, see steps 2-4 in “Flushing in a test tank”.
-
Page 57: Lubrication
Maintenance TIP: For long-term storage, fogging the engine with oil is recommended. Contact your Yamaha dealer for information about fogging oil and procedures for your engine. EMU28423 Cleaning and anticorrosion measures Wash down the exterior of the outboard motor with fresh water and dry off com- pletely. -
Page 58: Periodic Maintenance
Yamaha marine dealership. A service manual is available for purchase through your Yamaha dealer for owners who have the mechanical skills, tools, and other equipment necessary to perform mainte- nance not covered by this owner’s manual. -
Page 59: Maintenance Chart 1
When operating in salt water, muddy, other turbid (cloudy), acidic water, the engine should be flushed with clean water after each use. The “ ” symbol indicates the check-ups which you may carry out yourself. The “ ” symbol indicates work to be carried out by your Yamaha dealer. Initial Every Item Actions... - Page 60 Inspection or replace- Stop switch ment as necessary Connector connec- Inspection or replace- tions/lead connections ment as necessary Fuel tank (optional Inspection and clean- Yamaha portable fuel ing as necessary tank) Inspection and clean- Fuel tank (built-in tank) ing as necessary...
-
Page 61: Maintenance Chart 2
Maintenance EMU34451 Maintenance chart 2 Every Item Actions 1000 hours Exhaust guide/exhaust Inspection or replace- manifold ment as necessary... -
Page 62: Greasing
Maintenance EMU28941 Greasing Yamaha grease A (water resistant grease) Yamaha grease D (corrosion resistant grease; for propeller shaft) F4, F6 ZMU06764... -
Page 63: Cleaning And Adjusting Spark Plug
Do not attempt to diagnose any problems yourself. Instead, take the outboard motor to a Yamaha dealer. You should peri- odically remove and inspect the spark plug because heat and deposits will cause the spark plug to slowly break down and erode. -
Page 64: Inspecting Idle Speed
Maintenance material is found in the filters, clean or replace them. For cleaning or replacement of the fuel filters, consult a Yamaha dealer. ZMU06766 Start the engine. Warm it up and keep the idle speed for 5-10 minutes. ZMU06765 Stop the engine and leave it for 5-10 min- 1. - Page 65 NOTICE: If there are oil leaks, stop the engine and find the Add the correct amount of oil through the cause. Consult your Yamaha dealer if filler hole. NOTICE: Overfilling the oil the problem cannot be located and tank could cause leakage or damage.
-
Page 66: Checking Connector And Lead
16. Dispose of used oil according to local regulations. TIP: For more information on the disposal of used oil, consult your Yamaha dealer. Change the oil more often when operating the engine under adverse conditions such as extended trolling. 17. Install the top cowling. -
Page 67: Installing Propeller
You could be severely injured if the out- board motor falls on you. Apply Yamaha grease D (corrosion resis- tant grease) into the propeller shaft. Put the outboard motor in an upright po- Install the thrust washer and propeller sition (not tilted). -
Page 68: Inspecting And Replacing Anode (External)
Consult a [ECM00712] Yamaha dealer for replacement of the exter- TIP: nal anode. For disposal of used oil, consult your Yamaha ECM00720 dealer. NOTICE Using a flexible or pressurized filling de- Do not paint anodes, as this would render vice, inject the gear oil into the gear oil them ineffective. -
Page 69: Trouble Recovery
This section describes the likely causes and Q. Are engine inner parts damaged? remedies for problems, such as those in the A. Have serviced by a Yamaha dealer. fuel, compression, and ignition systems, poor starting, and loss of power. Please note that Engine idles irregularly or stalls. - Page 70 A. Check for pinched or kinked fuel line or oth- Q. Is carburetor clogged? er obstructions in fuel system. A. Have serviced by a Yamaha dealer. Q. Is fuel filter clogged? Q. Is fuel joint connection incorrect? A. Clean or replace filter.
-
Page 71: Temporary Action In Emergency
Whether damage is found or not, return to the nearest harbor slowly and careful- Engine vibrates excessively. Q. Is propeller damaged? Have a Yamaha dealer inspect the out- A. Have propeller repaired or replaced. board motor before operating it again. EMU39791 Starter will not operate Q. -
Page 72: Emergency Engine Starting
Trouble Recovery An unguarded, rotating flywheel is very dangerous. Keep loose clothing and other objects away when starting the en- gine. Use the emergency starter rope only as instructed. Do not touch the fly- wheel or other moving parts when the engine is running. - Page 73 Trouble Recovery Align the engine start mark “ ” on the throttle grip with the notch in the tiller han- dle. ZMU06783 Insert the knotted end of the emergency starter rope into the notch in the flywheel ZMU06808 magnet and wind the rope several turns 1.
-
Page 74: Treatment Of Submerged Motor
EMU33501 Treatment of submerged motor If the outboard motor is submerged, immedi- ately take it to a Yamaha dealer. Otherwise some corrosion may begin almost immediate- ly. NOTICE: Do not attempt to run the out- board motor until it has been completely inspected. -
Page 75: Consumer Information
Consumer information EMU29830 YAMAHA MOTOR CORPORATION, U.S.A. FOUR-STROKE OUTBOARD MOTOR THREE-YEAR LIMITED WARRANTY... - Page 76 Consumer information...
-
Page 77: Important Warranty Information If You Use Your Yamaha Outside The Usa Or Canada
Consumer information EMU29841 IMPORTANT WARRANTY INFORMATION IF YOU USE YOUR YAMAHA OUTSIDE THE USA OR CANADA... - Page 80 YAMAHA MOTOR CORPORATION, USA Printed in France December 2009–0.3 × 1 CR...
Need help?
Do you have a question about the F4 and is the answer not in the manual?
Questions and answers