Yamaha F2.5 Owner's Manual
Hide thumbs
Also See for F2.5:
- Owner's manual (122 pages) ,
- Service manual (43 pages) ,
- User manual (25 pages)

Related Manuals for Yamaha F2.5


Summary of Contents for Yamaha F2.5
- Page 1 F2.5 OWNER’S MANUAL Read this manual carefully before operating this LIT-18626-10-13 outboard motor. 6BV-F8199-37-E0...
- Page 2 Les gaz d’échappement du moteur de ce produit contiennent des substances chimiques connues dans l’État de Californie pour provoquer le cancer, des anomalies congénitales et des troubles de la reproduction. ZMU07696 Read this manual carefully before operating this outboard motor. Keep this manual onboard in a waterproof bag when boating.
-
Page 3: Important Manual Information
EWM00781 If you purchased this outboard motor used, WARNING see your Yamaha dealer to have it registered A WARNING indicates a hazardous situa- in your name in Yamaha records. tion which, if not avoided, could result in TIP: death or serious injury. -
Page 4: Table Of Contents
Personal flotation devices (PFDs) ..2 Components ........26 People in the water......2 Components diagram....26 Passengers ........2 Fuel tank (built-in fuel tank) (F2.5) ... 28 Overloading ........2 Fuel tank (built-in fuel tank) Avoid collisions........2 (F4, F6) ......... 28 Weather.......... - Page 5 Cooling water ........57 Cleaning and adjusting spark plug ... 83 Warming up engine ....... 57 Checking fuel filter (F2.5) ....84 Warming up ........57 Checking fuel filter (F4, F6) ....84 Checks after engine warm up ..58 Inspecting idle speed......
- Page 6 Table of contents Treatment of submerged motor..99 Consumer information....100 YAMAHA FOUR-STROKE OUTBOARD MOTOR THREE-YEAR LIMITED WARRANTY......100 IMPORTANT WARRANTY INFORMATION IF YOU USE YOUR YAMAHA OUTSIDE THE U.S.A. OR CANADA ..102...
-
Page 7: Safety Information
Safety information EMU33622 running away under power and leaving peo- Outboard motor safety ple stranded, or running over people or ob- Observe these precautions at all times. jects. EMU36501 Always attach the engine shut-off cord to a Propeller secure place on your clothing or your arm or People can be injured or killed if they come in leg while operating. -
Page 8: Modifications
Personal flotation devices (PFDs) distribution can compromise the boats han- Have an approved PFD on board for every oc- dling and lead to an accident, capsizing or cupant. Yamaha recommends that you must swamping. wear a PFD whenever boating. At a minimum, EMU33772... -
Page 9: Weather
Safety information Avoid areas with submerged objects or the National Association of State Boating Law ● shallow water. Administrators (NASBLA) and recognized by Ride within your limits and avoid aggressive the United States Coast Guard. Most, but not ● maneuvers to reduce the risk of loss of con- all, states accept this course to meet their trol, ejection, and collision. -
Page 10: Boating Organizations
Safety information presented in the following section are con- Chicago, IL 60601 densed- and have been provided for your http://www.nmma.org/ convenience only. Contact the U.S. Coast Guard, the National Marine Retailers Association of America Association of State Boating Law Administra- 155 N. -
Page 11: Rules When Encountering Vessels
Safety information Stand-on vessel Overtaking: (you are passing or being The vessel with the right-of-way has the duty passed by another vessel) to continue its course and speed, except to In the following illustration, your boat is in the avoid an immediate collision. When you main- center. -
Page 12: Other Special Situations
Safety information Crossing vessels, the operator should sound a pro- When two power driven vessels are crossing longed blast on the whistle (4 to 6 seconds). If each other’s path close enough to run the risk another vessel is around the bend, it too of collision, the vessel which has the other on should sound the whistle. - Page 13 Safety information are passed on the starboard (right) side when proceeding from open water into port, and black buoys are to port (left) side. When navi- gating out of port, your position with respect to the buoys should be reversed; red buoys should be to port and black buoys to star- board.
- Page 14 Safety information ZMU01708...
-
Page 15: General Information
Record your outboard motor serial number in the spaces provided to assist you in ordering spare parts from your Yamaha dealer or for reference in case your outboard motor is sto- len. F2.5 1. -
Page 16: Read Manuals And Labels
Read any manuals supplied with the boat. ● Read all labels on the outboard motor and the boat. ● If you need any additional information, contact your Yamaha dealer. EMU33832 Warning labels If these labels are damaged or missing, contact your Yamaha dealer for replacements. F2.5... - Page 17 WARNING Gasoline is highly flammable and explosive. Shut off engine before refueling. Tighten tank cap and air vent valve when not in use. YAMAHA 6S7-42698-60 AVERTISSEMENT L’essence est extrêmement inflammable et explosive. Areter le moteur avant de taire le plein de carburant.
- Page 18 General information EMU35132 Electrical hazard Symbols The following symbols mean as follows. Notice/Warning ZMU05666 ZMU05696 Read Owner’s Manual ZMU05664 Hazard caused by continuous rotation ZMU05665...
-
Page 19: Warning Labels
General information EMU42710 Warning labels If these labels are damaged or missing, contact your Yamaha dealer for replacements. F4, F6 ZMU06795... - Page 20 WARNING Gasoline is highly flammable and explosive. Shut off engine before refueling. Tighten tank cap and air vent valve when not in use. YAMAHA 6S7-42698-60 AVERTISSEMENT L’essence est extrêmement inflammable et explosive. Areter le moteur avant de taire le plein de carburant.
- Page 21 General information EMU44260 EMU42750 Contents of labels Symbols The above warning labels mean as follows. The following symbols mean as follows. EWM01691 Notice/Warning WARNING Emergency starting does not have start- in-gear protection. Ensure shift control is in neutral before starting engine. EWM01681 WARNING Keep hands, hair, and clothing away...
- Page 22 General information Electrical hazard ZMU05666...
-
Page 23: Specifications And Requirements
Specifications and requirements EMU38091 Performance: Specifications Full throttle operating range: TIP: F2.5MHA 5250–5750 r/min “(AL)” stated in the specification data below F4MHA 4000–5000 r/min represents the numerical value for the alumi- F6MHA 4500–5500 r/min num propeller installed. Rated power: EMU2821S F2.5MHA 1.8 kW (2.5 HP) Rated power: Dimension and weight:... -
Page 24: Installation Requirements
Specifications and requirements Starting carburetion system: Engine oil quantity: Choke valve F2.5MHA 0.4 L (0.42 US qt, 0.35 Imp.qt) Valve clearance IN (cold engine): F4MHA 0.6 L (0.63 US qt, 0.53 Imp.qt) 0.08–0.12 mm (0.0032–0.0047 in) F6MHA 0.6 L (0.63 US qt, 0.53 Imp.qt) Valve clearance EX (cold engine): Lubrication system: 0.08–0.12 mm (0.0032–0.0047 in) -
Page 25: Mounting The Outboard Motor
WARNING propriate. Improper mounting of the outboard mo- ● Your Yamaha dealer can help you select the tor could result in hazardous conditions right propeller for your boating needs. Select such as poor handling, loss of control, a propeller that will allow the engine to reach or fire hazards. -
Page 26: Start-In-Gear Protection (F4, F6)
If knocking or Recommended engine oil grade 2: pinging occurs, use a different brand of gaso- SAE 15W-40/20W-40/20W-50 line or premium unleaded fuel. Yamaha rec- API SH/SJ/SL ommends that you use alcohol-free gasoline Engine oil quantity: (see Gasoline with Ethanol) whenever possi- F2.5MHA 0.4 L (0.42 US qt,... - Page 27 However, if gasoline with Ethanol is the the gasoline in a layer at the bottom of the only fuel available in your area, your Yamaha fuel tank. This ethanol and water mixture is outboard motor is calibrated to run properly...
-
Page 28: Gasoline Additives
10-micron water-separating fuel filter be in- tor in muddy or acidic water conditions. stalled on your boat and serviced frequently. However, depending on the model it might not Consult your authorized Yamaha dealer for a be required. 10-micron filter that meets your engine’s re- EMU41350 quirements. -
Page 29: Motor Disposal Requirements
EFFECTUER, CONSULTEZ LE MANUEL DU PROPRIÉTAIRE. IL SATISFAIT AUX NORMES EVAP EPA DES É.-U. FAMILLE : FELs(HC+NOx / CO): g/kW-h Consult your Yamaha dealer for details. CYLINDRÉE : litre PUISS. MAX. : COMPOSANTS CERTIFIÉS : EMU25222 YAMAHA MOTOR CO.,LTD. -
Page 30: Star Labels
Air Resources Board (CARB) star label. ZMU07605 See below for a description of your particular label. EMU39201 Manufactured date label F2.5 This label is attached to the clamp bracket. F2.5 1. Star labels location F4, F6 1. Manufactured date label location... - Page 31 Specifications and requirements EMU40330 EMU40350 One Star—Low Emission Three Stars—Ultra Low Emission The one-star label identifies engines that The three-star label identifies engines that meet the Air Resources Board’s Personal meet the Air Resources Board’s Personal Watercraft and Outboard marine engine 2001 Watercraft and Outboard marine engine 2008 exhaust emission standards.
-
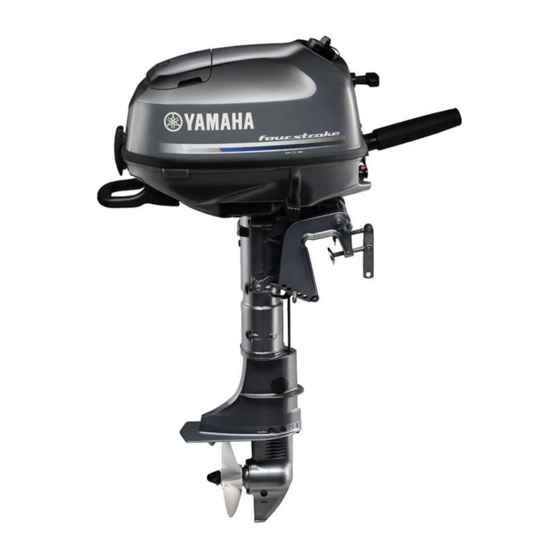
Page 32: Components
Components EMU2579Y Components diagram TIP: * May not be exactly as shown; also may not be included as standard equipment on all models (order from dealer). F2.5 ZMU07612 1. Top cowling 16.Clamp screw 2. Cowling lock lever(s) 17.Restraint cable attachment 3. - Page 33 Components F4, F6 21 19 ZMU07495 1. Top cowling 22.Clamp screw 2. Cowling lock lever 23.Restraint cable attachment 3. Carrying handle 24.Tilt support bar 4. Anti-cavitation plate 25.Gear shift lever 5. Propeller* 26.Fuel tank* 6. Cooling water inlet 7. Trim rod 8.
-
Page 34: Fuel Tank (Built-In Fuel Tank) (F2.5)
Components EMU44002 Fuel tank (built-in fuel tank) (F2.5) This outboard motor is equipped with a built- in fuel tank and its parts are as follows. ZMU07619 1. Air vent valve 2. Pointer 3. “OFF” position ZMU07613 EMU44013 1. Air vent valve Fuel tank (built-in fuel tank) (F4, F6) 2. -
Page 35: Fuel Tank (Portable Fuel Tank) (F4, F6)
Components mercial users should conform to relevant licensing or approval authority regula- tions. ZMU07620 1. Air vent valve 2. Pointer 3. “OPEN” position To close the air vent valve, align the pointer on the air vent valve with the “CLOSE” posi- tion. -
Page 36: Fuel Cock
Components EMU42990 EMU42800 Fuel cock Close F2.5 F2.5 To stop fuel flow to the engine, turn the lever The fuel cock turns on and off the supply of or knob to close position. fuel from the fuel tank to the engine. -
Page 37: Tiller Handle
Components F2.5 ZMU07358 1. Open position 1. Tiller handle F4, F6 F4, F6 To send fuel from the fuel tank to the carbure- tor, align the fuel cock with the position for the built-in fuel tank or portable fuel tank accord- ing to which fuel tank is being used. -
Page 38: Throttle Grip
The throttle grip is on the tiller handle. Turn closed. the grip counterclockwise to increase speed and clockwise to decrease speed. F2.5 ZMU06877 1. Fully open ZMU07359 2. Fully closed 1. -
Page 39: Throttle Friction Adjuster
Avoid acci- an accident. [EWM02261] dentally pulling the cord during normal F2.5 operation. Loss of engine power means the loss of most steering control. Also, without engine power, the boat could slow rapidly. This could cause people and ob- jects in the boat to be thrown forward. -
Page 40: Engine Stop Button
Components F2.5 F2.5 ZMU07362 1. Clip 1. Engine stop button 2. Cord F4, F6 3. Engine shut-off switch F4, F6 ZMU06726 1. Engine stop button ZMU06725 EMU26013 Choke knob for pull type 1. Engine shut-off switch To supply the engine with the rich fuel mixture 2. -
Page 41: Fuel Joint Cap (F4, F6)
Components F4, F6 F2.5 ZMU06784 ZMU07364 1. Choke knob 1. Manual starter handle EMU39723 F4, F6 Fuel joint cap (F4, F6) The fuel joint is equipped with the fuel joint cap. WARNING! When not using a portable fuel tank, make sure to install the fuel joint cap. -
Page 42: Trim Rod (Tilt Pin)
Components F2.5 F2.5 ZMU07365 ZMU07366 1. Steering friction adjuster 1. Trim rod F4, F6 F4, F6 ZMU06843 ZMU06729 1. Steering friction adjuster 1. Trim rod To increase resistance, turn the steering fric- EMU39363 Tilt lock mechanism (F4, F6) tion adjuster clockwise. -
Page 43: Tilt Support Bar (F4, F6)
1. Tilt support bar 2. Reverse position 2. Tilted up position 3. Shallow water cruising position EMU42600 Tilt support lever (F2.5) To keep the outboard motor in the tilted up po- sition, lock the tilt support lever to the clamp bracket. ZMU06839 1. -
Page 44: Carrying Handle
Components F2.5 ZMU07369 ZMU07367 1. Carrying handle 1. Cowling lock lever F4, F6 F2.5 The carrying handle is used to carry the out- board motor. For information on carrying and transporting the outboard motor, see page 70. ZMU07368 1. Cowling lock lever... -
Page 45: Installation
If you are not able to the water, move it to an area on land. mount the outboard motor properly, To prevent steering movement, turn the consult a Yamaha dealer. steering friction adjuster clockwise. EMU42940 Mounting the outboard motor F2.5... - Page 46 Installation Mount the outboard motor on the center line (keel line) of the boat, and ensure that the boat itself is well balanced. Oth- erwise the boat will be hard to steer. For boats without a keel or which are asym- metrical, consult your dealer.
-
Page 47: Clamping The Outboard Motor
Test runs at different heights can help determine 0–25mm (0–1in) the optimum mounting height. Consult your Yamaha dealer or boat manufacturer for further information on determining the prop- ZMU07370 er mounting height. 1. Idle hole For instructions on setting the trim angle of ●... - Page 48 Attach one end to the restraint cable at- tachment and the other to a secure mounting point on the boat. Otherwise the engine could be completely lost if it accidentally falls off the transom. F2.5 ZMU07509 1. Restraint cable attachment F4, F6 ZMU06812...
-
Page 49: Operation
Operation EMU36381 For the first hour of operation: First-time operation Run the engine at varying speeds up to EMU36391 2000 r/min or approximately half throttle. Fill engine oil For the second hour of operation: The engine is shipped from the factory without Run the engine at 3000 r/min or at ap- engine oil. -
Page 50: Remove The Top Cowling
Keep away from up and lift up the top cowling. sparks, cigarettes, flames, or other sourc- F2.5 es of ignition. EWM00910 WARNING Leaking fuel can result in fire or explosion. -
Page 51: Engine Shut-Off Cord (Lanyard)
1. Clip 2. Cord ZMU06851 EMU42860 Engine oil F2.5 Put the outboard motor in an upright po- sition (not tilted). Remove the top cowling. Check the oil level using the oil level check window to be sure the level falls between the upper and lower marks. -
Page 52: Engine
TIP: EMU42980 Installing top cowling The oil lubrication check window does not in- F2.5 dicate the engine oil level. Use the oil lubrica- Be sure that all cowling lock levers are re- tion check window to make sure that the leased. - Page 53 F4, F6 Check the rubber seal for damage. If the rubber seal is damaged, have it replaced by a Yamaha dealer. Align the fuel tank cap and manual starter handle with their respective holes in the top cowling.
-
Page 54: Filling Fuel
To prevent electrostatic sparks, discharge ● any built-up static electricity from your body before refueling. Filling fuel for built-in fuel tank Remove the fuel tank cap. F2.5 ZMU06739 EMU43463 Filling fuel EWM01950 WARNING Be sure the outboard motor is securely fastened to the transom or a stable stand. - Page 55 GASOLINE container. temperature increases. [EWM02610] Filling fuel for portable fuel tank (optional) (F4, F2.5 Disconnect the fuel hose from the fuel joint on the fuel tank. ZMU07623 F4, F6 ZMU07443 1.
- Page 56 Operation TIP: Release the fuel vapor contained in the fuel tank. While pressing and holding the pressure relief tab under the fuel tank cap again, turn the fuel tank cap counterclockwise to remove it. ZMU07444 1. Air vent screw Remove the fuel tank from the boat. To loosen the air vent screw, turn it coun- terclockwise until it stops.
-
Page 57: Operating Engine
Avoid blocking ex- haust outlets. EMU43476 Sending fuel ZMU07449 Sending fuel for built-in fuel tank (F2.5) 1. Fuel tank cap Open the air vent valve. Turn the air vent screw clockwise to close ZMU07624 1. Air vent valve ZMU07444 Open the fuel cock. - Page 58 Operation Sending fuel for portable fuel tank (optional) (F4, F6) To loosen the air vent screw, turn it coun- terclockwise until it stops. ZMU07625 1. Air vent valve Align the fuel cock with the built-in fuel tank position. ZMU07445 1. Air vent screw If there is fuel in the built-in fuel tank, open the air vent valve to prevent pres- sure from increasing inside the tank due...
- Page 59 Operation ZMU07452 ZMU07455 1. Toward the outboard motor 1. Fuel joint 2. Arrow 2. Fuel hose 3. Primer pump Wipe up any spilled gasoline immediately 4. Toward the fuel tank with dry rags. Remove the fuel joint cap. Align the fuel TIP: joint on the fuel hose with the fuel joint on Dispose of rags properly according to local...
-
Page 60: Starting Engine
Operation Procedure for starting outboard motor (F2.5) Place the gear shift lever in neutral. WARNING! Always start the engine in neutral to avoid accidentally moving the boat. [EWM00111] 1. Arrow 2. Primer pump EMU27494 Starting engine EWM01600 WARNING If the engine shut-off cord is equipped, at-... - Page 61 Operation Place the choke knob in the “ ” After the engine starts, slowly return the (start) position. After the engine starts, re- manual starter handle to the original posi- turn the knob to the “ ” (run) position. tion before releasing it. Slowly return the throttle grip to the fully closed position.
- Page 62 Operation TIP: If the ambient temperature is -15°C or less, turn the throttle grip so that the engine start mark “ ” is positioned past the notch in the tiller handle. ZMU06749 1. Neutral position Attach the engine shut-off cord to a se- cure place on your clothing, or your arm or leg.
-
Page 63: Checks After Starting Engine
Stop the engine and check whether the cooling water inlet on the lower case or the cooling water pilot hole is blocked. Consult your Yamaha dealer if the prob- ZMU06746 lem cannot be located and corrected. After the engine starts, slowly return the F2.5... -
Page 64: Checks After Engine Warm Up
In temperatures of -5°C or less, leave the ● choke knob pulled out fully for approximate- F2.5 ly 30 seconds after starting. To shift out of neutral (forward) EMU36531 Move the gear shift lever firmly and crisply to- Checks after engine warm up ward the bow. -
Page 65: Stopping Boat (F2.5)
ZMU06749 1. Neutral position EMU38071 Stopping boat (F2.5) The boat is not equipped with a separate braking system. Water resistance stops it af- ter the throttle lever is moved back to the fully closed position. The stopping distance varies depending on gross weight, water surface conditions, and wind direction. -
Page 66: Stopping Boat (F4, F6)
TIP: EMU43493 Procedure The engine can also be stopped by pulling the F2.5 engine shut-off cord and removing the clip Push and hold the engine stop button un- from the engine shut-off switch. til the engine stops completely. - Page 67 Operation ZMU07444 ZMU06726 1. Engine stop button 1. Air vent screw Align the fuel cock with the closed posi- tion. ZMU06867 1. Engine shut-off switch 2. Cord ZMU06871 3. Clip 1. Closed position Close the air vent valve and air vent After stopping the engine, disconnect the screw.
-
Page 68: Trimming Outboard Motor
The correct trim angle is affected by variables, such as the load in the boat, sea conditions, and running speed. F2.5 ZMU06753 1. Fuel hose 2. Fuel joint cap Disconnect the fuel hose from the fuel joint on the fuel tank. -
Page 69: Adjusting Trim Angle For Manual Tilt Models
Operation F4, F6 F2.5 ZMU07372 1. Trim rod F4, F6 ZMU06754 1. Trim operating angle ZMU06755 EMU42830 Adjusting trim angle for manual tilt 1. Trim rod models Change the position of the trim rod in di- EWM00400 rection “A” to raise the bow (“trim-out”). -
Page 70: Adjusting Boat Trim
Operation EMU40121 Adjusting boat trim Generally, a boat is stable when the keel line of the boat is up about 3 to 5 degrees. With the bow up, the boat may have a greater ten- dency to steer to one side or the other. If this occurs, adjust the trim angle. -
Page 71: Procedure For Tilting Up
180° (facing the rear). EMU43503 Procedure for tilting up Hold the carrying handle and tilt the en- F2.5 gine up fully until the tilt support lever au- Place the gear shift lever in neutral (if tomatically locks. - Page 72 Operation TIP: If the outboard motor is not facing forward, the tilt support lever cannot automatically turn to the locked position. If the tilt support lever does not automatically lock, swing the out- board motor a little to the left and right. F4, F6 Align the fuel cock with the closed posi- tion.
-
Page 73: Procedure For Tilting Down
EMU42950 Procedure for tilting down according operator preference. F2.5 WARNING! If there is too much resis- Slightly tilt the outboard motor up. tance it could be difficult to steer, Slowly tilt the outboard motor down while which could result in an accident. -
Page 74: Shallow Water (F4, F6)
Operation EMU28062 Shallow water (F4, F6) EMU39891 Cruising in shallow water EWM02391 WARNING Operate the boat at the lowest possible ● speed when cruising in shallow water. Hitting an underwater obstacle could cause the outboard motor to lift out of ZMU06749 the water, resulting in loss of control. -
Page 75: Cruising In Other Conditions
Operation ZMU06749 1. Neutral position Slightly tilt the outboard motor up, and then slowly tilt the outboard motor down while pulling the tilt support bar up. ZMU06881 1. Tilt support bar EMU35391 Cruising in other conditions Cruising in salt water After operating in salt water, flush the cooling water passages with fresh water to prevent them from becoming clogged. -
Page 76: Maintenance
Consult your Do not use the tilt support lever or knob ● Yamaha dealer for further details. when trailering the boat. The outboard EMU43513 Transporting/Dismounting the out- motor could shake loose from the tilt board motor support and fall. - Page 77 Maintenance Stop the engine and land the boat. Tighten the fuel tank cap until a click is heard. Close the air vent valve. ZMU07628 1. Air vent valve 2. Fuel tank cap Align the fuel cock with the closed posi- tion.
- Page 78 Maintenance ZMU06827 1. Steering friction adjuster Turn the tiller handle 180° so that it is pointing rearward. ZMU06835 10. When transporting or storing the out- board motor while removed from a boat, use an outboard motor stand. ZMU06836 Loosen the clamp screws. Hold the carrying handle and the hand- grip on the front side of the bottom cowl- ing and lift up the outboard motor using...
-
Page 79: Storing Outboard Motor
Stabilizer” to each gallon of fuel. be performed to prevent excessive damage. It is advisable to have your outboard motor serviced by an authorized Yamaha dealer pri- or to storage. However, the following proce- dures can be performed by the owner. - Page 80 The use of “Yamaha Fuel Conditioner and 2. Lowest water level Stabilizer” eliminates the need to drain the fuel system. Consult a Yamaha dealer or oth- Fill the tank with fresh water to above the er qualified mechanic if the fuel system is to level of the anti-cavitation plate.
- Page 81 [EWM00091] Quickly spray “Yamaha Stor-Rite Engine Fogging Oil” into the fogging hole of the silencer. When properly done, the engine will smoke excessively and stop. ZMU06822 1.
- Page 82 Remove the propeller. For further infor- Stabilizer” eliminates the need to drain the mation, see page 89. fuel system. Consult a Yamaha dealer or oth- Remove the screw located beside the er qualified mechanic if the fuel system is to “...
-
Page 83: Lubrication
Seal ZMU02509 replacement should be performed by an 1. Water flush plug authorized Yamaha dealer prior to use. Turn on the water supply to the outboard Grease all grease fittings. For further de- motor. -
Page 84: Checking Painted Surface Of Outboard Motor
1. Air intake A service manual is available for purchase Drain the cooling water completely out of through your Yamaha dealer for owners who the outboard motor. Clean the body thor- have the mechanical skills, tools, and other oughly. -
Page 85: Maintenance Chart 1
● be flushed with clean water after each use. The “ ” symbol indicates the check-ups which you may carry out yourself. The “ ” symbol indicates work to be carried out by your Yamaha dealer. Initial Every Item Actions... - Page 86 Stop switch ment as necessary Connector connec- Inspection or replace- tions/lead connections ment as necessary Fuel tank (optional Inspection and clean- Yamaha portable fuel ing as necessary tank) (F4, F6) Inspection and clean- Fuel tank (built-in tank) ing as necessary...
-
Page 87: Maintenance Chart 2
Maintenance EMU34451 Maintenance chart 2 Every Item Actions 1000 hours Exhaust guide/exhaust Inspection or replace- manifold ment as necessary EMU28943 Greasing Yamaha grease A (water resistant grease) Yamaha grease D (corrosion resistant grease; for propeller shaft) F2.5... - Page 88 Maintenance F4, F6 ZMU06764...
-
Page 89: Cleaning And Adjusting Spark Plug
Instead, take the outboard sion or fire. [EWM00561] motor to a Yamaha dealer. You should peri- odically remove and inspect the spark plug Standard spark plug: F2.5MHA BR6HS because heat and deposits will cause the F4MHA CR6HSB spark plug to slowly break down and erode. -
Page 90: Checking Fuel Filter (F2.5)
For cleaning or replacement of the fuel filters F2.5 at the intervals specified in the periodic main- Change the engine oil several minutes after tenance chart, consult a Yamaha dealer. the engine has been stopped, so that the oil is EMU39921 still warm, but not hot. - Page 91 Maintenance tighten 1/4 to 1/2 turn more. Tighten the drain screw to the correct torque with a torque wrench as soon as possible. Add the correct amount of oil through the filler hole. Install the filler cap. NOTICE: Overfilling the oil could cause leakage or damage.
- Page 92 Maintenance you are not familiar with the procedure for changing the engine oil, consult your Yamaha dealer. Put the outboard motor in an upright po- sition (not tilted). NOTICE: If the out- board motor is not level, the oil level indicated on the oil dipstick may not be accurate.
- Page 93 Maintenance TIP: TIP: The oil lubrication check window does not in- If the oil does not drain easily, change the tilt dicate the engine oil level. Use the oil lubrica- angle or turn the outboard motor to port and tion check window to make sure that the starboard to drain the oil.
-
Page 94: Checking Connector And Lead
15. Start the engine and make sure that there are no oil leaks. NOTICE: If there are oil leaks, stop the engine and find the cause. Consult your Yamaha dealer if the problem cannot be located and corrected. Continued operation with a problem could cause severe engine damage. -
Page 95: Removing Propeller
Otherwise, the propeller could come off during opera- tion and be lost. ZMU06777 Apply Yamaha grease D (corrosion resis- 1. Propeller shaft tant grease) into the propeller shaft. EMU30662 Install the thrust washer and propeller Removing propeller onto the propeller shaft. -
Page 96: Changing Gear Oil
F2.5 Yamaha dealer check and repair the outboard motor. [ECM00713] TIP: For disposal of used oil, consult your Yamaha dealer. Using a flexible or pressurized filling de- vice, inject the gear oil into the gear oil drain screw hole. Recommended gear oil: Yamalube Marine Gearcase Lube or 1. -
Page 97: Inspecting And Replacing Anode (External)
Maintenance F2.5 from the surface of the anode. Consult a Yamaha dealer for replacement of the exter- nal anode. ECM00720 NOTICE Do not paint anodes, as this would render them ineffective. F2.5 F4, F6 ZMU07374 1. Anode F4, F6 ZMU06780 Put a new gasket on the oil level plug. -
Page 98: Trouble Recovery
This section describes the likely causes and Q. Are engine inner parts damaged? remedies for problems, such as those in the A. Have serviced by a Yamaha dealer. fuel, compression, and ignition systems, poor starting, and loss of power. Please note that Engine idles irregularly or stalls. - Page 99 A. Check for pinched or kinked fuel line or oth- Q. Is carburetor clogged? er obstructions in fuel system. A. Have serviced by a Yamaha dealer. Q. Is fuel filter clogged? Q. Is fuel joint connection incorrect? A. Clean or replace filter.
-
Page 100: Temporary Action In Emergency
Whether damage is found or not, return to the nearest harbor slowly and careful- Engine vibrates excessively. Q. Is propeller damaged? Have a Yamaha dealer check the out- A. Have propeller repaired or replaced. board motor before operating it again. EMU43680 Starter will not operate Q. - Page 101 Trouble Recovery An unguarded, rotating flywheel is very ● dangerous. Keep loose clothing and other objects away when starting the en- gine. Use the emergency starter rope only as instructed. Do not touch the fly- wheel or other moving parts when the engine is running.
- Page 102 Trouble Recovery 12. While lifting the fuel tank, insert the knot- ted end of the emergency starter rope into the notch in the flywheel rotor and wind the rope several turns clockwise. TIP: If the rope is too long after winding it around the flywheel, shorten its length at the handle.
- Page 103 Trouble Recovery Avoid accidentally pulling the cord dur- Move the gear shift lever to the neutral ● ing normal operation. Loss of engine position. power means the loss of most steering control. Also, without engine power, the boat could slow rapidly. This could cause people and objects in the boat to be thrown forward.
- Page 104 Trouble Recovery 2. Manual starter/flywheel magnet cover Reinstall 2 bolts to secure the fuel tank. ZMU06744 Align the engine start mark “ ” on the ZMU06783 throttle grip with the notch in the tiller han- dle. Insert the knotted end of the emergency starter rope into the notch in the flywheel magnet and wind the rope several turns around the flywheel magnet clockwise.
-
Page 105: Treatment Of Submerged Motor
EMU33501 Treatment of submerged motor If the outboard motor is submerged, immedi- ately take it to a Yamaha dealer. Otherwise some corrosion may begin almost immediate- ly. NOTICE: Do not attempt to run the out- board motor until it has been completely inspected. -
Page 106: Consumer Information
Owner’s Manual. The owner of the outboard motor shall give notice to an authorized Yamaha Outboard Motor Dealer of any and all apparent defects within ten (10) days of discovery and make the motor available at that time for inspection and repairs at the dealer’s place of business. - Page 107 TRANSFER OF WARRANTY Transfer of the warranty from the original purchaser to any subsequent purchaser is possible by having the motor inspected by an authorized Yamaha Outboard Motor Dealer and requesting the dealer to submit a change of registration to Yamaha within ten (10) days of the transfer.
-
Page 108: Important Warranty Information If You Use Your Yamaha Outside The U.s.a. Or Canada
He will be able to contact Yamaha on your behalf to see if any refund can be provided. - Page 109 — right out of the box. Yamalube — Take care of your Yamaha with legendary Yamalube oils, lubricants, and care products. They’re formulated and approved by the toughest judges we know: the Yamaha engineering teams that know your Yamaha from the inside out.
- Page 110 Printed in France May 2013–0.3 × 1 CR...
Need help?
Do you have a question about the F2.5 and is the answer not in the manual?
Questions and answers