Table of Contents
Advertisement
Advertisement
Table of Contents

Related Manuals for Motorola CB3000


Summary of Contents for Motorola CB3000
- Page 1 CB3000 Client Bridge User’s Guide...
- Page 2 © 2009 Motorola, Inc. All rights reserved. MOTOROLA and the Stylized M Logo are registered in the US Patent & Trademark Office. Symbol is a registered trademark of Symbol Technologies, Inc. All other product or service names are the property of their respective owners.
-
Page 3: Table Of Contents
1.2.1 CB3000 Client Bridge Network Operating Modes ........ - Page 4 TOC-iv CB3000 Client Bridge User’s Guide Chapter 4: Management Options 4.1 Statistics and Logs ................4-1 4.1.1 Viewing Wireless Statistics .
-
Page 5: About This Guide
About This Guide Introduction This guide provides configuration and setup information for the CB3000 Client Bridge. Document Conventions The following document conventions are used in this document: NOTE Indicates tips or special requirements CAUTION: Indicates conditions that can cause equipment damage or data loss. -
Page 6: Service Information
NOTE: Motorola is not responsible for any damages incurred during shipment if the approved shipping container is not used. Shipping the units improperly can possibly void the warranty. If the original shipping container was not kept, contact Motorola to have another sent to you. -
Page 7: Chapter 1: Introduction
Up to 16 devices can be networked simultaneously by it. The CB3000 Client Bridge uses frequency modulation to transmit digital data to the devices within its own subnet. The transmission begins with a carrier signal that provides the center frequency. The digital data is superimposed on the carrier signal (modulation). -
Page 8: Within The Network
Figure 1.1 CB3000 Client Bridge within the Network The CB3000 Client Bridge and its client devices appear as a single mobile unit to an associated access point when operating in Infrastructure mode. For more information on CB3000 Client Bridge Infrastructure mode operation, see Infrastructure Mode on page 1-3. -
Page 9: Cb3000 Client Bridge Operational Principles
LAN and clients through the CB3000 Client Bridge. The access point is a dedicated device wired into the LAN backbone, while the CB3000 Client Bridge can be physically moved throughout the LAN. However, the CB3000 Client Bridge is designed to be placed in a single location for optimal use. -
Page 10: Media Access Control (Mac) Layer Bridging
The Ad-hoc (Peer-to-Peer) mode allows two or more CB3000 Client Bridge units to communicate exclusively with one another without using an access point. In the simplest of terms, this mode uses the CB3000 Client Bridge to bridge two or more Ethernet devices. -
Page 11: Dhcp Support
Client Bridge manually (static). If the CB3000 Client Bridge is configured to use DHCP, but there is no DHCP server to service the request, the CB3000 Client Bridge by default takes the address 10.10.1.1. The IP address of the device must be set manually if the device is not configured to use DHCP. -
Page 12: Wireless Security Support
1-6 CB3000 Client Bridge User’s Guide 1.2.6 Wireless Security Support CB3000 Client Bridge provides support for the following wireless security protocols. • WEP Security • WPA1 Security with TKIP algorithm • WPA2 Security with TKIP / CCMP (AES) algorithms • Secure 802.1x Security with MD5/MSCHAPV2/PEAP/TLS/TTLS EAP types... -
Page 13: Chapter 2: Getting Started
Getting Started Before installing the CB3000 Client Bridge, review the installation guidelines in the following sections: • Basic Requirements • Verifying the Package Contents • Observing Placement and Range Guidelines • Cabling the CB3000 • Logging into the CB3000 •... -
Page 14: Observing Placement And Range Guidelines
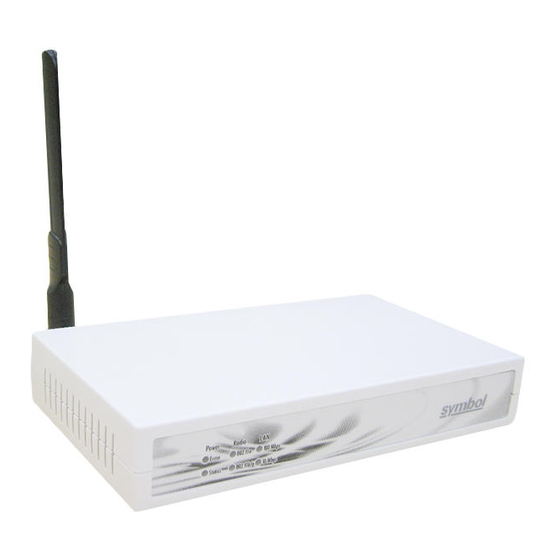
CB3000. 2.4 Cabling the CB3000 To cable the CB3000, follow these steps: 1. Screw the antenna clockwise onto the antenna connector on the rear of the CB3000 as shown in Figure 2.1. WARNING! Do not connect a Client Bridge set to Infrastructure mode directly to the LAN (for example, through a wall port). - Page 15 5. Connect the plug end of the power adapter into a power outlet. The built-in power converter automatically selects and adjusts the power for the appropriate voltage. 6. Verify the installation by checking the status of the LEDs on the front of the CB3000. Figure 2.2 Front of the CB3000 Table 2-1 describes the CB3000 LED indicators.
-
Page 16: Logging Into The Cb3000
Included on the CB3000 Client Bridge CD is a utility called the Discovery Tool. When executed, the Discovery Tool scans the network for all running CB3000 units and “discovers” them. When a unit is discovered, it is listed within the Discovery Tool interface. By selecting a discovered unit within the Discovery Tool, you can... - Page 17 Client Bridge on page 2-6. To run the Discovery Tool: 1. Locate the Discovery Tool (discover.exe) on the CB3000 CD and copy it to a desktop on the same network as the CB3000 you wish to access. 2. Double-click on the discover.exe file to launch the utility, and run a network scan. The scan starts immediately;...
-
Page 18: Changing The Ip Address For A New Client Bridge
If the device is unable to obtain and IP address then the IP address has to be manually configured. 1. Double click on the new CB3000. A warning is displayed and you are asked to change the IP address for the CB3000. - Page 19 Obtain IP address automatically option. 4. If the PC you are connecting this CB3000 to has more than one network adapter, you can choose to select the network adapter to connect to. To do so, select the appropriate network adapter from the...
-
Page 20: Web Interface Login
7. To continue, double click the IP address of the CB3000. 2.5.3 Web Interface Login After logging into the CB3000 console using the Discovery Tool (See Discovery Tool Login on page 2-4), save the IP address and log into the console in the future using the CB3000’s IP address. -
Page 21: Viewing Cb3000 Information
Understanding and Configuring Ethernet Settings on page 3-30. • WLAN Settings – Includes wireless LAN settings for the network that the CB3000 is a part of. To modify any of these settings, see Understanding and Configuring Wireless Settings on page 3-1. -
Page 22: Cb3000 Antenna Settings
Figure 2.12 CB3000 Information Screen 2.7 CB3000 Antenna Settings A CB3000 ships with antenna model ML-2452-APA1-01. This is an 802.11 a/b/g omni directional dipole antenna. However, if you intend to use a different model antenna, that antenna needs to be selected from the Antenna Settings screen in order to adjust the transmit power accordingly. - Page 23 Antenna Gain parameter. Information the CB3000 derives from the antenna look-up table is based on the antenna the user selects. The antenna gain parameter is read-only with no user editable values. If the user selects any antenna except ‘Other’, the gain value cannot be modified. If the user selects ‘Other’, the text entry field is blank and the user must enter a gain value.
- Page 24 2-12 CB3000 Client Bridge User’s Guide...
-
Page 25: Chapter 3: Network Configuration
3.1.1 Available Networks A Wireless Local Area Network (WLAN) is a data-communications system that flexibly extends the functionality of a wired LAN. A CB3000 can locate WLANs within its radio coverage area and connect to them. A WLAN does not require lining up devices for line-of-sight transmission. Roaming users can be handed off from one WLAN to another like a cellular phone system. - Page 26 If an access point or peer supported WLAN provides a better CB3000 connection option than the WLAN that the CB3000 is currently connected to, change the CB3000 connection. See Network Configurations on page 3-3 for more details.
-
Page 27: Network Configurations
802.11b/g, respectively. 3.1.2 Network Configurations The CB3000 can be configured to run within an infrastructure (access point) type network or ad hoc (peer-to- peer) type network, based on configured communication settings. See one of the following sections, depending on the network type you are configuring the CB3000 to run in. - Page 28 Band. Options include ‘a/b/g’,’a’, or ‘b/g’. Ensure the frequency band selected is consistent with the WLAN network. By restricting the Frequency Band on the CB3000, you can reduce the time the CB3000 takes to search for available APs. 5. Click the ‘View’...
- Page 29 To configure the CB3000 into an ad hoc network, see Configuring Ad Hoc Settings on page 3-5. 3.1.2.2 Configuring Ad Hoc Settings Ad hoc mode is used to form peer-to-peer CB3000 networks without access points. Use ad hoc mode to create networks within established network coverage areas or networks free of the physical constraints of access point provided radio coverage areas.
- Page 30 – See step 4 for more details on configuring the data rate. NOTE: The CB3000 must already be configured to run in ad hoc mode in order to set data rates. If the unit is configured for infrastructure mode, the Data Rate button is disabled.
- Page 31 CB3000 radio. Within the Supported Rates, select the data rate the CB3000 radio defaults to if a higher selected data rate cannot be maintained. NOTE: Select supported rates in respect to the data rates supported by the peer devices within the ad hoc network.
-
Page 32: Security Encryption Configurations
WEP is an encryption security protocol specified in the IEEE Wireless Fidelity (Wi-Fi) standard, 802.11b, and supported by the CB3000. WEP encryption is designed to provide a wireless device with a level of security and privacy comparable to a wired LAN. - Page 33 (Open System). If a shared key is used, both the CB3000 and its connected device are required to use the same key (1 through 4) to interoperate. A shared key increases the level of security within the network as opposed sending information without one.
- Page 34 WEP’s weaknesses with a re-keying mechanism, a per-packet mixing function, a message integrity check, and an extended initialization vector with sequencing rules. Also, WPA provides strong user authentication based on 802.1x EAP. The CB3000 supports three EAP types suitable for deployments with wireless LANs. They are: •...
- Page 35 Infrastructure (AP) network mode supports all the different security settings. To configure WPA1 (TKIP) security settings: 1. Select Settings > Wireless Settings > Security from the CB3000 menu tree. 2. Select WPA1 from the Security Mode drop-down menu.
- Page 36 Enter the key (8-63 characters long) that is shared between the client and CB3000. Configuring WPA1 (TKIP) Enterprise Parameters: WPA1 (TKIP) Enterprise type provides enterprise class security to the devices connected to the CB3000. WPA1 Enterprise type provides a wide range of Extensible Authentication Protocol (EAP) types to ensure secure WLAN connections.
- Page 37 3-13 Network Configuration Figure 3.7 WPA1 Type Screen - Enterprise Configure the WPA1 Enterprise type fields as per the following description: Configuring WPA1 Enterprise - EAP-TLS Extensible Authentication Protocol (EAP) is an authentication framework that provides common functions and a method to negotiate a desired authentication medium. EAP-Transport Layer Security (EAP-TLS) uses client side certificates to ensure that security is not compromised.
- Page 38 3-14 CB3000 Client Bridge User’s Guide WPA1 Key Password The key password. WPA1 TLS Key / The WPA1 TLS Key. The key can be uploaded to the device by: WPA1 TLS Key Import • Pasting the TLS key in the Paste TLS Key text area.
- Page 39 EAP-GTC is generally used inside a tunnel created by TTLS or PEAP to provide server authentication. Validate Server Check to force the CB3000 to validate the Server Certificate. Certificate Clean User ID and Check to prevent the CB3000 from saving the WPA user name and its Password password in its cache.
- Page 40 3-16 CB3000 Client Bridge User’s Guide WPA1 Algorithm WPA1 uses TKIP algorithm: • TKIP – Defines a ‘wrapper’ that goes around an existing WEP encryption algorithm. TKIP comprises the same encryption engine and RC4 algorithm defined for WEP. However, the key used for encryption in TKIP is 128 bits long.
- Page 41 WPA1 User ID The User ID for authentication. WPA1 Password The WPA1 user password. Clean User ID and Check to prevent the CB3000 from saving the WPA user name and its Password password in its cache.
- Page 42 Messages are encrypted using a 128-bit secret key and a 128-bit block of data. The end result is an encryption scheme as secure as any that the CB3000 provides. For further overview information on WPA2, see Appendix D, WPA2 (CCMP) Security.
- Page 43 (called a Pairwise Transient Key), the MAC address of the transmitting station, and the serial number for the packet. This mixing operation is designed to put a minimum demand on the CB3000 and its supported clients, but enough cryptographic strength so it cannot easily be broken.
- Page 44 The Cipher Block Chaining Message Authentication Code (CBC-MAC) component of CCMP provides data integrity and authentication. • Both – Select this option to enable CB3000 to support devices that use both TKIP and CCMP algorithms. Use this option when the number of devices is large.
- Page 45 Network Configuration Configuring WPA2 (CCMP) Enterprise Parameters WPA2 (CCMP) Enterprise type provides enterprise class security to the devices connected to the CB3000. WPA2 Enterprise type provides a wide range of EAP types to ensure secure WLAN connections. Figure 3.12 WPA2 Type Screen - Enterprise...
- Page 46 The Cipher Block Chaining Message Authentication Code (CBC-MAC) component of CCMP provides data integrity and authentication. • Both – Select this option to enable CB3000 to support devices that use both TKIP and CCMP algorithms. Use this option when the number of devices is large.
- Page 47 3-23 Network Configuration WPA2 Root Certificate / The WPA2 Root Certificate. The Root Certificate can be uploaded to the WPA2 Root Certificate device by: Import • Pasting the certificate in the Paste Root Certificate text area. To upload the certificate, click the Apply button at the bottom of the screen.
- Page 48 The Cipher Block Chaining Message Authentication Code (CBC-MAC) component of CCMP provides data integrity and authentication. • Both – Select this option to enable CB3000 to support devices that use both TKIP and CCMP algorithms. Use this option when the number of devices is large.
- Page 49 3-25 Network Configuration WPA1 Root Certificate / The WPA1 Root Certificate. The Root Certificate can be uploaded to the WPA1 Root Certificate device by: Import • Pasting the certificate in the Paste Root Certificate text area. To upload the certificate, click the Apply button at the bottom of the screen.
- Page 50 The Cipher Block Chaining Message Authentication Code (CBC-MAC) component of CCMP provides data integrity and authentication. • Both – Select this option to enable CB3000 to support devices that use both TKIP and CCMP algorithms. Use this option when the number of devices is large.
- Page 51 Network Configuration 3.1.3.5 Configuring Secure 802.1x Security Settings The Secure 802.1x security option provides the CB3000 and its associated clients an additional measure of security for data transmitted over the wireless network. Secure 802.1x uses (EAP) as an authentication mechanism between devices that is achieved through the exchange and verification of certificates.
- Page 52 • Symbol PassKey – Symbol proprietary algorithm the CB3000 can share with other Symbol clients capable of decoding it. The CB3000 decodes the PassKey into a set of 4 WEP keys using MD5 algorithms. The WEP keys display as alphanumeric text in the key fields until saved or the user navigates away from the WEP screen.
- Page 53 Only for PEAP and TTLS EAP Types • By default, the User ID and Password are retained on the CB3000 Client Bridge. To prevent misuse and to clear the User ID and Password used to access the network, check the...
-
Page 54: Understanding And Configuring Ethernet Settings
2. Assign a CB3000 device name and set CB3000 network address information. • Device Name – A device name for the CB3000. A suggestion is to use a name representative of the CB3000 user base (for example, eng1, eng2, SF_retail, NY_retail, etc.). •... - Page 55 3-31 Network Configuration • Speed Mode – The connection speed. This option is available when Auto Negotiate/Auto- Sense is Off. • Duplex Mode – The connection type. This option is available when Auto Negotiate/Auto- Sense is Off. 3. Click Apply to apply and save the settings, or Cancel to exit the screen without saving your changes.
-
Page 56: Client Management
WLAN by way of exception. By default, all located clients have the ability to connect and interoperate with the CB3000. It is only when the client list exceeds 16 devices, that clients require removal from the list. The list can be refreshed periodically to remove devices that have lost their CB3000. - Page 57 3-33 Network Configuration legacy devices. Only one client per CB3000 is supported. In this mode, the MAC address of the MU is visible on the network. • This option allows you to select the method by which the device attached to this CB3000 Client Bridge is discovered.
-
Page 58: Configuring A Wired Ethernet Acl
The CB3000 supports Ethernet MAC filtering. Only client devices with a MAC address within the range specified can pass traffic through the CB3000. If the list is empty, all clients are allowed. The Client Bridge allows all connected clients to configure the CB3000 through the User Interface and have access through SNMP. -
Page 59: Chapter 4: Management Options
CB3000‘s radio RF utilization and the level of RF interference currently within the radio coverage area. Use the CB3000 log to view an event timeline with each event or potential error condition defined. This information is useful when troubleshooting broken device connections and unexpected network events. - Page 60 Description Information Panel Details Physical Address MAC address of the CB3000 housing the radio. The MAC address is hard- coded into the device at the factory and cannot be changed. Current Channel Channel for communications between the CB3000 radio and its clients.
- Page 61 CB3000 radio. a. For CB3000 Client Bridge, the roam counter increments when the device moves from one AP to another on the same channel. If the device has moved to a different AP on a different channel, the roam counter...
-
Page 62: Viewing Rf Statistics
4-4 CB3000 Client Bridge User’s Guide 4.1.2 Viewing RF Statistics RF Statistics track CB3000 activity over the device radio. To view CB3000 RF statistics, select Statistics > RF Statistics from the CB3000 menu tree. Figure 4.2 RF Statistics 1. Refer to the... - Page 63 The Ethernet Statistics screen is partitioned into three detailed fields. • Information – Displays basic device address information and link connection status. • Received – Displays statistics for the cumulative packets, bytes, and errors received since the CB3000 was last rebooted or the data collection statistics refreshed.
-
Page 64: Viewing Event Log
Number of TCP/IP data carrier errors transmitted. 4.1.4 Viewing Event Log The CB3000 keeps a log of network events updated every time an event occurs. Use the log file to troubleshoot network problems that could result from broken device connections between the CB3000 and networked clients. - Page 65 Management Options Figure 4.4 View Log Screen...
-
Page 66: Configuring Management Protocols
The CB3000 supports both HTTP and HTTPS Web access mechanisms. This configuration sets the minimum requirement for access. If you select HTTPS (default), then only HTTPS can access the CB3000. If you select HTTP, then either HTTP or HTTPS will be able to access the CB3000. The Discovery Tool always launches HTTPS pages. - Page 67 IP address entered within the Ethernet Settings screen. • SNMP Authentication Failures – Trap generated whenever a SNMP-capable client is denied access to the CB3000’s SNMP management functions or data. This can result from an incorrect login, or missing or incorrect user credentials.
- Page 68 Figure 4.6 SNMP Trap Selection 4.2.2.2 SNMP Access Use the CB3000 SNMP interface to restrict access using IP addresses. Those who are allowed access to the CB3000 SNMP interface, have access to read the SNMP generated information and, if allowed, modify related settings from an SNMP-capable client.
- Page 69 Read Write field. The default is "private". 5. Enter Start IP and End IP addresses to specify a range of users that can access the CB3000 SNMP interface. Use just the Start IP Address field to specify a single SNMP user. To leave access unrestricted, do not enter an IP address.
-
Page 70: Snmp Rf Trap Thresholds
4-12 CB3000 Client Bridge User’s Guide 4.2.2.3 SNMP Destination Traps generated by the CB3000 can be sent to one or more destinations. To configure a SNMP trap destination for receiving SNMP traps generated by the CB3000: 1. Select Management > SNMP > SNMP Trap Destinations from the CB3000 menu tree. -
Page 71: Dhcp Server Settings
4.2.4 DHCP Server Settings A CB3000 in an Ad-hoc network can serve as a DHCP server to allocate IP addresses to other devices comprising the Ad-hoc network. NOTE: This feature is only relevant for Ad-hoc networks. -
Page 72: Time Settings
– IP address for the CB3000 DHCP server connection. This number is available from the ISP for a DSL or cable-modem connection, or from an administrator if the CB3000 connects to a larger network. A typical subnet mask is 255.255.255.0. - Page 73 • Local Time Settings – Current time based on the CB3000 system clock. If NTP is disabled or if there are no servers available, the system time displays the CB3000 uptime. The time does not automatically update. Click the Refresh button to update the date and time.
- Page 74 4-16 CB3000 Client Bridge User’s Guide...
-
Page 75: Chapter 5: Administrative Options
Troubleshooting Options 5.1 Changing the Password Before setting CB3000 security options, verify that an administrative password exists for the CB3000 that is different from the default password for the device (that can be easily obtained). To password protect and restrict CB3000 device access: 1. -
Page 76: Rebooting Or Restoring A Device
5.2 Rebooting or Restoring a Device If the CB3000 Client Bridge stops responding to commands or is slow, it is easier to reboot the device to restart all the process without changing the device settings. -
Page 77: Restoring The Device
1. Save the CB3000’s current configuration before updating the firmware. After the firmware update, the configuration file can be imported in order to restore the CB3000 to the configuration saved before the update. See Importing or Exporting the Configuration File on page 5-5 for more information. - Page 78 Restore button. The CB3000’s network connection is disrupted for a few moments while the CB3000 loads its default (out- of-box) configuration, then restores the screen. Once the default configuration is restored, restore the last saved configuration or reconfigure the device.
-
Page 79: Importing Or Exporting The Configuration File
5.3 Importing or Exporting the Configuration File A CB3000 configuration file can be saved and downloaded (exported) to be used later for importing to other CB3000 units, or to restore a CB3000 temporarily reset to factory defaults. Using the file-based configuration feature speeds up the setup process at sites using multiple CB3000s. - Page 80 CB3000 Client Bridge allows export of device configuration information as binary or text file types. Binary files are used when upgrading CB3000 Client Bridge device firmware from version 1.0 to version 1.1. Text files are human readable and are a important while troubleshooting the device. They can be read, updated, and uploaded to change the device’s configuration.
-
Page 81: Using Http
• If importing, click the FTP Import TFTP Import button. The system displays a confirmation window indicating the administrator must log out of the CB3000 after the operation completes for the changes to take effect. Click to continue the operation, or to cancel the configuration file import. - Page 82 5-8 CB3000 Client Bridge User’s Guide Figure 5.6 Download Complete Dialog Box • Click Open to open the file. As the file does not have an extension, the Open With pop-up window opens. Figure 5.7 Open With Dialog Box • In the Open With pop-up window, select Internet Explorer and click to open the configfile with Internet Explorer.
- Page 83 Administrative Options Figure 5.8 Save File As Dialog Box • From the Save as Type drop-down, select Text File (*.txt). Click Save to save the file.
-
Page 84: Loading Firmware
If the CB3000 firmware version displayed on the Information or Troubleshooting screens are older than the version on the Web site, Motorola recommends updating the CB3000 to the latest firmware for full feature functionality. NOTE: The firmware file must be available from an FTP or TFTP site, or a locally networked machine to perform the update. - Page 85 Upon confirming the firmware update, the CB3000 reboots and completes the update. 8. Confirm the CB3000’s configuration is the same as before the firmware update. If they are not, import the configuration file saved prior to performing the update (step 1). See Importing or Exporting the Configuration File on page 5-5 for more details.
-
Page 86: Logging Settings
• saved locally – Select this radio button to save the log file to the host to which the CB3000 is physically connected. Log entries are not saved in the CB3000. While the CB3000 is in operation, log data temporarily resides in memory. - Page 87 5-13 Administrative Options • eMail address – Enter an email address as the target destination for the log file. • Your Outgoing Mail Server– Enter the IP address of the outgoing mail server required to route the log file to the destination email address. 3.
-
Page 88: Troubleshooting Options
The CB3000 console includes utilities for testing IP network or local network communication issues between the device and host. These utilities (as well as a button to restore the CB3000 to its factory configuration) are available in the CB3000 Troubleshooting screen. - Page 89 • Ping the Host – The CB3000 can verify its link with its host by sending WNMP ping packets to the host’s IP address. To conduct an ICMP ping test with the CB3000’s host: a.
- Page 90 5-16 CB3000 Client Bridge User’s Guide...
-
Page 91: Appendix A: Cb3000 Technical Specifications
CB3000 Technical Specifications The CB3000 client bridge has the following technical specifications: Weight (with antenna) 0.65 lbs (0.30 kg) Dimensions 7 in. wide x 4 in. deep x 1.2 in. high (17.78 cm. wide x 10.16 cm. deep x 3.05 cm high) - Page 92 A-2 CB3000 Client Bridge User’s Guide Security 64/128-Bit WEP IEEE 802.1x WPA1 (TKIP) WPA2 (CCMP) 3 dBi at 2.4 GHz Peak Antenna Gain 4 dBi at 5 GHz Operating Temperature 0 – 50° Celsius Storage Temperature - 20 – 70° Celsius Operating Humidity 10 –...
-
Page 93: Appendix B: Snmp Mib Support
802.11 MIB for additional station management objects, association table, enhanced security, neighboring BSSs. SNMPv2-MIB MIB module for managing SNMPv2 entities. .1.3.6.1.6.3.x TCP-MIB MIB module for managing TCP .1.3.6.1.2.1.6 implementations. UDP-MIB MIB module for managing UDP .1.3.6.1.2.1.7 implementations. SBL-MIB Motorola-specific MIB information to be implemented... - Page 94 B-2 CB3000 Client Bridge User’s Guide...
-
Page 95: Appendix C: Customer Support
• Model number or product name • Software type and version number Motorola responds to calls by email, telephone or fax within the time limits set forth in support agreements. If you purchased your Enterprise Mobility business product from a Motorola business partner, contact that business partner for support. - Page 96 C-2 CB3000 Client Bridge User’s Guide...
-
Page 97: Appendix D: Wireless Security Basics
Wireless Security Basics CB3000 Client Bridge provides support for the following wireless security protocols. • WEP Security • WPA1 (TKIP) Security • WPA2 (CCMP) Security • Secure 802.1x Security... -
Page 98: Wep Security
WEP is an encryption security protocol specified in the IEEE Wireless Fidelity (Wi-Fi) standard, 802.11b and supported by the CB3000 Client Bridge. WEP encryption is designed to provide a wireless device with a level of security and privacy comparable to that of a wired LAN. -
Page 99: Wpa1 (Tkip) Security
EAP and are suitable for deployments with wireless LANs: • EAP-Transport Layer Security (EAP-TLS) • Tunneled Transport Layer Security (TTLS) • Protected EAP (PEAP) For detailed steps on configuring WPA1 for the CB3000 Client Bridge, see Configuring WPA1 (TKIP) Security Settings on page 3-10. - Page 100 D-4 CB3000 Client Bridge User’s Guide Table D-1 summarizes the major differences between the protocols. Table D-1. Detailed Comparison of TLS-based EAP Methods EAP Type TTLS PEAP (RFC 2716) (Internet draft) (Internet draft) Software Supported Client Linux, Mac OS X,...
- Page 101 Table D-1. Detailed Comparison of TLS-based EAP Methods (continued) EAP Type TTLS PEAP (RFC 2716) (Internet draft) (Internet draft) Authentication Mutual: Uses digital Mutual: Certificate Mutual: Certificate Direction certificates both for server for server, and ways authentication, and protected EAP tunneled method for method for client client...
-
Page 102: Wpa2 (Ccmp) Security
(similar to TKIP). Like TKIP, the keys the administrator provides are used to derive other keys. Messages are encrypted using a 128-bit secret key and a 128-bit block of data. For detailed steps on configuring WPA2 for the CB3000 Client Bridge, see Configuring WPA2 (CCMP) Security Settings on page 3-... -
Page 103: Secure 802.1X Security
(in this case, the CB3000 Client Bridge). The CB3000 Client Bridge passes EAP packets from the client to an authentication server on the wired side of the CB3000 Client Bridge. All other packet types are blocked until the authentication server (typically, a RADIUS server) verifies the MU’s identity. - Page 104 D-8 CB3000 Client Bridge User’s Guide...
- Page 106 MOTOROLA INC. 1303 E. ALGONQUIN ROAD SCHAUMBURG, IL 60196 http://www.motorola.com 72E-122702-01 Revision A August 2009...
Need help?
Do you have a question about the CB3000 and is the answer not in the manual?
Questions and answers