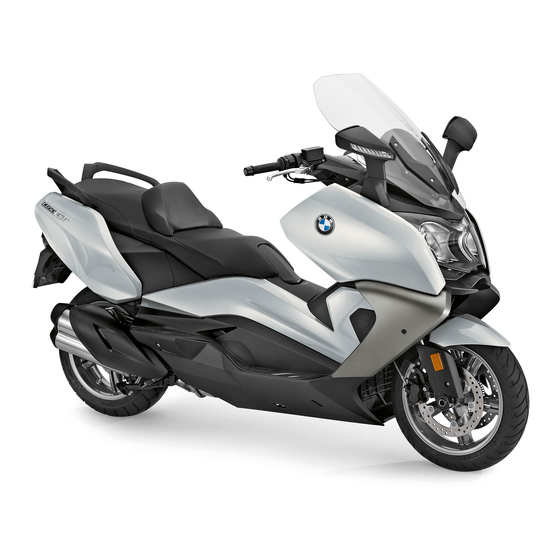
BMW C 650 GT Rider's Manual
Hide thumbs
Also See for C 650 GT:
- Rider's manual (194 pages) ,
- Rider's manual (180 pages) ,
- Rider's manual (168 pages)
Table of Contents
Advertisement
Quick Links
Advertisement
Table of Contents

Related Manuals for BMW C 650 GT


Summary of Contents for BMW C 650 GT
- Page 1 BMW Motorrad The Ultimate Riding Machine Rider's Manual C 650 GT...
- Page 2 Vehicle data/dealership details Vehicle data Dealership details Model Person to contact in Service department Ms/Mr Vehicle Identification Number Phone number Colour code Date of first registration Dealership address/phone number (com- Registration number pany stamp)
- Page 3 We congratulate you on your choice of a Maxi-Scooter from BMW Motorrad and welcome BMW Motorrad. you to the community of BMW riders. Please read this Rider's Manual carefully before starting to use your new Maxi-Scooter. It con-...
-
Page 4: Table Of Contents
Table of Contents Ambient temperature..23 5 Anti-theft alarm Tyre pressures ....23 DWA ..... 53 1 General instructions . - Page 5 Care products ... . . 116 BMW Motorrad ABS ..76 Anti-theft alarm... . 133 Washing the vehicle .
-
Page 7: General Instructions
General instructions Overview ......6 Abbreviations and symbols ..6 Equipment . -
Page 8: Overview
Manual will provide you with an ment on the motorcycle. all the BMW Motorrad initial overview of your Maxi- optional extras originally Indicates the end of an Scooter. All maintenance and ordered. -
Page 9: Equipment
Rider's Manual. separate manuals. Nor can BMW Motorrad entirely rule out errors and omissions. We hope you will appreciate that no claims can be entertained on the basis of the data, illustrations... -
Page 11: General Views
General views General view, left side ....11 General view, right side ... . . 13 Multifunction switch, left . -
Page 13: General View, Left Side
General view, left side Brake-fluid reservoir for the rear-wheel brake ( Fuel filler neck (underneath cover) ( Adjustable pelvis support Adjuster, spring preload Engine oil filler neck and oil dipstick (underneath footplate) (... -
Page 15: General View, Right Side
General view, right side Brake-fluid reservoir for the front-wheel brake ( Type plate (on the steering head tube right) Battery (underneath side panel) ( 110) Fuses (behind side panel) 105) VIN (on right frame tube) Coolant sight glass (through opening in side panel) ( Coolant expansion tank (underneath footrest plate) -
Page 16: Multifunction Switch, Left
Multifunction switch, left Operation of high-beam headlight and headlight flasher ( Control for hazard warning flashers ( Windscreen control Operation of the flashing turn indicators ( Horn INFO, operation of the on- board computer ( TRIP, operation of the trip- meter ( with daytime riding lights... -
Page 17: Right
Multifunction switch, right with heated handlebar grips Grip heating control with seat heating Operation of seat heating Emergency off switch (kill switch) ( Starter button (... -
Page 18: Cockpit
Cockpit Speedometer Multifunction display Warning and telltale lights Rider's Manual (in the stor- age compartment) ( Release for fuel-tank cover (integrated into ignition switch/steering lock) Seat release (integrated into ignition switch/steering lock) ( Stowage compartment Socket (in the stowage compartment) (... -
Page 19: Underneath The Seat
Underneath the seat Toolkit ( Payload table Table of tyre pressures Rider's Manual (at edge of carpet) -
Page 21: Status Indicators
Status indicators Multifunction display ....20 Warning and telltale lights ... 21 Service-due indicator ....22 Kilometres travelled after fuel down to reserve . -
Page 22: Multifunction Display
Multifunction display Fuel-gauge reading with seat heating Indicator for seat-heating stage ( Text box for warnings Warning symbols ( Odometer and tripmeters Service-due indicator Distance covered since fuel dropped to reserve Rev. counter On-board computer read- ings ( Clock ( with heated handlebar grips Indicator for grip-heating... -
Page 23: Lights
Warning and telltale lights with daytime riding lights Telltale light for daytime riding lights ( Telltale light for left turn indicators General warning light Anti-theft alarm telltale light Telltale light for right turn indicators ABS warning light ( Warning light for fuel down to reserve ( Warning light for engine electronics (... -
Page 24: Service-Due Indicator
Service-due indicator is accompanied by the 'gener- al' warning light showing yellow. The word "Service" remains per- manently visible. If the service-due indic- ator appears more than a month before the service date, the date saved in the instrument cluster must be adjusted. This situation can occur if the battery If the vehicle covers long dis- was disconnected. -
Page 25: Kilometres Travelled After Fuel Down
Kilometres travelled Ambient temperature after fuel down to If ambient temperature reserve drops below 3 °C the tem- perature display flashes to draw your attention to the risk of black ice forming. The display auto- matically switches from any other mode to the temperature read- ing when the temperature drops The tyre-pressure readings are... -
Page 26: Oil Level
Engine idling for at least ten The detailed description of seconds. BMW Motorrad RDC starts on Side stand retracted. page ( 78). Scooter is upright. Oil level The meanings of the readings... - Page 27 If two or more warnings occur at the same time, all the appropri- ate warning lights and warning symbols appear, alternating with warning words as applicable. The possible warnings are listed on the next pages.
- Page 28 Warnings, overview Warning and telltale Warning symbols in the Meaning lights display EWS! Lights up yellow appears on Electronic immobiliser active ( the display Lights up Fuel down to reserve ( Lights up red Appears on the dis- Coolant temperature too high ( play Appears on the dis- Engine in emergency-operation mode...
- Page 29 Warning and telltale Warning symbols in the Meaning lights display Lights up ABS fault ( LAMP! Lights up yellow appears Rear light defective ( on the display LAMP! Lights up yellow appears Bulb for headlight defective ( on the display LAMP! Lights up yellow appears...
- Page 30 Warning and telltale Warning symbols in the Meaning lights display Flashes red Appears on the dis- Tyre pressure, both tyres, outside per- play mitted tolerance ( The tyre pressure readings flash. --:-- " " or " " Signal transmission disrupted ( is displayed.
-
Page 31: Electronic Immobiliser
If the coolant or engine-oil placed, preferably by an au- red. temperature is frequently too high, have the fault rectified as thorised BMW Motorrad dealer. Temperature symbol ap- soon as possible by a specialist pears on the display. Fuel down to reserve... -
Page 32: Abs Fault
Engine in emergency- an authorised BMW Motorrad ABS self-diagnosis not dealer. operation mode completed Engine symbol appears on ABS warning light flashes. Engine-oil level too low the display. General warning light shows The engine is running in yellow. Possible cause: emergency operating mode. - Page 33 Consult a specialist specialist workshop, preferably Replacing bulbs for low-beam workshop, preferably an author- an authorised BMW Motorrad headlight and high-beam head- ised BMW Motorrad dealer. dealer. light ( 106). If the brake light is defective:...
-
Page 34: Outside Temperature
3 °C. tolerance. workshop, preferably an Always take extra care when Check the tyre for damage authorised BMW Motorrad temperatures are low; remember and to ascertain whether the dealer. that the danger of black ice form-... - Page 35 BMW Motorrad Check the tyre for damage Check the tyre for damage dealer. and to ascertain whether the and to ascertain whether the...
- Page 36 If the vehicle can be ridden with Have the fault rectified by a the tyres in the present condition: specialist workshop, preferably Do not continue your journey. an authorised BMW Motorrad Notify the breakdown service. Incorrect tyre pressures im- dealer. pair the Scooter's handling Signal transmission characteristics.
- Page 37 BMW Motorrad an authorised BMW Motorrad Possible cause: dealer. dealer. The integral battery in the tyre- pressure sensor has lost a sig- Sensor defective or Possible cause: nificant proportion of its original system error A system error has occurred.
- Page 38 Have the fault rectified as main operational if the vehicle's workshop, preferably an author- quickly as possible by a battery is disconnected. ised BMW Motorrad dealer. specialist workshop, preferably an authorised BMW Motorrad Seek the advice of a specialist Battery charge voltage dealer.
-
Page 39: Operation
Operation Ignition switch/steering lock ..38 Tyres ....... 49 Date and time . -
Page 40: Ignition Switch/Steering Lock
Consult a specialist workshop, preferably an author- ised BMW Motorrad dealer. Switching on ignition Turn the key to position 3, while moving the handlebars slightly. -
Page 41: Date And Time
Date and time Press and hold down button 1 (TRIP) until the next value Setting time starts to flash. Switch off the engine and Set the flashing value by press- switch on the ignition. ing buttons 1 (TRIP) and 2 (INFO). -
Page 42: Reading
Press and hold down button 2 (INFO) in each case until the next value starts to flash. After setting the time, press and hold down button 2 (INFO) until the reading stops flashing. This completes the process. You can exit the process at the end of each step: Without pressing any buttons, Press button 1 (TRIP) to select... -
Page 43: Lights
Resetting tripmeter The side lights place a strain on the battery. Switch on the ignition. Do not switch the ignition Select a tripmeter. on for longer than absolutely necessary. The low-beam headlight switches on automatically when the engine is switched on. Press and hold down button 2 with daytime riding lights (INFO) until the reading in... -
Page 44: Daytime Riding Lights
High-beam headlight and headlight flasher Immediately after switching off Press button 1 to switch on the ignition, push button 1 to the daytime riding lights and the left and hold it in this po- switch off the low-beam head- Push switch 1 forward to sition until the parking lights light. -
Page 45: Turn Indicators
By comparison with the Push button 1 to the right to flashers recommence flashing as low-beam headlight, the switch on the right flashing turn soon as the button is released. daytime running light makes the indicators. vehicle more visible to oncoming Centre button 1 to cancel the traffic. -
Page 46: Emergency Off Switch
Emergency off switch (kill switch) Engine switched off Repeatedly press button 1 until desired heating stage 2 ap- Normal operating position pears on the display. (run) Emergency off switch (kill The grips can be heated with switch) two-stage manual heating or Grip heating automatic heating. -
Page 47: Seat Heating
100% heating power 100% heating power 50% heating power 50% heating power Operating rear-seat Seat heating heating with seat heating Start the engine. Operating front-seat Seat heating can be activ- Repeatedly press button 1 until heating ated only when the engine desired heating stage 2 ap- is running. -
Page 48: Brakes
Press the side of button 1 with 100% heating power one dot to switch the heating to LOW. Brakes Centre button 1 to switch off the seat heating. Adjusting handbrake lever Changing the position of the brake-fluid reservoir can allow air to penetrate the brake system. -
Page 49: Mirrors
Mirrors Stowage compartments Adjusting mirrors Using front stowage compartments Press top section of button 1 to raise the windscreen. Press bottom section of but- Pivot the mirror to the correct ton 1 to lower the windscreen. position by pressing gently at To open a stowage compart- the edge. -
Page 50: Spring Preload
Opening/closing rear Spring preload stowage compartment Setting Open the seat. It is essential to set spring The stowage compartment preload of the rear suspension light switches on when to suit the load carried by the switching on the ignition. Scooter. Increase spring preload After switching off the ignition when the vehicle is heavily the stowage compartment light... -
Page 51: Tyres
2.9 bar (two-up and/or with preferably an authorised At high road speeds, tyre luggage, tyre cold) BMW Motorrad dealer, if you are valves installed perpen- unsure whether the headlight If tyre pressure is too low: dicular to the wheel rim have a beam-throw setting is correct. - Page 52 To close, press the rear of the seat down until it latches shut. Adjusting pelvic support Open the seat. Push the ignition key down and Align mounts 4 in the pelvic turn it clockwise. support in the desired position above the screws in the seat. Slacken screw 1 ten full turns.
- Page 53 Repeat this sequence until the pelvic support is installed. Tighten the screws only until hand-tight. Pelvic support to seat ( 122). Close the seat.
-
Page 55: Anti-Theft Alarm
Anti-theft alarm DWA Overview ......54 Activation ......54 Alarm function . -
Page 56: Overview
Overview Controls Conserving power in the vehicle's starter battery with anti-theft alarm (DWA) In order to conserve the power of the starter battery and en- General information about sure that the vehicle will start, the anti-theft alarm (DWA) the DWA anti-theft alarm auto- Any attempt to move the vehicle, matically switches off the alarm change its position, start it... - Page 57 Activation with motion If you want to activate the alarm ily from the battery. If you want function more than one minute to activate the alarm function sensor after switching off the ignition, after the anti-theft alarm has shut you must press button 1 for down in this way, you have to longer than one second.
-
Page 58: Alarm Function
Deactivating motion Alarm triggers control. This function does not change the status of the anti- sensor An alarm can be triggered by: theft alarm. the motion sensor While an alarm is in progress an attempt to switch on the igni- alarm tone sounds and the turn tion with an unauthorised key indicators flash. -
Page 59: Deactivation
Deactivating alarm Flashes 4x: Disconnection of "Activation after ignition OFF" is the anti-theft alarm from the programmed. function vehicle's battery Turn indicators flash once. Alarm tone sounds once (if Information on alarm programmed). triggering Alarm function is deactivated. If an alarm was triggered after the last activation of the alarm Conserving battery power function, the rider is notified... - Page 60 Programming options Programming anti-theft The programming function is active. alarm You can customise the follow- Programming is a four-step ing parameters of your anti-theft process, although no function alarm: is allocated to step 2. The Confirmation alarm tone after number of times the anti-theft activation/deactivation of the alarm status-indicator light on anti-theft alarm in addition to...
-
Page 61: Registration Of The Remote Con
Under what step in the programming Step 2: routine. No function allocated to this step. circumstances is Press button 1 or button 2. programming aborted? The anti-theft alarm status indic- Programming is aborted ator light stops flashing and four Step 3: Which alarm tone if the ignition is switched off acknowledgement tones sound. -
Page 62: Synchronisation
Registering remote Termination of Acknowledgement tone sounds twice. control registration You can now register a maximum Registration is terminated when of four remote control units with four remote control units have the anti-theft alarm. Registration been registered is a three-step process and has the ignition is switched off to be repeated for each remote 30 seconds elapse without a... -
Page 63: Battery
Battery When is it necessary to Synchronising remote synchronise the remote control with anti-theft alarm (DWA) control? When does the battery The remote control has to be have to be changed? synchronised if the buttons of the remote control have been The battery in the remote control pressed more than 256 times is due to be changed after ap-... - Page 64 remote control has to be syn- Slide old battery 3 forward from under retainer 5. chronised. Using a battery of the wrong type or inserting the battery with the polarity reversed can cause irreparable damage to the device. Use only the specified type of battery (see "Technical Data").
-
Page 65: Riding
Riding Safety instructions ....64 Checklist ......65 Starting . -
Page 66: Safety Instructions
Settings of the spring-strut and of the year. Your authorised with topcase shock-absorber system BMW Motorrad dealer will be Note the maximum permiss- Imbalanced load glad to advise you on the correct ible payload of the topcase and Loose clothing clothing for every purpose. -
Page 67: Checklist
unnecessarily. Ride away imme- Inhaling the exhaust fumes For this reason, observe the fol- therefore represents a lowing points: diately after starting the engine. health hazard and can even Do not run the fuel tank dry. Tampering cause loss of consciousness with Do not attempt to start or run fatal consequences. -
Page 68: Starting
Spring preload "Pre-Ride-Check". The test is aborted if you start the engine Tyre-tread depth and tyre before it completes. pressures Security of the luggage Phase 1 At regular intervals: The speedometer needle swings Engine oil level (every refuelling to the limit value on its scale. stop) The warning and indicator lights are switched on. -
Page 69: Riding
ABS warning light flashes. an authorised BMW Motorrad clutch engages and the Maxi- dealer. Scooter moves off. ABS self-diagnosis ABS self-diagnosis At speeds from approx. 50 km/h completed to approx. 110 km/h the engine... -
Page 70: Brakes
The sharper the vehicle decel- nificant margin. erates, the more load is shifted Apply the brakes in good time. BMW Motorrad ABS prevents to the front wheel. The higher the front wheel from locking up. the wheel load, the more braking... -
Page 71: Maxi-Scooter Parking
Descending mountain Riding on salted or gritted Always check that the ground roads. under the stand is level and passes firm. After work has been carried on There is a danger of the the brakes, due to traces of oil Extend the side stand and prop brakes fading if you use or grease. -
Page 72: Refuelling
Excessive movements could cause the centre stand to retract, and the vehicle would topple in consequence. Do not lean or sit on the vehicle with the centre stand extended. Extend the centre stand and lift the Maxi-Scooter on to the stand. - Page 73 Do not overfill the fuel tank. Recommended fuel Leaded fuel will destroy the grade catalytic converter. Super unleaded (max. 10 % Do not attempt to run the vehicle ethanol, E10) on leaded fuel or fuel with metal- 95 ROZ/RON lic additives, e.g. manganese or 89 AKI iron.
-
Page 74: Securing Vehicle For Transporta
Securing vehicle for Push the vehicle on to the transportation flat and hold it transportation in position: do not place it on Make sure that all components the side stand or centre stand. that might come into contact with straps used to secure the vehicle are adequately protec- ted against scratching. - Page 75 Tighten all the straps uniformly; the motorcycle's suspension should be compressed as tightly as possible front and rear.
-
Page 77: Engineering Details
Engineering details Brake system with BMW Motorrad ABS ....... . 76... -
Page 78: Brake System With Bmw Motorrad Abs
At this in- Severe braking can cause to lock and the vehicle loses its stant the BMW Motorrad ABS the rear wheel to lift off the directional stability; a fall is im- must assume an extremely low ground. - Page 79 Within the limits imposed by Invariably, a technical sys- Riding for a lengthy period with physics, BMW Motorrad ABS en- tem cannot perform beyond the front wheel lifted off the sures directional stability on any the abilities dictated by its level ground (wheelie).
-
Page 80: Tyre Pressure Monitoring Rdc
15 minutes after the BMW Motorrad ABS is unable vehicle comes to a stop. multifunction display. to counteract their effects. Temperature Pressure adaptation Tyre pressure compensation Compare the RDC readings on... - Page 81 the tyre is inflated to the correct pressure.
-
Page 83: Accessories
Accessories General instructions ....82 Power sockets ..... . 82 Topcase . -
Page 84: General Instructions
BMW Motorrad circumstances. Cannot be trapped by visiting our website: Use only parts and accessor- "www.bmw-motorrad.com". ies approved by BMW for your Topcase vehicle. Power sockets with topcase BMW has conducted extens- Notes on use of power sockets:... - Page 85 Opening topcase Closing topcase Pull the release lever behind cover 3 to the rear. Turn the key to the OPEN pos- Make sure that topcase The lid of the topcase opens. ition in topcase lock 1. handle 2 is extended. Open the topcase lid.
- Page 86 Removing topcase Installing topcase Turn the key to the RELEASE position in the topcase lock. Turn the key to the OPEN pos- Make sure that topcase Pull release lever 4 to the rear ition in topcase lock 1. handle 2 is extended and that and at the same time lift the the key is in the RELEASE topcase slightly by means of...
-
Page 87: Scooter Lock
Scooter lock with Scooter lock Securing vehicle Turn the handlebars to the Slip first chain link 2 on to left and bring the end of the handlebar connector 3 and slip Scooter lock up to the end of locking piece 4 into position. the handlebar. - Page 88 Alternatively, the Maxi-Scooter can be secured to a fixed object such as a post. Pass the Scooter lock round the post and slip the chain through endpiece 1. Then se- cure first chain link 2 to the handlebar as described above.
-
Page 89: Maintenance
Wheels ......97 BMW Motorrad front-wheel stand ......104 Fuses . -
Page 90: General Instructions
If you are in doubt, consult a Replace the fuses. at operating temperature to do specialist workshop, preferably this. Checking the oil level with your authorised BMW Motorrad the engine cold or after no more dealer. than a short ride will lead to mis-... - Page 91 interpretation; this in turn, means that the engine will be operated with the incorrect quantity of oil. In order to ensure that the en- gine oil level is read correctly, check the oil level only after a lengthy trip. With the Maxi-Scooter at op- erating temperature place it on its centre stand, making sure Remove footrest plate 1.
- Page 92 If the oil level is above the MAX mark: Install cover 2. Have the oil level corrected by a specialist workshop, preferably an authorised BMW Motorrad dealer. Install the oil dipstick. Engine oil, specified level Between MIN and MAX marks (Engine at regular operating temperature) Insert footrest plate 1.
-
Page 93: Brake System
Brake pads worn past the suspension toward brake specialist workshop, preferably minimum permissible thick- pads 1. an authorised BMW Motorrad ness can cause a reduction in dealer. braking efficiency and under certain circumstances they can cause damage to the brake sys-... - Page 94 Have the brake pads replaced by a specialist workshop, preferably an authorised BMW Motorrad dealer. Visually inspect the brake pads Brake-pad wear limit, Check the rear brake pad to ascertain their thickness. rear...
- Page 95 BMW Motorrad dealer. Have the brake pads replaced Checking brake-pad by a specialist workshop, thickness, parking brake preferably an authorised BMW Motorrad dealer.
- Page 96 If the brake fluid level drops be- low the permitted level: Have the defect rectified as quickly as possible by a spe- cialist workshop, preferably Check the brake fluid level in an authorised BMW Motorrad left brake fluid reservoir 1. dealer.
-
Page 97: Coolant
Wear of the brake pads cialist workshop, preferably causes the brake fluid level an authorised BMW Motorrad in the reservoir to sink. dealer. Coolant Checking coolant level Make sure the ground is level and firm and place the Maxi- Scooter on its centre stand. - Page 98 Topping up coolant Open cap 2 of the coolant ex- Lay the cover in position and pansion tank and top up the install screw 1. Remove footrest plate 1. coolant to the specified level. Checking coolant level ( 95). Close the cap of the coolant expansion tank.
-
Page 99: Rims And Tyres
TI, Checking tyre tread depth information from your authorised TWI or by an arrow. BMW Motorrad dealer or on Your Maxi-Scooter's hand- If the tyre tread is worn to min- the Internet at www.bmw-... -
Page 100: Removing Front Wheel
Maxi-Scooter, it is very calipers on left and right. important to consult a specialist workshop beforehand, preferably an authorised BMW Motorrad dealer. In some cases, the data programmed into the control unit can be changed to suit the new wheel sizes. - Page 101 Lift the front of the Maxi- Malfunctions are possible Scooter until the front wheel is when the ABS system in- clear of the ground, preferably tervenes if non-standard wheels using a BMW Motorrad front- are installed. wheel stand. See the information on the effect...
- Page 102 Raise the front wheel, insert Tighten screws 2 on left and Clamping screws (quick- quick-release axle 2 and right to the specified tightening release axle) in tele- tighten to specified torque. torque. scopic forks Quick-release axle in axle Brake caliper to fork leg Tightening sequence: Tighten holder screws six times in alternate...
-
Page 103: Remove The Rear Wheel
Remove the adhesive tape from the wheel rim. Firmly pull the handbrake lever until the pressure point is per- ceptible, and repeat this opera- tion several times. Remove screw 2 and remove Risk of burns caused by the the cover. hot exhaust system. - Page 104 Always have the security of the fasteners checked by a specialist workshop, preferably an author- ised BMW Motorrad dealer. Roll the rear wheel into position Turn the end silencer out. Remove five screws 1 from the...
- Page 105 Rear wheel to output shaft Tightening sequence: Tighten in diagonally opposite se- quence 60 Nm Install screw 3 and tighten Place the cover in position and to the specified torque while install screw 2. counter-holding the nut at the back. Silencer to bracket 20 Nm Turn the end silencer to the...
-
Page 106: Bmw Motorrad Front-Wheel
BMW Motorrad front- wheel stand Install the front-wheel stand Make sure the ground is level and firm and place the Maxi- Scooter on its centre stand. Use basic stand with tool num- ber (83 30 0 402 241) in com-... -
Page 107: Fuses
Switch off the ignition. ised BMW Motorrad dealer. If the Maxi-Scooter is raised Remove the right side panel. too far the centre stand will Installing fuse... -
Page 108: Lighting
The fuse assignments and Remove the left side panel to fuse amperage ratings spe- replace the bulb for the high- cified for your motorcycle are lis- beam headlight. ted in the section entitled "Tech- nical data". The figures in the graphic correspond to the fuse numbers. - Page 109 Replacing bulb for brake Replace the defective bulb. Engage spring retainer 4 in the catches. light Bulbs for the low-beam Open the seat. headlight H7 / 12 V / 55 W Bulb for high-beam headlight H7 / 12 V / 55 W Hold the new bulb by the base only, in order to keep the glass free of foreign matter.
- Page 110 Replace the defective bulb. Bulbs for flashing turn indicators, front Use a clean, dry cloth to hold the new bulb in order to keep the glass free of foreign matter. Turn socket 2 counter-clock- Turn socket 2 clockwise to in- wise and remove it from the stall it in the light housing.
- Page 111 Replacing number-plate light Make sure the ground is level and firm and place the Maxi- Scooter on its stand. Switch off the ignition. Remove the bulb from the Insert the bulb into the socket. socket. Replace the defective bulb. Bulb for number-plate light W5W / 12 V / 5 W Pull socket 1 out of the light...
-
Page 112: Jump-Starting
Jump-starting donor vehicle has a voltage rating attempt in order to protect the of 12 V. starter motor and the donor The wires leading to the battery. Make sure the ground is level charging socket do not Allow both engines to idle for a and firm and place the Maxi- have a load-capacity rating ad- few minutes before disconnect-... - Page 113 Charging battery when with the charger connected dir- Compliance with the points be- low is important in order to max- ectly to the battery posts. connected imise battery life: With the battery connected to Charging the connected Keep the surface of the battery the vehicle's on-board electrical battery directly at the bat- clean and dry...
-
Page 114: Body Panels
for caring for your battery. Al- Disconnect negative lead 1 Installation in the wrong ways fully recharge the battery first. sequence increases the risk before restoring it to use. of short-circuits. Then disconnect positive lead 2. Always proceed in the correct Removing battery sequence. - Page 115 The procedure for the right Then slightly raise the side side panel is described panel and remove. here, but the description ap- Installing side panel plies by analogy to the left side panel. Remove screw 4 in the stow- age compartment. Seat the side panel in mounts 6.
- Page 116 Install screw 4 in the right Install screw 1. stowage compartment. Close the stowage compart- ment. Install screws 2.
-
Page 117: Care
Care Care products ..... 116 Washing the vehicle ....116 Cleaning easily damaged compon- ents . -
Page 118: Care Products
BMW Motorrad recommends BMW Motorrad recommends Warm water intensifies the that you use BMW insect re- that you use the cleaning effect of salt. and care products you can mover to soften and wash off... -
Page 119: Paint Care
Chrome Using silicone sprays for We recommend BMW vehicle the care of rubber seals can Use plenty of water and BMW polish or BMW paint cleaner for cause damage. shampoo to clean chrome, par- this purpose. -
Page 120: Maxi-Scooter Laying Up
BMW Motorrad recommends us- It is time to rewax the paint- ing BMW tar remover for remov- work when water "puddles" on ing specks of tar. Remember to the surface, instead of forming wax the parts treated in this way. -
Page 121: Technical Data
Technical data Troubleshooting chart ... . . 120 Riding specifications ....133 Threaded fasteners ....121 Anti-theft alarm . -
Page 122: Troubleshooting Chart
Troubleshooting chart Engine does not start or is difficult to start. Possible cause Rectification Side stand extended Retract the side stand. Starting without brake application Operate a brake lever when starting. No fuel in tank Refuelling ( 70). Battery flat Recharge the battery. -
Page 123: Threaded Fasteners
Threaded fasteners Front wheel Value Valid Quick-release axle in axle holder M18 x 1,5 30 Nm Clamping screws (quick-release axle) in telescopic forks M6 x 30 Tighten screws six times in alternate sequence 8 Nm Brake caliper to fork leg M8 x 32 28 Nm Rear wheel... - Page 124 Rear wheel Value Valid End silencer to front silencer M8 x 30 19 Nm Seat Value Valid Pelvic support to seat Middle screw, M6 x 30 2 Nm Outer screws, M6 x 40 2 Nm...
-
Page 125: Engine
Engine Location of engine number Crankcase, left, below alternator Engine type 652EA Engine design Two-cylinder four-stroke DOHC engine, 4 valves actuated by bucket tappets, two balancing shafts, liquid cooling, dry-sump lubrication Displacement 647 cm Cylinder bore 79 mm Piston stroke 66 mm Compression ratio 11.6:1... -
Page 126: Fuel
Recommended fuel grade Super unleaded (max. 10 % ethanol, E10) 95 ROZ/RON 89 AKI Usable fuel capacity approx. 16 l Fuel consumption approx. 4.2 l/100 km Fuel reserve approx. 3 l Exhaust emissions standard EU 3 BMW recommends BP fuels... -
Page 127: Engine Oil
Specification SAE 15W-50, API SJ / JASO MA2, Additives (e.g. molybdenum-based) are not permissible because they can attack coated components of the engine, BMW Motorrad recommends BMW Motorrad High Performance oil SAE 15W-50, API SJ / JASO MA2 BMW recommends... -
Page 128: Transmission
Transmission Gearbox type CVT (Continuously Variable Transmission) Primary transmission ratio 1:1.06 Transmission ratio, secondary transmission 1:2.72 Transmission ratio, CVT 1:10.7...4.6 Rear-wheel drive Type of final drive Chain drive in oil bath Final drive, number of teeth (Pinion / sprocket) 16 / 27 Secondary transmission ratio 1.688... -
Page 129: Running Gear
Running gear Type of front suspension Upside-down telescopic fork Spring travel, front 115 mm, at wheel Type of rear suspension Cast aluminium single swinging arm Type of rear suspension Direct-pivot spring strut with adjustable spring preload Spring travel, rear 115 mm, at wheel Brakes Type of front brake Hydraulically actuated twin-disc brake with 2-pis-... -
Page 130: Wheels And Tyres
11 mm, at end of lever Wheels and tyres Recommended tyre sets You can obtain an up-to-date list of approved tyres from your authorised BMW Motorrad dealer or on the Internet at "www.bmw-motorrad.com". Front wheel Front wheel type Cast aluminium, MT H2 Front wheel rim size 3.50"... -
Page 131: Electrics
Tyre pressure Tyre pressure, front 2.4 bar, tyre cold Tyre pressure, rear 2.5 bar, one-up, tyre cold 2.9 bar, two-up and/or with luggage, tyre cold Electrics Battery Battery type AGM (Absorbent Glass Mat) battery Battery rated voltage 12 V Battery rated capacity 10 Ah Spark plugs Electrode gap of spark plug... -
Page 132: Lighting
Lighting Bulbs for the low-beam headlight H7 / 12 V / 55 W Bulb for high-beam headlight H7 / 12 V / 55 W Bulb for parking light Bulbs for flashing turn indicators, front Bulbs for flashing turn indicators, rear Bulb for tail light/brake light LED / PR-21W / 12 V / 21 W Bulb for number-plate light... - Page 133 Fuses Fuse holder 30 A, Fuse 9: Control unit, instrument panel / ig- nition switch 30 A, Fuse 10: Control unit, anti-lock brake sys- tem (ABS) Fuse box 15 A, Fuse 1: DME main relay 10 A, Fuse 2: Control unit, digital engine electron- ics (DME) 4 A, Fuse 3: Control unit, anti-theft alarm (DWA) / tyre pressure monitoring (RDC)
-
Page 134: Frame
Frame Frame type Bridge-type steel frame with cast light-alloy bolt- on side parts Position of the Vehicle Identification Number Frame tube, front right Type plate location Steering head, front right Dimensions Length of motorcycle 2218 mm Height of motorcycle 1250 mm, to top edge of mirror Width of motorcycle 825 mm, without mirrors Front-seat height... -
Page 135: Weights
Weights Unladen weight 261 kg, DIN unladen weight, ready for road, 90 % load of fuel, without optional extras Permissible gross weight 445 kg Maximum payload 184 kg Riding specifications Starting capability on uphill gradients (at permiss- 20 % ible gross weight) Top speed 175 km/h Anti-theft alarm... -
Page 136: Remote Control
Remote control with anti-theft alarm (DWA) Range of the remote control 10 m Reception standby for signal from remote control 1 h, after ignition OFF Signal frequency 25 kHz, Broadband Transmission frequency 433.92 MHz Battery voltage (for remote control) Battery type (for remote control) CR 2032 lithium... -
Page 137: Service
Service BMW Motorrad Service ... . 136 BMW Motorrad Mobility services ......136 Maintenance work . -
Page 138: Bmw Motorrad Service
BMW Motorrad has an extensive BMW Motorrad dealer. after-sales service network in As owner of a new BMW place to look after you and motorcycle, in circumstances In order to help ensure that your Maxi-Scooter in more... - Page 139 500 km and 1200 km BMW Service The BMW Service is carried out once a year; the extent of ser- vicing can vary, depending on the age of the vehicle and the distance it has covered.
-
Page 140: Confirmation Of Mainten
Confirmation of maintenance work BMW Pre-delivery BMW Running-in Check Check Completed Completed Odometer reading Next service at the latest or, if logged beforehand, Odometer reading Stamp, signature Stamp, signature... - Page 141 BMW Service BMW Service BMW Service Completed Completed Completed Odometer reading Odometer reading Odometer reading Next service Next service Next service at the latest at the latest at the latest or, if logged beforehand, or, if logged beforehand, or, if logged beforehand,...
- Page 142 BMW Service BMW Service BMW Service Completed Completed Completed Odometer reading Odometer reading Odometer reading Next service Next service Next service at the latest at the latest at the latest or, if logged beforehand, or, if logged beforehand, or, if logged beforehand,...
- Page 143 BMW Service BMW Service BMW Service Completed Completed Completed Odometer reading Odometer reading Odometer reading Next service Next service Next service at the latest at the latest at the latest or, if logged beforehand, or, if logged beforehand, or, if logged beforehand,...
- Page 144 BMW Service BMW Service BMW Service Completed Completed Completed Odometer reading Odometer reading Odometer reading Next service Next service Next service at the latest at the latest at the latest or, if logged beforehand, or, if logged beforehand, or, if logged beforehand,...
-
Page 145: Confirmation Of Service
Confirmation of service The table is intended as a record of maintenance and repair work, the installation of optional accessories and, if appropriate, special campaign (recall) work. Item Odometer Date reading... - Page 146 Item Odometer Date reading...
-
Page 147: Appendix
Appendix Certificate ......146... -
Page 148: Certificate
Certification RDC (tire pressure control / FCC ID: MRXBC54MA4 FCC ID: MRXBC5A4 Contrôle de pression des pneus) IC: 2546A-BC54MA4 IC: 2546A-BC5A4 EWS (electronic immobilizer / FCC ID: 2AACW-K18KMMG FCC ID: 2AACW-K19KMMG antidémarrage électronique) IC: 11117A-K18KMMG IC: 11117A-K19KMMG This device complies with Part 15 of the FCC Le présent appareil est conforme aux CNR Rules and with Industry Canada license-exempt d'Industrie Canada applicables aux appareils... -
Page 149: Index
Brake pads Abbreviations and symbols, 6 Battery Checking front, 91 change, 61 Checking parking brake, 93 Engineering details, 76 Charging battery when Checking rear, 92 Self-diagnosis, 67 connected, 111 Running in, 68 Warnings, 30 Charging battery when Brakes disconnected, 111 Accessories Adjusting handlebar lever, 46 General instructions, 82... - Page 150 Coolant Engine Fuel reserve Checking fill level, 95 Distance covered, 23 starting, 66 Filler neck, 13 Warning, 29 Technical data, 123 Fill-level indicator, 13 Fuses Warning for engine Position on the motorcycle, 13 Topping up, 96 electronics, 30 Replacing, 105 Warning for overtemperat- Engine oil Technical data, 131...
- Page 151 Headlight Lighting Maintenance Beam throw, 49 General instructions, 88 Replacing bulb for brake Driving on right/driving on Maintenance intervals, 136 light, 107 left, 49 Maxi-Scooter Replacing bulb for high-beam Heated handlebar grips Care, 115 headlight, 106 Operation, 44 Cleaning, 115 Replacing bulb for low-beam Horn, 14 Lashing, 72...
- Page 152 Parking, 69 Technical data Safety instructions Battery, 129 For brake, 68 Power socket Notes on use, 82 Brakes, 127 For riding, 64 Position on the motorcycle, 16 Clutch, 125 Seat Adjusting pelvic support, 50 Dimensions, 132 Pre-Ride-Check, 66 Electrics, 129 Programming, 58 Operation, 49 Engine, 123...
-
Page 153: Overview
Topcase Removing front wheel, 98 Warning lights Operation, 82 Technical data, 128 Overview, 21 Torques, 121 Windscreen Warnings Operation, 47 Transmission ABS, 30 Technical data, 126 Anti-theft alarm, 36 Troubleshooting chart, 120 Battery charge current, 36 Turn indicators Control, 14 Bulb faulty, 31 Operation, 43 Coolant temperature, 29... - Page 154 Errors and omissions excepted. © 2014 Bayerische Motoren Werke Aktiengesellschaft 80788 Munich, Germany Not to be reproduced by any means whatsoever, wholly or in part, without the written per- mission of BMW Motorrad, After Sales.
- Page 155 3 l Tyre pressure Tyre pressure, front 2.4 bar, tyre cold Tyre pressure, rear 2.5 bar, one-up, tyre cold 2.9 bar, two-up and/or with luggage, tyre cold BMW recommends *01418550601* Order No.: 01 41 8 550 601 12.2013, 4th edition, 01...
Need help?
Do you have a question about the C 650 GT and is the answer not in the manual?
Questions and answers