RCF ES3160 User Manual
Mixer-amplifier with tuner and cd/usb-mp3 player
Hide thumbs
Also See for ES3160:
- User manual (70 pages) ,
- Brochure & specs (4 pages) ,
- User manual (25 pages)
Table of Contents
Advertisement
Available languages
Available languages
Quick Links
MIXER-AMPLIFIER
MIXER-AMPLIFIER
WITH TUNER AND CD/USB – MP3 PLAYER
WITH TUNER AND CD/USB – MP3 PLAYER
WITH TUNER AND CD/USB – MP3 PLAYER
MIXER-AMPLIFICATORE
MIXER-AMPLIFICATORE
CON SINTONIZZATORE RADIO E LETTORE CD/USB - MP3
CON SINTONIZZATORE RADIO E LETTORE CD/USB - MP3
User manual
User manual
User manual
Manuale d'uso
Manuale d'uso
Manuale d'uso
the rules of sound
ES3160
Advertisement
Table of Contents

Subscribe to Our Youtube Channel
Related Manuals for RCF ES3160


Summary of Contents for RCF ES3160
- Page 1 ES3160 MIXER-AMPLIFIER MIXER-AMPLIFIER WITH TUNER AND CD/USB – MP3 PLAYER WITH TUNER AND CD/USB – MP3 PLAYER WITH TUNER AND CD/USB – MP3 PLAYER MIXER-AMPLIFICATORE MIXER-AMPLIFICATORE CON SINTONIZZATORE RADIO E LETTORE CD/USB - MP3 CON SINTONIZZATORE RADIO E LETTORE CD/USB - MP3...
-
Page 3: Table Of Contents
INDICE - ITALIANO AVVERTENZE PER LA SICUREZZA pag. 4 DESCRIZIONE pag. 6 PANNELLO FRONTALE pag. 6 PANNELLO POSTERIORE pag. 8 FUNZIONAMENTO pag. 11 USO DEL LETTORE CD/USB – MP3 E SINTONIZZATORE RADIO pag. 13 • PANNELLO FRONTALE pag. 14 • MENÙ... - Page 4 L’installazione e l’utilizzo errati del prodotto esimono la RCF S.p.A. da ogni responsabilità. ATTENZIONE: Per prevenire i rischi di fiamme o scosse elettriche, non esporre mai questo prodotto alla pioggia o all’umidità.
- Page 5 Verificare inoltre l’idoneità del supporto (parete, soffitto, struttura ecc., al quale è ancorato il prodotto) e dei componenti utilizzati per il fissaggio (tasselli, viti, staffe non fornite da RCF ecc.) che devono garantire la sicurezza dell’impianto / installazione nel tempo, anche considerando, ad esempio, vibrazioni meccaniche normalmente generate da un trasduttore.
- Page 6 RCF S.p.A. Vi ringrazia per l’acquisto di questo prodotto, realizzato in modo da garantirne l’affidabilità e prestazioni elevate. DESCRIZIONE ES 3160 è un mixer-amplificatore avente 4 ingressi audio mic.-linea su connettori rimovibili (l’ingresso 1 dispone inoltre di connettore XLR), lettore CD/USB – MP3 e sintonizzatore radio integrati, un ingresso ausiliario per un’eventuale sorgente sonora esterna.
- Page 7 La sua attivazione esclude automaticamente (se presente) il segnale del lettore CD/USB MP3 – sintonizzatore radio (l’indicatore luminoso del pulsante INTERNAL si spegne). Il segnale presente all’ingresso AUX INPUT è sempre riportato sull’uscita MUSIC ON HOLD (non soggetta al controllo del pulsante AUX IN). Pulsante INTERNAL con indicatore luminoso Attiva (LED acceso) / disattiva il segnale del lettore CD/USB MP3 –...
-
Page 8: Pannello Posteriore
2 ingressi relativi ai canali 2 e 3 con prese RJ 45, per il collegamento di 2 basi microfoniche RCF BM 3001 (una per ciascun ingresso). Nota: nel caso sia utilizzata una base microfonica BM 3001, è necessario attivare la modalità... - Page 9 Ingresso audio canale 1 con connettore XLR. COLLEGAMENTO BILANCIATO polo positivo – polo negativo massa COLLEGAMENTO SBILANCIATO Controllo di “presenza” (toni medi, f = 2,15 kHz) PRESENCE CONTROL comune per i canali 1, 2, 3, 4. Controlli di tono TREBLE (alti) e BASS (bassi) dell’ingresso ausiliario AUX INPUT. Controllo di guadagno GAIN dell’ingresso ausiliario AUX INPUT.
- Page 10 8 microinterruttori “dip-switch” PRESET per le impostazioni di priorità: MIX: la sorgente musicale (interna od MUSIC OFF: la sorgente musicale (interna esterna) rimane presente (in miscelazione), od esterna) è tolta dal segnale inviato MIX – MUSIC OFF nel segnale inviato all’amplificatore, durante all’amplificatore durante l’attivazione di un l’attivazione di un comando di priorità.
- Page 11 Uscita (tramite connettore rimovibile a 3 poli) dei contatti di un relè interno per la segnalazione della funzione di priorità attiva. 1. contatto normalmente aperto 2. contatto comune 3. contatto normalmente chiuso Max. tensione applicabile ai contatti: 24 V; portata: 0,5 A. Uscite di potenza (max.
- Page 12 La modalità di attuazione della priorità (inclusa la funzione “VOX”) è impostata tramite i dip-switch nr.2 e nr.3 del gruppo di 8 microinterruttori (vedere punto 21): DIP 2 DIP 3 MODO È accettato solo il comando di priorità attivato per primo in uno dei 4 canali (eventualmente anche la funzione VOX, se abilitata mediante il dip-switch nr.4).
- Page 13 I canali 2 e 3 hanno ciascuno un ingresso con connettore RJ 45, al quale è possibile collegare una sola base microfonica RCF BM 3001 (nota: in tal caso è necessario attivare la modalità MIC. PHANTOM tramite i “dip-switch” nr.3 e 4; vedere il punto 12).
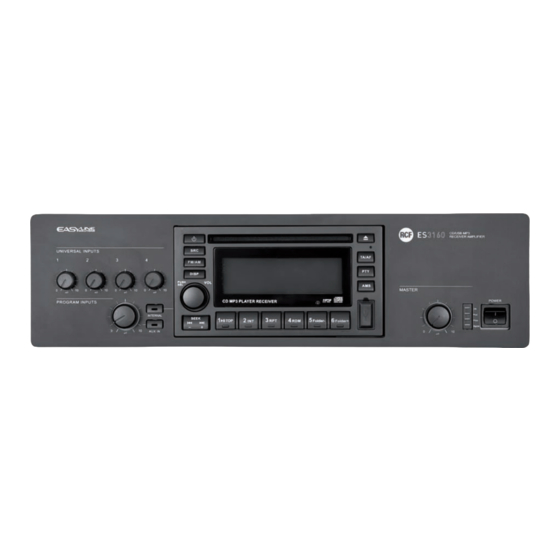
- Page 14 PANNELLO FRONTALE 7 7 7 7 Pulsante per l’accensione / lo spegnimento del (solo) lettore CD/USB – MP3 e sintonizzatore radio. Pulsante SRC (“source”): selezione tra radio (“tuner”), CD (quando inserito), USB (se presente una chiave USB). Pulsante FM/AM: selezione della banda del sintonizzatore tra modulazione di frequenza FM (3 gruppi: FM1, FM2, FM3) ed onde medie in modulazione d’ampiezza AM (2 gruppi: MW1, MW2).
- Page 15 SEEK: (-) = indietro (+) = avanti Doppio pulsante RADIO: • incrementare la frequenza di un passo (0,05 MHz): premere per un istante (meno di un secondo) il tasto “avanti” • diminuire la frequenza di un passo (0,05 MHz): premere per un istante (meno di un secondo) il tasto “indietro” •...
- Page 16 Pulsante RDM “random, casuale” (solo CD audio e file MP3) Attiva RDM ON / disattiva RDM OFF la riproduzione casuale delle tracce. Pulsante Folder- (solo file MP3) Se premuto per un istante, la riproduzione salta indietro di 10 tracce (10TRK <<); se tenuto premuto per qualche secondo, viene selezionata la cartella precedente (FOLDER <<).
- Page 17 PULSANTE nr. TIPO DI MUSICA TIPO DI PROGRAMMA PARLATO EASY M (musica leggera) SPORT LIGHT M (musica classica leggera) EDUCATE (programmi educativi) — DRAMA (commedia e teatro) CLASSIC M (musica classica) CULTURE (programmi culturali) OTHER M (altri generi) SCIENCE (programmi scientifici) —...
- Page 18 EON “enhanced other networks” Quando i dati EON sono ricevuti (appare l’indicazione EON sul display), le funzioni TA ed AF sono implementate come segue: TA sono ricevuti gli annunci sul traffico sia della stazione corrente sia di altre stazioni; AF La lista di frequenze con RDS è sempre aggiornata (nei dati EON) per l’utilizzo della frequenza alternativa.
-
Page 19: Note Sui File Mp3
NOTE SUI FILE MP3 • MP3 sta per MPEG Audio Layer 3 ed è uno standard di compressione audio. • Questo prodotto permette la riproduzione di file MP3 su CD-ROM, CD-R, CD-RW e chiavi USB; sono visualizzati (se disponibili) il titolo del brano, l’artista e l’album (ID3 TAG). •... - Page 20 TELECOMANDO Il telecomando necessita di una batteria al litio CR 2025 (3 V), da sostituire non appena il telecomando non funziona più correttamente. Per sostituire la batteria, estrarre il cassettino posteriore muovendo il suo fermo; rispettare la polarità della batteria. Durante l’uso, puntare il telecomando (tenendolo per il verso giusto) in direzione dell’apparecchio.
-
Page 21: Collegamento Dei Diffusori Acustici
CODICI D’ERRORE ERR-1 e ERR-2 Premere per almeno 2 secondi il pulsante EJECT per espellere il compact disc. Se il CD non è stato espulso, premere con un oggetto appuntito il piccolo pulsante RESET e poi di nuovo EJECT (per almeno 2 s). Nel caso non sia possibile espellere il CD, contattare il rivenditore od un centro d’assistenza autorizzato. - Page 22 CAMBIO TENSIONE DI FUNZIONAMENTO DELL’APPARECCHIO IMPORTANTE: La presente sezione del manuale riguarda il solo personale qualificato. Le seguenti operazioni NON devono essere effettuate direttamente dall’utente. FOTO 1 Togliere la tensione dall’apparecchio (staccando il cavo d’alimentazione dalla presa di rete). Rimuovere il coperchio superiore dell’apparecchio.
-
Page 23: Dati Tecnici
DATI TECNICI AMPLIFICATORE Potenza d’uscita 160 W (RMS) Risposta in frequenza 50 Hz ÷ 13,5 kHz Rapporto segnale/rumore - Mic (1 ÷ 4) 60 dB - Aux 80 dB Distorsione (a 1 kHz, potenza nom.) < 0,3 % CONTROLLI TONI AUX INPUT - Bass ±... - Page 24 ESEMPIO COLLEGAMENTI BM 3001 BM 3001...
- Page 26 INDEX SAFETY PRECAUTIONS page 27 DESCRIPTION page 29 FRONT PANEL page 29 REAR PANEL page 31 OPERATION page 34 CD/USB – MP3 PLAYER AND TUNER page 36 • FRONT PANEL page 37 • FUNCTION MENU page 41 • NOTES ABOUT MP3 FILES page 42 •...
-
Page 27: Safety Precautions
Before powering up, make sure that all the connections have been made correctly and the voltage of your mains corresponds to the voltage shown on the rating plate on the unit, if not, please contact your RCF dealer. The metallic parts of the unit are earthed by means of the power cable. -
Page 28: Important Notes
(screw anchors, screws, brackets not supplied by RCF etc.), which must guarantee the security of the system / installation over time, also considering, for example, the mechanical vibrations normally generated by transducers. -
Page 29: Description
All inputs 1, 2, 3 and 4 can access the priority through an external command (connected to the removable connector). Inputs 2 and 3 also have an RJ 45 socket for quick connection of an RCF BM 3001 paging microphone (through CAT5 cable). - Page 30 AUX IN button (with LED) It turns on (LED is lit) / off the AUX INPUT to the internal amplifier (and PRE OUT). If activated, the CD/USB – MP3 player / tuner signal will not be sent to the internal amplifier (the INTERNAL button LED will turn off).
-
Page 31: Rear Panel
REAR PANEL 2 RJ 45 sockets (channels 2 and 3) to connect 1 RCF BM 3001 paging microphone per socket. Note: when a BM 3001 paging microphone is connected, it is necessary to set the dip-switches 3 and 4 to MIC. PHANTOM (see 12 below) of the relevant channel. - Page 32 Channel no.1 XLR input BALANCED CONNECTION – cold ground UNBALANCED CONNECTION PRESENCE CONTROL (f = 2.15 kHz) common for all the channels 1, 2, 3, 4. AUX INPUT TREBLE and BASS controls. AUX INPUT GAIN control. AUX INPUT with dual RCA connector. The two channels of the stereo source connected to the AUX INPUT are summed internally (to get a mono signal).
- Page 33 8 dip-switches PRESET to set the priority options: MIX: the music source (internal or MUSIC OFF: the music source (internal or external) is always present in the (mixed) MIX – MUSIC OFF external) is not sent to the amplifier during signal sent to the amplifier, even during a a priority command.
-
Page 34: Operation
CHIME LEVEL (a trimmer adjustable by using a small screwdriver). CHIME SEQUENTIAL COMMAND with removable connector (activated when the 2 pins are short-circuited) to send either the chime continuously (the chime type can be selected by the dip-switch no.7, see 21-7) or an alarm tone. If the dip-switch no.8 is set to “SIREN ON SEQ.CMD”, the alarm tone will have the maximum volume level (adjustable by the MASTER volume only). - Page 35 PRIORITY If a priority command is present (or VOX), the music source can be either included in the mixed signal sent to the amplifier or excluded, according to dip-switch no.1 setting (see 21: the 8 dip- switch group). During a priority command (‘PRIOR’ LED turns on), only the audio signal of the channel with priority (and the music, if turned on) is sent to the amplifier (and the PRE OUT output).
-
Page 36: Cd/Usb – Mp3 Player And Tuner
When the chime is playing (a few seconds), the (internal / external) music source is removed from the signal sent to the amplifier. RCF BM 3001 PAGING MICROPHONE (NOT INCLUDED) Channels 2 and 3 have an input with RJ 45 socket, to which a BM 3001 paging microphone can be connected (note: it is necessary to set the dip-switches no.3 and no.4 to the “MIC with PHANTOM”... -
Page 37: Front Panel
FRONT PANEL 7 7 7 7 CD/USB – MP3 PLAYER / TUNER power on / off button. SRC (source) button: source selection among tuner, CD (when inserted), USB (if a USB flash drive is present). FM/AM button: tuner band selection between FM (frequency modulation, 3 groups: FM1, FM2, FM3) and AM (medium wave amplitude modulation, 2 groups: MW1, MW2). - Page 38 (-) = back (+) = forward SEEK dual button: TUNER: • To tune the frequency a 0.05 MHz step up: push and immediately release the forward button • To tune the frequency a 0.05 MHz step down: push and immediately release the back button •...
- Page 39 (random) button (audio CD and MP3 files only) RDM ON RDM OFF It turns on / off the track random play. Folder - button (MP3 files only) 10TRK Push and immediately release to skip 10 tracks back ( <<). FOLDER Push and hold to select the previous folder ( <<).
- Page 40 BUTTON no. SPEECH PROGRAMME MUSIC KIND EASY M (easy listening music) SPORT LIGHT M (light classical music) EDUCATE (educational programmes) — DRAMA CLASSIC M (classical music) CULTURE OTHER M (other music kinds) SCIENCE — VARIED JAZZ M (jazz music) WEATHER COUNTRY M (country music) FINANCE —...
-
Page 41: Function Menu
EON (enhanced other networks) If EON data are received (EON is displayed), TA and AF functions will be enhanced: • TA traffic announcements will be received from both the current station and others. • AF RDS frequency list will be always kept updated (EON data memory) for the alternative station selection. -
Page 42: Notes About Mp3 Files
NOTES ABOUT MP3 FILES • MP3: means MPEG Audio Layer 3 and refers to an audio compression type. • This player reads MP3 files on CD-ROM, CD-R or CD-RW discs and USB flash drives; if available, track titles, artists and albums are displayed (ID3 TAG). •... -
Page 43: Remote Control
REMOTE CONTROL The remote control uses a CR 2025 (3 V) lithium battery. The battery may need replacing when the control does not operate correctly or for example, it is necessary to get closer to the ES 3160 to restore operation. To replace the battery: open the battery holder on the rear side by moving the lock part. -
Page 44: Error Codes
ERROR CODES ERR-1 and ERR-2 Push and hold (at least 2 seconds) the EJECT button to eject the compact disc. If the CD is not ejected, push the RESET button by using a pin and then EJECT (2 seconds) again. Should not be possible to eject the CD, please consult your dealer (or an authorized service centre). -
Page 45: Power Supply Voltage Change
POWER SUPPLY VOLTAGE CHANGE IMPORTANT: This manual section concerns qualified personnel only. The following instructions are to be ignored by the user. PICTURE 1 Make sure the device is not connected to the mains (unplug the power supply cable). Remove the lid. The power supply circuit is under the ventilation screen (see picture 1), which can be removed by unscrewing the 2 screws. -
Page 46: Specifications
SPECIFICATIONS AMPLIFIER Output power 160 W (RMS) Frequency response 50 Hz ÷ 13.5 kHz Signal / noise ratio - Mic (1 ÷ 4) 60 dB - Aux 80 dB Distortion (at 1 kHz, nominal power) < 0.3 % AUX INPUT TONE CONTROLS - Bass ±... -
Page 47: Example Of Connections
EXAMPLE OF CONNECTIONS BM 3001 BM 3001... - Page 48 Except possible errors and omissions. RCF S.p.A. reserves the right to make modifications without prior notice. the rules of sound RCF SpA: Via Raffaello, 13 - 42010 Reggio Emilia Italy > tel. +39 0522 274411 - fax +39 0522 274484 - e-mail: rcfservice@rcf.it...
Need help?
Do you have a question about the ES3160 and is the answer not in the manual?
Questions and answers