Table of Contents
Advertisement
Quick Links
Advertisement
Table of Contents

Related Manuals for Datavideo AD-100M


Summary of Contents for Datavideo AD-100M
-
Page 2: Table Of Contents
WARNINGS AND PRECAUTIONS ................3 WARRANTY ....................... 3 ....................3 TANDARD ARRANTY ....................4 ARRANTY ..............4 & S ISCLAIMER OF RODUCT ERVICES ........................4 ISPOSAL PACKING LIST ......................5 FRONT PANEL ......................5 REAR PANEL ......................6 MENU SETTINGS ......................7 EXAMPLE SETUP ...................... -
Page 3: Warnings And Precautions
This product should only be operated from the type of power source indicated on the marking label of the AC adapter. If you are not sure of the type of power available, consult your Datavideo dealer or your local power company. -
Page 4: Two Year Warranty
Certain parts with limited lifetime expectancy such as LCD Panels, DVDDrives, Hard Drives are only covered for the first 10,000 hours, or 1 year (whichever comes first). Any second year warranty claims must be made to your local Datavideo office or one of its authorized Distributors before the extended warranty expires. -
Page 5: Packing List
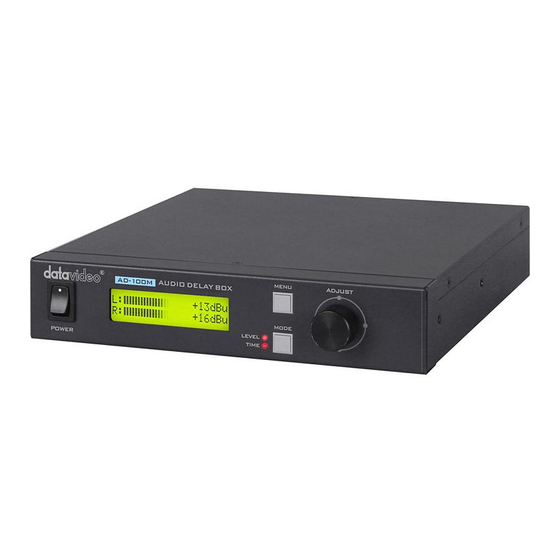
The following items should be in the box. If any items are missing please contact your supplier. Items Description Q’ty AD-100M Accessory List AD-100M Quick Start Guide Front Panel Power On/Off Switch Switches the power On / Off Menu This switch allows access to the 9 mode system settings. -
Page 6: Rear Panel
ATTENUATION settings. Adjust The ADJUST knob is for mode select and value adjustment. It can be rotated to display the correct menu option or value and then pressed in to select or confirm a chosen value. Rear Panel Audio Out 2 channels of XLR balanced audio output. -
Page 7: Menu Settings
MIC IN 1 Channel of XLR balanced MIC input. MIC Switch MIC OFF / 48V (ON / OFF) Gain Three levels of MIC gain: 20/40/60 dB MENU Settings N.B. The unit will automatically exit the MENU settings mode if it is left idle for 12 seconds or more. - Page 8 This setting adjusts how loud or quiet the audio will be at the output. 0dB=Loud and -60dB=Quiet. NB: The AD-100M is an Audio Delay device and it can also be used as a Tone Generator. Please DO NOT connect the AD-100M directly to a headset or set of speakers it should not be used like an Audio AMP.
- Page 9 Please review and adjust the default menu settings before re- connecting any output connections on the AD-100M rear panel. NB: The AD-100M is an Audio Delay device and it can also be used as a Tone Generator. Please DO NOT connect the AD-100M directly to a headset or...
- Page 10 Press the MENU button to enter the system configuration settings. • Turn the ADJUST knob to select SOFTWARE VERSION. • The firmware version of the AD-100M is displayed for 12 seconds. 9. ESCAPE • After reviewing or changing the system configuration settings.
-
Page 11: Example Setup
Example Setup AD-100M Specifications 1x Microphone Input, XLR connectors Audio inputs 2 x balanced stereo audio, XLR connectors 2 x unbalanced stereo audio, RCA / Phone sockets 2 x balanced stereo audio, XLR connectors Audio Output 2 x unbalanced stereo audio, RCA / Phone sockets Bandwidth 20~20KHz <...
Need help?
Do you have a question about the AD-100M and is the answer not in the manual?
Questions and answers