
Related Manuals for SecurityMan SmartCamDVR


Summary of Contents for SecurityMan SmartCamDVR
- Page 1 SmartCamDVR User’s Manual Compact High Definition Color Camera with Micro SD Recorder, Rechargeable Battery, and Remote Control...
- Page 2 Warranty SecurityMan Inc warrants that this product will be free from defects in title, materials and manufacturing workmanship for a period of one year or otherwise specified on the product packaging. This limited warranty shall commence from the date of purchase.
- Page 3 The liability of SecurityMan Inc, arising from this warranty and sale shall be limited to a refund of the purchase price. In no event shall SecurityMan be liable for costs of procurement of substitute products or services, or for any lost profits, or for any consequential, incidental, direct or indirect damages, however caused and on any theory of liability, arising from this warranty and sale.
-
Page 4: Table Of Contents
Table of Contents Introduction Important Restrictions Conditions Features Package Contents Product Basics Rechargeable Battery Important Note System Setting Date, Time, and Date/Time Format Setting MD Sensitivity Refresh Rate (Hz) Resolution OverWrite Button Sound Operation Taking Photo Video Recording Taking Photo by Motion Detection Video Recording by Motion Detection System Reset Installation... -
Page 5: Introduction
Important This guide provides important information on the use and operation of SmartCamDVR. Please read all the information carefully prior to using the product for the best performance and to prevent any damage/ injuries or misuse of the device(s). Customers are entitled to have read through this complete user’s manual before using the SmartCamDVR. - Page 6 • DO NOT use this product to carry out any illegal activities. SecurityMan shall not be responsible for any consequences of illegal conducts made by users. • DO NOT put the plastic package bags in reach of children or babies.
-
Page 7: Conditions
• DO NOT disassemble or repair the dialer or any other relevant peripheral equipment s on your own. Improper disassembly might cause damage to the product or the peripheral equipment. • DO NOT put the camera in quaky paces. The camera may be unstable or out of operation if installed improperly. -
Page 8: Features
• Do not use the camera near harmful chemicals. • Do not place product near any strong magnetic objects • It might influence the normal operation of the product if used at the fringe range of normal temperature. Please turn off the power when not in use. -
Page 9: Package Contents
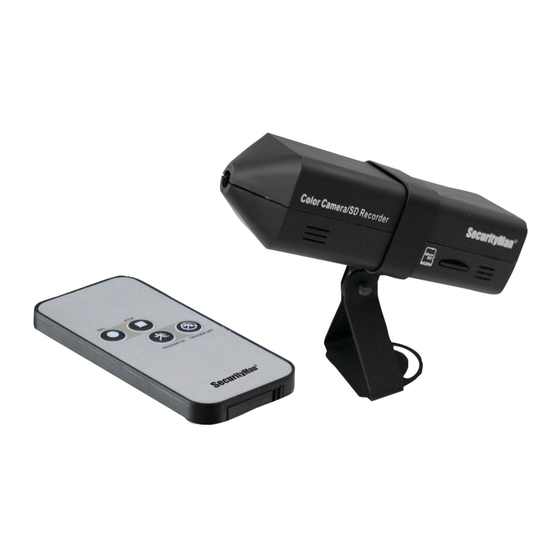
** Micro SD card is not included Package Contents 1 x SmartCamDVR 1 x Mounting Bracket 1 x Remote Control 1 x Adapter 1 x Video Cable 1 x Remote Control Receiver cable 1 x USB Cable Plectrum for Reset User’s Manual &... -
Page 10: Product Basics
Product Basics Right Side Camera Lens Mounting Bracket Left Side Video OUT/IR Extension Video OUT IR Extension Microphone Buzzer hole Bottom Side Buzzer Reset Air Ventilations Reset... - Page 11 Back Panel Motion Detection Power/Manual ON/OFF Record/Stop Status Indicator Recharging Indicator USB port Video/Photo Switch Remote Control STOP TRIGGER ON TRIGGER OFF...
- Page 12 Press the REC or TRIGGER ON buttons to activate manual recording or motion detection recording accordingly. During activation, the SmartCamDVR will beep twice giving an audible notification that the recording type has been successfully activated. Press the STOP or TRIGGER OFF buttons to disable manual recording or disable motion detection recording.
-
Page 13: Rechargeable Battery Important Note
It is important that the battery is fully charged for first time use. Please let the battery charge for at least 2 hours before using the SmartCamDVR. The charging indicator will turn solid red while charging and turn off when fully charged. The SmarCamDVR are shipped with low battery, using while the battery is low may result in a system halt and automatic system shut down. -
Page 14: System Setting
Insert a Micro SD card (not included) into the Micro SD slot located on the right side of the SmartCamDVR. Using the provided USB cable, plug the smaller end into the back of the camera and the other end into a computer as shown below. -
Page 16: Date, Time, And Date/Time Format Setting
Date, Time, and Date/Time Format Setting To set the date and time, click on the corresponding value as illustrated below, then use the (up) and (down) arrows to adjust the date and time accordingly. After setting the date and time, click on the (down) arrow located to the right of the “Date/Time Format”... -
Page 17: Md Sensitivity
MD Sensitivity To adjust the Motion Detection Sensitivity level, simply click on the drop down arrow located to the right of the MD Sensitivity label to view the options available. The sensitivity levels range from 1 to 5, with 1 being the least sensitive and 5 being the most (defaulted at #3). -
Page 18: Refresh Rate (Hz)
The Motion Detection Sensitivity level depends on your application. If there are to many false recordings, please reduce the sensitivity level or increase the level if you want to capture more, click the SAVE button at anytime to confirm and save the setting. Refresh Rate (Hz) The default refresh rate (light frequency) is set to 60Hz which is standard for United Sates and Japan. -
Page 19: Resolution
Resolution Resolution refers to the quality of the video being recorded (video resolution). The default resolution is set to HD (High Definition) 1280 x 720 which can record up to 13.5 hours when using a 32GB Micro SD card. This is the highest level of resolution. To make changes to the cameras resolution, click on the (down) arrow to select between HD, D1, and VGA as illustrated below. -
Page 20: Overwrite
(down) arrow to select between ON and OFF as illustrated below. When set to “OFF” the SmartCamDVR will stop recording when the memory card becomes full. Click on the SAVE button at anytime to confirm and save your changes. -
Page 21: Button Sound
Button Sound The BUTTON SOUND setting enables (ON) and disables (OFF) the audible alert notification that can be heard whenever a command is initiated. For example, when set to “ON” (default), the camera will send out a beeping sound whenever you start or stop manual recording. To make changes to the button sound setting, click on the (down) arrow to select between ON and OFF as illustrated below. -
Page 22: Operation
Operation Light indicators and what they mean. Status Indicator Recharging Indicator LED Indicator Description Solid Red Charging (off when fully charged) Green Then Blue Power On, Stand-by Green Light then Flashes Blue Photo Snapshot Flash Blue Then Green Video Recording Rapid Flash Then Off Low Power... -
Page 23: Taking Photo
Taking Photo (manually) To start taking manual snap shots using your SmartCamDVR, move the event type switch to “PHOTO” as illustrated below. Blue and green indicator (Photo Mode) With your recording preference set to “PHOTO”, press and hold the power button for 4 seconds as illustrated below. -
Page 24: Video Recording
NOTE: The SmartCamDVR will take 3 consecutive snap shots every time the REC button is pressed while in “Photo” mode. Video Recording To start recording video manually using your SmartCamDVR, move the event type switch to “VIDEO” as illustrated below. - Page 25 (Video Mode) With your recording preference set to “VIDEO”, press and hold the power button for 4 seconds as illustrated below. (Power On)
- Page 26 REC button on the RC (remote control) to start video recording. At this point the SmartCamDVR will beep twice and the indicator light will stay solid green whenever video recording has been initiated.
-
Page 27: Taking Photo By Motion Detection
Press the motion detection button located on the back of the SmartCamDVR or the TRIGGER ON button on the RC (remote control) to enable motion detection. At this point the the indicator LED will turn green and SmartCamDVR will beep 2 times to indicate that motion detection has been enabled. -
Page 28: Video Recording By Motion Detection
SmartCamDVR or the TRIGGER OFF button on the RC (remote control) at any time. When disabling motion detection recording, the indicator light will turn blue and the SmartCamDVR will beep 5 times if there are any new events recorded and beep 1 time if there were no new events recorded. - Page 29 Press the motion detection button located on the back of the SmartCamDVR or the TRIGGER ON button on the RC (remote control) to enable motion detection. At this point the the indicator LED will turn green and SmartCamDVR will beep 2 times to indicate that motion detection has been enabled.
- Page 30 Blue status indicator When disabling motion detection video recording, the indicator light will turn blue and the SmartCamDVR will beep 5 times if there are any new events recorded and beep 1 time if there were no new events recorded.
-
Page 31: System Reset
System Reset The reset button should only be used in the event that the SmartCamDVR’s buttons or functions start to act abnormal or erratic. Events such as: not being able to shut off the device, not being able to start or stop manual recording or not being able to start or stop motion detection recording, etc. - Page 32 Philip screw driver to secure as illustrated below. 3. Connect one end of the power adapter (included) to the Mini USB port on the back side of the SmartCamDVR and then connect the other end into an electrical power outlet as illustrated below. The charging indicator light will turn red and turns off when the battery is full.
- Page 33 4. Next, connect one end of the IR EXTENSION cable (provided) to the IR port of the SmartCamDVR and then peel off the adhesive overlay to mount the IR receiver to a suitable location as illustrated below. The IR receiver requires direct line of sight with the remote control.
- Page 34 Manually record a few files by pressing on the TRIGGER ON button of the remote control. Playback the file by removing the SD card to a card reader on your computer or connect the SmartCamDVR directly to your computer for playback to ensure proper monitoring areas.
-
Page 35: Video/Audio Output Display
Video Output Display When the device is connected to a TV using the Video cable provided, a live camera video feed will appear on screen as shown below. A: “ ” Video icon. “ ” Photo icon. “ ” Recording icon. B: Current time and date. -
Page 36: Playback And Backup File
Playback and Backup File To playback the recorded video/photo files, please use the USB cable that was provided to connect your SmartCamDVR to your computer or lap top as illustrated. Connect to computer Once connected, an “AutoPlay” window will appear as shown below. - Page 37 Double click on the VIDEO or PHOTO folder to pull up the recorded date folder and then double click on the recorded date folder to pull up the video/photo files for playback as illustrated below. Now double click on the event file you wish to playback using your computers default media player.
- Page 38 To backup the video\photo files, please high light one or multiple files and then right mouse click on the file to select “Copy”. Then access the backup drive or partition and right mouse click to “Paste” to backup the video\photo files as illustrated below. After completing the operation on the computer, please disconnect the SmarCamDVR from the computer and a blue light indicator will turn on to represent stand-by mode.
-
Page 39: Faqs
G: In low-light condition, or the moving object being same color as background, the sensitivity may be decreased. Q. When I turned on my SmartCamDVR and try to record, I cannot record video clips or take any pictures? A. Please check if the Micro SD card is inserted with the pins/teeth facing down and that the SD card clicks into place. - Page 40 Make sure the Micro SD card is not full. Q. The SmartCamDVR device cannot power on or start up? A. Be sure to press and hold down the power button for a period of 4 seconds to turn on the device. Check for low battery or connect the device to the A/C adapter provided.
-
Page 41: Specifications
Specifications Image Sensor Color CMOS, 5.17m pixels (Max) Video Resolution HD (1280x720), D1 (800x592), VGA (640x480) Audio Microphone built-in Built-in Memory 22 MB flash memory Storage Medium MicroSD card up to 32GB (not included), HD:13.5h, D1:36h, and VGA:41h Rechargeable Battery 720mAh Lithium-ion battery Charge Time/Work Time 2-hr/2-hr (Max)
Need help?
Do you have a question about the SmartCamDVR and is the answer not in the manual?
Questions and answers