Table of Contents
Advertisement
Quick Links
Advertisement
Table of Contents

Related Manuals for Vacmaster VQ1530SIWDC


Summary of Contents for Vacmaster VQ1530SIWDC
- Page 1 WET & DRY VACUUM CLEANER VQ1530SIWDC 110V IPX4 VQ1530SIWDC / 1000W / 30L...
-
Page 2: Table Of Contents
Troubleshooting Thank you for purchasing this Vacmaster® wet and dry vacuum cleaner. Feel confident that with Vacmaster® you are obtaining a high quality product engineered for optimal performance. This vacuum cleaner is capable of picking up liquids and dry materials. -
Page 3: Warranty
• Never hold the connectors in front of your face (especially your eyes, Vacmaster® takes pride in producing a high quality, durable product. This ears, etc.) Never direct the nozzle towards persons or animals. -
Page 4: Specifications
container, or any other protective equipment when using the vacuum • Don’t put the appliance in water. Make sure that water is not spilled on the cleaner in some special places such as carpet or insulated floor. appliance. • Do not store the vacuum cleaner in insulated places after using for carpet •... -
Page 5: Unpacking And Checking Carton Contents
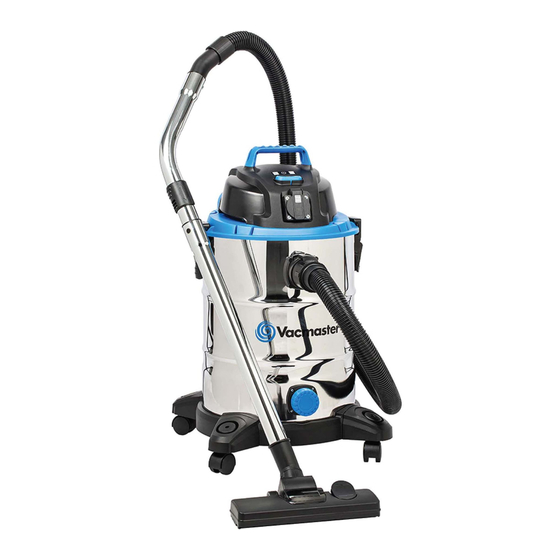
Handle Power Head NPACKING AND CHECKING CARTON CONTENTS On-Off Switch Blowing port Remove entire contents of carton.Check each item against the carton Outlet-socket contents list. Carton Contents List Key Description……………..…..…....... QTY Vacuum Port Latch Vacuum Cleaner……............ 2.5m Hose………..……..........Metal Tube..............Floor Nozzle………………….…........ -
Page 6: General Assembly Instructions
5. With the power head removed, turn the container upside down. Insert the feet with casters into the slots and apply pressure into place and secure ENERAL ASSEMBLY INSTRUCTIONS them with supplied screw. Do not over- tighten screws. (fig.5a) 6. Insert the wheel axle into the base. Insert washer onto the axle followed by rear wheel and insert washer again. -
Page 7: Dry Vacuum Operation
Position II switches the vacuum cleaner to stand by so that it switches on and Dry filter. This is a very fine dust which will not be captured by the and off automatically with a power tool that is plugged into the on-board filter and may cause damage to motor. -
Page 8: Liquid Vacuum Operation
3. Fit the desired nozzle to the vacuum cleaner hose. (fig.3) IQUID VACUUM OPERATION 4. Verify that the switch is in the ‘O’ OFF position before plugging the power cord into the power socket. (fig.4) 5. Turn the motor on by flipping the switch to the ‘I’ ON position. (fig.5) 6. -
Page 9: Maintenance
This wet and dry vacuum cleaner has blowing capabilities. To use the 4. Clear all dirt or debris from the container and hose. (fig.4) blower feature follow the instructions listed. 5. Check the hose, attachments, and power cord to verify that they have WARNING: ALWAYS WEAR SAFETY GOGGLE BEFORE USING not been damaged. -
Page 10: Installing & Cleaning Foam Filter
2. Remove power head and place in an upside down position. Cleaning Foam Filter 3. Install the cartridge filter over the filter cage with the flat end of the filter towards the vacuum cleaner power head. Carefully push filter in until it 1. - Page 11 Correct Disposal of this product This marking indicates that this product should not be disposed with other household wastes throughout the EU. To prevent possible harm to the environment or human health from uncontrolled waste disposal, recycle it responsibly to promote the sustainable reuse of material resources.
- Page 12 VQ1530SIWDC...
Need help?
Do you have a question about the VQ1530SIWDC and is the answer not in the manual?
Questions and answers