Advertisement
Advertisement

Subscribe to Our Youtube Channel
Related Manuals for Powersmart DB5011


Summary of Contents for Powersmart DB5011
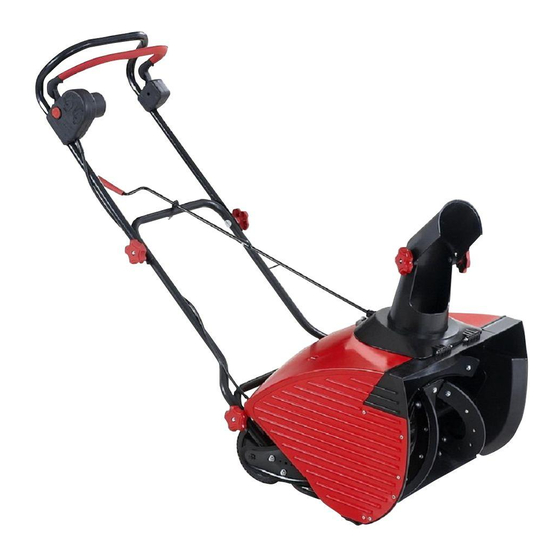
- Page 1 MODEL #DB5011 13 AMP ELECTRIC SNOW THROWER Español p. 19 Español p. Français p. 38 Français p. ATTACH YOUR RECEIPT HERE Serial Number Purchase Date Questions, problems, missing parts? Before returning to your retailer, call our customer service department at 1-800-791-9458.
-
Page 2: Table Of Contents
TABLE OF CONTENTS Safety Information ........................... 5 Package Contents ........................... 3 Hardware Contents ......................... 4 Preparation ............................. 7 Assembly Instructions ........................8 Operating Instructions ........................14 Care and Maintenance ........................18 Warranty ............................18 PRODUCT SPECIFICATIONS SPECIFICATIONS Voltage: 120 V, 60 Hz Input power: 13 Amp Rotation speed: 2,100 RPM Plow width and depth: Approx. -
Page 3: Package Contents
PACKAGE CONTENTS PART DESCRIPTION QUANTITY PART DESCRIPTION QUANTITY Lower frame (preassembled) Auger (preassembled) Middle frame Rubber plate (preassembled) Upper frame Scraper (preassembled) Cable clip Pivot wheel (preassembled) Upper chute crank Switch housing (preassembled) Lower chute crank (preassembled) Polarized plug (preassembled) Chute deflector Handle bar (preassembled) Discharge chute... -
Page 4: Hardware Contents
HARDWARE CONTENTS DIA. 8 Metal washer M4 x 16 Qty. 4 Qty. 1 Joint fixing knob Screw M8 x 45 Joint fixing bolt Qty. 4 Qty. 1 Qty. 4 Ф6 × Ф13 × 1 Washer Qty. 1 Qty. 2 ST6 x 30 7 mm Screw Two-sided open-end wrench... -
Page 5: Safety Information
SAFETY INFORMATION Please read and understand this entire manual before attempting to assemble, operate or install the product. Work Area Keep work area clean and well-lit. Cluttered, dark areas invite accidents. Do not operate snow thrower in an explosive atmosphere, such as in the presence of flammable liquids, gases, or dust. - Page 6 SAFETY INFORMATION Body position - Maintain proper footing and balance at all times. Place heels firmly on the ground and tightly grasp the handle bar. Watch for uneven surfaces and do not overreach. In case you fall or collide with the snow thrower, inspect the unit for damage. When stepping backwards, be careful to avoid obstacles beneath your feet or behind you to avoid falling.
-
Page 7: Preparation
SAFETY INFORMATION PRODUCT LABELS WARNING - Read, understand and follow all safety labels and markings on the unit. CAUTION Inspect wiring, which, if damaged during shipping, may cause serious bodily injury during equipment use. If any damage is seen or suspected, do not assemble. Instead, contact our customer service department at 1-800-791-9458. -
Page 8: Assembly Instructions
ASSEMBLY INSTRUCTIONS 1. Hold the middle frame (B) so that the screw holes align with the holes on the lower frame (A). Note: Make sure the middle frame is held upright, following the UP mark attached to the middle frame. Holding the middle frame in the reverse direction will prevent proper assembly. - Page 9 ASSEMBLY INSTRUCTIONS 4. Hold the upper frame (C) so that the screw holes align with the holes on the middle frame (B). 5. Insert the joint fixing bolt (AA) with the metal washer (BB) into the aligned holes on each side. The metal washer (BB) should be inserted outside of the frame.
- Page 10 ASSEMBLY INSTRUCTIONS 7. Locate the three cable clips (D) in the parts bag. Secure the power cord to the frame of the unit by clipping them onto the frame at evenly spaced intervals. 8. Remove the screw (JJ) and metal washer (HH) on the main cover (I).
- Page 11 ASSEMBLY INSTRUCTIONS 10. Insert the metal washer (HH) and the screw (JJ) into the hole on the main cover (I) and tighten the screw with the screwdriver (FF). Hardware Used Ф6 × Ф13 × 1 Washer ST6 x 30 Screw Phillips Screwdriver 11.
- Page 12 ASSEMBLY INSTRUCTIONS 13. Locate the upper chute crank (E) in the parts bag. Remove the screw (EE) and nut (DD) from the upper chute crank (E) using a Phillips screwdriver and the wrench provided. Note: You may be able to unfasten the screw and nut by hand.
- Page 13 ASSEMBLY INSTRUCTIONS 16. Remove the washer (HH) and nut (II) from the eye bolt with rubber grommet (Q) found on the upper chute crank (E). 17. Position the chute crank (E) so that the eye bolt with rubber grommet (Q) inserts into the center hole of the middle frame (B).
-
Page 14: Operating Instructions
OPERATING INSTRUCTIONS Note: Before using this machine, make sure that the power source you will use complies with the specifications detailed in this manual. Before inserting the plug into the socket, verify that the snow thrower’s auger and scraper are firmly attached with screws. Perform a test run to ensure that the rotor turns freely. - Page 15 OPERATING INSTRUCTIONS WARNING Damaged electrical cords present risk of fire, electric shock, and serious bodily injury. Before operating the snow thrower, carefully examine the electrical cord. If the cord is damaged, do not use the snow thrower. Replace or repair the damaged cord immediately. If you need assistance, contact our customer service department at 1-800-791-9458.
- Page 16 OPERATING INSTRUCTIONS MOVING THE MACHINE AND PLOWING THE SNOW WARNING Foreign objects, such as rocks, broken glass, nails, wire, or string, can be picked up and thrown by the snow thrower, causing serious personal injury. Remove all foreign objects from the area to be plowed before operating the snow thrower. Keep the area of operation free of foreign objects that can become thrown by the rotor blades.
- Page 17 OPERATING INSTRUCTIONS CHANGING THROW DIRECTION AND THROW HEIGHT WARNING Never direct the snow discharge chute at the operator, at bystanders, at vehicles or at nearby windows. Discharged snow and foreign objects accidentally picked up by the snow thrower can cause serious damage and personal injury. Always orient the discharge chute in the opposite direction from where you, bystanders, surrounding vehicles, or windows are located.
-
Page 18: Care And Maintenance
CARE AND MAINTENANCE WARNING Make sure to turn off the switch and disconnect the extension cord before performing any maintenance task on your snow thrower. Run the snow thrower for a few minutes to melt away any snow on the snow thrower. Turn the snow thrower’s power off.
Need help?
Do you have a question about the DB5011 and is the answer not in the manual?
Questions and answers