Advertisement
Quick Links
INSTRUCTION MANUAL
EN 21"ELECTRIC SNOW THROWER
FR 21"CHASSE-NEIGE ÉLECTRIQUE
ES
LANZDE NIEVE ELECTRICA DE 21"
Model
# DB5021
Have product questions or need technical support? Please feel free to contact us!
Website:
www.Amerisuninc.com
www.PowerSmartUSA.com
Toll free: 1-800-791-9458 Mon-Fri 9-5 EST
Email: support@amerisuninc.com
Advertisement

Related Manuals for Powersmart DB5021


Summary of Contents for Powersmart DB5021
- Page 1 INSTRUCTION MANUAL EN 21"ELECTRIC SNOW THROWER FR 21"CHASSE-NEIGE ÉLECTRIQUE LANZDE NIEVE ELECTRICA DE 21" Model # DB5021 Have product questions or need technical support? Please feel free to contact us! Website: www.Amerisuninc.com www.PowerSmartUSA.com Toll free: 1-800-791-9458 Mon-Fri 9-5 EST Email: support@amerisuninc.com...
-
Page 3: Table Of Contents
TABLE OF CONTENTS Feature Identification ..................4 Safety Information ................... 5 Assembly Instructions ..................8 Operating Instructions ..................11 Troubleshooting ....................16 Care and Maintenance ..................17 Exploded View and Part List................18 Two Years Limited Warranty ................22 PRODUCTS SPECIFICATIONS Voltage:120v,60Hz Input Power:15Amp Rotation speed:2,100 RPM... -
Page 4: Feature Identification
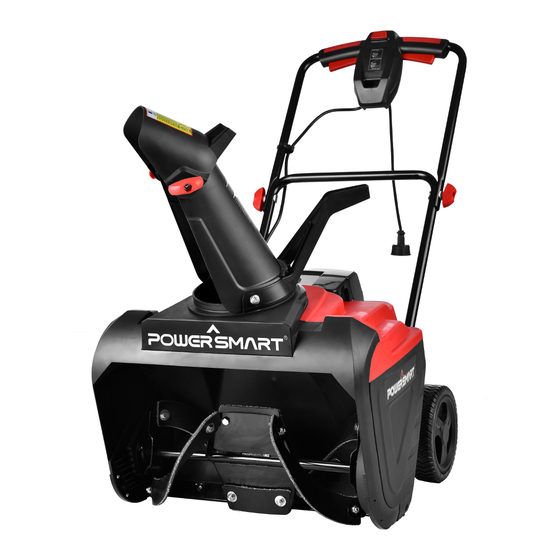
FEATURE IDENTIFICATION Auger Control Auger Switch button Chute Deflector Upper Tube Chute Polarized Plug Chute Crank Lower Tube Knob Wheel... -
Page 5: Safety Information
SAFETY INFORMATION Please read and understand this entire manual before attempting to assemble, operate or install the product. Work Area Keep work area clean and well-lit. Cluttered, dark areas invite accidents. Do not operate snow thrower in an explosive atmosphere, such as in the presence of flammable liquids, gases, ... - Page 6 Body position-Maintain proper footing and balance at all times. Place heels firmly on the ground and tightly grasp the handle bar. Watch for uneven surfaces and do not over reach. In case you fall or collide with the snow thrower, inspect the unit for damage.
- Page 7 PRODUCT LABELS WARNING-Read, understand and follow all safety labels and markings on the unit. CAUTION Inspect wiring, which, if damaged during shipping, may cause serious bodily injury during equipment use. If any damage is seen or suspected, do not assemble. instead, contact our customer service department at 1-800-791-9458. Handle with care during assembly so that electrical wiring does not become damaged.
-
Page 8: Assembly Instructions
ASSEMBLY INSTRUCTIONS 1 .Remove the machine and accessories from the packing box Chute Assembly Chute Crank Standard Component Upper Handle Lower Handle Machine wheel wheel cover... - Page 9 2. Place wheel to the axle shown below and insert the cotter pin into the hole in the axle. Bend the cotter pin and install the wheel cover. Cutter pin (2) Spacer (2) wheel (2) wheel cover L wheel cover R 3.
- Page 10 4. Place the Chute assembly on the rotating bracket as shown in below. 5. Use two screws to lock the chute assembly into rotation bracket.
-
Page 11: Operating Instructions
6. Locate the three cable clips in the parts bag. Secure the power cord to the frame of the unit by clipping them onto the frame at evenly spaced intervals. Clip OPERATING INSTRUCTIONS Note: Before using this machine, make sure that the power source you will use complies with the specification’sdetailedinthismanual.Beforeinsertingtheplugintothesocket, verify that the snow throwers auger and scraper are firmly attached with screws. - Page 12 2. To prevent the extension cord from disconnecting during use, tie the female end of the extension cord in to a loose knot on the top right side of the middle frame (B) before connecting to the male plug in the socket of the snow thrower. Note: The protective cover around the polarized plug is compatible with most extension cords.
- Page 13 MOVING THE MACHINE AND PLOWING THE SNOW WARNING Foreign objects, such as rocks, broken glass, nails, wire, or string, can be picked up and thrown by the snow thrower, causing serious personal injury. Remove all foreign objects from the area to be plowed before operating the snow thrower. Keep the area of operation free of foreign objects that can be become thrown by the rotor blades.
- Page 14 CHANGING THROW DIRECTION AND THROW HEIGHT WARNING Never direct the snow discharge chute at the operator, at bystanders, at vehicles or at nearby windows. Discharge snow and foreign objects accidentally picked up by the snow thrower can cause serious damage and personal injury.
- Page 15 DRIVE BELT REPLACEMENT WARNING Entanglement Hazard - Before performing any service procedures, make sure the snow thrower is disconnected from the power source. Note: Record component position before disassembly, to assist in reassembly. 1. Using screw driver, remove 3 screws attaching belt cover to housing. 2.
-
Page 16: Troubleshooting
TROUBLESHOOTING Problem Possible Causes Remedy WARNING - Before attempting to make any inspections, repairs or adjustments, stop the snow thrower, wait for all moving parts to stop moving and carefully disconnect the AC extension cord from the power source. No power from AC Connect to known good AC power source power source Extension cord not... -
Page 17: Care And Maintenance
CARE AND MAINTENANCE WARNING Make sure to turn off the switch and disconnect the extension cord before performing any maintenance task on your snow thrower. Run the snow thrower for a few minutes to melt away any snow on the snow thrower. Turn the snow thrower's power off. -
Page 18: Exploded View And Part List
EXPLODED VIEW AND PART LIST... - Page 20 Nut M8 303090002 End Cover 302110092 DB2801 Long Scraper 303010221 Screw ST4×40 302110091 DB2801 Short Scraper 303020079 Bolt M4x14 DB5021 Auger Shaft Tension Wheel Brasket 303181303 303180588 Welded Welded 303050066 Shaft Ring 17 203020077 Tension Wheel Deep Groove Ball Bearing 303010284 Screw ST4.8×12...
- Page 21 Square Neck Bolt 303020161 303081213 Middle Tube M8x25 203050174 Upper Chute 303081212 Upper Tube 203010648 Chute Handle 303010358 Screw ST4.2×14 203050175 Middle Chute 302070001 Oil Cap Seal Ring 303030077 Nut M8 203050660 Lower Switch Box 203050172 Rotating disc 303130013 Button Spring 203010647 Locating Piece 303042019...
-
Page 22: Two Years Limited Warranty
CONSUMER POWER TOOLS WILL BE FREE FROM DEFECTS IN MATERIAL OR WORKMANSHIP FOR A PERIOD OF TWO (2) YEARS FROM DATE OF PURCHASE. NINETY (90) DAYS FOR ALL POWERSMART PRODUCTS, IF THE TOOL IS USED FOR PROFESSIONAL OR COMMERCIAL USE.
Need help?
Do you have a question about the DB5021 and is the answer not in the manual?
Questions and answers