Advertisement
Quick Links
Advertisement

Subscribe to Our Youtube Channel
Related Manuals for Parmco RC6W500


Summary of Contents for Parmco RC6W500
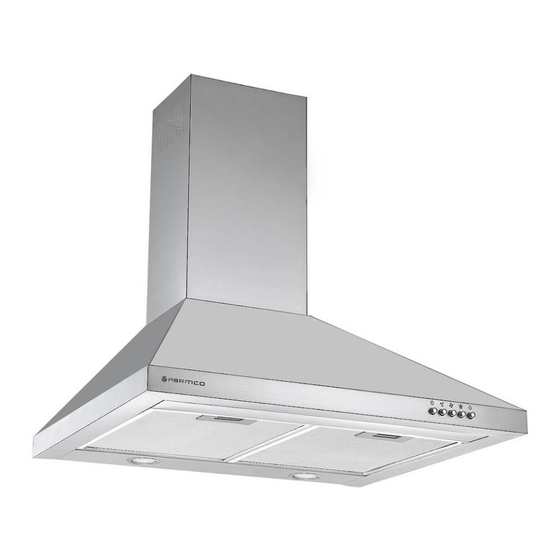
- Page 1 INSTALLATION AND OPERATING INSTRUCTIONS Model: RC6W500 As part of Parmco Appliances commitment to improving and updating product ranges, we reserve the right to alter, change and update technical specifications and appearance attributes of all Parmco Appliances products. E&OE. 727626052023...
- Page 2 Dear Valued Customer, Thank you and congratulations on purchasing your new Parmco appliance. All Parmco products are made to the highest quality and design standards. We are sure you will enjoy your new appliance. As a note, please read through these instructions carefully. These will assist you in gaining a complete understanding of the functions and features offered by your appliance.
- Page 3 • If proof of date of purchase is not supplied, except at the sole Service Agent. discretion of Parmco Sales. Proof of purchase can be for the • This warranty is offered as an extra benefit, and does product itself, or if installed with a kitchen or house then proof of...
-
Page 4: Table Of Contents
Contents Safety instructions Installation Start using your cooker hood Troubleshooting Maintenance and cleaning Environment protection... -
Page 5: Safety Instructions
SAFETY INSTRUCTIONS his manual explains the proper installation and use of your cooker hood, please read it carefully before using even if you are familiar with the product. The manual should be kept in a safe place for future reference. of a cooker hood or other cooking Never to do: fume extractor, the operation of open... - Page 6 appliance in a safe way and f the voltage rating of the lamp is less ● understand the hazards involved. than the rated voltage of the appliance, Children shall not play with the the voltage rating of the lamp shall appliance.
- Page 7 hen the cooker hood and ARNING: Danger of fire: do not ● ● appliances supplied with energy other store items on the cooking surfaces. than electricity are simultaneously in steam cleaner is not to be used. ● operation, the negative pressure in the EVER try to extinguish a fire with ●...
-
Page 8: Installation
INSTALLATION If you have an outlet to the outside, your cooker hood can be connected as below picture by means of an extraction duct (enamel, aluminum, flexible pipe or non- flammable material with an interior diameter of 150mm) 1. Before installation, turn the unit off and unplug it from the outlet. 2. - Page 9 5. Install the expansion pipe to the outlet and fixed by cable tie. Please note the expansion pipe is not included in the product.See pic 3. Pic 3 6. Fix the outside chimney bracket on the outside chimney, and be sure that the inside chimney can be adjusted the height in it freely.See pic 4.
- Page 10 9. Before usage, read all the instructions and make sure that the power rating of the cooker hood matches the power rating of the supply. HINTS FOR EXHAUST DUCT INSTALLATION The following rules must be strictly followed to obtain optimal air extraction: •...
-
Page 11: Start Using Your Cooker Hood
Start Using Your Cooker Hood Push button Push the stop button, and the motor will stop. Push the low button, and the motor will run at low speed. Push the middle button, and the motor will run at mid speed. Push the high button, and the motor will run at high speed. -
Page 12: Maintenance And Cleaning
MAINTENANCE AND CLEANING Caution: • Before maintenance or cleaning is carried out, the cooker hood should be disconnected from the mains power supply. Ensure that the cooker hood is switched off at the wall socket and the plug removed. • External surfaces are susceptible to scratches and abrasions, so please follow the cleaning instructions to ensure the best possible result is achieved without damage. - Page 13 INSTALLING GREASE MESH FILTERS • To install filters for the following four steps (See pic): - Angle the filter into the slots at the back of the hood. - Push the button on the handle of the filter. - Release the handle once the filter fits into a resting position.
- Page 14 Changing the lights: Remove the grease filter. Find out the junction box, unscrew the screws on the junction box cover, then take down the junction box cover(If there is wire pressing plate which pressed the light wire, the wire pressing plate needs to be dismantled first).See pic 1.The junction box has version a and b, depending on different models.
-
Page 15: Environment Protection
ENVIRONMENTAL PROTECTION: This product is marked with the symbol on the selective sorting of waste electronic equipment. This means that this product must not be disposed of with household waste but must be supported by a system of selective collection in accordance with Directive 2012/19/EU.
Need help?
Do you have a question about the RC6W500 and is the answer not in the manual?
Questions and answers