Advertisement
Table of Contents
- 1 Installation Manual
- 2 Table of Contents
- 3 Safety Precautions
- 4 Before Installation
- 5 Selection of Installation Location
- 6 Preparation before Installation
- 7 Installation of Indoor Unit
- 8 Refrigerant Piping Work
- 9 Drain Piping Work
- 10 Electric Wiring Work
- 11 Mounting Decoration Panel
- 12 Field Setting and Test Operation
- Download this manual
See also:
Operating Manual
MODELS
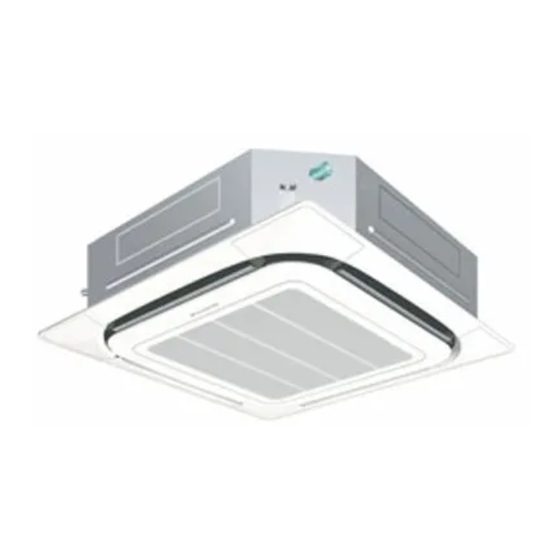
Ceiling Mounted Cassette type (Round Flow with Sensing)
FXFQ25SVM
FXFQ32SVM
FXFQ40SVM
FXFQ50SVM
CAREFULLY READ THESE INSTRUCTIONS BEFORE INSTALLATION.
KEEP THIS MANUAL IN A HANDY PLACE FOR FUTURE REFERENCE.
3P335596-2D
SYSTEM
FXFQ63SVM
FXFQ80SVM
FXFQ100SVM
FXFQ125SVM
INSTALLATION MANUAL
Air Conditioners
Advertisement
Table of Contents

Related Manuals for Daikin FXFQ25SVM


Summary of Contents for Daikin FXFQ25SVM
-
Page 1: Installation Manual
INSTALLATION MANUAL SYSTEM Air Conditioners MODELS Ceiling Mounted Cassette type (Round Flow with Sensing) FXFQ25SVM FXFQ63SVM FXFQ32SVM FXFQ80SVM FXFQ40SVM FXFQ100SVM FXFQ50SVM FXFQ125SVM CAREFULLY READ THESE INSTRUCTIONS BEFORE INSTALLATION. KEEP THIS MANUAL IN A HANDY PLACE FOR FUTURE REFERENCE. 3P335596-2D... -
Page 2: Table Of Contents
FXFQ25SVM FXFQ63SVM VRV SYSTEM FXFQ32SVM FXFQ80SVM Installation manual FXFQ40SVM FXFQ100SVM Air Conditioners FXFQ50SVM FXFQ125SVM CONTENTS Otherwise, this may lead to an accident due to oxygen deficiency. • Be sure to use only the specified parts and accessories for 1. SAFETY PRECAUTIONS .......... 1 installation work. -
Page 3: Before Installation
• For selection of installation location, use the installation CAUTION pattern paper as reference. • Install drain piping according to this installation manual to • Do not use the air conditioner where in the salty atmosphere ensure good drainage, and insulate the piping to prevent such as coastal areas, vehicles, vessels or the voltage condensation. -
Page 4: Selection Of Installation Location
2-2 OPTIONAL ACCESSORIES Items to be checked at delivery • This indoor unit separately requires a decoration panel and a Items to be checked Check column remote controller. • Confirm if a decoration panel shown in the Table 1 is Have you carried out field setting? (if necessary) prepared and meets your model. - Page 5 • Each sensor has been set so that the center of the sensing Required installation space (mm) area is located in the center of the product 800 mm above the floor (in case of the infrared presence sensor) or 0 mm above the floor (in case of the infrared floor sensor) when the ceiling height is approximately 2.7 m. (2) Ceiling height Discharge Suction Discharge • This indoor unit can be installed in a space of which ceil-...
-
Page 6: Preparation Before Installation
4. PREPARATION BEFORE INSTALLATION section “6. REFRIGERANT PIP ING WORK, 7. DRAIN PIPING WORK and 8. ELECTRIC WIRING WORK”) (1) Check the relation of location between the ceiling • After making the opening, sometimes it is necessary to opening and the indoor unit hanging bolts. reinforce the ceiling framework to keep the level of the Refrigerant ceiling and prevent vibration of the ceiling. -
Page 7: Refrigerant Piping Work
(6) Remove the installation pattern paper (5). [Washer clamp (7) fixing method] Washer clamp (7) (accessory) Insert Upper side nut Fig. 8 Level Vinyl tube [Maintaining horizontality] • The installation pattern paper (5) is matched to the ceil- ing opening dimension. Fig. - Page 8 Do not mix substance other than the specified refriger- refrigerant leak and result in malfunction (such as does ant such as air into the refrigeration circuit. not cool or heat). If the refrigerant leaks during the work, ventilate the Table 3 room. Piping size Tightening Recommended arm length of (mm) angle tool used...
-
Page 9: Drain Piping Work
• Before brazing refrigerant piping, have nitrogen flow Gas side piping insulating method through the refrigerant piping and substitute air with nitro- Joint insulating gen (NOTE 1) (Refer to Fig. 13). Then, carry out brazing material (8) (NOTE 2). (accessory) After all the brazing works are finished, carry out flare Flare nut Piping insulating connection with the indoor unit. (Refer to Fig. 12) Wind around the connection material (main unit) - Page 10 <In case of sticking vinyl tape> 1~1.5 m Tightened part Support Downward inclination of 1/100 or more Vinyl tape Good Stick vinyl tape without tearing the sealing material (Large) (10) . <In case of bending the tip> Wrong Tightened part Fig.
- Page 11 CAUTION • To avoid the attached drain hose (1) getting excessive force, do not bend nor twist it. It may cause water leakage. • In case of centralized drain piping, carry out piping work according to the procedure shown in the fol lowing Fig. 18. Sealing material (14) (accessory) Fig.
-
Page 12: Electric Wiring Work
Units Fan motor supply Be sure to lay the Voltage sealing material Model Volts MCA MFA range (10) on (14). Do not have FXFQ25SVM 0.048 the clearance. FXFQ32SVM 0.048 Sealing material (14) FXFQ40SVM 0.048 (accessory) FXFQ50SVM 0.048 220- Max. 264 Min. - Page 13 The lengths of remote controller wiring and transmission < Power supply wiring · earth wiring · remote controller wiring · transmission wiring connecting method > wirings are as follows: (1) Remote controller wiring (indoor unit - remote controller) ...Max. 500 m • Power supply wiring, earth wiring (2) Transmission wirings ....Total wiring length 2000 m Pull the wiring through the wiring penetrating hole (high • Outdoor unit - Indoor unit ....Max.
- Page 14 [Remote controller wiring, Transmission wiring] Prohibited • Do not connect the power supply wiring (high voltage). Transmission Remote Power supply wiring/ wiring controller wiring Wiring penetrating earth wiring Sheathed part of hole (high voltage) P1 P2 F1 F2 T1 T2 remote controller wiring, transmission wiring Approx.
- Page 15 < No. 2 system: When carrying out group control or 2 Wiring penetrating hole remote controller control. > Power supply wiring/earth Power supply wiring or remote controller 220-240 V wiring/transmission wiring 50 Hz Sealing material (Small) (13) 220, 230 V (accessory) Outdoor Note) It is not needed to set the...
-
Page 16: Mounting Decoration Panel
9. MOUNTING DECORATION PANEL Terminal block <<If test operation is required before mounting the (X1M) decoration panel, “10. FIELD SETTING AND TEST OPERATION” can be carried out before “9. MOUNTING Terminal for remote DECORATION PANEL”.>> controller wiring (P1, P2) No polarity CAUTION In case of a wireless remote controller, unless the decoration panel is mounted, field setting and test opera tion cannot be... - Page 17 10-1 SETTING CEILING HEIGHT Table 6 • Set the SECOND CODE No. according to the ceiling height Hours until FIRST SECOND Contamination Mode No. indication CODE No. CODE No. as shown in the Table 4. Approx. Table 4 Normal 2500 hrs Ceiling height (m) FIRST SECOND...
- Page 20 3P335596-2D EM13A007 (1310) FS...
Need help?
Do you have a question about the FXFQ25SVM and is the answer not in the manual?
Questions and answers