Table of Contents
Advertisement
Advertisement
Table of Contents

Related Manuals for Robe clubspot 500 CT


Summary of Contents for Robe clubspot 500 CT
- Page 1 Version 1.1...
-
Page 3: Table Of Contents
Club Spot Table of contents 1. Safety instructions........................4 2. Operating determinations......................4 3. Description of the device......................5 4. Installation..........................6 4.1 Fitting the lamp........................... 6 4.2 Lamp adjustment........................7 4.3 Inserting / Exchanging gobos....................7 4.4 Manual zoom..........................7 4.5 Connection to the mains...................... -
Page 4: Safety Instructions
CAUTION! Keep this device away from rain and moisture! Unplug mains lead before opening the housing! FOR YOUR OWN SAFETY, PLEASE READ THIS USER MANUAL CAREFULLY BEFORE YOU INITIAL START - UP! 1. Safety instructions Every person involved with installation and maintenance of this device have to: - be qualilfied - follow the instructions of this manual CAUTION! -
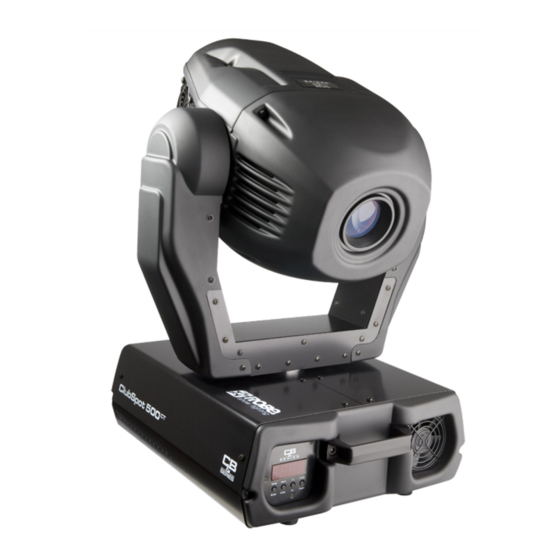
Page 5: Description Of The Device
Never run the device without lamp! Do not shake the device. Avoid brute force when installing or operating the device. Never lift the fixture by holding it at the projector-head, as the mechanics may be damaged. Always hold the fixture at the transport handles. -
Page 6: Installation
Rear panel of the base 5 - Power switch 6 - Fuse holder 7 - Power cord 8 - DMX input 9 - DMX output Front panel of the base 10 - Display 11 - Mode-button 12 - Enter-button 13 - Up-button 14 - Down-button 4. -
Page 7: Lamp Adjustment
Do not operate this fixture with open housing-cover! 4.2 Lamp adjustment The ClubSpot 500 CT lamp holder is aligned at the factory. Due to differences between lamps, fine adjustment may im- prove light performance. Strike the lamp,open the shutter and set the dimmer intensity onto 100% and focus the light on a flat surface (wall). Center a hot-spot(the brightest part of the image) by using the 3 adjustment screws „A, B, C”. -
Page 8: Connection To The Mains
4.5 Connection to the mains Verify the power supply settings before applying power! If you wish to change the power supply settings, see the chapter below. Connect the fixture to the mains with the enclosed power plug. If you need to install other power plug on the power cable, follow the identification table below. -
Page 9: Rigging The Fixture
Power supply settings: 120V / 60Hz 4.7 Rigging the fixture DANGER TO LIFE! Please consider the respective national norms during the installation! The installation must only be carried out by an authorized dealer! The installation of the projector has to be built and constructed in a way that it can hold 10 times the weight for 1 hour without any harming deformation. -
Page 10: Dmx-512 Connection/Connection Between Fixtures
Danger of fire ! When installing the device, make sure there is no highly inflammable material (decoration articles, etc.) in a distance of min. 0.5 m. Warning ! Use 2 clamps to rig the fixture on the truss. Follow the instructions mentioned at the bottom of the base. Make sure that the device is fixed properly! Ensure that the structure (truss) to which you are attaching the fixtures is secure. - Page 11 input of the first fixture in the DMX-chain. If you wish to connect DMX-controllers with other XLR-outputs, you need to use adapter-cables. Building a serial DMX-chain: Connect the DMX-output of the first fixture in the DMX-chain with the DMX-input of the next fixture. Always connect one output with the input of the next fixture until all fixtures are connected.
-
Page 12: Dmx Protocol - Version 1.0
5. DMX protocol - version 1.0 Mode/Channel Type Function Value of control Mod1 Mod2 8bit 0 - 255 proportional Pan movement by 530° Pan Fine 0 - 255 proportional Fine control of pan movement Tilt 0 - 255 proportional Tilt movement by 280° Tilt fine 0 - 255 proportional... - Page 13 Mode/Channel Type of Function Value control Mod1 Mod2 8bit Rotating gobos 0 - 31 Open/hole step 32-63 Rot.gobo 1(multicolour dichroic) step 64-95 Rot.gobo 2 step 96-127 Rot.gobo 3 step 128-159 Rot.gobo 4 step 160-191 Rot.gobo 5 (dichroic) step 192-223 Rot.gobo 6 step 224-255 Rot.
-
Page 14: Controller Mode
The ClubSpot 500 CT is to be operated with a Philips MSR 575/2 or Osram HSR 575/2. A relay inside of the ClubSpot 500 CT allows you to switch on and off the lamp via the control panel or via your DMX- -controller without affecting the rest of the lighting. -
Page 15: Stand - Alone Mode
7. Stand - alone mode The fixtures on a data link are not connected to the controller but can execute pre-set programs which can be different for every fixture. To set the program to be played, see the „Stand-alone setting” (menu „St.AL.”). „Stand-alone operation”... -
Page 16: Control Menu Map
8. Control menu map Default settings = Bold print A001 dM.Ad. MA.SL. d.Abl MASt. SLA.1 SLA.9 SL.Ct. InFo Po.ti. totl rSEt La.ti. totl rSEt LA.St. totl rSEt Hi.tE. totl rSEt tEMP. DM.ln. Pan (0-255) dim (0-255) VErS (ICI.b..ICIr.) PErS. r.PAn (On, Off) r.tilt (On, Off) 16b.r. - Page 17 tESt Mod.1 Mod.2 St.AL. Auto. tESt PrG.1 PrG.2 PrG.3 PLAY tESt PrG.1 PrG.2 PrG.3 Edit PrG.1 PrG.2 PrG.3 St.01 St.99 PAn (0-255) S.tim. (0.1-25.5) (s) rESE COPY SPEC MAnu. PAn (Pan.1...Pan.3) dimr (dim.0...dim.C.) LA.Ad. PAn (0-255) tilt (0-255) Foc. (0-255) CodE AdJ.
-
Page 18: Control Menu
La.ti. - Lamp on time. Select this submenu to read the number of the operation hours with the lamp on. totL - The function shows the total number of the operation hours with the lamp on since the ClubSpot 500 CT has been fabricated. -
Page 19: Personality
ClubSpot 500 CT automatically switches off the lamp. LoHi - The fans keep the adjusted low speed until the temperature exceeds max. inside temperature of the fixture, then the ClubSpot 500 CT automatically switches from low to high the fan speed. -
Page 20: Lamp On/Off
Mod. 1 - Mode 1. This mode is suitable for projections on the wall, ceiling or ground without any head movement. Mod. 2 - Mode 2. This mode uses all ClubSpot 500 CT functions including pan/tilt movement and therefore is good for a complete introduction of the fixture. -
Page 21: Reset Functions
This message appears if you try to switch on the lamp within 5 minutes after having switched it off (the lamp is too hot). The message will appear on the display if the lamp doesn’t ignite within 28 seconds. The ClubSpot 500 CT will store this information and automatically ignite the lamp when the 5 minutes period has expired. -
Page 22: Technical Specifications
CoEr. This messsage will appear after the reset of the fixture if the magnetic-indexing circuit malfunctions (sensor failed or magnet missing) or the stepping-motor is defective (or its driver circuit on the main PCB). The color-wheel is not located in the default position after the reset. rGEr. - Page 23 Rotating gobo wheel: -6 glass gobos (1 effect-glass gobo, 3 black and white gobos,1 multicolour and 1 dichroic gobo) -Gobo indexing and rotation in both directions at different speeds -Gobo carousel cont. rotation -All rotating gobos are easily replaceable -Gobo dimensions: outside diameter=26.8mm, thickness=1.1mm, high temperature -borofloat or better glass, image diameter=22 mm -Effect-glass gobo: outside diameter=26.8 mm, max.thickness=4mm, high temperature borofloat or better glass...
- Page 24 Beampath: Dimensions (mm): Weight (net): EU version: 31.7 kg US version: 35.6 kg...
-
Page 25: Maintenance And Cleaning
12. Maintenance and cleaning It is absolutely essential that the fixture is kept clean and that dust, dirt and smoke-fluid residues must not build up on or within the fixture. Otherwise, the fixture. s light-output will be significantly reduced. Regular cleaning will not only ensure the maximum light-output, but will also allow the fixture to function reliably throughout its life.
Need help?
Do you have a question about the clubspot 500 CT and is the answer not in the manual?
Questions and answers