Advertisement
Quick Links
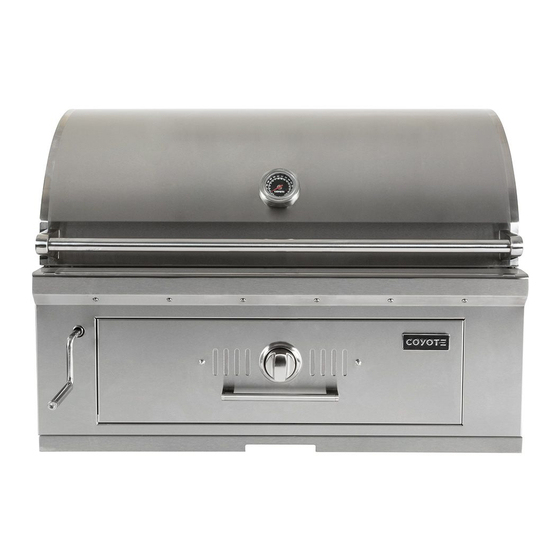
Coyote Stainless Steel Charcoal Grill
Built‐in Model
Coyote Stainless Steel Charcoal Grill
IMPORTANT: Read the lighting instruction on Page 5 before first time use!
To installer or person assembling grill: Leave this manual with grill for future reference.
To consumer: Keep this manual for future reference.
COYOTE OUTDOOR LIVING, INC.
www.coyoteoutdoor.com
Use & Care Manual
For Charcoal Model
(C1CH36)
For Outdoor Use Only
Advertisement

Subscribe to Our Youtube Channel
Related Manuals for Coyote C1CH36


Summary of Contents for Coyote C1CH36
- Page 1 Coyote Stainless Steel Charcoal Grill Use & Care Manual For Charcoal Model Built‐in Model Coyote Stainless Steel Charcoal Grill (C1CH36) For Outdoor Use Only IMPORTANT: Read the lighting instruction on Page 5 before first time use! To installer or person assembling grill: Leave this manual with grill for future reference. To consumer: Keep this manual for future reference. COYOTE OUTDOOR LIVING, INC. www.coyoteoutdoor.com ...
- Page 2 Welcome & Congratulations Congratulations on your purchase of a new grill! We are very proud of our product and we are completely committed to providing you with the best service possible. Your satisfaction is our #1 priority. Please read this manual carefully to understand all the instructions about how to install, operate and maintain for optimum performance and longevity. We know you’ll enjoy your new grill and thank you for choosing our product. We hope you consider us for future purchases. Please read and save the instructions This manual provides specific operating instructions for your model. Use your grill only as instructed in this manual. These instructions are not meant to cover every possible condition and ...
-
Page 3: Table Of Contents
Table of Contents Safety Instructions…...... 2 Locating the Grill ....... 3 Lighting Your Grill ...... 5 Operation and Features ..... 9 Care & Maintenance ...... 10 Limited Warranty ...... 13 Parts Listing ........ 14 Safety Symbols • • WARNING WARNING DANGER indicates an imminently WARNING: hazardous situation which, if not avoided, DO NOT store or use gasoline or other will result in death or serious injury. ... -
Page 4: Safety Instructions
Safety Instructions WARNING: Improper installation, adjustment, alteration, service or maintenance can cause injury or property damage. Read the installation, operating and maintenance instructions thoroughly before installing or servicing this equipment. General Safety Instructions For Household Outdoor Use Only – DO NOT use indoors or in any type of enclosed area such as a garage, shed or breezeway. Keep clear of trees and shrubs. The grills are not intended for installation in or on recreational vehicles, portable trailers, boats or any other moving installation. Not for commercial use. ... -
Page 5: Locating The Grill
If the wind is strong, then you can still have problems with the heat being trapped in the hood. Our Wind Guards can be purchased through any of our authorized dealers. Clearance : • TO NON‐COMBUSTIBLE CONSTRUCTION: For non‐combustible material, Coyote grills can be placed directly on, or adjacent to the non‐combustible material. The hood on a Coyote grill pivots mainly on the body. If you have a wall or partition behind the unit that would block ventilation, then a minimum of 7" clearance from the back of the grill to the wall is needed for the purpose of ventilation. If you do not have a wall or partition blocking the ventilation of the unit, then you only need an extra 2" behind the unit for the hood to open fully. If you wish to use the rotisserie option, you will want to make sure ... - Page 6 • INSULATED JACKETS AND COMBUSTIBLE CONSTRUCTION: Due to the charcoal fuel there is no insulated jacket available for the C1CH36 and it can never be placed into combustible material. For Built‐in Installations A built‐in grill is designed for easy installation into masonry enclosures. For non‐combustible applications, the grill drops into the opening (as shown in cut‐out detail drawing ‐ Fig. A) and hangs from the grill body itself. A bottom deck is not required to support the grill from the bottom. It is also required that: • The counter should be flat and level in reference to the floor. Cut out Dimensions Figure A Model Cutout Dimensions Overall Dimensions Grills Height Width Depth Height Width Depth C1CH36 13" 32 1/2" 20 1/2" 25 3/8" 35 1/2" 25 1/2" ...
- Page 7 Lighting Instruction WARNING • DO NOT stand with head, body, or arms over the grill when lighting. • Ensure the area around the barbecue is clear of flammable substances such as gasoline, yard debris, wood, etc.
- Page 8 3. Fill charcoal on the charcoal grids: Fill charcoal onto the charcoal grids, and get it burned. Put the cooking grates back and start using the grill. ...
- Page 9 Turn the knob to adjust the vents. 4. Add charcoal during use: Lower the charcoal tray, pull out the drawer to add fuel, then push it in and continue cooking. ...
- Page 10 6. Clean after use: Rotate the lift crank , pull out the drawer and get rid of ash. ...
-
Page 11: Operation And Features
Operations and Features Preparing Food for the Grill WARNING: Always observe safe food‐handling and safe food‐preparation practices when using this Grill, to prevent food‐borne illnesses. Always cook foods adequately. Undercooked foods can retain bacteria, especially if thawed or exposed to warm conditions prior to cooking. Always use separate plates and utensils for the handling of raw food. Never place raw food and cooked food on the same plate, and never place cooked food on a plate that was used for handling raw food. Always carefully wash all plates and utensils used to handle raw food before using them to handle cooked food. Always wash all vegetables, seafood and poultry before cooking. Always leave uncooked foods in the refrigerator until you are ready to start cooking. Always marinate meat in the refrigerator. Dispose of the excess marinade, and never reuse it. Grilling Tips: If you pre‐cook meat or poultry, do so immediately before grilling. Refrigerate leftovers within 2 hours of taking food off the grill. Never let the tray boil dry. That could be hazardous, as grease from fatty foods that have collected in the tray could ignite and possibly cause bodily injury or property damage. Use a meat thermometer to be sure food has reached a safe internal temperature. Always trim excess fat from your foods to reduce the occurrence of flare‐ups during cooking. Apply a light coating of cooking oil to the cooking grids before grilling, to prevent foods from sticking. Cook similar portion sizes together, so that they all cook evenly. Use tongs to turn foods on the grill. Never pierce foods while they are cooking on the Grill, as this will dry them out. Turn foods infrequently. Some chefs say that a good steak should never be turned more than once. Apply sugar‐based sauces such as commercial barbecue sauces only during the latter stages of cooking, to prevent charring. Soak the string you use to tie up roasts and poultry on the rotisserie spit to protect it from burning. Use a disposable aluminum tray filled with water, fruit juice, wine or a marinade to add extra flavor and moisture to slow‐cooked foods like roasts, whole chickens, turkeys or ducks. ... -
Page 12: Care & Maintenance
Care & Maintenance CAUTION: All cleaning and maintenance should be done only when grill is cool. DRIP TRAY The drip tray located below the grill should be cleaned periodically to prevent heavy buildup of debris. NOTE: Allow the drip tray to cool before attempting to clean. IMPORTANT: Do not leave the grill outside during inclement weather unless it is covered (cover sold separately). Rain water can collect inside the grill, the grill cart or the drip tray if left uncovered. If the drip tray is ... - Page 13 7) Sprays and cleaning solutions containing alkaline, lime, acid, salt might have been left on the grill surface un‐dried. 8) No stainless steel polish was ever used after one of the above mentioned acts took place. Ways to Avoid Rust on your Grill: 1) Always purchase a Coyote Grill cover for your unit. This will ensure that your cover is correct fit and breathable, while providing the protection needed to keep all other contaminants off of the surface. 2) When installing the unit, make sure to keep the unit covered when any masonry work is being performed. If any mortar or dust does come into contact with the stainless, make sure to wipe it off as soon as possible and use a stainless steel polish immediately afterwards. ...
- Page 14 ANNUAL CLEANING OF GRILL HOUSING Burn‐off the barbecue after every cookout will keep it ready for instant use, however, once a year you should give the entire grill a thorough cleaning to keep it in top operating condition. 1. Remove and clean the cooking grids, flavorizers, etc. 2. Remove warming rack and wash with mild detergent and warm water. 3. Brush the inside and bottom of the grill with a stiff wire brush, and wash down with a mild soap and warm water solution. Wash thoroughly and let dry. 4. Reinstall flavorizers, cooking grids, and warming rack. IMPORTANT: You should NOT line the bottom of the grill housing with aluminum foil, sand or any other grease absorbent substance. Grease will not be able to drip into the drip tray and a grease fire may occur. MAINTENANCE GUIDELINES 1. Keep outdoor cooking appliance area clear and free from combustible materials, gasoline and other flammable vapors and liquids. ...
-
Page 15: Limited Warranty
Limited Warranty Coyote Outdoor warrants to the original purchaser at the original site of delivery with proof of purchase of each Outdoor grill/Side burner that when subject to normal residential use, it is free from defects in workmanship and materials for the periods specified below. This warranty excludes grills used in rental and commercial applications. This warranty excludes surface corrosion, scratches, and discoloration which may occur during regular use. It does NOT cover labor or labor related charges. There will be shipping and handling charge for the delivery of the warranty part(s). COMPONENT WARRANTY PERIOD Cooking Grids (no rust or burn through) ………………………........5 years (limited) Flavorizer Bars (no rust or burn through)…………………………………......2 years (limited Charcoal Pan, Charcoal Grid, Thermometer, Ash Tray, Wind Deflector…..…….1 year (limited) ... - Page 16 Parts List C1CH36 Exploded Parts View ...
-
Page 17: Parts Listing
C1CH36 Parts Listing No. Description Part No. 1 Hood Handle‐36 1 C3600006 2 Handle Fixing 2 C0000007 3 Thermometer 1 C0000022 4 Thermometer Base 1 C0000044 5 Hood – CH36 1 CH360001 6 Rubber Stopper 2 C0000032 7 Hood Connector Hardware 2 C0000045 ...
Need help?
Do you have a question about the C1CH36 and is the answer not in the manual?
Questions and answers