Table of Contents
Advertisement
Quick Links
Advertisement
Table of Contents

Subscribe to Our Youtube Channel
Related Manuals for Brandt me1245m


Summary of Contents for Brandt me1245m
-
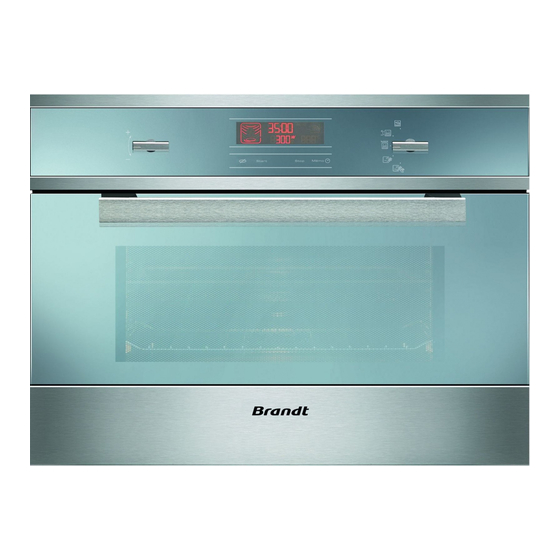
Page 1: Microwave Oven
INSTRUCTIONS FOR USE Microwave oven... - Page 2 Innovation and performance: we designed it so that it is always easy to use. In the line of Brandt products, you will also find a wide range of ovens, hobs, ventilation hoods, electronic cookers, dishwashers, refrigerators and freezers that can be coordinated with your new Brandt microwave oven.
-
Page 3: Table Of Contents
TABLE OF CONTENTS 1/NOTICES TO THE USER •Safety recommendations ......... . •... -
Page 4: Safety Recommendations
1/ SAFETY INSTRUCTIONS IMPORTANT SAFETY INSTRUCTIONS - READ CAREFULLY AND RETAIN FOR FUTURE USE. Warning: Keep this user guide with your appliance. If the appliance is ever sold or transferred to another person, ensure that the new owner receives the user guide. Please become familiar with these recommendations before installing and using your oven. - Page 5 1/ SAFETY INSTRUCTIONS WARNING: Liquids and other foods must not be heated in sealed containers, as they may explode. — If the appliance is being used in combination mode, it is recommended that children only use the oven under adult supervision due to the temperatures generated.
-
Page 6: Protecting The Environment
1/ SAFETY INSTRUCTIONS WARNING: — If the door or door seal is damaged, the oven should not be used until it has been repaired by an authorised person. — It is recommended that you clean your oven regularly and to remove any food build-up. - Page 7 1/ SAFETY INSTRUCTIONS STANDBY MODE In order to limit power consumption, the display will fade after 30 seconds of inactivity. Depending on the model of oven, when a delayed start is programmed an animation will be displayed alternately with the time to indicate that the oven is in “Standby mode”.
-
Page 8: Building In
2/INSTALLING YOUR APPLIANCE Fig.02 CHOICE OF LOCATION The diagrams above determine the dimensions of a cabinet that will be able to hold your oven. The oven can be installed under a work top or in a column of cabinetry (open* or closed) having the appropriate dimensions for built-in installation (see adjacent diagram). -
Page 9: 2/Installing Your Appliance
2/INSTALLING YOUR APPLIANCE To be certain that you have properly installed your appliance, do not hesitate to seek advice from a household appliance specialist. Monophase 20A Counter 220-240V ~ 50Hz Monophase line 220-240 V ~ 16A fuse or differential circuit breaker Electrical outlet 2 prong receptacle +earth CEI Standard 60083... - Page 10 4/USING YOUR APPLIANCE Warning The safety wire (green-yellow) is connected to the appliance’s terminal and must be connected to the ground lead of the electrical set-up. In the case of connection to an electric wall socket, it must remain accessible after installation.
-
Page 11: 3/Description Of Your Appliance
3/DESCRIPTION OF YOUR APPLIANCE •THE APPLIANCE Fig.03 Control panel Cavity Turntable Door handle • Turntable: Enables even cooking of foods with no handling. It rotates indiscriminately in both directions. If it is not rotating, ensure that all the components are properly positioned. Do not attempt to rotate it manually;... -
Page 12: Control Panel
3/DESCRIPTION OF YOUR APPLIANCE •CONTROL PANEL Fig.09 The “ - / + ” selector allows you to set the time, duration of programmes, the power level, the weight of the food, and memorised programmes. The STOP TURNTABLE touch control stops the rotation of the turntable to allow for the use of dishes that require all the space available in the oven. -
Page 13: Function Selector
4/USING YOUR APPLIANCE •FUNCTION SELECTOR SPEED DEFROST PASTRY/BREAD SPEED DEFROST 1000 W MICROWAVE MICROWAVE LEVELS Fig.10 KEEP WARM •DISPLAY Fig.11 The display guides you through programming the various settings : Time, Programme length, Microwave power level (Watts), Food weight (grams), Stop turntable, Automatic programmes COOKING ANIMATION depending on the selected function MICROWAVE SPEED DEFROST... -
Page 14: Setting And Adjusting The Time
4/USING YOUR APPLIANCE •SETTING AND ADJUSTING THE TIME After hooking up your appliance or after an extended power outage, “1 2 : 0 0 ” will flash in the display. To set the time on the clock Display Turn the +/- selector to set the time, e.g 6:30. 1 2 : 0 0 Confirm by pressing the MEMO touch control. -
Page 15: Programming
4/USING YOUR APPLIANCE •PROGRAMMING Your appliance is now hooked up and the correct time is set. Open the door using the handle. Place the food in the appliance, then close the door. If the door is not closed properly, the appliance will not function. Opening the door during operation does not cancel the current programme;... -
Page 16: Microwave Function
4/USING YOUR APPLIANCE •MICROWAVE FUNCTION 1000W Direct programming Display Turn the function selector to choose the maximum power microwave function. The microwave display lights up; 1000 W appears in the display. 1 0 0 0 The clock’s digits start flashing in the display. Turn the +/- selector to adjust the programme time, e.g. -
Page 17: Keep Warm Function
4/USING YOUR APPLIANCE •KEEP WARM FUNCTION This function allows you to maintain the temperature of your dish at the end of a programme. Programming the keep warm function Display Select KEEP WARM with the function selector. The corresponding symbol lights up, 00:00 blinks in the display. -
Page 18: Defrosting
4/USING YOUR APPLIANCE •DEFROSTING Using your microwave oven to defrost frozen vegetables enables you to save a lot of time. To defrost food, use the SPEED DEFROST function or the MICROWAVE function set to power level 200 W (defrost). Note: Small cuts of meat and fish can be cooked immediately after defrosting. -
Page 19: Speed Defrost Function
4/USING YOUR APPLIANCE •SPEED DEFROST FUNCTION Choose the type and quantity of food that you wish to defrost and the automatic function will programme the appropriate defrosting time. Speed defrost Display Turn the function selector to choose the “Speed Defrost” function. -
Page 20: Memory Programmes M1 / M2 / M3
4/USING YOUR APPLIANCE •MEMORY PROGRAMMES M1 / M2 / M3 The three memory functions allow you to record three common programmes that you can then select rapidly. Programming a memory touch control Display Access the memory function by pressing the MEMO touch control. -
Page 21: Child Safety
4/USING YOUR APPLIANCE Ñ •CHILD SAFETY You can activate the “CHILD SAFETY” function to prevent the unauthorised use of your microwave oven. Programming Display Open the door and press the STOP touch control for five seconds, until the key symbol appears in the display. -
Page 22: 6/Troubleshooting
6/TROUBLESHOOTING If you have doubts about the proper functioning of your appliance, this does not necessarily mean that there is breakdown. In any event, check the following items: You observe that ... What should you do? The time counts down, but the appliance is not Your appliance is in DEMONSTRATION working (the turntable is not rotating and food mode. -
Page 23: 7/Functional Aptitude Tests
7/FUNCTIONAL APTITUDE TESTS Functional aptitude tests in accordance with CEI/EN/NF EN 60705 norms 60705. The International Electrotechnical Commission, SC.59K, has established a standard for comparative performance tests conducted on various microwave ovens. We recommend the following for this appliance: Approx. Power Test Load... -
Page 24: 8/After Seles Service
8/ AFTER-SALES SERVICE •SERVICE CALLS Any repairs that are made to your appliance _______________ must be performed by a qualified professional Cl.B - Gr.2 _____ W max Service: ____________ certified as a brand agent. When you call, 220 - 240 V 50Hz Nr : AA MM 00001 please mention your appliance’s “Service”...
Need help?
Do you have a question about the me1245m and is the answer not in the manual?
Questions and answers