LENCO L-90 User Manual
Wooden turntable with usb connection and built-in pre amplifier
Hide thumbs
Also See for L-90:
- User manual (31 pages) ,
- Quick manual (11 pages) ,
- User manual (112 pages)

Related Manuals for LENCO L-90


Summary of Contents for LENCO L-90
-
Page 1: User Manual
L-90 WOODEN TURNTABLE WITH USB CONNECTION AND BUILT-IN PRE AMPLIFIER User Manual www.lenco.eu V1.0... -
Page 2: Table Of Contents
How to replace the stylus ..................23 How to disassemble the cartridge ................. 23 How to install a new cartridge................23 Recommendations from Lenco................24 Trouble shooting....................... 24 Specifications ......................25 Spare parts list......................25 ... -
Page 3: What Is In The Box
Dear customer, Thank you for buying this Lenco product. Quality and usability is our top priority. In order to let you fully enjoy this turntable, we have manufactured this product using high quality standards, materials, components, and care. Please read all safety instructions and national restrictions, before you use this turntable. -
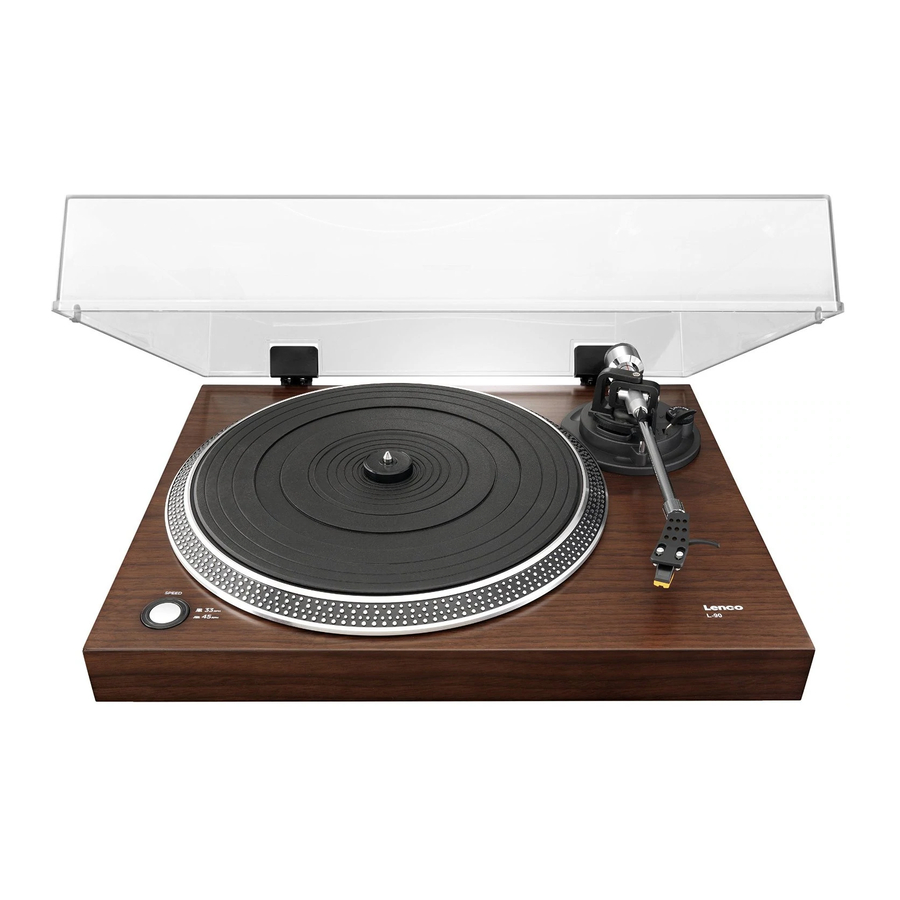
Page 4: Exploring The Turntable
Exploring the turntable 1. Counterweight, use the counterweight to balance the tone arm. 2. Anti-Skating control: sets the anti-skating. Use anti-skating to prevent the cartridge from swinging in towards the centre. 3. Tone arm lever: lowers or raises the tone arm. 4. -
Page 5: Getting Started
Be careful that you do not move the metal part. Turn the metal part to the left to increase the needle pressure. Lenco recommends to set the needle pressure to 2,5. Set the anti-skating. Lenco recommends that the anti-skating should about half the needle pressure, for the best result try different settings yourself. - Page 6 Place the hinges and mount the dust cover. Connect the AC cable to the wall outlet. Connect the line out cables to a mixer or HiFi system. Important note: This turntable has a built-in amplifier to avoid damage on the turntable or your audio-system. Do not connect this turntable to your audio-system by using the phone-input because this input is also amplified.
-
Page 7: Basic Operation
Before you connect the turntable to a computer, unplug it from your mixer or Hi-Fi system. The included software is a third party application and therefore Lenco does not handle any questions or problems regarding the software. 1. Switch the computer on 2. -
Page 8: Software Installation & Configuration (Windows 7)
Select the “Edit” menu and then “Preferences” 4. Select the USB audio device under the “Recording” selection as shown in the example below. 5. Select “Software Playthrough” to listen to the audio while recording. 6. Press “okay” to save your settings. 7. - Page 9 4. Click with the right mouse-button on the speaker icon (taskbar) and select “recording”. The screen as shown in the example below appears. 5. Click on “microphone USB audio device”. 6. Click on “properties”. 7. Go to the Tab "levels" and move the volume slider down to level 2 as shown in example below.
- Page 10 13. Go to the taskbar and click on "edit" and then on "preferences". The screen as shown in the example below appears. 14. Go to the “recording device” pull-down menu and select the option “microphone” (USB-audio device). 15. Go to the “channels” pull-down menu and select option 2 (stereo) 16.
-
Page 11: Digitalizing Records
Before you connect the turntable to a computer, unplug it from your mixer or Hi-Fi system. The included software is a third party application and therefore Lenco does not support questions or problems with or about the software. 1. Switch the computer on 2. - Page 12 Play: plays audio at the cursor position. If you have selected some audio, only said selection is played. Loop: if you press and hold the “shift” key, the “play” button changes to a “loop” button, enabling you to play the selection repeatedly. Record: records audio at the project’s sample rate (the sample rate in the lower-left corner of the window).
- Page 13 Redo (repeat last command). Zoom In Zoom Out Fit selection in window: zooms until the selection just fits inside the window. Fit project in window: zooms until all of the audio just fits inside the window. The “Track Pop-Down” Menu If you click on the title of a music track, the “track”...
- Page 14 bottom track represents the right speaker. When tracks are joined into a stereo pair, all edits automatically apply to both channels. Split Stereo Track - if the selected track is a stereo track (a pair of left and right tracks joined as a single track), this operation splits them into two separate tracks, which you can modify, and edit, independently.
- Page 15 exporting from Audacity by opening “file format preferences”. Note that exporting will automatically mix and re-sample all tracks, in case there are 2 or more tracks, or varying sample rates. See also File Formats. Export Selection As WAV: same as above, but only exports the current selection. Export as MP3: exports audio as an MP3 file.
- Page 16 Cut: removes the selected audio data and stores it on the clipboard. Only one project can be on the clipboard at a time, but that project may contain multiple tracks. Copy: copies selected audio data to the clipboard without removing it from the project.
- Page 17 Move Cursor ... > to Track Start: moves the cursor to the start of the selected track. Move Cursor ... > to Track End: moves the cursor to the end of the selected track. Move Cursor ... > to Selection Start: moves the cursor to the start of the current selection.
- Page 18 selecting “undo” or “redo” many times in a row. You can also discard the “undo” history to save disk space. Whilst working, you can keep the history window open. Float Control Toolbar: moves the “control toolbar” out of the window and into its own floating window, so you can place it wherever you want.
- Page 19 implicitly mixed. This command offers a way to do it permanently and save the results to the disk, saving space on the playback resources. Note that if you try to mix two very loud tracks together, you may get clipping (it will sound like pops, clicks, and noise).
- Page 20 If you choose an item from the “generate” menu without any tracks in a project, a new track is created. Otherwise, the current track is used. If a track is selected and the cursor is placed in a single place on the track, audio is inserted at the cursor position. The default duration of this operation is 30 seconds.
- Page 21 Change Tempo: changes the tempo (pace) of the audio, without changing the pitch. Obviously, this changes the length of the selection. Compressor: compresses the dynamic range of the selection. Loud parts will be softer while keeping the volume of the soft parts the same. You can optionally normalize the recording afterwards, resulting in the entire piece having a higher perceived volume.
-
Page 22: Maintenance
Reverse: reverses the selected audio temporally. Once in place, the end of the audio will be heard first, and the beginning last. Wahwah - uses a moving band pass filter to create its sound. A low frequency oscillator (LFO) is used to control the movement of the filter throughout the frequency spectrum. -
Page 23: How To Replace The Stylus
How to replace the stylus Lock the tone arm. Remove the protective cap from the stylus. Pull the stylus in the direction of the arrow (A) and remove it. Put in the new stylus following the reverse procedure. ... -
Page 24: Recommendations From Lenco
Recommendations from Lenco Clean your records with a rag, impregnated with an antistatic product. Replace the stylus approximately every 250 playing hours. An old cartridge wears out the records much faster. Clean the stylus regularly with a soft brush dipped in alcohol. -
Page 25: Specifications
Specifications Operation 10 Watt Power consumption Standby < 1 Watt Drive Belt drive Rubber belt Amplifier Built in pre-amplifier Platter rotating speed 33 / 45 RPM Adjustable counter weight Anti-skating Headshell Removable Moving magnet Bonded 0.6 mm Cartridge System Stylus tip diamond Sphere shaped Model number... -
Page 26: Safety Instructions
Safety instructions IMPORTANT SAFETY INSTRUCTIONS - READ CAREFULLY BEFORE USE. CAUTION RISK OF ELECTRICAL SHOCK DO NOT OPEN CAUTION: TO PREVENT AN ELECTRICAL SHOCK, DO NOT REMOVE ANY COVER SCREWS. THERE ARE NO USER SERVICEABLE PARTS INSIDE. REQUEST A QUALIFIED SERVICE PERSON TO PERFORM SERVICING. - Page 27 ESD can disturb normal usage of this turntable. If so, simply reset and restart the device following the instruction manual. During file transmission, please handle with care and operate in a static-free environment. Safety instructions - continued WARNING! NEVER INSERT AN OBJECT INTO THE PRODUCT THROUGH THE VENTS OR OPENINGS.
-
Page 28: Declaration Of Conformity
OR SERVICE BY YOU OR ANY THIRD PARTY, EVEN IF ADVISED OF THE POSSIBILITY OF SUCH DAMAGES.” Third party services may be terminated or interrupted at any time, and Lenco makes no representation or warranty that any content or service will remain available for any period. -
Page 29: Service And Support
Lenco offers service and warranty in accordance to European law, which means that in case of repair (both during and after the warranty period), you should contact your local dealer. Please note: It is not possible to send repairs to Lenco directly. ... -
Page 30: End Of Life
(Waste Electrical and Electronic Equipment Directive). When you see a crossed-out wheeled waste container on the product. It means that the product falls under the EU directive 2002/96/EC. ©Lenco 2012, all rights reserved. ... - Page 31 L-90 PLATTENSPIELER IM HOLZGEHÄUSE MIT USB-ANSCHLUSS UND EINGEBAUTEM VORVERSTÄRKER Benutzerhandbuch www.lenco.eu V1.0...
- Page 32 Wartung ........................24 Auswechseln der Nadel..................25 Auseinandernehmen des Nadelhalters ..............25 Installieren eines neuen Nadelhalters ..............25 Empfehlungen von Lenco..................25 Fehlerbehebung ....................... 25 Technische Daten..................... 27 Ersatzteilliste ......................28 Sicherheitshinweise ....................28 ...
-
Page 33: Verpackungsinhalt
Sehr geehrter Kunde, sehr geehrte Kundinnen, Vielen Dank für den Kauf dieses Lenco Produkts. Qualität und Benutzerfreundlichkeit haben bei uns absolute Priorität. Bei der Herstellung dieses Produkts kamen höchste Qualitätsstandards und Sorgfalt zum Einsatz, sowie hochwertige Materialien und Bauteile. Wir hoffen, dass Ihnen dieses Produkt viel Freude bereiten wird. -
Page 34: Beschreibung Des Plattenspielers
Beschreibung des Plattenspielers Gegengewicht - Verwenden Sie das Gegengewicht zum Ausbalancieren des Tonarms. Anti-Skating-Steuerung: Stellt die Anti-Skating-Funktion ein. Verwenden Sie Anti-Skating-Funktion, um zu verhindern, dass der Nadelhalter zur Mitte schwingt. Tonarmhebel: Hebt oder senkt den Tonarm. Tonarmklemme: Stellt den Tonarm fest, wenn der Plattenspieler nicht in Gebrauch ist. -
Page 35: Erste Schritte
Linie auf dem Tonarm übereinstimmen. Achten Sie darauf, dass Sie dabei das Metallteil nicht bewegen. Drehen Sie das Metallteil auf die linke Seite, um die Nadeldruck zu erhöhen. Lenco empfiehlt einen Nadeldruck von 2,5. ... -
Page 36: Grundlegende Bedienung
Sie ihn von Ihrem Mischpult bzw. Ihrem Hi-Fi-System ab. Bei der mitgelieferten Software handelt es sich um eine Anwendung eines Drittanbieters. Lenco bearbeitet keine Anfragen oder Probleme, die sich auf die Software beziehen. Schalten Sie Ihren Computer ein. -
Page 37: Software-Konfiguration (Windows Xp, Vista, Mac)
Stellen Sie den Netzschalter auf der Rückseite des Plattenspielers auf die Position "on". Wenn der Computer gestartet wird, schließen Sie den Plattenspieler an. Der Computer installiert die Treiber dann automatisch. Nachdem die Treiber installiert sind, müssen Sie dann die Audacity-Software installieren. -
Page 38: Software-Installation & -Konfiguration (Windows 7)
Klicken Sie auf "OK", um Ihre Einstellungen zu speichern. Die Software ist nun fertig eingerichtet, um die Aufnahme zu starten. Software-Installation & -Konfiguration (Windows 7) Schließen Sie den Plattenspieler an einer Steckdose an. Schließen Sie den Plattenspieler an einen USB-Anschluss Ihres Computers an. Warten Sie einige Sekunden, bis ein Fenster erscheint, wie im Beispiel unten gezeigt. - Page 39 Klicken Sie nacheinander auf "Anwenden", "OK" und erneut auf "OK" (alle Programme sind damit geschlossen). Legen Sie die Audacity-Software-CD in das Laufwerk, bzw. laden Sie die Software von der Webseite http://audacity.sourceforge.net/ herunter. Folgen Sie den Installationsanweisungen der Bedienungsanleitung. ...
-
Page 40: Digitalisierung Von Schallplatten
Sie ihn von Ihrem Mischpult bzw. Ihrem Hi-Fi-System ab. Bei der mitgelieferten Software handelt es sich um eine Anwendung eines Drittanbieters. Lenco bearbeitet keine Anfragen oder Probleme, die sich auf die Software beziehen. Schalten Sie Ihren Computer ein. - Page 41 An den Anfang springen: an den Anfang der Tonspur (bzw. den Zeitpunkt 0). Wenn Sie die Wiedergabe an diesem Punkt starten, wird Ihr Projekt von Anfang an abgespielt. Wiedergabe: Die Wiedergabe startet von der Cursor-Position ausgehend. Wenn ein nur Teil der Spur markiert ist, wird nur der markierte Teil abgespielt.
- Page 42 Trimmen - Herausschneiden von Abschnitten außerhalb des markierten Abschnitts Auswahl in Stille umwandeln Rückgängig Wiederholen Einzoomen Auszoomen Auswahl ins Fenster einpassen: vergrößert den Abschnitt bis das Fenster ausgefüllt ist. Ganzes Projekt ins Fenster einpassen – vergrößert alle Audiodaten bis das Fenster ausgefüllt ist.
- Page 43 Das Spur-Ausklappmenü Wenn Sie auf den Titel eines Musikstücks klicken, erscheint das "Spur" -Menü. Damit haben Sie Zugriff auf verschiedene Befehle zur Bearbeitung individueller Tonspuren. Name der Spur...: hier kann der Name der Tonspur geändert werden. ...
- Page 44 mithilfe dieser Funktion in zwei getrennte Spuren trennen, um sie getrennt zu modifizieren und zu bearbeiten. Sampleformat einstellen: Bestimmt die Qualität der Audiodaten und die Menge des erfoderten Speicherplatzes. 16-bit ist die von Audio-CDs benutzte Qualität und ebenfalls die Minimalqualität, die intern von Audacity benutzt wird (8-bit Audio wird automatisch beim Öffnen in 16-bit Audio konvertiert).
- Page 45 Zuletzt geöffnete Dateien...: zeigt eine Liste der zuletzt geöffneten Dateien in Audacity, sodass Sie die gewünschte Datei sofort wieder öffnen können. Exportieren als... WAV: Exportiert das gesamte Audioprojekt als WAV-Datei. WAV ist ein Industriestandardformat für unkomprimierte Audiodaten. Sie können bei Bedarf das Standarddateiformat für das Exportieren von Audacity-Daten unter "Bearbeiten >...
- Page 46 Seite einrichten...: Hier können Sie konfigurieren wie Audacity einen Ausdruck der Wellenformseite vornimmt und welchen Drucker Sie benutzen wollen. Drucken...: Druckt das Hauptfenster von Audacity mit den Spuren und Wellenformen aus. Beenden: Schließt alle Fenster und beendet Audacity. Sie werden aber vorher gefragt, ob vorgenommene Veränderungen gespeichert werden sollen.
- Page 47 In neue Tonspur kopieren: Kopiert die gesamte Tonspur bzw. den markierten Abschnitt in neue Tonspuren. Siehe Abbildung unten: Auswählen... > Alles: Markiert alle Audiodaten in allen Tonspuren innerhalb des Projekts. Auswählen... > Links vom Cursor bis...: Markiert die Audiodaten in den von Ihnen gewählten Tonspuren vom Anfang bis zur Cursor-Position.
- Page 48 Sekundenanfang. Wenn Sie z. B. den Abschnitt von 4,2 Sekunden auf 9,8 Sekunden markieren, erhalten Sie eine Auswahl von genau 4 Sekunden bis 10 Sekunden. Sie können die Einheiten, die mit der Option "Auswahlformat Einstellen" "Ansicht- Menü", festlegen. ...
- Page 49 Auf diese Weise können Sie die Werkzeugleiste an jedem beliebigen Ort positionieren. Der Menüpunkt verändert sich dann zu "Werkzeugleiste andocken", womit Sie die Werkzeugleiste dann wieder in das Fenster integrieren können. Schwebende Bearbeitungswerkzeugleiste: Diese Funktion verschiebt Bearbeitungswerkzeugleiste aus dem Fenster heraus, damit sie ein eigenes Fenster bilden kann.
- Page 50 Quick-Mix: Mischt alle ausgewählten Titel. Wenn Sie Stereospuren bzw. Spuren die mit links und rechts markiert sind, mischen, ist das Ergebnis eine Stereospur (zwei Kanäle). Andernfalls ist das Ergebnis eine Monospur. Wann immer Sie auf die Wiedergabe-Taste klicken und wann immer Sie exportieren, werden Ihre Spuren nebenbei gemischt.
- Page 51 Textmarke während Wiedergabe hinzufügen: Erstellt eine neue Textmarke an der Stelle, die gerade abgespielt oder aufgenommen wird. Sie können diese Funktion dazu verwenden, eine Sequenz während des Zuhörens zu markieren. Sie können der Textmarke einen Titel geben, indem Sie auf der Tastatur schreiben und dann die "Enter" oder "Return"-Taste, betätigen.
- Page 52 Bass-Verstärkung: Verstärkt die Bassfrequenzen im Audioabschnitt. Tonhöhe (Pitch) ändern: Verändert die Tonhöhe/-frequenz des markierten Audioabschnitts, ohne dabei das Tempo zu verändern. Wenn Sie das Dialogfenster öffnen, ist die angegebene Startfrequenz ein von Audacity gesetzter Schätzwert. Dies funktioniert besonders Gesangsaufnahmen oder Instrumentalaufnahmen ohne Hintergrundgeräuschen.
- Page 53 dass diese Funktion zu einer leichten Verzerrung führt. Es funktioniert am besten, wenn das Audiosignal wesentlich lauter ist als das Rauschen. Normalisieren: Korrigiert den DC-Offset (eine vertikale Verschiebung der Spur) und / oder verstärkt eine Spur als solche, dass die maximale Lautstärke einen festen Wert darstellt: -3 dB.
-
Page 54: Wartung
Das "Analyse"-Menü wird für Effekte und Plug-In-Effekte, die keine Änderung der Audiodaten verursachen, sondern einfach ein Dialogfeld öffnen und beschreibende Informationen anzeigen, verwendet. Audacity unterstützt außerdem Befehle zur Analyse, die Kommentare in einer Textspur erzeugen. Hilfe-Menü Über Audacity: Dies zeigt die Versionsnummer und eine Liste aller Projektteilnehmer von Audacity. -
Page 55: Auswechseln Der Nadel
Befestigen Sie den Nadelhalter. Setzen Sie die Nadel zurück. Setzen Sie die Schutzkappe auf die Nadel. Empfehlungen von Lenco Reinigen Sie Ihre Schallplatte mit einem Tuch, das mit einem antistatischen Mittel imprägniert ist. Wechseln Sie die Nadel etwa alle 250 Stunden aus. Ein alter Nadelkopf verschleißt Ihre Schallplatten wesentlich schneller. ... - Page 56 Überprüfen Sie, ob die Audiokabel korrekt ordnungsgemäß angeschlossen sind, d. h. dass sie NICHT mit einem Telefonanschluss verbunden sind. Überprüfen Sie den Nadeldruck und die Anti- Skating-Einstellung. Reinigen Sie die Nadel mit einem in Alkohol getauchten, weichen Pinsel. Überprüfen Sie den Nadeldruck und die Anti- Die Platte springt ...
-
Page 57: Technische Daten
Technische Daten 10 Watt Bedienung Stromverbrauch Bereitschaft < 1 Watt Riemenantrieb Antrieb Gummiriemen Verstärker Ja Eingebauter Vorverstärker Drehgeschwindigkeit des 33 / 45 RPM Plattentellers Einstellbares Gegengewicht Ja Anti-Skating Ja Tonarmkopfhaub Abnehmbar System e ... -
Page 58: Ersatzteilliste
Ersatzteilliste Beschreibung Bestellmenge Ersatzteilnummer Staubschutz L90-104 1 L90-105 2 Scharnier System mit Nadel L90-116 1 L90-113 Tonarmkopf 1 Gegengewicht L90-115 1 Antriebsriemen L90-119 1 Einzel-Puck L90-125 1 ... - Page 59 Sicherheitshinweise Beachten Sie die folgenden Hinweise: Tablet nicht in der Nähe von Wasser verwenden. Nur mit einem leicht angefeuchteten Tuch reinigen. Belüftungsöffnungen nicht abdecken oder blockieren. Wenn Sie das Tablet in einem Regal aufstellen, lassen Sie 5 cm (2”) Platz um das Tablet herum. Installieren Sie das Tablet anhand der Anleitungen im mitgelieferten Handbuch.
-
Page 60: Konformitätserklärung
Dieser Plattenspieler muss mit einer Stromversorgung betrieben werden, die den Angaben auf dem Typenschild entspricht. Falls Sie sich nicht sicher über die Spezifikationen Ihres Netzstroms sind, wenden Sie sich bitte an Ihren Händler oder Ihren Stromnetzbetreiber. Die Steckdose muss sich in Bereich des Geräts befinden und leicht zugänglich sein. ... -
Page 61: Haftungsausschluss
Gültigkeit des Haftungsausschlusses einzuschränken, schließt Lenco jede Verantwortung oder Haftung für Unterbrechungen oder Aussetzungen von Inhalten oder Leistungen, die durch Dritte bereitgestellt werden, aus. Lenco haftet auch nicht für Kundendienste in Bezug auf die Inhalte und Leistungen. Fragen und Probleme in Bezug auf die Inhalte und Leistungen müssen direkt an die jeweiligen Anbieter der Inhalte und Leistungen gerichtet... -
Page 62: Kundendienst Und Hilfe
Falls Ihr Gerät repariert werden muss, wird Sie unsere Hotline an Ihren Einzelhändler vor Ort weiterleiten. Lenco bietet Leistungen und Garantien in Übereinstimmung mit dem Europäischen Gesetz. Im Falle von Reparaturen (sowohl während als auch nach Ablauf der Garantiezeit) sollten Sie also Ihren Einzelhändler kontaktieren. Beachten Sie: Es ist nicht möglich, Geräte für Reparaturen direkt an Lenco zu schicken. -
Page 63: Entsorgung
Entsorgung von elektrischen Altgeräten (Richtlinie über die Entsorgung von elektrischen und elektronischen Altgeräten). Die durchgekreuzte Mülltone auf einem Produkt weist darauf hin, dass das Produkt in den Anwendungsbereich der EU-Richtlinie 2002/96/EC fällt. Lenco 2012, alle Rechte vorbehalten. ... - Page 64 L-90 HOUTEN DRAAITAFEL MET USB AANSLUITING EN INGEBOUWDE VOORVERSTERKER Gebruikershandleiding www.lenco.eu V1.0...
- Page 65 Onderhoud........................ 22 De naald vervangen ....................22 De cartridge demonteren..................22 Een nieuwe cartridge plaatsen ................22 Aanbevelingen van Lenco ..................22 Problemen oplossen....................23 Specificaties ......................24 Onderdelenlijst......................24 Veiligheidsinstructies ....................25 ...
-
Page 66: Wat Zit Er In De Doos
Het scherm dat als voorbeeld wordt weergegeven in deze handleiding kan verschillen van het daadwerkelijke scherm. Lenco is niet aansprakelijk voor enige gevolgschade. Wat zit er in de doos? Deze platenspeler is met de grootst mogelijke zorg samengesteld. -
Page 67: De Draaitafel Verkennen
1 x Quick Guide De draaitafel verkennen 1. Tegenwicht, gebruik het tegenwicht om de arm in evenwicht te houden. 2. Anti-skating regelaar: stelt de anit-verplaatsingsstand in. Gebruik deze stand om te voorkomen dat de cartridge richting het midden balanceert. 3. Hefboom voor de arm: verlaagt of verhoogt de arm. 4. -
Page 68: Aan De Slag Gaan
10. Auto stop schakelaar: deze functie is alleen voor 33 RPM platen. Nadat de plaat is afgelopen stopt het plateau automatisch met draaien. 11. USB poort: sluit de draaitafel aan op uw computer. 12. Uitlijningskabel: sluit de draaitafel aan op een mixer of audio-systeem. Belangrijke mededeling: Deze draaitafel heeft een ingebouwde versterker om scahde aan de draaitafel of uw audio-systeem te vooromen. -
Page 69: Basisbediening
Haal de draaitafel uit de mixer of het Hi-Fi systeem voordat u deze met de computer verbindt. De bijgeleverde software is een applicatie van derden en Lenco handelt daarom geen vragen of problemen af die betrekking hebben op deze software. - Page 70 5. Nadat de besturingsprogramma’s geïnstalleerd zijn dient u de Audacity software te installeren. Voor windows gebruikers; voer de CD in of download de nieuwste software via http://audacity.sourceforge.net Voor MAC gebruikers; download de nieuwste software via http://audacity.sourceforge.net Belangrijk: Zorg ervoor dat uw computer de draaitafel herkent als een opnameapparaat.
-
Page 71: Softwareconfiguratie (Windows Xp, Vista, Mac)
Softwareconfiguratie (Windows XP, Vista, MAC) 1. Sluit de draaitafel aan op de computer. Opmerking: Koppel de draaitafel los van uw audiosysteem voordat u de draaitafel aansluit op uw PC. 2. Start de Audacity-software 3. Klik op Microphone in het drop-down menu en selecteer “Stereo Mix” 4. -
Page 72: Software Installatie & Configuratie (Windows 7)
Software installatie & configuratie (Windows 7) 1. Sluit de draaitafel aan op het stopcontact. 2. Sluit de draaitafel met behulp van de USB-poort aan op uw computer en wacht enkele seconden tot de onderstaande popup op uw scherm verschijnt. 3. Klik op Sluiten. 4. - Page 73 12. Start de Audacity-software. ...
- Page 74 13. Ga naar de taakbalk en klik op "Edit" en daarna op "Preferences". Het onderstaande scherm verschijnt: 14. Selecteer in het pull-down menu “Recording”, “Device” de optie Microphone (USB-audio device). 15. Selecteer in het pull-down menu “Channels” de optie “2 (stereo)”. 16.
-
Page 75: Platen Digitaliseren
Haal de draaitafel uit de mixer of het Hi-Fi systeem voordat u deze met de computer verbindt. De bijgeleverde software is een applicatie van derden en Lenco handelt daarom geen vragen of problemen af die betrekking hebben op deze software. - Page 76 Record – start het opnemen van audio met de sample-rate van het project (de sample-rate in de linkeronderhoek van het venster). De nieuwe track start op de huidige positie van de cursor, dus klik eerst op "Skip to Start" als u wilt dat de track begint op tijdstip 0. Pause –...
- Page 77 Move Track Up – de geselecteerde track wisselt van positie met de track erboven. Move Track Down – de geselecteerde track wisselt van positie met de track eronder. Waveform – stel de weergave in op golfvormen – dit is de standaardmanier voor het visualiseren van audio.
- Page 78 naam "Composition" geeft, dan zal Audacity een bestand maken met de naam "Composition.aup" en een map met de naam Composition_data. Audacity- projectbestanden zijn niet bedoeld om te delen met andere programma’s – gebruik een van de Export-commando’s (zie hieronder) als u klaar bent met het bewerken van een bestand.
- Page 79 Undo – Dit zal de laatste bewerkoperatie die u heeft uitgevoerd in uw project ongedaan maken. Audacity ondersteunt volledig onbeperkt gebruik van undo – dit wil zeggen dat u elke bewerkoperatie ongedaan kunt maken vanaf het punt waarop u het venster heeft geopend. Redo –...
- Page 80 Snap-To ... > Snap On – Schakel deze functie in om de selectie te beperken tot de dichtstbijzijnde interval op de tijdschaal standaard de dichtstbijzijnde seconde. Als u klikt en sleept van 4,2 seconden tot 9,8 seconden, dan zal dit resulteren in een selectie van precies 4 seconden tot 10 seconden.
- Page 81 Import Audio... – Dit commando wordt gebruikt om audio van een standard audioformaat te importeren in uw project. Gebruik dit commando als u al een aantal tracks heeft en een andere track aan het project wilt toevoegen, bijvoorbeeld om ze te mixen.
- Page 82 Remove Tracks – Dit commando verwijdert de geselecteerde track of tracks uit het project. Zelfs als alleen een gedeelte van de track is geselecteerd, wordt de hele track verwijderd. U kunt ook een track verwijderen door op de X te klikken in de linkerbovenhoek.
- Page 83 er tot drie seconden audio afgespeeld, waardoor u kunt horen hoe het zal klinken nadat het effect is toegepast. Dit is handig voor het fijnafstemmen van de parameters van effecten. Repeat Last Effect – door dit commando te selecteren kunt u het laatst gebruikte effect met dezelfde instellingen nogmaals toepassen.
- Page 84 dB. Het is handig om al uw tracks voor het mixen te normaliseren. Als u veel tracks heeft, dan kunt u gebruik maken van de gain-sliders om bepaalde tracks zachter te maken. Nyquist Prompt – deze optie is alleen voor geavanceerde gebruikers. Hiermee kunt u willekeurige transformaties uitdrukken met behulp van een krachtige functionele programmeertaal.
-
Page 85: Onderhoud
Duw de cartridge in het omhulsel van de kop. Herpositioneer de naald. Plaats de beschermhuls om de naald. Aanbevelingen van Lenco Maak uw platen schoon met een doek die geïmpregneerd is met een antistatisch product. Vervang de naad ongeveer elke 250 speeluren. Een oude naald zorgt voor snellere verslijting van de platen. -
Page 86: Problemen Oplossen
Problemen oplossen Problem Solution Controleer of de voedingskabel in het stopcontact gestoken is. Controleer of de aan/uit-schakelaar aan Speelt niet / plateau draait niet rond de achterkant van de draaitafel op aan staat. Check if the belt is mounted correctly. Controleer of de hefboom van de arm Arm raakt het plateau niet aan omlaag is. -
Page 87: Specificaties
Specificaties In werking 10 Watt Energieverbruik Standby < 1 Watt Aandrijving Riemaandrijving Rubberen riem Versterker Ingebouwde voorversterker Draaisnelheid van het plateau 33 / 45 RPM Verstelbaar tegenwicht Anti-skating Kopomhulsel Verwijderbaar Bewegende magneet Gebonden 0.6 mm Cartridge Systeem Naaldpunt diamant Bolvormig Model nummer CR-2861 Vervangingsmodel... -
Page 88: Veiligheidsinstructies
Veiligheidsinstructies BELANGRIJKE VEILIGHEIDSINSTRUCTIES - LEES DEZE ZORGVULDIG DOOR VOOR GEBRUIK. WAARSCHUWING RISICO OP ELEKTRISCHE SCHOK NIET OPENEN WAARSCHUWING: VERWIJDER GEEN AFDEKSCHROEVEN OM EEN ELEKTRISCHE SCHOK TE VOORKOMEN. ER BEVINDEN ZICH GEEN VOOR DE GEBRUIKER BRUIKBARE ONDERDELEN IN DIT APPARAAT. VRAAG VOOR ONDERHOUD NAAR EEN GEKWALIFICEERD SERVICEPERSOON. - Page 89 Veiligheidsinstructies - vervolg Elektrostatische storing kan normaal gebruik van deze platenspeler verstoren. Wanneer dit gebeurt, reset het apparaat dan en start het opnieuw op volgens de gebruikershandleiding. Handel voorzichtig en in een statisch-vrije omgeving tijdens bestandsoverdracht. WAARSCHUWING! STEEK NOOIT OBJECT VENTIELATIESCHACHTEN OF OPENINGEN IN HET APPARAAT.
-
Page 90: Verklarking Van Conformiteit
NOOIT oplosmiddelen of vloeistoffen op basis van benzine. Om erge vlekken te verwijderen mag u een vochtig doekje met verdund reinigingsmiddel gebruiken. Lenco is niet verantwoordelijk voor schade of dataverlies veroorzaakt door verkeerde werking, misbruik, aanpassing aan het apparaat. -
Page 91: Disclaimer
VAN HET GEBRUIK VAN ENIGE INHOUD OF SERIVCE DOOR U OF ELKE DERDE, ZELFS BIJ ADVISERING OVER DE MOGELIJKHEID VAN DERGELIJKE SCHADE." Services door derden kunnen op elk moment worden afgebroken of onderbroken, en Lenco geeft geen verklaring of garantie dat enige inhoud of service beschikbaar blijft voor enige periode. -
Page 92: Service En Ondersteuning
Lenco biedt service en garantie aan in overeenstemming met de Europese wetgeving, wat betekent dat u uw lokale dealer dient te contacteren in geval van reparatie (zowel tijdens of na de garantieperiode). Belangrijke mededeling: Het is niet mogelijk om producten rechtstreeks naar Lenco te sturen voor reparatie. -
Page 93: Einde Levensduur
(Waste Electrical and Electronic Equipment Directive). Wanneer u een container op wielen met een kruisje erdoor op het product ziet staan, betekent dit dat het product onder de EU richtlijn 2002/96/EC valt. Lenco 2012, all rights reserved. ... - Page 94 L-90 TOURNE-DISQUE BOIS AVEC CONNEXION USB ET PRÉAMPLIFICATEUR INTÉGRÉ Manuel de l’utilisateur www.lenco.eu...
- Page 95 Comment remplacer le stylet................. 24 Comment démonter la cartouche ................24 Comment installer une nouvelle cartouche ............25 Recommandations de Lenco................. 25 Résolution des problèmes ..................25 Spécifications ......................27 Liste des pièces détachées ..................27 ...
-
Page 96: Contenu Du Paquet
Cher client, Merci d’avoir acheté ce produit Lenco. La qualité et le confort d’utilisation sont nos priorités principales. Afin de vous permettre d'apprécier au maximum ce produit, nous l’avons fabriqué en respectant des standards élevés de qualité, de matériel, de composants et de soin. -
Page 97: Découvrir Le Tourne-Disque
Découvrir le tourne-disque 1. Contrepoids, utilisez le contrepoids pour équilibrer le bras de lecture. Commande anti dérapage : réglez la tenue du bras. Utilisez le mode anti dérapage pour empêcher le bras ne dévie vers le centre. 3. Levier de bras de lecture : soulève ou abaisse le bras. 4. -
Page 98: Pour Commencer
Interrupteur d’arrêt automatique : cette fonction ne sert que pour les disques 33 tours. Une fois que le disque est termine, le plateau s’arrête automatiquement de tourner. 11. Port USB : connecte le tourne-disque sur votre ordinateur. 12. Sortie ligne : connecte le tourne-disque sur un mélangeur ou sur un système sonore Remarque importante : Ce tourne-disque dispose d’un préampli intégré... -
Page 99: Fonctionnement Basique
Lenco recommande de régler la pression de l’aiguille sur 2,5. 5. Régler la protection contre le dérapage. Lenco recommande que la protection anti dérapage soit d’environ la moitié de l’aiguille, pour un résultat optimal essayez différents réglages. 6. Placez les charnières et montez le couvercle anti poussière. -
Page 100: Configuration Du Logiciel (Windows Xp, Vista, Mac)
Lenco ne traitera aucune question relative au logiciel. 1. Allumez l’ordinateur 2. Connectez le tourne-disque sur une prise d’alimentation murale. 3. Positionnez l’interrupteur d’alimentation principal sur l’arrière du tourne-disque sur la position « on ». 4. Si l‘ordinateur a démarré, connectez le tourne-disque. L’ordinateur installera alors les pilotes. - Page 101 7. Appuyez sur « okay » pour confirmer le réglage. 8. le logiciel est à présent prêt à enregistrer. ...
-
Page 102: Installation Et Configuration Du Logiciel (Windows 7)
Installation et configuration du logiciel (Windows 7) 1. Connectez le tourne-disque sur une prise d’alimentation murale. 2. Connectez le tourne-disque sur un port USB de votre ordinateur. Attendez quelques secondes que la fenêtre de dialogue apparaisse sur l’écran, comme dans l’illustration ci-dessous. 3. - Page 103 10. Insérez le CD du logiciel Audacity dans le lecteur CD, ou téléchargez la dernière version du logiciel gratuitement sur http://audacity.sourceforge.net/. 11. Suivez les instructions d’installation décrites dans ce manuel d’instruction. 12. Lancez le logiciel Audacity. 13. Allez sur la barre des taches et cliquez sur « éditer », puis sur « préférences ». Un écran apparait comme illustré...
-
Page 104: Numériser Des Disques
Hi-Fi. Le logiciel fourni est une application de tiers et par conséquent Lenco ne traitera aucune question relative au logiciel. 1. Allumez l’ordinateur 2. Connectez le tourne-disque sur une prise d’alimentation murale. - Page 105 Revenir au début : Déplacez le curseur sur le temps 0 (par exemple : le début d’une chanson). Si vous appuyez sur Lecture à ce moment-la, votre tourne-disque lira depuis le début. Lecture : Lit le son sur la position du curseur. Si vous avez sélectionné...
- Page 106 Supprime le son hors de la sélection Coupe le son de la sélection audio Retour Refaire (répète la dernière commande). Agrandissement Rétrécissement Adapte la sélection à la fenêtre : Zoome jusqu'à ce que la sélection s'adapte à la fenêtre. Adapte le projet à la fenêtre : Zoome jusqu'à ce que la bande entière s'adapte à...
- Page 107 Mono : Le son sort seulement d’un haut parleur, soit le droit, soit le gauche. Canal gauche : Lit la piste seulement dans le haut-parleur gauche. Canal droit : Lit la piste seulement dans le haut-parleur droit. Faire une piste stéréo : S’il y a une autre piste sous celle en cours de lecture, cette fonction l’ajoute dans une piste stéréo unique.
- Page 108 l’une des commandes « exporter » (sous) lorsque vous avez terminé de modifier un fichier. Sauvegarder le projet : Similairement à « sauvegarder le projet » (ci-dessus), mais vous permet de renommer le fichier comme vous le souhaitez. Fichiers récents : Affiche une liste des fichiers récemment ouverts dans Audacity, vous permettant de les ré-ouvrir rapidement.
- Page 109 Imprimer : Imprime la vue de la fenêtre principale d’Audacity, indiquant les pistes et les formes de signal. Sortie (quitter) : Ferme toutes les fenêtres et sort d’Audacity, vous invitant à sauvegarder les modifications préalablement. Le menu « Modifier » Retour : Défait la dernière opération d’édition que vous avez exécuté sur votre projet. Audacity prend en charge un retour complet sans limite, ce qui signifie que vous pouvez défaire toutes les modifications apportées au cours d’une session.
- Page 110 Sélectionner… > Démarrer au curseur : Sélectionne tout depuis le début des pistes sélectionnées sur la position du curseur. Sélectionner… > Curseur jusqu'à la fin : Sélectionne depuis l'emplacement du curseur jusqu'à la fin des pistes sélectionnées. Trouver zéro croisements : Modifie légèrement la sélection, afin que les deux extrémités, droite et gauche, de la sélection apparaissent sur une pente positive sans croisement.
- Page 111 Ajuster à la fenêtre : Rétréci jusqu'à ce que le projet entier s’ajuste à la fenêtre. Ajuster verticalement : Redimensionne toutes les pistes verticalement, leur permettant de rentrer dans la fenêtre (si possible). Agrandir la sélection : Agrandi ou rétréci de manière q ce que la sélection remplisse la fenêtre.
- Page 112 Importer des étiquettes : Prenez un fichier texte qui contient des codes de temps et des étiquettes, et convertissez-les en une « piste étiquetée ». Importer des fichiers MIDI : Importe des fichiers MIDI et les place dans une piste MIDI.
- Page 113 Enlever des pistes : Supprime la piste sélectionnée, ou les pistes du projet. Même si vous n’avez sélectionné qu’une partie d’une piste, cette fonction supprime la piste entière. Vous pouvez également effacer une piste en cliquant sur la X dans son coin supérieur gauche.
- Page 114 effets ne fonctionnant pas sur une entrée audio seront placés automatiquement dans le menu Générer. Le menu « Effets » Les éléments dans ce menu ne fonctionnent que si vous avez sélectionné un son. Audacity ne dispose d’effet en temps réel ; vous devez sélectionner le son par vous- même, appliquer un effet et écouter les résultats.
- Page 115 Equaliseur: Augmente ou diminue les fréquences aléatoires. Vous pouvez sélectionner l’un des numéro de courbes différents qui visent à égaliser les sons de certains fabricants de disques populaires, ou de dessiner votre propre courbe. Fondu : Fait un fondu avec la sélection de manière linéaire Déclin graduel : Fait un déclin graduel avec la sélection de manière linéaire Filtre FFT : Similaire à...
-
Page 116: Entretien
Plugins 1 à 15 (etc.) : Ces sous-menus contiennent tous les plug-ins VST, Ladspa ou Nyquist, téléchargés par Audacity. Il est possible qu’un plug-in mal écrit fasse échouer Audacity, donc sauvegardez toujours votre travail avant d’utiliser un effet avec plug-in. Le menu «... -
Page 117: Comment Remplacer Le Stylet
Comment remplacer le stylet Verrouillez le bras de lecture. Enlevez le couvercle de protection du stylet. Tirez le stylet dans la direction de la flèche (A) et enlevez-le. Installez le nouveau stylet de la manière inverse. ... -
Page 118: Comment Installer Une Nouvelle Cartouche
Poussez la cartouche dans la tête de lecture Repositionnez le stylet Placez le couvercle de protection du stylet. Recommandations de Lenco Nettoyez vos vinyles avec un chiffon imprégné de produit antistatique. Remplacez le stylet environ toutes les 250 heures de lecture. Une ancienne cartouche use le disque plus rapidement. - Page 119 l’enregistrement avec Audacity d’Audacity. ...
-
Page 120: Spécifications
Spécifications Utilisation 10 Watt Consommation énergétique Veille < 1 Watt Transmission Courroie Courroie en caoutchouc d’entrainement Amplificateur Préampli intégré Vitesse de rotation du plateau 33/45 tours Contrepoids réglable Anti-dérapage Tête de lecture Amovible Aimant mobile Cartouche Diamant meulé 0.6 mm Système Pointe du style Forme de sphère... -
Page 121: Précautions De Sécurité
Précautions de sécurité PRÉCAUTIONS DE SÉCURITÉ IMPORTANTES – LIRE ATTENTIVEMENT AVANT UTILISATION. ATTENTION RISQUE DE CHOC ÉLECTRIQUE NE PAS OUVRIR ATTENTION : POUR PRÉVENIR LES CHOCS ÉLECTRIQUES, N’ENLEVEZ AUCUNE DES VIS DE PROTECTION. IL N’Y A AUCUNE PIÈCE UTILE À L’UTILISATEUR À L’INTÉRIEUR. FAITES APPEL À DU PERSONNEL QUALIFIÉ... - Page 122 à base de pétrole. Pour les tâches difficile, vous pouvez utiliser un linge humide avec du détergent dilué. Lenco n’est pas responsables des dégâts ou de la perte de données résultant d’un mauvais fonctionnement, d’usage erroné, de modification de l’appareil ou du remplacement de la batterie.
-
Page 123: Déclaration De Conformité
AVERTISSEMENT: Une exposition prolongée à de forts volumes sonores peut causer des pertes d’audition temporaires ou permanentes. Déclaration de conformité Les produits avec la marque CE sont conformes à la directive CEM (2004/108/CE) et à la directive basse tension (2006/95/EC) émises par la commission de la communauté... -
Page 124: Dégagement De Responsabilité
L’UTILISATION DE TOUT CONTENU OU SERVICE PAR VOUS OU UN TIERS, MEME SI AVERTIS DE LA POSSIBILITE DE TELS DEGATS. Les services de tiers peuvent être terminés ou interrompus à tout moment, et Lenco ne fait aucune allégation ou garantie que les contenus ou services resteront disponibles pour une période de temps. -
Page 125: Service Et Support
Lenco propose un service et une garantie conformément aux lois européenne, ce qui signifie qu’en besoin de réparation (aussi bien pendant et après la période de garantie), vous pouvez contacter votre revendeur le plus proche. À prendre en considération: Il n’est pas possible de renvoyer l’appareil pour réparation directement... -
Page 126: Fin De Vie Du Produit
électriques (Directive relative aux déchets d’équipements électriques et électroniques). Lorsque vous voyez un container à roue barré sur le produit, cela signifie que les produit est sujet a la directive UE 2002/96/EC. Lenco 2012, Tous droits réservés. ... - Page 127 L-90 TOCADISCOS EN MADERA CON CONEXIÓN USB Y PREAMPLIFICADOR Manual del usuario www.lenco.eu V1.0...
- Page 128 Cómo sustituir la aguja..................22 Cómo desmontar el cartucho ................22 Cómo instalar un nuevo cartucho................23 Recomendaciones de Lenco ................. 23 Localización y resolución de problemas ..............24 Especificaciones....................... 25 Lista de recambios ....................25 ...
-
Page 129: Qué Contiene La Caja
Estimado cliente, Le damos las gracias por adquirir este producto Lenco. La calidad y facilidad de uso son nuestras principales prioridades. Para que usted pueda disfrutar enteramente de este producto, lo hemos fabricado con estándares, materiales y componentes de alta calidad, además de sumo... -
Page 130: Conocimiento Del Tocadiscos
Conocimiento del tocadiscos 1. Contrapeso: use el contrapeso para equilibrar el brazo del tocadiscos. 2. Control antivibraciones: para evitar las vibraciones. Use este control para evitar que el cartucho se corra hacia el centro. 3. Palanca del brazo del tocadiscos: alza o baja el brazo del tocadiscos. 4. -
Page 131: Iniciación
10. Interruptor de detención automática: está función será válida solo para discos de 33 RPM. Una vez termine de reproducirse el disco, el plato dejará de girar automáticamente. 11. Puerto USB: conecta el tocadiscos a un ordenador. 12. Line out: conecta el tocadiscos a un mezclador o a un sistema de audio. Nota importante: Este tocadiscos incorpora un amplificador para evitar que el propio tocadiscos o su sistema de audio se estropeen. -
Page 132: Funcionamiento Básico
Antes de conectar el tocadiscos a un ordenador, desenchúfelo de su mezclador o sistema Hi-Fi. El software que se incluye es una aplicación de terceros y, por lo tanto, Lenco no procesará ninguna pregunta o problema referente a dicho software. 1. Encienda el ordenador. -
Page 133: Configuración Del Software (Windows Xp, Vista, Mac)
4. Cuando el ordenador esté encendido, conecte el tocadiscos. El ordenador instalará entonces los drivers. 5. Una vez se hayan instalado los drivers, será preciso instalar el software Audacity. Para usuarios de Winddows; introduzca el CD o descargue el último software en http://audacity.sourceforge.net ... -
Page 134: Instalación Del Software Y Configuración (Windows 7)
Instalación del software y configuración (Windows 7) 1. Conecte el tocadiscos a una toma de corriente. 2. Conecte el tocadiscos a una toma USB de su ordenador y espere unos segundos hasta que aparezca la pantalla que se muestra a continuación. 3. - Page 135 10. Introduzca el CD del software Audacity en su unidad de disco o descárguelo gratuitamente en http://audacity.sourceforge.net/. 11. Siga las instrucciones de instalación como se describe en el manual de instrucciones. 12. Ejecute el software Audacity. 13. Vaya a la barra de herramientas y haga clic en "Edit" y después en "Preferences". Se mostrará...
-
Page 136: Digitalización De Discos
Antes de conectar el tocadiscos a un ordenador, desenchúfelo de su mezclador o sistema Hi-Fi. El software que se incluye es una aplicación de terceros y, por lo tanto, Lenco no procesará ninguna pregunta o problema referente a dicho software. 1. Encienda el ordenador. - Page 137 Reproducir - empieza la reproducción de audio en la posición del cursor. Si selecciona audio, solo se reproducirá la selección Bucle - si mantiene pulsado el botón Shift, el botón Reproducir pasa al botón Bucle, que le permite reproducir la selección una y otra vez Grabar - inicia la grabación de audio a la velocidad de muestreo del proyecto (la velocidad de muestreo de la esquina inferior izquierda de la pantalla).
- Page 138 Rehacer (repetición del último comando). Aumento Reducción Ajustar la selección en la pantalla - aumenta hasta que la selección se ajuste a toda la ventana. Ajuste del proyecto en la ventana - aumenta hasta que todo el audio se ajuste en la ventana. Menú...
- Page 139 Hacer pista estéreo - Si hay otra pista debajo, se une a ella para formar una sola pista estéreo, con la pista superior representando el altavoz izquierdo, y la pista inferior representando el derecho. Cuando las pistas están unidas en un par estéreo, todas las ediciones se aplicarán automáticamente tanto al canal izquierdo como al derecho.
- Page 140 Archivos recientes ... - Hace aparecer una lista de archivos que usted ha abierto recientemente en Audacity para reabrirlos rápidamente. Exportar como WAV... -Exporta todo el audio de su proyecto como archivo WAV, un formato estándar de la industria para audio descomprimido. Podrá variar el formato de archivo estándar usado para la exportación de Audacity abriendo "Formato de archivo Preferencias"...
- Page 141 Menú de “Edición” Deshacer - Esto deshará la última operación de edición que usted llevó a cabo en su proyecto. Audacity permite deshacer de forma ilimitada - lo que significa que podrá deshacer cada operación de edición volviendo al estado en que se encontraba al abrir la ventana.
- Page 142 Seleccionar ... > Desde el cursor hasta el final- Selecciona desde la posición del cursor hasta el final de las pistas seleccionadas. Encontrar cero cruces - Modifica ligeramente la selección, de modo que los bordes izquierdo y derecho de la selección aparezcan en un cruce positivo con pendiente cero.
- Page 143 Ajuste de la ventana - Realiza un zoom de reducción hasta que el proyecto entero ocupa toda la ventana. Ajuste vertical - Redimensiona todas las pistas verticalmente para que quepan dentro de la ventana (si fuera posible). Zoom de la selección - Aumente o reduzca para que la selección ocupe toda la pantalla.
- Page 144 dos proyectos Audacity es abrirlos en ventanas separadas, para después copiar y pegar las pistas. Importar etiquetas... - Este comando toma un archivo de texto que contenga códigos de tiempo y etiquetas, convirtiéndolos en "Pistas de etiqueta". Importar MIDI... - Este comando del menú importa archivos MIDI y los ubica en una Pista MIDI.
- Page 145 Nueva pista de tiempo - Crea una nueva pista de tiempo, empleada para variar la velocidad de reproducción conforme avanza el tiempo. Quitar pistas - Este comando quita la pista o pista(s) seleccionada(s) del proyecto. Incluso si solo se ha seleccionado una parte de una pista, se retirará toda la pista. Podrá...
- Page 146 en cuenta que cualquier efecto que no tome audio como entrada será ubicado automáticamente en el Menú de generación. Menú de “Efectos” Los elementos de este menú solo funcionan cuando usted haya seleccionado audio. Audacity no contiene efectos en tiempo real; usted deberá seleccionar el audio, aplicar el efecto y después escuchar los resultados.
- Page 147 Ecualizador - Potencia o reduce frecuencias arbitrarias. Podrá seleccionar una entre un número de curvas diferentes diseñadas para actualizar el sonido de algunos fabricantes famosos de discos, o trazar su propia curva. Fundido de entrada - La selección va apareciendo linealmente Fundido de salida - La selección va desapareciendo linealmente Filtro FFT - Similar a "Ecualizador", le permite potenciar o reducir frecuencias arbitrarias.
-
Page 148: Mantenimiento
Plug-ins 1 a 15 ..., etc. Estos submenús contienen cualquier plug-in VST, Ladspa o Nyquist cargado por Audacity. Será posible que un plug-in mal escrito estropee Audacity, así que lo mejor será guardar sus tareas siempre que vaya a usar un efecto plug-in. -
Page 149: Cómo Instalar Un Nuevo Cartucho
Presione el cartucho contra la cápsula. Recoloque la aguja. Coloque el capuchón protector en la aguja. Recomendaciones de Lenco Limpie sus discos usando un trapo impregnado con un producto antiestático. Sustituya la aguja aproximadamente cada 250 horas de reproducción. Un cartucho viejo gasta lo discos mucho más rápido. -
Page 150: Localización Y Resolución De Problemas
Localización y resolución de problemas Problema Solución Asegúrese cable alimentación ha sido enchufado a la toma de corriente. Asegúrese de haber posicionado el No se reproduce / el plato no gira interruptor principal de encendido de la parte posterior del tocadiscos en la posición "On". -
Page 151: Especificaciones
Especificaciones En uso 10 Vatios Consumo eléctrico En espera < 1 Vatio Transmisión Transmisión por Correa de goma correa Amplificador Sí Preamplificador incorporado Velocidad de giro del plato 33 / 45 RPM Contrapeso ajustable Sí Antivibración Sí Cápsula Extraíble Sí Imán móvil Diamante 0,6 mm... -
Page 152: Instrucciones De Seguridad
Instrucciones de seguridad IMPORTANTES INSTRUCCIONES DE SEGURIDAD – LEA ATENTAMENTE ANTES DEL USO. PRECAUCIÓN RIESGO DE DESCARGA ELÉCTRICA NO ABRIR PRECAUCIÓN: PARA EVITAR UNA DESCARGA ELÉCTRICA, NO RETIRE NINGUNO DE LOS TORNILLOS DE LA CUBIERTA. EL INTERIOR DEL APARATO NO CONTIENE PARTES QUE PUEDAN SER REPARADAS POR EL USUARIO. - Page 153 instrucciones. Durante la transmisión de archivos, por favor, tenga cuidado y use la tableta en un entorno sin electricidad estática. ¡ADVERTENCIA! NO INTRODUZCA OBJETOS EN EL PRODUCTO A TRAVÉS DE LAS ABERTURAS DE VENTILACIÓN U OTROS ORIFICIOS. POR EL PRODUCTO PASA UN FLUJO CONTINUO DE CORRIENTE, POR LO QUE LA INSERCIÓN DE UN OBJETO PODRÍA CAUSAR UNA DESCARGA ELÉCTRICA Y/O UN CORTOCIRCUITO DE LOS COMPONENTES INTERNOS.
-
Page 154: Declaración De Conformidad
Lenco no se responsabiliza por los posibles daños o pérdida de datos causados por un fallo de funcionamiento, mal uso o modificación del aparato. ADVERTENCIA: la exposición prolongada a un volumen elevado con los auriculares podría llevar a sordera temporal o permanente. -
Page 155: Aviso De Exención De Responsabilidad
Lenco no expresará ni garantizará que algún contenido o servicio permanecerá disponible durante cierto periodo. Los contenidos y servicios son transmitidos por terceros mediante redes y centros de transmisión sobre las que Lenco no tiene ningún control. Sin limitar la generalidad de este aviso de exención de responsabilidad, Lenco declina expresamente cualquier responsabilidad por la posible interrupción o suspensión de cualquier contenido o... -
Page 156: Servicio Y Asistencia
El teléfono de asistencia está disponible de lunes a jueves, de 9 de la mañana a 6 de la tarde. Lenco ofrece servicio y garantía en cumplimiento de la ley de la Unión Europea, lo cual implica que en caso de que su producto precise ser reparado (tanto durante como después del periodo de garantía), deberá... -
Page 157: Final De La Vida Útil
(Directiva de Residuos de Aparatos Eléctricos y Electrónicos). Cuando vea un símbolo con un contenedor de ruedas con una cruz en el producto, significa que dicho producto pertenece al ámbito de la directiva de la UE 2002/96/EC. ©Lenco 2012, todos los derechos reservados. ...
Need help?
Do you have a question about the L-90 and is the answer not in the manual?
Questions and answers