LENCO L-90 User Manual
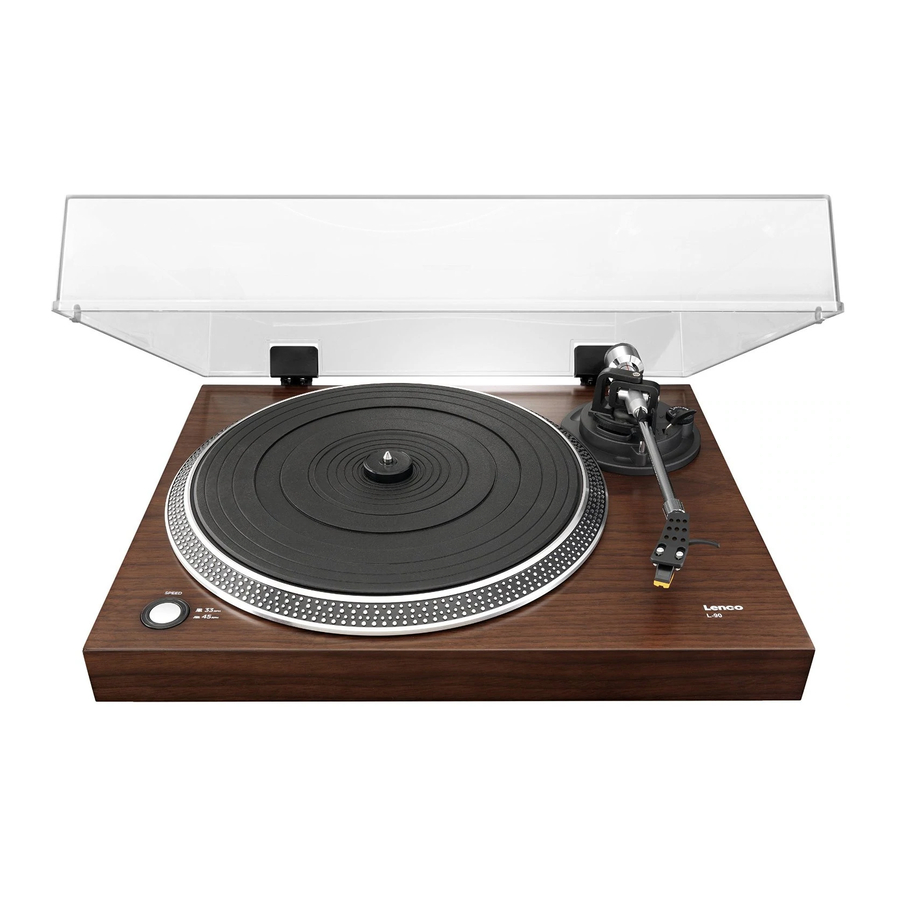
Wooden turntable with usb connection and built-in pre amplifier
Hide thumbs
Also See for L-90:
- Quick manual (11 pages) ,
- User manual (157 pages) ,
- User manual (112 pages)

Subscribe to Our Youtube Channel
Related Manuals for LENCO L-90


Summary of Contents for LENCO L-90
-
Page 1: User Manual
L-90 WOODEN TURNTABLE WITH USB CONNECTION AND BUILT-IN PRE AMPLIFIER User Manual www.lenco.eu V1.0... -
Page 2: Table Of Contents
Maintenance ......................23 How to replace the stylus ..................24 How to disassemble the cartridge ................. 24 How to install a new cartridge ................24 Recommendations from Lenco ................25 Trouble shooting ...................... 25 Specifications ......................26 Spare parts list ......................26 Safety instructions .................... -
Page 3: What Is In The Box
Dear customer, Thank you for buying this Lenco product. Quality and usability is our top priority. In order to let you fully enjoy this turntable, we have manufactured this product using high quality standards, materials, components, and care. Please read all safety instructions and national restrictions, before you use this turntable. -
Page 4: Exploring The Turntable
1 x Quick Guide Exploring the turntable 1. Counterweight, use the counterweight to balance the tone arm. 2. Anti-Skating control: sets the anti-skating. Use anti-skating to prevent the cartridge from swinging in towards the centre. 3. Tone arm lever: lowers or raises the tone arm. 4. -
Page 5: Getting Started
Turn the metal part to the left to increase the needle pressure. Lenco recommends to set the needle pressure to 2,5. 5. Set the anti-skating. Lenco recommends equaling the anti-skating to the needle pressure. 6. Place the hinges and mount the dust cover. - Page 6 8. Connect the line out cables to a mixer or HiFi system. Important note: This turntable has a built-in amplifier to avoid damage on the turntable or your audio-system. Do not connect this turntable to your audio-system by using the phone-input because this input is also amplified.
-
Page 7: Basic Operation
Before you connect the turntable to a computer, unplug it from your mixer or Hi-Fi system. The included software is a third party application and therefore Lenco does not handle any questions or problems regarding the software. 1. Switch the computer on 2. -
Page 9: Software Installation & Configuration (Windows 7)
Select the “Edit” menu and then “Preferences” 4. Select the USB audio device under the “Recording” selection as shown in the example below. 5. Select “Software Playthrough” to listen to the audio while recording. 6. Press “okay” to save your settings. 7. - Page 10 4. Click with the right mouse-button on the speaker icon (taskbar) and select “recording”. The screen as shown in the example below appears. 5. Click on “microphone USB audio device”. 6. Click on “properties”. 7. Go to the Tab "levels" and move the volume slider down to level 2 as shown in example below.
- Page 11 13. Go to the taskbar and click on "edit" and then on "preferences". The screen as shown in the example below appears. 14. Go to the “recording device” pull-down menu and select the option “microphone” (USB-audio device). 15. Go to the “channels” pull-down menu and select option 2 (stereo) 16.
-
Page 12: Digitalizing Records
Before you connect the turntable to a computer, unplug it from your mixer or Hi-Fi system. The included software is a third party application and therefore Lenco does not support questions or problems with or about the software. 1. Switch the computer on 2. - Page 13 Loop: if you press and hold the “shift” key, the “play” button changes to a “loop” button, enabling you to play the selection repeatedly. Record: records audio at the project’s sample rate (the sample rate in the lower-left corner of the window). The new track will begin at the current cursor position, so click the "skip to start"...
- Page 14 Zoom Out Fit selection in window: zooms until the selection just fits inside the window. Fit project in window: zooms until all of the audio just fits inside the window. The “Track Pop-Down” Menu If you click on the title of a music track, the “track” pop-down menu appears. This lets you access a few special commands that apply to individual tracks.
- Page 15 Set Sample Format: determines the quality of the audio data, and the amount of disk space it requires. 16-Bit is the quality used by audio CD's and is the minimum quality that Audacity uses internally (8-bit audio files are automatically converted when you open them).
- Page 16 Export as MP3: exports audio as an MP3 file. As MP3 files are compressed, they use less disk space, but they lose some audio quality. Another compress alternative is Ogg Vorbis (see below). You can set the quality of MP3 compression in the File Format Preferences.
- Page 17 Paste: inserts whatever is on the clipboard at the selected position, or cursor position in the project. This replaces any selected audio data, if any. Trim: removes everything to the left and right of the selection. Delete: removes all selected audio data without copying it to the clipboard. Silence: suppresses all selected audio data, replacing said data with silence, instead of removing it.
- Page 18 Move Cursor ... > to Selection End: moves the cursor to the end of the current selection. Snap-To ... > Snap On: enables the “snap-to” mode. This mode constrains the selection to the nearest interval on the time scale, by default the nearest second. Therefore, if you click and drag from 4.2 seconds to 9.8 seconds, it results in a selection from precisely 4 seconds to 10 seconds.
- Page 19 Float Edit Toolbar: moves the “edit toolbar” out of the window and into its own floating window, so you can position it wherever you want. The menu item changes to “dock edit toolbar”, which you can use to put the toolbar back into the main window. Float Meter Toolbar: does the same thing for audacity's VU meters, which you use to set recording levels and adjust playback.
- Page 20 However, you can use this command to cut, or copy, data from an existing track and paste it into a blank track. If that track was at a non-default rate, then you may need to use “set rate” from the “track pop-down” menu to set the correct sample rate. New Stereo Track: see above, but this command creates a stereo track.
- Page 21 Tone: creates a “sine wave”, “square wave”, or “Sawtooth wave”. White Noise: inserts random audio samples, sounding like pure static. Any items, which appear after these three built-ins, are VST, Ladspa, or Nyquist plug- ins. A poorly written plug-in may crash Audacity, so always save your work before using a plug-in.
- Page 22 want to add silence to the end of the track before applying it (using the “generate menu”). Equalization: boosts or reduces random frequencies. You can select one of a number of different curves designed to equalize the sound of some popular record manufacturers, or draw your own curve.
-
Page 23: Maintenance
Plugins 1 to 15 (etc).: these sub-menus contain any VST, Ladspa, or Nyquist plug- ins, as loaded by audacity. It is possible for a poorly written plug-in to crash Audacity, so always save your work before using a plug-in effect. The “Analyze”... -
Page 24: How To Replace The Stylus
How to replace the stylus Lock the tone arm. Remove the protective cap from the stylus. Pull the stylus in the direction of the arrow (A) and remove it. Put in the new stylus following the reverse procedure. ... -
Page 25: Recommendations From Lenco
Recommendations from Lenco Clean your records with a rag, impregnated with an antistatic product. Replace the stylus approximately every 250 playing hours. An old cartridge wears out the records much faster. Clean the stylus regularly with a soft brush dipped in alcohol. -
Page 26: Specifications
Specifications Operation 10 Watt Power consumption Standby < 1 Watt Drive Belt drive Rubber belt Amplifier Built in pre-amplifier Platter rotating speed 33 / 45 RPM Adjustable counter weight Anti-skating Headshell Removable Moving magnet Bonded 0.6 mm Cartridge diamond System Stylus tip Sphere shaped Model number... -
Page 27: Safety Instructions
Safety instructions IMPORTANT SAFETY INSTRUCTIONS - READ CAREFULLY BEFORE USE. CAUTION RISK OF ELECTRICAL SHOCK DO NOT OPEN CAUTION: TO PREVENT AN ELECTRICAL SHOCK, DO NOT REMOVE ANY COVER SCREWS. THERE ARE NO USER SERVICEABLE PARTS INSIDE. REQUEST A QUALIFIED SERVICE PERSON TO PERFORM SERVICING. - Page 28 ESD can disturb normal usage of this turntable. If so, simply reset and restart the device following the instruction manual. During file transmission, please handle with care and operate in a static-free environment. Safety instructions - continued WARNING! NEVER INSERT AN OBJECT INTO THE PRODUCT THROUGH THE VENTS OR OPENINGS.
-
Page 29: Declaration Of Conformity
OR SERVICE BY YOU OR ANY THIRD PARTY, EVEN IF ADVISED OF THE POSSIBILITY OF SUCH DAMAGES.” Third party services may be terminated or interrupted at any time, and Lenco makes no representation or warranty that any content or service will remain available for any period. -
Page 30: Service And Support
(both during and after the warranty period), you should contact your local dealer. Please note: It is not possible to send repairs to Lenco directly. Important note: If the unit is opened by a non-official service center the warranty... -
Page 31: End Of Life
(Waste Electrical and Electronic Equipment Directive). When you see a crossed-out wheeled waste container on the product. It means that the product falls under the EU directive 2002/96/EC. ©Lenco 2012, all rights reserved.
Need help?
Do you have a question about the L-90 and is the answer not in the manual?
Questions and answers