Table of Contents
Advertisement
Quick Links
Advertisement
Table of Contents

Related Manuals for Russell Hobbs 18995-56


Summary of Contents for Russell Hobbs 18995-56
- Page 1 INSTRUCTIONS AND WARRANTY MODEL NO. 18995-56 AURA 750W 2-IN-1 GLASS JUG BLENDER...
-
Page 2: Important Safeguards
Thank you for purchasing the Russell Hobbs Aura 750W 2-in-1 Glass Jug Blender. Each unit has been manufactured to ensure safety, reliability and ease of use. Before use, please read these instructions carefully and keep them for further reference. FEATURES OF THE RUSSELL HOBBS AURA 750W 2-IN-1 GLASS JUG BLENDER ... - Page 3 stop before removing the lid from the jug, and before removing the jug from the motor/ base unit. This appliance is not intended for use by persons (including children) with reduced physical, sensory or mental capabilities, or lack of experience and knowledge, unless they have been given supervision or instruction concerning use of the appliance by a person responsible for their safety.
- Page 4 Do not use the blender for any purpose other than those described in these instructions. Do not run the blender empty, as it may overheat. Do not operate the blender after it malfunctions. If the mains lead or plug is damaged, return the blender to the manufacturer in order to avoid any hazard.
-
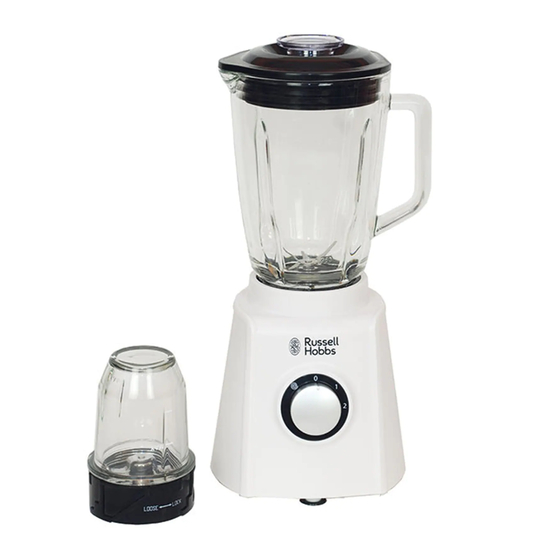
Page 5: Parts Diagram
PARTS DIAGRAM BEFORE FIRST USE Before using your appliance for the first time take it out of the box and take off any protective wrappings. REMEMBER: DO NOT LEAVE PROTECTIVE PACKAGING LYING AROUND, AS IT COULD BE DANGEROUS AROUND INFANTS. Wash the jug, lid and cap in warm soapy water, rinse well and dry. -
Page 6: Speed Control
Do not run the blender without the cap. POWER UP Check that the speed control is set to 0. Put the plug into the power socket and switch on. SPEED CONTROL Turn the speed control clockwise (1 = low, 2 = high). Turn it back to 0 to turn the motor off. -
Page 7: Cleaning And Maintenance
Align the “arrow” on the bottom of the mill base with the “open lock” on the motor unit. Lower the mill on to the motor unit, then turn, to align the “arrow” with the “closed lock”. Turn the speed control in short bursts until you achieve the size of grind you want. ... -
Page 8: Storing The Appliance
Remove the jug from the motor unit. Wash the jug, lid and measuring cup in warm soapy water, rinse well, then turn the jug upside down to drain and dry. Keep hands out of the jug – BLADES ARE VERY SHARP. ... -
Page 9: Changing The Plug
CHANGING THE PLUG Should the need arise to change the fitted plug, follow the instructions below. This unit is designed to operate on the stated current only. Connecting to other power sources may damage the appliance. Connect a three-pin plug as follows: The wires in this mains lead are coloured in accordance with the following code: Green/Yellow = Earth... - Page 10 PLEASE AFFIX YOUR PROOF OF PURCHASE/RECEIPT HERE IN THE EVENT OF A CLAIM UNDER WARRANTY THIS RECEIPT MUST BE PRODUCED. W A R R A N T Y 1. Home of Living Brands (Pty) Limited (“Home of Living Brands”) warrants to the original purchaser of this product (“the customer”) that this product will be free of defects in quality and workmanship which under normal personal, family or household use and purpose may manifest within a period of 1 (one) year from the date of purchase (“warranty period”).
Need help?
Do you have a question about the 18995-56 and is the answer not in the manual?
Questions and answers