Table of Contents

Related Manuals for Horizon Fitness 3.2E


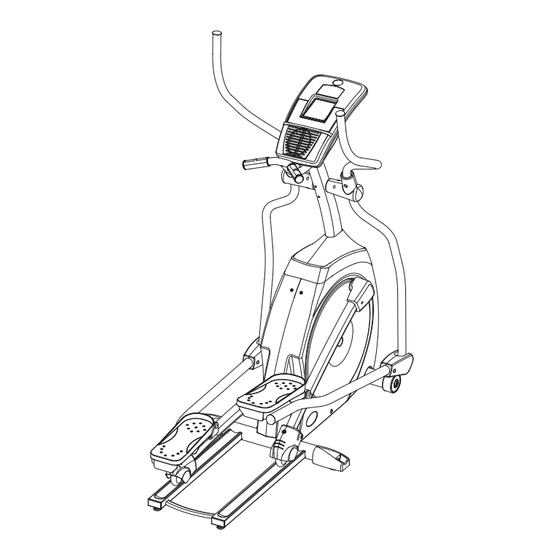
Summary of Contents for Horizon Fitness 3.2E
- Page 1 ELITE SERIES FOR MODELS : 3.2E 4.2E 3.2E 4.2E ELL IPT ICAL USER ’S G UID E...
-
Page 3: Table Of Contents
I N T R O D U C T I O N CONGRATULATIONS and THANK YOU for your purchase of this Elite Series elliptical! Whether your goal is to win races or simply enjoy a fuller, healthier lifestyle, an Elite Series elliptical can help you attain it –... -
Page 4: Important Precautions
• Unplug elliptical before moving or cleaning it. To clean, wipe surfaces down with soap and slightly damp cloth only; never use solvents. (See MAINTENANCE) • This elliptical should not be used by persons weighing more than 300 pounds on the 3.2E and 325 pounds on the 4.2E. Failure to comply will void the warranty. -
Page 5: Assembly
A S S E M B LY IMPORTANT: READ THESE SAFETY INSTRUCTIONS BEFORE USE! WARNING There are several areas during the assembly process of a elliptical that special attention must be paid. It is very important to follow the assembly instructions correctly and to make sure all parts are firmly tightened. If the assembly instructions are not followed correctly, the elliptical could have frame parts that are not tightened and will seem loose and may cause irritating noises. - Page 6 �������������������� ������������������������� ��������������������� �������������������� ���������� ��������������� ��� ��������������� ������������ ������������ ���������� ���������������������� ��������� �������������� ��������������� ����������������� ��������������������� ������������� �������������� �������������� ������������ ��������� ���������������� ������������������ �������������� ���������������� ����������������� ����������������������� ��������������������� ������������������������ ������������������ ������������������� ������������������ ��������������� ���������������� ������������������������ �������������� �������������� ����������������������� ��������������� ���������������������������...
- Page 7 ������������������ of the CONSOLE MAST and 4 BOLTS (A), 4 SPRING WASHERS (B) and 4 FLAT WASHERS (D) into the 4 side holes on the CONSOLE MAST. 3.2E. Steps A-D 4 . 2 E �������� ����������������� A) Open HARDWARE BAG FOR STEP 1.
- Page 8 AS S E MB LY S T E P 2 HARDWARE BAG FOR STEP 2 CONTENTS : ��������������� �������� ����� ����� ������ ������ A) Open HARDWARE BAG FOR STEP 2. B) Slide left and right FOOT LEVELERS ���������� onto MAIN FRAME. ���������������...
- Page 9 AS SE M BLY S T E P 4 NOTE: There is NO hardware for this step. All hardware is pre-installed. ��������������� A) Remove PRE-ATTACHED BOLT & ����� WASHERS from CONSOLE MAST. ������������ ���������� ��� ������������ B) Slide LOWER HANDLEBAR onto CONSOLE MAST and attach by re- inserting PRE-ATTACHED BOLT &...
- Page 10 AS S E MB LY S T E P 5 HARDWARE BAG FOR STEP 5 CONTENTS : �������� ����� ������ ������� ��������� �������������� A ) Open HARDWARE BAG FOR STEP 5. B) Attach FOOTPAD to LOWER LINK ARM using 4 BOLTS (L). C) Repeat on other side.
- Page 11 ASS E M BLY S T E P 6 HARDWARE BAG FOR STEP 6 CONTENTS : ���������� ���������� ������ ����������������� ����� ������ �������� ��������������� ����� ����� ������ ������ ��������� ����������������� �������� �������������� ������ ������ ���� ��������� ����������������� �������������� ��������� ���� ���������������...
- Page 12 A S S E M B LY ST E P 7 HARDWARE BAG FOR STEP 7 CONTENTS : �������� ����������������� ����� ����� ������ ������ ���������� ��������� ����� ������� ���������� ����� ������ ������ ������ ��������������� �������� ������� ���������� �������������� ������������������� ������������������ ������������������...
- Page 13 ������������ ������ C) Attach CONSOLE to the CONSOLE MAST using the 4 PRE-ATTACHED SCREWS (screws will have to be removed from the console first). DO NOT PINCH WIRES! ������������ Y OU ’RE FI N I SH ED ! 3.2E 4.2E...
-
Page 14: Before You Begin
B E F O R E Y O U BEGI N CONGRATULATIONS! on choosing your elliptical. You’ve taken an important step in developing and sustaining an exercise program! Your elliptical is a tremendously effective tool for achieving your personal fitness goals. Regular use of your elliptical can improve the quality of your life in so many ways. HERE ARE JUST A FEW OF THE HEALTH BENEFITS OF EXERCISE: •... -
Page 15: Elliptical Operation
E L L I P T IC A L O P E R ATI ON POWER Your programmable elliptical is powered by a power supply. The power must be plugged into the power jack, which is located in the front of the machine near the STABILIZER TUBE. Do not operate the elliptical if the power cord or plug is damaged. - Page 16 3. 2 E C O N S O L E D I S P L AY ���� � � � ���� ���� ������ � � ������� ������ � � ����� ������������ � � � � � �� � � � � � � � � � �...
- Page 17 4.2E CONS O L E D I S P L AY � � � � � � � � � � � � � Note: There is a thin protective sheet of clear plastic on the overlay of the console and should be removed. A) MONITOR DISPLAY: Speed, Time, Pulse, Distance, Level, Calories and Program Profiles.
- Page 18 3. 2 E & 4 . 2 E C O N S O L E O P E RAT IO N Q UI C K S TA RT Turn on Elliptical. Press START button and begin exercising. Program will automatically default to MANUAL (P1), the time will count up from 0:00, and the resistance will default to level 1.
- Page 19 SE LE CTIN G T H R ZO N E PR O G R A M Select THR ZONE program using the PROGRAM SELECT keys and press ENTER. • The HEART RATE window will flash showing the default target heart rate of 100 beats per minute. Select your target heart rate (from the chart on page 24) using the ARROW KEYS and press ENTER.
- Page 20 ��������� ��������� ������� ������� ����������� PR O G R A M P R O F I L E S ����������� ����������� ����������� MANUAL ������ ���� Allows you to adjust the resistance level to your preference, without a preset program. ������ ������...
- Page 21 ������ ���� ������������� PRO GRA M PR O F I L E S ������ WORKOUT CALENDAR (STORES UP TO 2 USER’S INFORMATION) (4.2E ONLY) ���������������� This long-term goal oriented programming helps you stay motivated by tracking your workout progress over the course of several weeks. The goal of this program is to keep you working out 3 times a week for 6 weeks for a total of 18 workouts with each workout being a preset amount of time.
- Page 22 H EA R T R AT E HANDLEBARS Place the palm of your hands directly on the grip pulse handlebars. Both hands must grip the bars for your heart rate to register. It takes 5 consecutive heart beats (15-20 seconds) for your heart rate to register. When gripping the pulse handlebars, do not grip tightly.
-
Page 23: Conditioning Guidelines
C O N D I T I O NI N G G U I DEL IN ES ALWAYS CONSULT YOUR PHYSICIAN BEFORE BEGINNING AN EXERCISE PROGRAM. HOW OFTEN? (Frequency of Workouts) The American Heart Association recommends that you exercise at least 3 to 4 days per week to maintain cardiovascular fitness. - Page 24 TA RG E T H E A R T R AT E Z O N E CH A R T What is Target Heart Rate Zone? Target Heart Rate Zone tells you the number of times per minute your heart needs to beat to achieve a desired workout effect.
- Page 25 STRETCHING � � �� STRETCH FIRST Before using your product, it is best to take a few minutes to do a few gentle stretching exercises. Stretching prior to exercise will improve flexibility and reduce chances of exercise related injury. Ease into each of these stretches with a slow gentle motion.
-
Page 26: Achieving Your Fitness Goals
THE IMPORTANCE OF WARM UP & COOL DOWN � � � � WARM UP The first 2 to 5 minutes of a workout should be devoted to warming up. The warm-up will limber your muscles and prepare them for more strenuous exercise. Make sure that you warm-up on your product at a slow pace. - Page 27 MO N T H LY L O G S H E ET S � � � � � ���� ���� ���� � �� � � � � �� �� � �� �������� � ��� � � � � � �� � � � �� � � � � �...
- Page 28 W E E K LY L O G S HEET S �� � � �� � ������ ���� � �� ���� �� ������ ���� ���� �� �� �� ����� � � � � � �� � � � � �� �...
- Page 29 �� �� � � � ������ ���� � �� ���� �� ������ ��� ����� ���� �� ����� � ��� � �� � � �� �� �� �� � �� �� � � � � � �� �� �� � � �� ���...
-
Page 30: Troubleshooting & Maintenance
T R O U B L E S H OOT I NG Your Horizon Fitness elliptical is designed to be reliable and maintenance free. However, if you do experience problems with your elliptical, please reference the troubleshooting guide listed below. - Page 31 • Does the problem occur when using the handlebars? Without using the handlebars? Answering these and other questions will give the technicians the ability to send proper replacement parts and the service necessary to get you and your Horizon Fitness elliptical running again!
- Page 32 C O M M O N P R O D U C T Q U E S T I O NS ARE THE SOUNDS MY ELLIPTICAL MAKES NORMAL? Our ellipticals are some of the quietest available because they use belt drives and friction free magnetic resistance.
- Page 33 Clean with soap and water cleaners only. Never use solvents on plastic parts. Cleanliness of your elliptical and its operating environment will keep maintenance problems and service calls to a minimum. For this reason, Horizon Fitness recommends that the following preventive maintenance schedule be followed.
-
Page 34: Limited Warranty
• Any attempt to repair this equipment creates a risk of injury. Horizon Fitness is not responsible or liable for any damage, loss or liability arising from any personal injury incurred during the course of, or as a result of any repair or attempted repair of your fitness equipment by other than an authorized service technician. - Page 36 T e l : 1 . 8 0 0 . 2 4 4 . 4 1 9 2 F a x : 6 0 8 . 8 4 2 . 1 6 6 0 3.2E, 4.2E. Rev. 1.1 2005 Horizon Fitness Products | Designed & Engineered in the U.S.A. | Made in China...
Need help?
Do you have a question about the 3.2E and is the answer not in the manual?
Questions and answers