Table of Contents
Advertisement
Available languages
Available languages
Quick Links
GB
call free on 0800 331 6015
IRL
call free on 1800 744 5477
AU
UA
0-800-500-697
(дзвінки зі стаціонарних телефонів на території
України безкоштовні)
CZ
HU
Breast pump – BPA-free
Молоковідсмоктувач – не містить BPA
Odsávačka mateřského mléka bez BPA
Mellszívó -BPA-mentes
42133 5415 471
Manual breast pump
GB
UA
CZ
HU
2.
c
a
e
d
b
f
j
l
g
k
h
h
or
або
nebo
vagy
l
h
h
m
i
i
n
Advertisement
Table of Contents

Related Manuals for Philips AVENT SCF310/13


Summary of Contents for Philips AVENT SCF310/13
- Page 1 call free on 0800 331 6015 call free on 1800 744 5477 0-800-500-697 (дзвінки зі стаціонарних телефонів на території України безкоштовні) Breast pump – BPA-free Молоковідсмоктувач – не містить BPA Odsávačka mateřského mléka bez BPA Mellszívó -BPA-mentes або nebo vagy Manual breast pump 42133 5415 471...
-
Page 2: Table Of Contents
6. (1)–(7) Please take five minutes to read through the WHOLE of this leaflet BEFORE you use your Philips AVENT manual breast pump for the first time. Contents Introducing the manual breast pump Detailed parts guide Cleaning and sterilisation Keeping your breast pump sterile for travel... -
Page 3: Introducing The Manual Breast Pump
1. Introducing the manual breast pump The manual breast pump is a breakthrough in breast pump design. Its silicone diaphragm provides 100% reliable vacuum, whilst the Let-down Massage Cushion naturally imitates your baby’s suckling action to provide fast milk flow – silently, comfortably and gently. The pump is easy to assemble, discreet to use and all parts are dishwasher safe. Doctors recommend that breast milk is the best nutrition for babies during the first year, combined with solid food after the first 6 months. Your milk is specially adapted to your baby’s needs and contains antibodies which help protect your baby against infection and allergies. Your manual breast pump will help you breastfeed longer. You can express and store your milk so that – whether you are out for a few hours, taking a well deserved rest, or back at work – your baby can still enjoy the benefits of your breast milk, even if you can’t be there to give it yourself. As the pump is so silent and discreet you can take it with you anywhere, allowing you to express milk at your own convenience and maintain your milk supply. Since the Philips AVENT bottle and teat are specially designed to mimic breastfeeding, your baby will switch easily between breast and bottle. This allows mothers to continue providing breast milk to baby even when they return to work. -
Page 4: Detailed Parts Guide
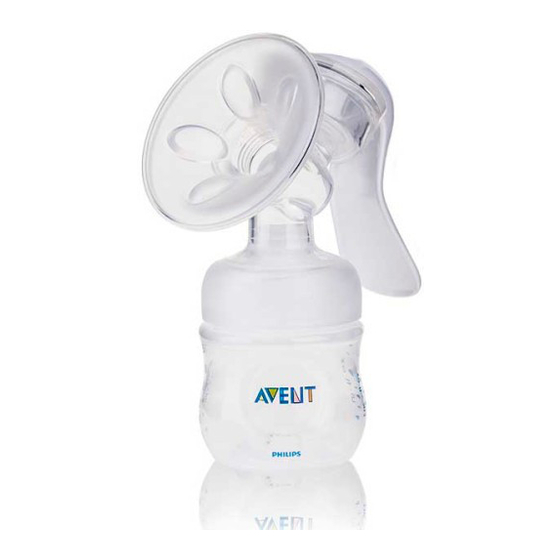
2. Detailed parts guide MANUAL BREAST PUMP BOTTLE a) Funnel cover (same as i) h) Philips AVENT feeding bottle (125ml/4oz) / VIA adaptor/VIA cup / adaptor ring b) Let-down Massage Cushion i) Stand (same as a) c) Pump cover / VIA lid/stand d) Silicone diaphragm j) Dome cap and stem* k) Extra Soft teat, Newborn Flow (0m+) e) Handle l) Screw ring f) Pump body m) Sealing base g) White valve* n) Sealing disc *spares included 3. -
Page 5: Using The Manual Breast Pump With The
5. Using the manual breast pump with the Philips AVENT VIA feeding system S imply replace the Philips AVENT feeding bottle with a VIA cup and adaptor. To make the pump completely stable insert the VIA cup into the VIA lid/stand. 6. How to assemble the manual breast pump S eparate all parts and ensure pump has been cleaned and sterilised as in section 3: 1) W ash your hands thoroughly. Insert the white valve (g) into the pump body (f) from underneath. 2) Place the pump body (f) onto the Philips AVENT feeding bottle (h).* 3) Twist gently clockwise until secure. DO NOT OVERTIGHTEN! 4) P lace the silicone diaphragm and stem (d) into the pump body (f). Make sure it fits securely around the rim by pressing down with your fingers to ensure a perfect seal. (This is easier if assembled whilst wet.) -
Page 6: Hints To Help You Succeed
2) The exceptions to the above are: a) If you are expressing milk for your baby to be given in hospital. b) I f your breasts are engorged (painful or swollen), you can express a small amount of milk before or between feeds to ease the pain and to help your baby latch on more easily. c) I f you have sore or cracked nipples, you may wish to express your milk until they are healed. d) I f you are separated from your baby and wish to continue to breastfeed when you are reunited, you should express your milk regularly to stimulate your milk supply. 3) Y ou will need to find the right times of the day for you to express your milk, e.g: a) E arly in the morning when your breasts are full, just before or after your baby’s first feed. b) A fter a feed, if your baby has not emptied both breasts. c) Between feeds, or in a break if you have returned to work. 8. Hints to help you succeed U sing a breast pump takes practice – you may need to make several attempts before you succeed, but because the pump is so simple and natural to use, you will soon get used to expressing your milk. -
Page 7: How To Use The Manual Breast Pump
6) R epositioning the pump on the breast from time to time can help stimulate your milk ducts. P ractice with your pump to find the best technique for you. However, if the process becomes very painful, stop and consult your breastfeeding advisor. 9. How to use the manual breast pump 1) W ash your hands thoroughly and make sure your breasts are clean. Gently squeeze a little milk from each nipple to ensure milk ducts are not blocked. 2) M ake sure you have sterilised and carefully assembled your pump exactly as shown in sections 3 and 6. 3) C onsult the ‘Hints to help you succeed’ section. 4) R elax in a comfortable chair, leaning slightly forward (use cushions to support your back). Make sure you have a glass of water nearby. 5) P ress the funnel and Let-down Massage Cushion of the pump firmly against your breast, making sure that no air can escape – otherwise there will be no suction. -
Page 8: Storing Your Breast Milk
P lease remember that, should the process become very painful or uncomfortable, you should stop using the pump and consult your health professional or breastfeeding advisor. 9) O n average you will need to pump for 10 minutes to express 60-125ml or 2-4oz. However, this is just a guide and varies from woman to woman. If you find that you regularly express more than 125ml/4oz per session, please use a 260ml/9oz Philips AVENT bottle or 240ml/8oz VIA cup. D o not overfill Philips AVENT feeding bottles or VIA cups and keep upright, otherwise milk may leak from below the pump body. 10. Storing your breast milk • B reast milk can be stored in the fridge or freezer in either sterile breast milk containers (125ml/4oz or 260ml/9oz bottles fitted with sealing discs) or in VIA cups with lids. • O nly milk collected with a sterile pump should be stored to be fed to your baby. • Expressed milk should be refrigerated immediately. • E xpressed breast milk can be stored in the refrigerator for up to 48 hours (not in the door) or in the freezer for up to 3 months. • I f you are storing milk in the fridge to add to during the day, only add milk which has been expressed into a sterile container. Milk can only be kept like this for a maximum of 48 hours (from first expression) -
Page 9: Feeding Your Baby Your Expressed Breast Milk
Storing your milk in the freezer T o store in the freezer, use a sealing disc in place of the teat and dome cap or use a sterilised VIA lid to seal the VIA cup. The storage containers should be clearly labelled with the date and time of expression and older milk used up first. N EVER refreeze breast milk. DO NOT add fresh breast milk to already frozen milk. ALWAYS discard any milk that is left over at the end of a feed. 11. Feeding your baby your expressed breast milk I f breast milk has been stored in an Philips AVENT breast milk container, replace the sealing disc with a sterilised Philips AVENT teat. A lternatively replace the VIA lid with a sterilised VIA adaptor, screw ring, dome cap and Philips AVENT teat. F rozen breast milk should be defrosted overnight in the refrigerator. However, in an emergency, it can be defrosted in a jug of hot water. Once thawed use within 24 hours. B reast milk can be heated in the same way as any other bottle feed. Stand the Philips AVENT bottle or VIA feeding system in a bowl of hot water, or alternatively, for a safe and fast way to warm feeds, use the Philips AVENT bottle and baby food warmer. IMPORTANT! Milk or food will heat faster in VIA cups than in standard feeding bottles/containers. Always check milk or food temperature before feeding. -
Page 10: Choosing The Right Teat For Your Baby
12. Choosing the right teat for your baby P hilips AVENT teats can be used on both the Philips AVENT feeding bottle and VIA feeding system. Philips AVENT teats are clearly numbered on the side to indicate flow rate. NEWBORN FLOW EXTRA SOFT SILICONE TEAT Ideal for newborns and breastfed 1 hole babies of all ages. SLOW FLOW EXTRA SOFT SILICONE TEAT Ideal for newborns and breastfed 2 holes babies of all ages. -
Page 11: Troubleshooting Guide
13. Troubleshooting guide Lack of suction Check that all the pump components have been assembled correctly and that the white valve is the right way up. Ensure that the diaphragm and Let-down Massage Cushion are fitted securely to the pump body and a perfect seal is created. No milk being expressed Ensure suction is created and the pump is correctly assembled. Relax and try again, expression may improve after practice. Please refer to the ‘Hints to help you succeed’ section. Pain in the breast area You may be pumping too hard. You do not need to use when expressing all the suction the pump can generate. Try depressing the handle halfway and remember the 2-3 second pumping rhythm. Consult your health professional/ breastfeeding advisor. Milk is drawn up the Remove and refit the Let-down Massage Cushion Let-down Massage Cushion ensuring it is firmly attached and pushed far enough down the funnel. Try leaning slightly forward. Cracking/discolouration of Avoid contact with antibacterial or abrasive detergents/ pump parts cleaners as these can damage the plastic. Combinations of detergents, cleaning products, sterilising solution, softened water and temperature fluctuations may, under certain circumstances, cause the plastic to crack. If this occurs, do not use. Contact Philips AVENT Customer Services for spare parts. The pump is dishwasher safe but food colourings may discolour components. Keep the product out of direct sunlight, as prolonged exposure may cause discolouration. Lost or broken parts Spare parts are available through Philips AVENT Customer Services (see back cover for contact details). - Page 12 Знайомство з ручним молоковідсмоктувачем Детальний огляд частин Чищення та стерилізація Стерильність молоковідсмоктувача під час подорожей Використання ручного молоковідсмоктувача із системою зберігання Philips AVENT VIA Складання ручного молоковідсмоктувача Коли зціджувати молоко Корисні поради Використання ручного молоковідсмоктувача 10. Зберігання грудного молока 11. Годування дитини зцідженим молоком...
- Page 13 зручний, його можна взяти зі собою будь-де та зціджувати молоко відповідно до власних потреб і для підтримання лактації. Оскільки пляшечка та соска Philips AVENT спеціально розроблені для імітації годування грудьми, дитині легко буде переходити з годування груддю на годування з пляшечки та навпаки. Це дає змогу працюючим мамам продовжувати...
- Page 14 молоковідсмоктувач не працюватиме належним чином. Чистіть клапан, легко протираючи його у теплій воді з миючим засобом – не вставляйте жодних предметів, оскільки це може спричинити пошкодження. Стерилізуйте всі частини в паровому стерилізаторі Philips AVENT або кип’ятіть їх у воді впродовж 5 хвилин. У разі стерилізації в паровому стерилізаторі Philips AVENT молоковідсмоктувач зберігатиме стерильність щонайменше 6 годин, якщо не відкривати кришки стерилізатора.
- Page 15 5. В икористання ручного молоковідсмоктувача із системою зберігання Philips AVENT VIA Просто замініть пляшечку для годування Philips AVENT чашкою та адаптером VIA. Щоб добре зафіксувати молоковідсмоктувач, поставте чашку VIA на кришечку/підставку VIA. 6. Складання ручного молоковідсмоктувача Від’єднайте усі частини, помийте та простерилізуйте їх, як описано у розділі 3: 1) Добре...
- Page 16 2) Винятками можуть бути такі ситуації: a) якщо Ви зціджуєте молоко для годування дитини в лікарні; b) якщо груди набрякли (болять або опухлі), перед або між сеансами годування можна зцідити трохи молока, щоб зменшити відчуття болю та полегшити прикладання дитини до грудей; c) якщо...
- Page 17 6) Періодична зміна положення молоковідсмоктувача на грудях стимулює молочні протоки. Підберіть найзручніший для себе спосіб зціджування молока. Проте, якщо зціджування стає дуже болісним, припиніть цей процес і зверніть до лактолога. 9. Використання ручного молоковідсмоктувача 1) Руки та груди мають бути чистими. Легко витисніть трохи молока із кожного...
- Page 18 скористайтеся пляшечкою для грудного молока Philips AVENT ємністю 260 мл або чашкою VIA ємністю 240 мл. Не наливайте у пляшечки для годування Philips AVENT або чашки VIA надто багато молока і зберігайте їх у вертикальному положенні, щоб запобігти витіканню молока.
- Page 19 Якщо молоко зберігалося у пляшечці для молока Philips AVENT, замініть ущільнюючий диск стерилізованою соскою Philips AVENT. Також замініть кришечку VIA стерилізованим адаптером VIA, кільцем з отвором для соски, купольним ковпаком та соскою Philips AVENT. Заморожене молоко слід розморозити за ніч у холодильнику. Однак, за необхідності його можна...
- Page 20 приблизно 20 хвилин, поки вона охолоне. 12. Вибір соски для дитини Соски Philips AVENT можна використовувати як з пляшечками для годування Philips AVENT, так і з ємностями системи годування VIA. Збоку на сосках Philips AVENT є цифри, які позначають інтенсивність потоку рідини. Г...
- Page 21 Запасні частини можна придбати в центрі обслуговування деталь клієнтів Philips AVENT (контактна інформація на звороті). Якщо Вам не вдається усунути проблеми, зверніться до центру обслуговування клієнтів Philips AVENT (контактна інформація на звороті). Крім того, можна звернутися до лікаря чи лактолога.
- Page 22 Vyšetřete si pět minut a přečtěte si CELOU tuto brožuru PŘED prvním použitím ruční odsávačky Philips AVENT. Obsah Představujeme ruční odsávačku Podrobný přehled součástí Čištění a sterilizace Zachování sterility odsávačky na cestách Používání ruční odsávačky se systémem skladování Philips AVENT VIA Sestavení...
- Page 23 že ji s sebou můžete vzít kamkoli. Umožňuje odstříkávat podle potřeby a udržet tvorbu mléka. Láhev a dudlík Philips AVENT jsou navrženy tak, že napodobují kojení, proto dítěti usnadní přechod z kojení na krmení z lahve. Matky tak mohou...
- Page 24 Všechny části sterilizujte v parním sterilizátoru Philips AVENT nebo v horké vodě po dobu 5 minut. Při použití sterilizátoru Philips AVENT a pokud není sejmuto víko, zůstane pumpa ve sterilizátoru sterilní minimálně po dobu 6 hodin. 4. Zachování sterility odsávačky na cestách P o sterilizaci všech součástí...
- Page 25 části 3: Umyjte si důkladně ruce. Zespodu vložte bílý ventil (g) do těla odsávačky (f). Tělo odsávačky (f) postavte na láhev na krmení Philips AVENT (h). Jemně otáčejte ve směru hodinových ručiček, dokud není zajištěna. Nepřetáhněte! Silikonovou membránu s nástavcem (d) umístěte na tělo odsávačky (f).
- Page 26 Výjimkou jsou tyto situace: a) Pokud odstříkáváte mléko pro dítě, jež má být hospitalizováno v nemocnici. b) Máte-li přeplněné (bolestivé nebo nateklé) prsy, můžete odstříkávat malé množství mléka před a mezi kojením, abyste zmírnily bolest a usnadnily dítěti přisátí k prsu. c) Máte-li bolestivé nebo popraskané bradavky, můžete mléko odstříkávat, dokud se nezhojí.
- Page 27 Občasná změna polohy odsávačky na prsu může stimulovat mléčné žlázy. Vyzkoušejte odsávačku a zjistěte, která technika vám vyhovuje nejlépe. Je-li však proces příliš bolestivý, odstříkávání ukončete a obraťte se na laktační poradkyni. 9. Používání ruční odsávačky Umyjte si důkladně ruce a zkontrolujte, zda máte čisté prsy. Z obou bradavek jemně...
- Page 28 Zjistíte-li, že pravidelně odstříkáváte více než 125 ml najednou, použijte 260m láhev Philips AVENT. Láhve na krmení Philips AVENT ani pohárky VIA nepřeplňujte a uchovejte je ve svislé poloze, jinak může mléko z těla odsávačky prosakovat. 1 0 . Skladování mateřského mléka •...
- Page 29 Po rozmrazení je do 24 hodin spotřebujte. Mateřské mléko lze ohřívat stejně jako jakékoli jiné krmení z lahve. Láhev Philips AVENT nebo systém krmení VIA postavte do mísy s horkou vodou nebo rychle a bezpečně ohřejte ohřívačem lahví a dětské stravy Philips AVENT.
- Page 30 1 2 . Výběr správného dudlíku pro dítě Dudlíky Philips AVENT lze použít s lahví na krmení Philips AVENT i se systémem krmení VIA. Dudlíky Philips AVENT jsou po straně jasně označeny číslem vyjadřujícím průtok. PRŮTOK PRO NOVOROZENCE MIMOŘÁDNĚ JEMNÝ SILIKONOVÝ DUDLÍK Ideální pro novorozence a kojené děti 1 otvor v každém věku...
- Page 31 Ztracené nebo rozbité Náhradní díly získáte prostřednictvím zákaznických služeb součásti společnosti Philips AVENT (kontaktní informace naleznete na zadní straně obalu). Pokud problémy přetrvávají, obraťte se na zákaznické služby společnosti Philips AVENT (kontaktní informace naleznete na zadní straně obalu), nebo na zdravotníka/laktační poradkyni.
- Page 32 A kézi mellszívó bemutatása Az alkatrészek részletes bemutatása Tisztítás és sterilizálás A mellszívó sterilen tartása utazás közben A kézi mellszívó használata az Philips AVENT VIA tárolási rendszerrel A kézi mellszívó összeszerelése Mikor kell lefejni az anyatejet Tippek a sikeres fejéshez A kézi mellszívó...
- Page 33 1. A kézi mellszívó bemutatása A Philips AVENT kézi mellszívó áttörést jelent a mellszívók tervezésében. A szilikon membrán 100%-osan megbízható vákuumot képez, a tejleadást serkentő masszázspárna pedig természetesen utánozza a csecsemő szopását, így gyors tejleadást biztosít – csendesen, kényelmesen és gyengéden. A mellszívó összeszerelése egyszerű, használata diszkrét és minden tartozéka mosogatógépben tisztítható.
- Page 34 Az alkatrészek sterilizálásához használjon Philips AVENT gőzsterilizálót, vagy forralja 5 percig. Philips AVENT gőzsterilizáló használata esetén a mellszívó a sterilizálóban legkevesebb 6 órán át steril marad, ha nem veszi le a fedelét 4. A mellszívó sterilen tartása utazás közben Az összes rész sterilizálása után helyezze be a fehér szelepet (g), és tegye a membránt a nyéllel (d) a mellszívótestbe (f).
- Page 35 és sterilizálta a 3. szakaszban leírtaknak megfelelően: Alaposan mosson kezet. A fehér szelepet (g) alulról helyezze be a mellszívótestbe (f). Helyezze a mellszívótestet (f) az Philips AVENT cumisüvegre (h). Csavarja óvatosan az óramutató járásával megegyező irányba, amíg nem rögzül. ne szorítsa túl! Helyezze a szilikon membránt a nyéllel (d) a mellszívótestre (f).
- Page 36 Mindenképpen szükséges fejni: a) Ha kisbabája, Öntől távol, pl.: kórházban van. b) Ha a melle túltelítődött (fájdalmas vagy duzzadt), lefejhet egy kevés anyatejet a szoptatások előtt vagy között a problémák csökkentésére és, hogy a kisbabája könnyebben vegye szájába a mellbimbót. c) Ha a mellbimbója nagyon sebes vagy berepedt és szakember átmeneti megoldásként ezt ajánlotta.
- Page 37 Változtassa időnként a mellszívó helyzetét a mellén, mert ez segít a tejtermelés stimulálásában. Gyakorlással alakíthatja ki a legmegfelelőbb technikát. Ha az eljárás túlságosan fájdalmas lenne, ne folytassa és kérje ki védőnő/szoptatási tanácsadó véleményét. 9. A kézi mellszívó készülék használata Alaposan mosson kezet és ellenőrizze melle tisztaságát. Mellbimbójából óvatosan préseljen ki egy kevés tejet.
- Page 38 Ha alkalmanként rendszeresen 125 ml tejnél többet fej le, használjon 260 ml-es Philips AVENT cumisüveget vagy 240 ml-es VIA poharat. Ne töltse túl az Philips AVENT cumisüvegeket vagy VIA poharakat, mert a tej kiszivároghat a mellszívótest alól. 1 0 . Az anyatej tárolása •...
- Page 39 Kiengedés után 24 órán belül használja fel. Az anyatej ugyanúgy melegíthető, mint bármely más üveges étel. Állítsa az Philips AVENT cumisüveget vagy a VIA etetési rendszert meleg vízzel megtöltött edénybe, vagy ha biztonságosabban és gyorsan szeretné felmelegíteni, használjon Philips AVENT cumisüveg és bébiétel melegítőt.
- Page 40 1 2 . A megfelelő etetőcumi kiválasztása a csecsemő számára Az Philips AVENT etetőcumik Philips AVENT cumisüvegen és VIA etetési rendszeren egyaránt használhatók. Az Philips AVENT etetőcumik folyáserősségéről az oldalukon szereplő számok egyértelmű eligazítást nyújtanak. ÚJSZÜLÖTT ETETŐCUMI EXTRA PUHA SZILIKON ETETŐCUMI Újszülött kortól Ideális újszülötteknek, illetve bármilyen...
- Page 41 Cserealkatrészek a Philips AVENT ügyfélszolgálatokon keresztül alkatrészek szerezhetők be (az elérhetőséget lásd a hátsó borítón). Ha további problémái merülnének fel, vegye fel a kapcsolatot a Philips AVENT ügyfélszolgálattal (az elérhetőséget lásd a hátsó borítón). Vagy kérje ki egészségügyi szakember/szoptatási tanácsadó véleményét.
Need help?
Do you have a question about the SCF310/13 and is the answer not in the manual?
Questions and answers