Kyocera FS-600 Installation Manual
Hide thumbs
Also See for FS-600:
- Service manual (178 pages) ,
- User manual (144 pages) ,
- Network manual (20 pages)
Table of Contents
Advertisement
Quick Links
This manual mainly covers topics pertaining to installation and maintenance of the
printer. The printer is also supplied with a CD-ROM and a Quick Reference
booklet. For other information such as operation, refer to the on-line User's Manual
in the CD-ROM and the Quick Reference booklet.
Installation Manual
FS-600
Kyocera Laser Printer
Advertisement
Table of Contents

Related Manuals for Kyocera FS-600


Summary of Contents for Kyocera FS-600
-
Page 1: Installation Manual
The printer is also supplied with a CD-ROM and a Quick Reference booklet. For other information such as operation, refer to the on-line User's Manual in the CD-ROM and the Quick Reference booklet. Installation Manual FS-600 Kyocera Laser Printer... - Page 2 Copying or other reproduction of all or part of this manual, any copyrightable subject matter without the prior written consent of Kyocera Corporation is prohibited. Any copies made of all or part of this manual, any copyrightable subject must contain the same copyright notice as the material from which the copying is done.
- Page 3 Introduction _________________________________________________ IBM PROGRAM LICENSE AGREEMENT THE DEVICE YOU HAVE PURCHASED CONTAINS ONE OR MORE SOFTWARE PROGRAMS (“PROGRAMS”) WHICH BELONG TO INTERNATIONAL BUSINESS MACHINES CORPORATION (“IBM”). THIS DOCUMENT DEFINES THE TERMS AND CONDITIONS UNDER WHICH THE SOFTWARE IS BEING LICENSED TO YOU BY IBM. IF YOU DO NOT AGREE WITH THE TERMS AND CONDITIONS OF THIS LICENSE, THEN WITHIN 14 DAYS AFTER YOUR ACQUISITION OF THE DEVICE YOU MAY RETURN THE DEVICE FOR A FULL REFUND.
- Page 4 Introduction IBM will not be liable for any lost profits, lost savings, or any incidental damages or other economic consequential damages, even if IBM, or its authorized supplier, has been advised of the possibility of such damages. IBM will not be liable for any damages claimed by you based on any third party claim.
- Page 5 Sublicensee violates the terms of paragraphs 2. or 3. above. In the event of such violation, this agreement will terminate automatically without notice from KYOCERA. Upon termination, you should destroy FONTWARE/TrueDoc and all copies of them, in part and in whole, including modified copies,...
-
Page 6: Fcc Statement
Shielded circular cable should be used for interfacing with the computer. Caution to user Any modification without prior permission may cause harmful interference. If any modification/change is introduced to this equipment without prior permission, Kyocera as the manufacturer cannot guarantee compliance with FCC rules. -
Page 7: Interface Connectors
Introduction To use equipment which does not comply with FCC rules is prohibited. The printer may be optionally installed with the following units: Conforming to the Class B limits • PK-Series KPDL 2 Upgrade Kit • IB-10 Serial Interface Board Kit •... - Page 8 Introduction CAUTION LASER RADIATION WHEN OPEN. DO NOT STARE INTO BEAM OR VIEW DIRECTLY WITH OPTICAL INSTRUMENTS. ∗ Use of controls or adjustments or performance of procedures other than those specified herein may result in hazardous radiation exposure. (U.S.A./Canada) (Europe/Asia)
-
Page 9: Caution Labels
Introduction CDRH regulations The Center of Devices and Radiological Health (CDRH) of the U.S. Food and Drug Administration implemented regulations for laser products on August 2, 1976. These regulations apply to laser products manufactured after August 1, 1976. Compliance is mandatory for products marketed in the United States. -
Page 10: Important Safeguards
Introduction IMPORTANT SAFEGUARDS Read all of these instructions and save these instructions for later use. Unplug this product from the wall outlet before cleaning. Do not use this product near water. Do not place this product on an unstable cart, stand, or table. The product may fall, causing serious damage to the product. - Page 11 Introduction Except as explained elsewhere in User’s Manual, do not attempt to service this product yourself. Removing covers may expose you to dangerous voltage points or other risks. Refer all servicing in those compartments to service personnel. Unplug this product from the wall outlet and refer servicing to qualified service person-nel under the following conditions: A —...
- Page 12 2-14-9 Tamagawadai, Setagaya Ward, Tokyo 158-8610, Japan declares that the product Product name: Page Printer Model number: FS-600 (as tested with the enhancement optional unit: PF-16) conforms to the following product specifications. EN 55 022:1994 Class B EN 61 000-3-2:1995 EN 61 000-3-3:1995...
- Page 13 FS-600 (as tested with the enhancement optional unit: PF-16) Description of device: The model FS-600 is a 6-ppm, A4 size plain paper supporting page printer, utilizing laser, dry toner, etc. The printer can be equipped with the optional paper feeder model PF-16.
- Page 14 Introduction Declaration of Conformity (U.S.A.) Model Number: FS-600 Trade Name: Kyocera Responsible Party: Kyocera Electronics Inc. Address: 11465 John’s Creek Parkway, Suite #250 Duluth, GA30097, U.S.A. Telephone number: 770-623-2150 Fax number: 770-623-2151 Contact person for technical matter: Paul Bosak Phone:...
- Page 15 Introduction Disclaimer We shall have no liability or responsibility to customers or any other person or entity with respect to any liability, loss or damage caused or alleged to be caused directly or indirectly by equipment sold or furnished by us, including but not limited to, any interruption of service, loss of business or anticipatory profits, or consequential damages resulting from the use or operation of the equipment or software.
- Page 16 This product has been developed and manufactured with the express interest of reducing the impact on the environment. Using Kyocera's innovative cartridge free technology, Kyocera has created an advanced printing system that does not require the wasteful replacement and disposal of a cartridge.
- Page 17 Introduction Introduction The Kyocera laser printer has many extremely desirable features. It was designed to make a contribution to a cleaner environment as well as to represent the latest generation of page printer technology. Superb print quality The latest technology from Kyocera such as KIR (Kyocera Image Refinement) function, this laser printer delivers superb print quality and clarity.
- Page 18 Introduction A new printer control language, PRESCRIBE IIe PRESCRIBE IIe provides features including advanced graphics capabilities that allow you to print any conceivable outline shape or solid form. Also provided are a variety of special effects, such as patterned fills, gray-scale shading, a user-accessible print image model, and multiple page orientations and print directions within the same page.
- Page 19 Introduction Options The following options are available for this printer. PF-16 Paper feeder (250-sheet capacity, 80 g/m [0.11-mm paper thickness]) PK-series KPDL 2 upgrade kit IB-10 Serial interface board kit xviii...
-
Page 20: Table Of Contents
Introduction Contents Installing the Page Printer..............1 Environmental Requirements of the Page Printer..............1 Names of Parts ........................6 Install the toner container....................8 Add paper.........................11 Open the paper stopper on the face-down tray ...............15 Open the face-up output tray (when the tray is being used) ..........16 Connect the printer to the computer ................17 Attach the power cord ......................19 Test the printer .........................20... -
Page 21: Installing The Page Printer
Installing the Page Printer Installing the Page Printer Environmental Requirements of the Page Printer Places to Avoid Avoid installing the printer in locations subject to: • Direct drafts of hot or cold air • Direct drafts from outside (Avoid locations near doors leading outside.) •... - Page 22 Environmental Requirements of the Page Printer • Level and well supported Place the printer on a sturdy table or desk. Do not place the printer on an unstable cart, stand, or table. The printer may fall, causing injury, or serious damage to the printer. •...
-
Page 23: Power Supply
Installing the Page Printer Power Supply The printer should not be on the same power circuit as an air conditioner, fluorescent light, copier, or shredder, because these devices generate electrical noise on the power line. If it must share a power circuit with equipment like this, a high-frequency noise filter or isolation transformer is advisable. -
Page 24: Surrounding Space
Environmental Requirements of the Page Printer Grounding Be sure to connect the ground wire for the printer's power supply to the ground terminal of the power outlet, to a copper pole buried at least 65 cm (25 inches) in the ground, or to a water pipe approved by the water department for use as a ground. - Page 25 Removing or changing parts other than disposable parts is prohibited. For repairs, contact the Kyocera dealer from which you purchased the printer. When moving the printer to a new location, contact the Kyocera dealer from which you purchased the printer.
-
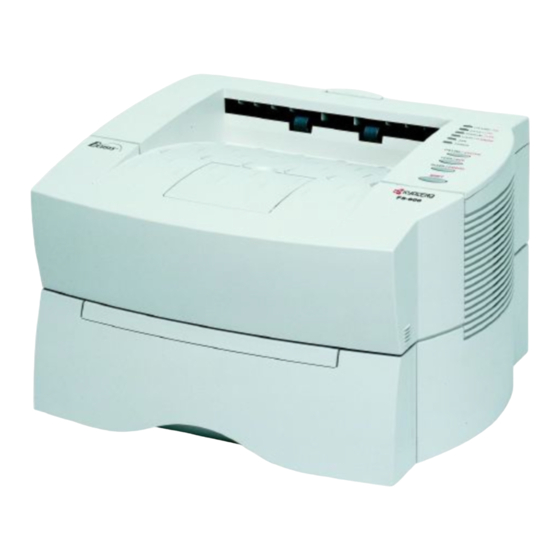
Page 26: Names Of Parts
Names of Parts Names of Parts Front View Rear View Face-Up Output Tray Face-Down Output Tray Control Panel Paper Stopper Paper Cassette Power Cord Connector Sub Tray Parallel Interface Manual feed tray Connector Power Switch Slot Cover for Installation of Optional Interface... - Page 27 Installing the Page Printer Interior View Top Cover Process Unit Toner Container Release Lever (Green)
- Page 28 Remove the protective cover Remove the process unit protective cover Open the printer top cover all the way. Top Cover Process Unit Protective Cover Process Unit Lift the process unit out of the printer. The drum in the process unit is sensitive to light. Do not expose the drum even to normal office lighting (500lux) for more than five minutes.
- Page 29 Installing the Page Printer Pull and remove the process unit protective cover and give the process unit a horizontal shake of 4 to 5 times. Process Unit Shake four or five times Protective Cover Process Unit Install the process unit in the printer. In doing so, carefully align the guides at the both ends of the process unit properly with the slots in the printer.
-
Page 30: Install The Toner Container
Install the toner container Install the toner container Take the toner container from the bag. Shake the toner container with the protective seal (orange- colored) facing up as shown in the figure five times or more to thoroughly mix the toner inside. Toner Container Protective Seal (Orange-colored) - Page 31 Installing the Page Printer Check that the toner container is installed in the correct position, and push forcefully on the top of the toner container at “PUSH HERE.” Close the top cover.
-
Page 32: Add Paper
Add paper Add paper Try as much as possible to use fresh paper which has just been opened. Paper which has been stored long periods contains moisture and may result in sheets sticking together and/or paper jams. For specifications on the paper which can be used with this printer, refer to Appendix B in the User’s Manual on CD-ROM. - Page 33 Installing the Page Printer Adjust the position of the paper stopper located at the rear of the cassette. While holding up the paper stopper, slide the paper stopper to the desired paper size. Adjust the position of the paper guides located on the left and right side of the cassette. Align the paper guides to the desired paper size by lifting the paper guides so they slide.
- Page 34 Add paper Close the cassette cover. Cassette Cover Insert the paper cassette into the slot in the printer. Push it straight in as far as it will go.
-
Page 35: Open The Paper Stopper On The Face-Down Tray
Installing the Page Printer Open the paper stopper on the face-down tray Raise the paper stopper on the face-down tray as shown in the figure. Paper Stopper... -
Page 36: Open The Face-Up Output Tray (When The Tray Is Being Used)
Open the face-up output tray (when the tray is being used) Open the face-up output tray (when the tray is being used) Use the face-up output tray when you wish paper to be stacked with the printed side facing up (reverse order). -
Page 37: Connect The Printer To The Computer
Installing the Page Printer Connect the printer to the computer CAUTION Before performing this step, be sure to turn off the printer's power switch and unplug the power plug from the power outlet. Failure to do so may result in electric shock. A standard Centronics parallel interface connector ( ) is located on the rear side of the printer. -
Page 38: Parallel Interface Connection
Connect the printer to the computer Parallel Interface Connection Plug one end of the printer cable into the connector on the printer marked with a (parallel) symbol. Close the clips on both sides to fix the connector in place. Clips Printer Cable Rear panel Plug the other end of the printer cable into the computer’s parallel (Centronics) interface... -
Page 39: Attach The Power Cord
Installing the Page Printer Attach the power cord CAUTION Be sure the printer's power switch is turned off. Note______________________________________________________________________ Only use the power cord supplied with the printer. Plug the power cord into the power cord connector on the rear side of the printer. Power Cord Connector Power Cord Connect the other end of the power cord into a power outlet. -
Page 40: Test The Printer
Test the printer Test the printer Use the following procedure to test the printer and print out a status page indicating factory settings. For details on the indicators and keys on the printer’s control panel, please refer to Chapter 2 The Control Panel in the User’s Manual on CD-ROM. -
Page 41: Test The Interface With The Computer
Installing the Page Printer Test the interface with the computer In order to check that the printer and the computer are properly connected you must print by sending an actual command from the computer. Turn on the printer's power switch and turn on the computer’s power as well. Wait until the ON LINE/A4 indicator lights. -
Page 42: Install The Printer Driver
Install the printer driver Install the printer driver A CD-ROM containing a printer driver for Windows (Windows3.1, Windows 95 and Windows NT 3.51/4.0) is supplied with this printer. Once this printer driver is installed on the computer, it is possible to make various settings for this printer from within Windows applications. - Page 43 The Pri A scree Next, “C A scree Select “Kyocera FS-600,” click on “Next >,” and follow the on-screen instructions to install. Once the driver has been properly installed, a Kyocera printer icon will be added to the Printers folder.
- Page 44 Install the printer driver Note______________________________________________________________________ When printing under Windows 95, be sure to set the emulation of this printer to HP LaserJet 5P (default setting).
- Page 45 Installing the Page Printer Installing Under Windows3.1 Insert the supplied CD-ROM into the CD-ROM drive of the computer. Double click on the Control Panel. Double click on “Printers.”...
- Page 46 Install the printer driver Click on “Add >>.” A screen for “List of Printers:” will appear. From the choices, click on “Install Unlisted or Updated Printer.”...
- Page 47 Refer to the Readme.txt file at the root directory of the CD-ROM and browse to the directory which contains the appropriate drivers for your country. Select “Kyocera FS-600” from the printers displayed and click on “OK.” Once the driver has been installed, close the Control Panel by clicking on “Close.”...
-
Page 48: Expanding Memory
Note______________________________________________________________________ The expansion memory should be installed only by a Kyocera authorized dealer or Kyocera certified technician. Kyocera shall not be liable for damage due to improper installation of the expansion memory. Memory Required by the Printer Environment It may be necessary to extend memory depending on the operating environment of the printer. Please refer to the table below for minimum memory requirements in various environments. - Page 49 Installing the Page Printer The description given below is intended for service personnel. Precautions on the Handling of Extended SIMM Static electricity which may accumulate in the human body through walking on carpets or other such surfaces is the enemy of SIMM loaded with many semiconductor chips. Pay attention to the following things before installation to protect memory chips against damage from static electricity.
-
Page 50: Installing Simm
Expanding Memory Installing SIMM Insert the SIMM into the socket on the printer's main board. WARNING Take precautions that no foreign substances such as metal chips or liquid get inside the printer during the installation process. Operation of the printer during the presence of a foreign substance may lead to fire or electric shock. - Page 51 Installing the Page Printer Draw the main circuit board all way out of the printer as follows: Turn the printer's power off. Unplug the printer’s power cable and disconnect it from the host computer. Remove the two screws from the printer's rear cover. Screws...
- Page 52 Expanding Memory Pull the main circuit board all the way out of the printer. Caution Before pulling the main board out, clean the area on the table, etc., at the back of the printer’s rear panel. Foreign objects, if accidentally stuck to the back of the main board, may cause serious damage to the printer.
- Page 53 Installing the Page Printer Insert the connector end of the SIMM into the socket. Carefully push the board upright until it snaps into place. Make sure that the catches at the ends of the socket fit into the holes at the ends of the SIMM board.
- Page 54 Expanding Memory To remove the SIMM, carefully pull the end catches sideways slightly and tilt the SIMM to the left as shown, then pull the SIMM out of the socket. After SIMM has been installed in the printer, use the following procedure to check that installation has been performed properly.
- Page 55 Installing the Page Printer Testing Extended Memory Check that the power switch is off, plug the power cord into the printer, and turn the power on. Wait for the printer's ON LINE/A4 indicator to light, then press and hold the SHIFT key followed by the ON LINE/STATUS key briefly.
-
Page 56: Manual Paper Feeding
Manual Paper Feeding Manual Paper Feeding Manual paper feeding enables you to print on special paper without having to reload the paper feed cassette. Appendix B in the CD-ROM User’s Manual lists the usable types of paper. Note______________________________________________________________________ Since the printer does not sense the position of the manual feed paper guides, the printer assumes that all manually fed paper uses the legal size (8-1/2 ×... - Page 57 Installing the Page Printer Fold the sub-tray outward, then adjust the paper guides to the size of the manually fed paper. Sub-Tray Making sure that the ON LINE/A4 indicator is lit, press the FEED/SIZE key so that the MANUAL/LGL indicator begins flashing. Insert a sheet of paper as far as it will go.
-
Page 58: Feeding Envelopes
Manual Paper Feeding Send printing commands and data from the computer. The DATA/LTR indicator begins flashing. When the data has processed (the DATA/LTR indicator stays lit), paper is fed from the manual feed tray. To exit manual paper feed, press the FEED/SIZE key to light the CASSETTE/OTHERS indicator. Feeding Envelopes Envelopes should be fed in the face up, right edge first. - Page 59 Installing the Page Printer Making sure that the ON LINE/A4 indicator is lit, place a sheet of letterhead paper on the manual feed tray in the same manner as when printing normally from the manual tray. (The ON LINE/A4 and MANUAL/LGL indicators begin flashing.) Send data to the printer.
-
Page 60: Fonts
Fonts Fonts This section contains a full list of the printer’s resident scalable fonts. Scalable Fonts The printer has 45 resident scalable fonts. These fonts include the letters SWC or SWM in the typeface name and are equivalent to HP LaserJet 5P fonts. - Page 61 Installing the Page Printer Resident Scalable Fonts (1)
- Page 62 Fonts Resident Scalable Fonts (2)
-
Page 63: Toner Container Replacement
Installing the Page Printer Toner Container Replacement When the printer runs low on toner, TONER indicator flashes on the control panel. Be sure to promptly replace with a new toner kit and clean the inside of the printer when this initial message appears. If the printer stops printing while TONER indicator is lighting, replace with a new toner kit so the printer can continue printing. - Page 64 Be sure to clean the inside of the printer along with replacing the toner container. For details, see “Cleaning” on page 50. • Use of original Kyocera toner kits is highly recommended to prevent printer trouble and ensure the long life of the printer.
-
Page 65: Replenishing Toner
Installing the Page Printer Replenishing Toner Open the top cover. Top Cover Slide the toner container release lever to the right to release the old toner container from the printer. After removing it, take care not to tilt the toner container. Toner Container Release Lever Old Toner Container... - Page 66 Toner Container Replacement Use the cap provided in this toner kit to cover the removed toner container as shown in the diagram below. This is to prevent the waste toner from spilling. Dispose of the old toner container in the plastic waste bag supplied in the new toner kit so that toner does not scatter.
- Page 67 Installing the Page Printer Take the new toner container from the toner kit. Shake the toner container with the protective seal (orange-colored) facing up as shown in the figure five times or more to thoroughly mix the toner inside. Shake five or more times Carefully remove the protective seal.
- Page 68 Toner Container Replacement Align the ends of the toner container with the grooves to the left and right inside the printer and install. Toner Container Grooves Check that the toner container is installed in the correct position, and push forcefully on the top of the toner container “PUSH HERE.”...
- Page 69 Installing the Page Printer Note______________________________________________________________________ Make sure that the toner container is properly locked into the printer. Close the top cover.
-
Page 70: Cleaning
Cleaning Cleaning To avoid print quality problems, the interior of the printer must be cleaned with every toner container replacement. Note______________________________________________________________________ Cleaning should be done from time to time to avoid print quality problems. Printer Interior Note______________________________________________________________________ Before cleaning the interior of the printer, switch off the printer power. To avoid print quality problems due to paper dust and debris, clean the interior of the printer in the following manner. - Page 71 Installing the Page Printer Use the cleaning cloth provided together with this kit to clean dust and dirt away from the registration roller and laser scanner cover glass. Registration Roller Laser Scanner Cover Glass Cleaning Cloth Note______________________________________________________________________ While cleaning, be careful to avoid touching the transfer roller (the black roller) and laser scanner cover glass.
- Page 72 Cleaning After cleaning is done, install the process unit in the printer. In doing so, carefully align the guides at the both ends of the process unit properly with the slots in the printer. Close the printer’s top cover by pressing down on the front left and right corners of the top cover.
-
Page 73: General Guide
Installing the Page Printer General Guide There are quite a few printer problems which may be corrected by the user. This section explains how to correct these problems. If some kind of printer problem should occur, check the following before concluding the printer is broken. Symptom Check Items Corrective Action... - Page 74 Try printing another file or using another print software. command. If the problem occurs only with a specific file or application, check the printer settings for that application. If you still cannot correct a printer problem even after checking the above, please contact your Kyocera dealer.
-
Page 75: Correcting A Paper Jam
Installing the Page Printer Correcting a Paper Jam This section describes how to remove paper when it jams in the printer. The printer will stop whenever paper jams in the printer or paper is not fed from a cassette. The printer will go off line and Jam indicator will light in the control panel. - Page 76 Correcting a Paper Jam Jam at the Paper Cassette and the (Optional) Paper Feeder’s Cassette Pull out the paper cassette and remove any partially fed paper, then re-close the paper cassette. Open and close the printer’s top cover to clear the error. Follow the same steps for clearing the jammed paper at the option paper feeder’s cassette.
-
Page 77: Jam Inside The Printer
Installing the Page Printer Jam Inside the Printer Open the printer’s top cover and remove the process unit. Remove any jammed paper, then replace the process unit and close the top cover. For removal/installation method of the process unit, refer to Cleaning (page 50). - Page 78 Correcting a Paper Jam Notes after removing the paper jam Once the jammed paper is removed, opening and closing the printer’s top cover clears the jam error. The printer then automatically warms up and resumes printing. Depending on where the jam occurred, the printer may or may not reprint the jammed page.
-
Page 79: Printer Specifications
6 pages/minute (when printing multiple copies of the same page) Resolution 600 dots/inch (vertical and horizontal) with KIR 2 (Kyocera Image Refinement 2). First print (A4, 23°C) Sleep mode off - 25 seconds or less Sleep mode on - 55 seconds or less Warmup time (23°C) - Page 80 Printer Specifications Item Description Paper Plain paper (See Appendix B in the User’s Manual on CD-ROM.) Paper sizes Cassette: Letter size, A4 to A5 universal cassette Manual feed tray: 80 mm x 148 mm to 215.9 mm x 355.6 mm Paper capacity Cassette: 150 sheets each (80 g/m...
- Page 81 Index Index Cap ............46 Installing ...........22 Cleaning cloth .......... 43 Cleaning........... 50 Manual paper feeding.......36 Dispose of the old toner container ... 46 Paper jam ..........55 Parallel interface connector ......17 Environmental requirements Places to avoid ...........1 of the page printer..1 Plastic waste bag........43 Expanding memory ........
- Page 82 Index Toner kit ........... 43 Windows........... 22 Index-2...
Need help?
Do you have a question about the FS-600 and is the answer not in the manual?
Questions and answers