Auriol Z31743A Operation And Safety Notes
Temperature station
Hide thumbs
Also See for Z31743A:
- Operation manual (159 pages) ,
- Operation and safety notes (154 pages)
Table of Contents
Advertisement
Available languages
Available languages
ESTACIÓN DE TEMPERATURA /
STAZIONE METEOROLOGICA
ESTACIÓN DE TEMPERATURA
Instrucciones de utilización y de seguridad
STAZIONE METEOROLOGICA
Indicazioni per l'uso e per la sicurezza
ESTAÇÃO METEREOLÓGICA
Instruções de utilização e de segurança
TEMPERATURE STATION
Operation and Safety Notes
TEMPERATURSTATION
Bedienungs- und Sicherheitshinweise
IAN 96385
Advertisement
Chapters
Table of Contents

Related Manuals for Auriol Z31743A


Summary of Contents for Auriol Z31743A
- Page 1 ESTACIÓN DE TEMPERATURA / STAZIONE METEOROLOGICA ESTACIÓN DE TEMPERATURA Instrucciones de utilización y de seguridad STAZIONE METEOROLOGICA Indicazioni per l’uso e per la sicurezza ESTAÇÃO METEREOLÓGICA Instruções de utilização e de segurança TEMPERATURE STATION Operation and Safety Notes TEMPERATURSTATION Bedienungs- und Sicherheitshinweise IAN 96385...
- Page 2 Instrucciones de utilización y de seguridad Página IT / MT Indicazioni per l’uso e per la sicurezza Pagina 29 Instruções de utilização e de segurança Página 52 GB / MT Operation and Safety Notes Page DE / AT / CH Bedienungs- und Sicherheitshinweise Seite...
-
Page 6: Table Of Contents
Uso adecuado ........Página Descripción de los elementos ... Página Datos técnicos ........Página Seguridad ..........Página Indicaciones generales de seguridad ..Página 10 Indicaciones de seguridad sobre las pilas ..Página 11 Antes de la puesta en marcha Indicaciones generales ......Página 13 Puesta en marcha del sensor exterior .. -
Page 7: Uso Adecuado
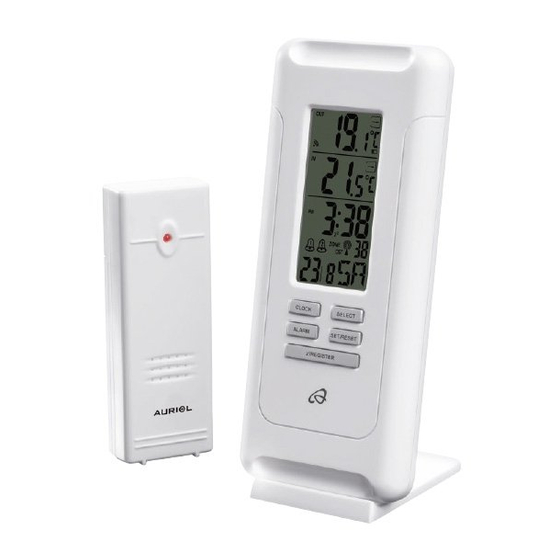
Estación de temperatura Uso adecuado La estación meteorológica muestra la temperatura interior y exterior en grados Celsius (ºC) o Fahren- heit (ºF), así como sus valores máximos y mínimos. La estación meteorológica también muestra la hora con formato de 12 / 24 horas y la fecha. La estación meteorológica también dispone de función de alarma. -
Page 8: Datos Técnicos
Segunda zona horaria (ZONE) Indicación MAX / MIN (temperatura exterior) Estación meteorológica Tecla Z / REGISTER (función de repetición de alarma / REGISTRER) Tecla SELECT (“seleccionar”) Tecla SET / RESET (“ajustar” / “resetear”) Tecla ALARM Tecla CLOCK (hora) Dispositivo para colgar Compartimento de las pilas Soporte vertical Tornillo (ø... -
Page 9: Seguridad
Pilas: 2 x AA 1,5 V (incluidas en el volu- men de suministro) Sensor exterior: Rango de temperaturas: –20 °C – +60 °C –4 °F – +140 °F Nota: Si la temperatura es inferior a –20 °C (–4 °F) se mostrará “LL.L”. Si la temperatura es superior a 60 °C (140 °F) se mostrará... -
Page 10: Indicaciones Generales De Seguridad
Indicaciones generales de seguridad Este producto puede ser utilizado por niños mayores de 8 años, así como por personas con capa- cidades físicas, sensoriales o mentales reducidas o que cuen- ten con poca experiencia y / o falta de conocimientos, siempre y cuando se les haya enseñado cómo utilizar el aparato de forma segura y hayan comprendido los... -
Page 11: Indicaciones De Seguridad Sobre Las Pilas
afectar al funcionamiento del aparato. Tenga en cuenta que los daños producidos por manejo incorrecto, no seguimiento del manual de instrucciones o manipulación por parte de personas no auto- rizadas, están excluidos de la garantía. Indicaciones de seguridad sobre las pilas ¡PELIGRO DE MUERTE! Las pilas podrían ser ingeridas, lo cual comporta... - Page 12 Retire las pilas del aparato si no piensa utilizarlo durante un período de tiempo prolongado. ¡PRECAUCIÓN! ¡PELI- GRO DE EXPLOSIÓN! No recargue nunca pilas no recargables. ¡Cuando coloque las pilas observe la polaridad correcta! Ésta se indica en el comparti- mento de las baterías.
-
Page 13: Antes De La Puesta En Marcha
Utilice únicamente pilas del mismo tipo. En caso contrario existe peligro de explosión. ¡Si se derrama el líquido de las pilas dentro del aparato, sáquelas inmediatamente para evitar daños en el aparato! Evite el contacto con la piel, ojos y mucosas. Si se entra en contacto con el ácido de las baterías, lave la parte afectada con abundante agua y / o pro-... -
Page 14: Puesta En Marcha Del Sensor Exterior
calor (p. ej. radiadores). De hacerlo podrían sufrir daños. Coloque la estación meteorológica sobre el soporte vertical correspondiente Asegúrese de que los aparatos adyacentes no utilicen la misma frecuencia de 433 MHz. Estos aparatos pueden alterar la comunica- ción inalámbrica. No coloque los aparatos cerca o encima de placas de metal. -
Page 15: Puesta En Funcionamiento De La Estación Meteorológica
El sensor exterior ya está listo para funcionar y el LED de control se ilumina brevemente. Cierre la cubierta del compartimento de las pilas. Si fuera necesario, reinicie la estación meteo- rológica, si ésta no funciona correctamente. Para ello, mantenga pulsada la tecla Z REGISTER Puesta en funcionamiento de la estación meteorológica... - Page 16 Nota: si la estación meteorológica no recibe la señal del sensor exterior al cabo de 3 minutos, la estación meteorológica inicia entonces automáti- camente la recepción de la señal de radiofre- cuencia. La estación meteorológica inicia la recepción de la señal de radiofrecuencia una vez recibida la señal exterior o al cabo de 3 minutos.
-
Page 17: Estación Meteorológica
Montaje de la estación meteorológica y / o sensor exterior en la pared: Nota: para este paso de trabajo necesita un taladro y un destornillador con punta de estrella. ¡PRECAUCIÓN! ¡PELIGRO MORTAL Y DE LESIONES, ASÍ COMO DAÑOS AL APARATO! Lea también las indicaciones de manejo y seguridad de su taladro. -
Page 18: Ajuste Manual De Idioma / Zona Horaria / Hora / Fecha
Enganche el sensor exterior con el dispositivo para colgar en el tornillo. Nota: asegúrese de que el sensor exterior no entre en contacto directo con agua o los rayos solares. Los aparatos electrónicos pueden produ- cir interferencias en la recepción. Ajuste manual de idioma / zona horaria / hora / fecha La recepción de la señal de radiofrecuencia DCF... - Page 19 4. Pulse la tecla SET / RESET, para ajustar el idioma deseado (GE = alemán, FR = francés, SP = español, IT = italiano, EN = inglés). 5. Presione la tecla CLOCK para confirmar la entrada. La indicación de zona horaria par- padea.
-
Page 20: Visualización Del Horario De Verano
11. La pantalla LCD regresa a continuación nuevamente al modo estándar. Visualización del horario de verano El horario de verano se muestra automáticamente en la pantalla LCD con el símbolo DST . La estación meteorológica reconoce automática- mente a través de la señal DCF el horario de verano. -
Page 21: Consultar Alarmas
4. Pulse la tecla SET / RESET para ajustar el valor deseado. 5. Presione la tecla ALARM para confirmar su entrada. 6. Repita los pasos 2 a 5 para programar la alarma 2. Consultar alarmas Pulse 1 o 2 veces la tecla ALARM para consultar la hora de la alarma 1 o de la alarma 2. -
Page 22: Uso De La Función De Retraso De Alarma
tecla SET / RESET 1 vez para desactivar las alarmas 1 y 2. Uso de la función de retraso de alarma Presione la tecla Z / REGISTER para activar la función de retraso de la alarma. La alarma enmudece y las indicaciones parpadean. -
Page 23: Visualizar La Tendencia De Temperatura
Pulse la tecla SELECT para visualizar los valores máximos de la temperatura interior y exterior Pulse la tecla SELECT para visualizar los valores mínimos de la temperatura interior y exterior. Pulse la tecla SET / RESET mientras se muestran los valores máximo y mínimo para resetear los valores. -
Page 24: Cambiar Pilas
Cambiar pilas Abra el compartimento de las pilas Retire las pilas gastadas. Inserte dos pilas nuevas de 1,5 V (AA) en el compartimento. Nota: Tenga en cuenta la polaridad correcta. Ésta se indica en el compartimento de las pilas (véase también fig. C + E). Cierre el compartimento de las pilas. -
Page 25: Limpieza Y Mantenimiento
la estación base. Un „contacto visual“ entre el sensor exterior y la estación base a menudo mejora la transmisión. El frío (temperaturas exteriores bajo 0 °C) pueden reducir el rendimiento de las pilas del sensor exterior y, en consecuencia, perjudicar la radio transmisión. Las pilas gastadas o casi vacías son otro factor que puede perjudicar a la recepción del sensor externo. - Page 26 Puede consultar las posibilidades de eliminación del producto usado en la administración de su comunidad o ciudad. Para proteger el medioambiente, cuando ya no utilice el aparato, no lo arroje a la basura doméstica, sino deséchelo adecuadamente. Diríjase a la administración competente para obtener información sobre los puntos de recogida de desechos y sus horarios.
-
Page 27: Declaración De Conformidad
Declaración de conformidad Nosotros OWIM GmbH & Co. KG, Stiftsbergstraße 1, D-74167 Neckarsulm, declaramos en responsa- bilidad única que el producto: Estación de tempe- ratura, modelo n.° Z31743 A / Z31743B, versión: 03 / 2014, al que esta declaración hace referen- cia, cumple con todas las normas / y la normativa de los documentos de 1999 / 5 / EC. - Page 28 compra original. Este documento se requerirá como prueba de que se realizó la compra. Si en el plazo de tres años a partir de la fecha de compra se produce un fallo de material o fabricación en este producto, repararemos el pro- ducto o lo sustituiremos gratuitamente por un pro- ducto nuevo (según nuestra elección).
- Page 29 Utilizzo conforme alla destinazione d’uso ..... Pagina 30 Descrizione dei componenti ..Pagina 30 Dati tecnici ..........Pagina 32 Sicurezza Avvisi di sicurezza generali ....... Pagina 33 Avvertenze di sicurezza sulle batterie ..Pagina 34 Prima della messa in funzione Avvertenze generali ........
-
Page 30: Utilizzo Conforme Alla Destinazione D'uso
Stazione meteorologica Utilizzo conforme alla destinazione d’uso La stazione meteo visualizza la temperatura interna ed esterna espressa in gradi Celsius (°C) oppure in gradi Fahrenheit (°F), nonché i loro valori minimi e massimi. La stazione meteo visua- lizza inoltre l’orario in formato 12 / 24 ore nonché la data. - Page 31 Data (die / mese) Visualizzazione DST (ora legale) Simbolo (Allarme 1 / Allarme 2) 2. Fuso orario (ZONE) Visualizzazione MAX / MIN (temperatura esterna) Stazione meteo Tasto Z / REGISTER (funzione di ripetizione dell’allarme / REGISTRO) Tasto SELECT (“selezione”) Tasto SET / RESET (“impostazione”...
-
Page 32: Dati Tecnici
Dati tecnici Stazione meteo: Campo di misurazione della temperatura: 0 – + 50 °C +32 – +122 °F Consiglio: Se la temperatura è minore di 0 °C (32 °F), viene visualizzato „LL.L“. Se la tempera- tura è maggiore di 50 °C (122 °F), viene visua- lizzato „HH.H“. -
Page 33: Sicurezza
Sicurezza CONSERVARE TUTTE LE AVVER- TENZE DI SICUREZZA E LE ISTRU- ZIONI PER UN EVENTUALE USO FUTURO! Avvisi di sicurezza generali Quest‘apparecchio può essere utilizzato da bambini di età superiore agli 8 anni, da persone con capacità fisiche, sensoriali o mentali ridotte o da persone inesperte solo se supervisionate o preventivamente istruite sull’- utilizzo in sicurezza del prodotto... -
Page 34: Avvertenze Di Sicurezza Sulle Batterie
essere eseguite dai bambini senza supervisione. Non esporre l’apparecchiatura ad un campo magnetico di alta intensità. Ciò potrebbe limitare la funzionalità dell’apparecchiatura. Prendere in considerazione il fatto che i danneggiamenti ad opera di maneggio scorretto, violazione delle istruzioni d’uso e causati da interventi di perso- nale non autorizzato sono esclusi dalla garanzia. - Page 35 Rimuovere dall’apparecchio le batterie non utilizzate per parecchio tempo. PRUDENZA! PERI- COLO DI ESPLO- SIONE! Non ricaricare mai batterie non ricaricabili. Prestare attenzione alla polarità corretta quando vengono inserite le batterie! La polarità è riportata nei vani portabatterie. Rimuovere immediatamente le batterie esauste dall’apparecchio.
-
Page 36: Prima Della Messa In Funzione
contrario sussiste il pericolo di esplosione. Se le batterie del vostro appa- recchio dovessero aver perso dell’acido, estrarle immediata- mente al fine di evitare danni all’apparecchio! Evitare il contatto con pelle, occhi e mucose. In caso di contatto con l’acido della batteria sciacquare abbondantemente il punto inte- ressato e / o rivolgersi alle cure mediche! -
Page 37: Messa In Funzione Del Sensore Esterno
calore quali ad es. termosifoni. Altrimenti si rischia di danneggiare le apparecchiature. Posizionare la stazione meteo sull’apposito piedino Assicurarsi che le apparecchiature adiacenti non vengano messe in funzione con la stessa frequenza di 433 MHz. Queste apparec- chiature potrebbero causare un disturbo del collegamento radio. -
Page 38: Messa In Funzione Della Stazione Meteo
Nota: Assicurarsi che la polarità sia corretta. La polarità è riportata nel vano portabatterie (vedi anche la fig. E). Ora il sensore esterno è pronto per essere messo in funzione e il LED di controllo accende brevemente. Chiudere il coperchio del vano portabatterie. Qualora la stazione meteo non funzionasse più... - Page 39 lampeggiare e la temperatura viene visualizzata nel display a cristalli liquidi. Nota: Qualora la stazione meteo non riuscisse a ricevere il segnale del sensore esterno dopo 3 minuti, la stazione meteo avvia automaticamente la ricezione del segnale radio. Una volta ricevuto il segnale del sensore esterno ovvero dopo 3 minuti la stazione meteo avvia la ricezione del segnale radio.
-
Page 40: Stazione Meteo
e la data anche manualmente (vedi il capitolo “Impostazione manuale di lingua / fuso orario / orario / data”). Montaggio della stazione meteo e / o del sensore esterno su una parete: Nota: Per svolgere le operazioni di seguito descritte è necessario utilizzare un trapano ed un cacciavite a croce. -
Page 41: Sensore Esterno
Sensore esterno Contrassegnare il punto dove eseguire il foro (ø ca. 6 mm) sulla parete. Eseguire il foro utilizzando un trapano. Inserire il tassello nel foro eseguito con il trapano. Usando un cacciavite a croce, avvitare la vite nel tassello. Appendere il sensore esterno alla vite per mezzo del dispositivo di aggancio Nota: Assicurarsi che il sensore esterno non... - Page 42 eseguire un’impostazione accelerata dei valori. Questa impostazione veloce può essere utilizzata per le seguenti procedure di impostazione. Qualora 30 secondi non si prema alcun tasto, il display a cristalli liquidi torna automaticamente alla visualizzazione standard. 4. Per impostare la lingua desiderata (GE = tedesco, FR = francese, SP = spagnolo, IT = italiano, EN = inglese) premere il tasto SET / RESET.
-
Page 43: Visualizzazione Dell'ora Legale
7. Per confermare l’immissione, premere il tasto CLOCK. Lampeggia la visualizzazione dell’ora. 8. Per impostare il valore desiderato premere il tasto SET / RESET. 9. Per confermare l’immissione, premere il tasto CLOCK. 10. Ripetere i passi di lavoro 6 e 7 per impostare i valori relativi a ore, minuti, secondi anno e data (giorno / mese). -
Page 44: Richiamo Degli Orari Di Allarme
1. Premere e mantenere premuto il tasto ALARM per circa 3 secondi. Nota: Qualora un allarme fosse stato impo- stato in precedenza, sul display a cristalli liquidi apparirà l’orario di allarme impostato. Altrimenti, appare la visualizzazione 0:00 oppure AM 12:00. 2. -
Page 45: Utilizzo Della Funzione Di Ripetizione Della Suoneria
2 volte il tasto SET / RESET. Per attivare gli allarmi 1 e 2, premere 3 volte il tasto SET / RESET. Nota: Sul display a cristalli liquidi appare il simbolo oppure . Il segnale acustico di allarme risuona non appena è... -
Page 46: Visualizzazione Della Temperatura
Visualizzazione della temperatura Sul display a cristalli liquidi vengono visualizzate sia la temperatura interna che la temperatura esterna Premere e mantenere premuto il tasto SELECT per circa 3 secondi. Lampeggia la visualizza- zione °C. Per scegliere tra le scale di temperatura °C (Celsius) e °F (Fahrenheit) premere il tasto SET / RESET Confermare il dato inserito premendo il tasto... -
Page 47: Visualizzazione Della Tendenza Di Temperatura
Visualizzazione della tendenza di temperatura Dopo il collegamento coronato da successo con il sensore esterno vengono visualizzate la ten- denza della temperatura (esterna) nonché il trend della temperatura (interna) Sono possibili le seguenti visualizzazioni: = la temperatura aumenta. = la temperatura rimane costante. = la temperatura scende. - Page 48 fonti di disturbo quali telefoni cellulari, apparecchi radio, radio CB, telecomandi o forni a microonde ecc. Qualora il display segnalasse dei disturbi, rimuovere tali apparecchi dalla portata della stazione meteo / del sensore esterno, oppure rimuovere per breve tempo le batterie dalla stazione meteo / dal sensore esterno.
-
Page 49: Pulizia E Manutenzione
Pulizia e manutenzione Pulisca l’apparecchiatura solo sulla sua superficie esterna servendosi di una pezza morbida e asciutta. Non spruzzare assolutamente sul sensore esterno, ad es. con un tubo da giardino. Il sensore esterno è solo protetto contro la pioggia sulla superficie superiore. Smaltimento L’imballaggio è... - Page 50 L’errato smaltimento delle batterie può causare danni ambientali! Le batterie non devono essere smaltite nella spaz- zatura domestica. Esse possono contenere metalli pesanti velenosi e devono essere trattate quali rifiuti speciali. I simboli chimici dei metalli pesanti sono i seguenti: Cd = Cadmio, Hg = mercurio, Pb = piombo.
-
Page 51: Garanzia
Garanzia L‘apparecchio è stato prodotto secondo severe diret- tive di qualità e controllato con premura prima della consegna. In caso di difetti del prodotto, l‘acquirente può far valere i propri diritti legali nei confronti del venditore. Questi diritti legali non vengono limitati in alcun modo dalla garanzia di seguito riportata. - Page 52 Utilização correcta ......Página 53 Descrição das peças ...... Página 53 Dados técnicos ........Página 54 Segurança Indicações gerais de segurança ....Página 56 Indicações de segurança relativas às pilhas ........Página 57 Antes da colocação em funcionamento Indicações gerais ........Página 59 Colocar o sensor exterior em funcionamento ........
-
Page 53: Utilização Correcta
Estação metereológica Utilização correcta A estação meteorológica indica a temperatura interior e exterior em graus Celsius (°C) ou Fahrenheit (°F), assim como os seus valores máxi- mos e mínimos. Os restantes valores do visor da estação meteorológica incluem a hora no formato de 12 / 24 horas e a data. -
Page 54: Dados Técnicos
Indicação DST (horário de Verão) Símbolo (Alarme 1 / Alarme 2) 2.º Fuso horário (ZONE) Indicação de MÁX. / MÍN. (temperatura exterior) Estação meteorológica Tecla Z / REGISTER (Função „snooze“ / REGISTER) Tecla SELECT (“seleccionar”) Tecla SET / RESET (“configurar” / “repor”) Tecla ALARM Tecla CLOCK (Hora) Orifício para pendurar... - Page 55 Nota: Se a temperatura for inferior a 0 °C (32 °F) é apresentada a indicação “LL.L”. Se a temperatura ultrapassar os 50ºC (122ºF) é apresentada a indicação “HH.H”. Resolução de temperatura: 0,1 °C Sinal de radiofrequência: DCF Pilhas: 2 x AA 1,5 V (incluídas no material fornecido) Sensor exterior:...
-
Page 56: Segurança
Segurança GUARDE TODAS AS INDICA- ÇÕES DE SEGURANÇA E INSTRU- ÇÕES PARA FUTURA CONSULTA! Indicações gerais de segurança Ente aparelho pode ser utilizado por crianças a partir dos 8 anos, assim como por pessoas com capacidades físicas, sensoriais ou mentais reduzidas ou defi- ciências na experiência e.ou conhecimento se for vigiadas ou instruídas em relação ao uso... -
Page 57: Indicações De Segurança Relativas Às Pilhas
realizadas por crianças sem vigilância. Nunca exponha o aparelho a campos electromagnéticos extre- mamente elevados. Isso pode prejudicar o funcionamento do aparelho. Tenha em atenção que a garan- tia não abrange danos causados por um manuseamento inade- quado, pela inobservância do manual de instruções ou por uma intervenção por pessoal não autorizado. - Page 58 engolida, deve procurar ime- diatamente ajuda médica. Retire as pilhas do aparelho, se este não for utilizado durante muito tempo. CUIDADO! PERIGO DE EXPLOSÃO! Nunca recarregue pilhas não recarre- gáveis. Ao colocar as pilhas, tenha em atenção a polaridade correcta! Esta é...
-
Page 59: Antes Da Colocação Em Funcionamento
Utilize apenas pilhas do mesmo tipo. Caso contrário, existe perigo de explosão. Caso as pilhas do seu aparelho comecem a derramar dentro deste, retire-as imediatamente, de forma a evitar danos no aparelho! Evite o contacto com a pele, olhos e mucosas. No caso de contacto com o ácido das pilhas, lave o local afectado com bas- tante água e / ou consulte um... -
Page 60: Colocar O Sensor Exterior Em Funcionamento
aquecedores. Caso contrário, os aparelhos podem ficar danificados. Coloque a estação meteorológica sobre o respectivo pé de suporte Certifique-se de que os aparelhos contíguos não funcionam com a mesma frequência de 433 MHz. Estes aparelhos poderão causar interferências na ligação por rádio. Não coloque os aparelhos junto ou em cima de placas metálicas. -
Page 61: Colocar A Estação Meteorológica Em Funcionamento
O sensor exterior está agora operacional e o LED de controlo acende-se de forma breve. Feche a tampa do compartimento das pilhas. Se necessário, se a estação meteorológica não estiver a funcionar correctamente, pro- ceda a um reinício desta. Para isso, prima e mantenha premida a tecla Z / REGISTER Colocar a estação... - Page 62 Nota: Quando a estação meteorológica não recebe sinal do sensor exterior num período de 3 minutos, esta inicia automaticamente com a recepção do sinal de radiofrequência. A estação meteorológica começa a funcionar, após a recepção com sucesso do sinal do sensor exterior ou após 3 minutos, com a recepção do sinal de radiofrequência.
-
Page 63: Estação Meteorológica
Montar a estação meteorológica e / ou o sensor exterior numa parede: Nota: para esta tarefa necessita de um berbequim e de uma chave de fendas Philips. CUIDADO! PERIGO DE MORTE, FERI- MENTOS E DANOS MATERIAIS! Leia atenta- mente as indicações de utilização e de segurança do seu berbequim. -
Page 64: Configurar Manualmente Idioma / Fuso Horário / Hora / Data
Pendure o sensor exterior colocando o orifício para pendurar no parafuso. Nota: certifique-se de que o sensor exterior não entra em contacto com água ou luz solar directa. Aparelhos electrónicos podem interferir com a recepção da radiofrequência. Configurar manualmente idioma / fuso horário / hora / data A recepção do sinal de radiofrequência DCF pode sofrer interferências ou interrupções no... - Page 65 4. Prima a tecla SET / RESET para configurar o idioma desejado (GE = alemão, FR = francês, SP = espanhol, IT = italiano, EN = inglês). 5. Prima a tecla CLOCK para confirmar a sua configuração. A indicação do fuso horário fica intermitente.
-
Page 66: Indicar A Hora De Verão
Nota: A indicação dos segundos só pode ser reposta a 00. 11. De seguida, o visor LC encontra-se novamente na visualização padrão. Indicar a hora de Verão A hora de Verão é indicada no visor LC através do símbolo DST . -
Page 67: Aceder Às Horas De Alarme
3. Prima a tecla ALARM para confirmar a sua configuração. A indicação dos minutos fica intermitente. 4. Prima a tecla SET / RESET para configurar o valor desejado. 5. Prima a tecla ALARM para confirmar a sua configuração. 6. Repita os passos 2 a 5 para configurar a hora para o alarme 2. -
Page 68: Utilizar A Função "Snooze
Prima três vezes a tecla SET / RESET para desactivar o alarme 1. Prima duas vezes a tecla SET / RESET para desactivar o alarme 2. Prima uma vez a tecla SET / RESET para desactivar o alarme 1 e 2. Utilizar a função “snooze” Prima a tecla Z / REGISTER durante o... -
Page 69: Aceder A Valores Mínimos / Máximos
Aceder a valores mínimos / máximos A estação meteorológica memoriza os valores máximos e mínimos do sensor exterior a que está ligada e da estação meteorológica em si. Prima a tecla SELECT para que sejam apresentados os valores máximos da tempe- ratura interior e exterior Prima novamente a tecla SELECT para que... -
Page 70: Substituir As Pilhas
pilhas do sensor exterior ou da estação meteoro- lógica estão fracas. Substituir as pilhas Abra o compartimento das pilhas Retire as pilhas gastas. Coloque as novas pilhas de 1,5 V (AA) nos compartimentos das pilhas. Nota: Tenha em atenção a polaridade cor- recta. -
Page 71: Limpeza E Conservação
alcance indicado é o alcança do campo livre e significa que entre o sensor exterior e a estação base não se podem encontrar nenhuns obstáculos. Um „contato visual“ entre o sensor exterior e a esta- ção de base melhora muitas vezes a transmissão. Frio (temperaturas exteriores abaixo de 0 °C) também pode influenciar de forma negativa a potência da pilha do sensor exterior e assim a... - Page 72 Pode obter informações sobre as possibilidades de eliminação do produto usado junto das autori- dades locais responsáveis pela reciclagem. Não deposite o seu aparelho usado no lixo doméstico. A bem da protecção do ambiente, dê-lhe um destino final adequado. Pode obter informações sobre os pontos de recolha e os res- pectivos horários de abertura junto das autoridades responsáveis.
-
Page 73: Declaração De Conformidade
Declaração de conformidade A empresa OWIM GmbH & Co. KG, Stiftsbergs- traße 1, D-74167 Neckarsulm, declara, sob exclusiva responsabilidade que o produto: Estação metereológica, modelo-n.º.: Z31743 A / Z31743B, versão: 03 / 2014, ao qual se refere a presente declaração, se encontra em conformi- dade com as normas / documentos normativos da Directiva 1999 / 5 / CE. - Page 74 Esse documento é necessário para comprovar a compra. Caso num espaço de tempo de 3 anos a partir da data da compra deste aparelho surja um erro de material ou de fabrico, o aparelho será repa- rado ou substituído por nós – segundo a nossa escolha –...
- Page 75 Proper use ..........Page 76 Description of parts and features ......Page 76 Technical data ........Page 77 Safety General safety information ......Page 78 Safety instructions for batteries ....Page 80 Before initial use General information ........Page 82 Preparing to use the outdoor sensor ...
-
Page 76: Proper Use
Temperature station Proper use The weather station displays the indoor and out- door temperatures in Celsius (°C) or Fahrenheit (°F) and their maximum and minimum values. The weather station also displays the time in 12 / 24- hour clock modes and the date. In addition, the weather station has an alarm function. -
Page 77: Technical Data
Weather station / REGISTER button (snooze function / REGISTER) SELECT button SET / RESET button ALARM button CLOCK button Hanging slot Battery compartment Stand Screw (ø 2.5 mm) Dowel (ø 6 mm) Outdoor sensor Control LED Hanging slot Battery compartment Screw (ø... -
Page 78: Safety
Outdoor sensor: Temperature measurement range: –20 °C – +60 °C –4 °F – +140 °F Note: If the temperature is ≤ –20 °C (–4 °F), the LC display shows “LL.L”. If the temperature is ≥ 60 °C (140 °F), the LC display shows “HH.H”. HF transmission signal: 433 MHz HF transmission range: max. - Page 79 above and persons with reduced physical, sensory or mental ca- pabilities or lack of experience and knowledge if they have been given supervision or instruction concerning use of the appliance in a safe way and understand the hazards involved. Children shall not play with the appliance.
-
Page 80: Safety Instructions For Batteries
Safety instructions for batteries DANGER TO LIFE! Batteries can be swal- lowed, which may represent a danger to life. If a battery has been swallowed, medical help is required immediately. Remove the batteries from the device if they are not going to be used for a prolonged period. - Page 81 Keep batteries away from chil- dren do not throw the batteries in the fire, short-circuit them or take them apart. Always replace all the batteries at once. Use batteries of the same type only. Otherwise there is a risk of an explosion. If the batteries have leaked inside your device, you should remove them immediately in order to...
-
Page 82: Before Initial Use
Before initial use Put the batteries first into the outdoor sensor, then into the weather station. General information CAUTION! When choosing where to position the weather station, make sure that it is not exposed to direct sunlight, vibrations, dust, heat, cold or moisture. -
Page 83: Preparing To Use The Outdoor Sensor
Preparing to use the outdoor sensor Inserting the batteries: Remove the battery compartment cover from the back of the outdoor sensor. Insert two 1.5 V batteries (AA) (included) into the battery compartment Note: Make sure you fit the batteries the right way round (polarity). - Page 84 with the outdoor sensor. This process can take a few minutes. The symbol flashes. Once the de- vice has successfully connected to the external sensor, the symbol stops flashing and the tem- perature is shown in the LC display. Note: If the weather station does not receive the signal from the outdoor sensor within 3 minutes, the weather station automatically starts with the reception of the radio time signal.
-
Page 85: Weather Station
Mounting the weather station and / or the outdoor sensor on a wall: Note: You will require an electric drill and a crosshead screwdriver for this step. CAUTION! DANGER TO LIFE, RISK OF INJURY AND MATERIAL DAMAGE! Read the operating and safety instructions for your drill carefully. -
Page 86: Setting The Language / Time Zone / Time / Date Manually
Note: Ensure that the external sensor does not come into contact with water or direct sunlight. Electronic devices may adversely affect the wire- less signal reception. Setting the language / time zone / time / date manually The reception of DCF radio signal where the weather station has been positioned may become degraded or interrupted. -
Page 87: Displaying Summer Time
6. Press the SET / RESET button to set the desired time zone for time zone 2 (–12 hours to +12 hours). Note: Should you be in a country in which the DCF signal can be received but the time is different to your current local time, you can use the time zone setting to have the clock display your current local time. -
Page 88: Calling Up The Time Zone
automatically detects from the DCF radio signal whether it is summer time or not. Calling up the time zone The default display shows the time zone according to the information provided by the DCF signal. Press the CLOCK button . The time zone appears in the LC display. -
Page 89: Calling Up The Alarm Times
Calling up the alarm times Press ALARM button once or twice to call up the set time for Alarm 1 or Alarm 2 respectively. Press the ALARM button again to return to the default display. Switching the alarm on / off Press the SET / RESET button once to acti- vate Alarm 1. -
Page 90: Displaying Temperature
The alarm signal is silenced and the displays and Z flash. The alarm signal sounds again after approx. 5 minutes. Press the SELECT button to deactivate the snooze function. Displaying temperature The LC display shows the indoor temperature and the outdoor temperature Press and hold down the SELECT button for approx. -
Page 91: Displaying Temperature Trends
Press the SET / RESET button while the maximum and minimum values, are being dis- played to reset the values. Press the SELECT button, to return to the default display. Displaying temperature trends After successfully connecting with the outdoor sensor, the weather station can display the tem- perature trend (outdoor) and the temperature trend (indoor) -
Page 92: Troubleshooting
Troubleshooting Note: This appliance has delicate electronic components. This means that if it is placed near an object that transmits radio signals, it could cause interference. If the display indicates a problem, move such objects away from it or remove the batteries for a short while and then replace them. -
Page 93: Cleaning And Maintenance
If your weather station is not working correctly, please remove the batteries for a short while and then replace them. Cleaning and maintenance The device should only be cleaned on the outside with a soft dry cloth. Under no circumstances should you spray the outdoor sensor, e.g. -
Page 94: Declaration Of Conformity
We, OWIM GmbH & Co. KG, Stiftsbergstraße 1, D-74167 Neckarsulm, hereby declare under our sole responsibility that the product: Temperature station, model no.: Z31743A / Z31743B, Version: 03 / 2014, to which this declaration refers, com- plies with the standards / normative documents of 1999 / 5 / EC. -
Page 95: Warranty
Warranty The device has been manufactured to strict qual- ity guidelines and meticulously examined before delivery. In the event of product defects you have legal rights against the retailer of this product. Your legal rights are not limited in any way by our warranty detailed below. - Page 96 Bestimmungsgemäße Verwendung .......... Seite 97 Teilebeschreibung ......Seite 97 Technische Daten ....... Seite 98 Sicherheit Allgemeine Sicherheitshinweise ....Seite 99 Sicherheitshinweise zu Batterien ....Seite 101 Vor der Inbetriebnahme Allgemeine Hinweise ........Seite 103 Außenfühler in Betrieb nehmen ....Seite 104 Wetterstation in Betrieb nehmen ....
-
Page 97: Bestimmungsgemäße Verwendung
Temperaturstation Bestimmungsgemäße Verwendung Die Wetterstation zeigt die Innen- und Außentem- peratur in Celsius (°C) oder Fahrenheit (°F) sowie deren Maximal- und Minimalwerte an. Weitere Anzeigewerte der Wetterstation sind die Zeit im 12- / 24-Stundenformat sowie das Datum. Des Weiteren verfügt die Wetterstation über eine Alarmfunktion. -
Page 98: Technische Daten
2. Zeitzone (ZONE) MAX- / MIN-Anzeige (Außentemperatur) Wetterstation / REGISTER-Taste (Schlummerfunktion / REGISTER) SELECT-Taste („auswählen“) SET / RESET-Taste („einstellen“ / „zurücksetzen“) ALARM-Taste CLOCK-Taste (Uhr) Aufhängevorrichtung Batteriefach Standfuß Schraube (ø 2,5 mm) Dübel (ø 6 mm) Außenfühler Kontroll-LED Aufhängevorrichtung Batteriefach Schraube (ø 2,5 mm) Dübel (ø... -
Page 99: Sicherheit
Funksignal: Batterien: 2 x AA 1,5 V Lieferumfang enthalten) Außenfühler: Temperaturmessbereich: –20 °C – +60 °C –4 °F – +140 °F Tipp: Beträgt die Temperatur weniger als –20 °C (–4 °F), wird „LL.L“ angezeigt. Übersteigt die Temperatur 60 °C (140 °F), wird „HH.H“ angezeigt. HF Übertragungssignal: 433 MHz HF Übertragungs- reichweite:... - Page 100 von Personen mit verringerten physischen, sensorischen oder mentalen Fähigkeiten oder Mangel an Erfahrung und Wis- sen benutzt werden, wenn sie beaufsichtigt oder bezüglich des sicheren Gebrauchs des Gerätes unterwiesen wurden und die daraus resultierenden Gefahren verstehen. Kinder dürfen nicht mit dem Gerät spielen.
-
Page 101: Sicherheitshinweise Zu Batterien
der Bedienungsanleitung oder Eingriff durch nicht autorisierte Personen von der Garantie aus- geschlossen sind. Sicherheitshinweise zu Batterien LEBENSGE- FAHR! Batterien können ver- schluckt werden, was lebensge- fährlich sein kann. Ist eine Batterie verschluckt worden, muss sofort medizinische Hilfe in Anspruch genommen werden. - Page 102 Achten Sie beim Einlegen auf die richtige Polarität! Diese wird in den Batteriefächern angezeigt. Entfernen Sie erschöpfte Batte- rien umgehend aus dem Gerät. Es besteht erhöhte Auslaufgefahr! Halten Sie Batterien von Kindern fern, werfen Sie die Batterien nicht ins Feuer, schließen Sie sie nicht kurz und nehmen Sie sie nicht ausein ander.
-
Page 103: Vor Der Inbetriebnahme
spülen Sie die betroffene Stelle mit reichlich Wasser ab und / oder suchen Sie einen Arzt auf! Vor der Inbetriebnahme Setzen Sie die Batterien zuerst in den Außenfühler ein, dann erst in die Wetterstation. Allgemeine Hinweise VORSICHT! Stellen Sie bei der Wahl des Aufstellortes sicher, dass die Geräte keiner direkten Sonneneinstrahlung, Vibration, Staub, Hitze, Kälte und Feuchtigkeit ausgesetzt sind. -
Page 104: Außenfühler In Betrieb Nehmen
Deutschland, abgegeben werden – sie variiert um 1 Sekunde in 1 Million Jahren. Ihre Wetterstation empfängt diese Signale unter optimalen Bedingungen bis zu einer Distanz von ca. 1.500 km um Frankfurt / Main. Außenfühler in Betrieb nehmen Batterien einsetzen: Entfernen Sie die Batteriefachabdeckung auf der Rückseite des Außenfühlers. - Page 105 Hinweis: Achten Sie auf die korrekte Polarität. Diese wird im Batteriefach angezeigt (siehe auch Abb. E). Schließen Sie die Batteriefachabdeckung. Wetterstation mit dem Außenfühler und dem DCF-Funksignal verbinden: Die Wetterstation versucht nach dem Einsetzen der Batterien, eine Verbindung zum Außenfühler herzustellen.
- Page 106 wechseln Sie zunächst den Standort der Wetter- station (z.B. in die Nähe eines Fensters). Der Empfang kann durch Hindernisse (z.B. Beton- wände) oder Störquellen (z.B. andere elektrische Geräte) erheblich eingeschränkt werden. Sollte der Empfang des Funksignals weiterhin ge- stört sein, können Sie die Uhrzeit und Datum auch manuell einstellen (siehe „Sprache / Zeitzone / Uhrzeit / Datum manuell einstellen“).
-
Page 107: Wetterstation
Wetterstation Markieren Sie das Bohrloch (ø ca. 6 mm) an der Wand. Bohren Sie mit einer Bohrmaschine das Loch. Stecken Sie den Dübel in das Bohrloch. Drehen Sie mit einem Kreuzschlitzschrauben- dreher die Schraube in den Dübel ein. Hängen Sie die Wetterstation mit der Aufhänge- vorrichtung an der Schraube auf. - Page 108 1. Drücken und halten Sie die CLOCK-Taste für ca. 3 Sekunden gedrückt. 2. Drücken Sie die SET / RESET-Taste , um zwischen dem 12- und 24-Stundenformat zu wählen. 3. Drücken Sie die CLOCK-Taste, um Ihre Eingabe zu bestätigen. Die Wochentagsanzeige blinkt.
-
Page 109: Sommerzeit Anzeigen
Zeitzone auf +01. Die Uhr ist nun immer noch DCF gesteuert, zeigt aber die Uhrzeit eine Stunde mehr an. Möchten Sie zum Bei- spiel wissen, wie spät es in den USA ist, dann setzen Sie die Zeitzone einfach auf –10 für die Ortszeit in Los Angeles, etc. -
Page 110: Alarmzeit Einstellen
Drücken Sie die CLOCK-Taste erneut, um zur Standardanzeige zurückzugelangen. Alarmzeit einstellen Sie haben die Möglichkeit, zwei unterschiedliche Alarmzeiten einzustellen. 1. Drücken und halten Sie die ALARM-Taste für ca. 3 Sekunden gedrückt. Hinweis: Wenn zuvor ein Alarm eingestellt wurde, erscheint die eingestellte Alarmzeit im LC- Display. -
Page 111: Alarm Ein- / Ausschalten
Alarm ein- / ausschalten Drücken Sie 1 x die SET / RESET-Taste , um Alarm 1 zu aktivieren. Drücken Sie 2 x die SET / RESET-Taste, um Alarm 2 zu aktivieren. Drücken Sie 3 x die SET / RESET-Taste, um Alarm 1 und 2 zu aktiveren. -
Page 112: Temperatur Anzeigen
Temperatur anzeigen Im LC-Display werden sowohl die Innen- auch die Außentemperatur angezeigt. Drücken und halten Sie die SELECT-Taste für ca. 3 Sekunden gedrückt. Die Anzeige °C blinkt. Drücken Sie die SET / RESET-Taste , um zwischen den Temperaturskalen °C (Celsius) und °F (Fahrenheit) zu wählen. Drücken Sie die SELECT-Taste, um Ihre Ein- gabe zu bestätigen. -
Page 113: Temperaturtrend Anzeigen
Temperaturtrend anzeigen Nach erfolgreicher Verbindung mit dem Außen- fühler werden der Temperaturtrend (außen) sowie der Temperaturtrend (Innen) angezeigt. Folgende Anzeigen sind möglich: = Die Temperatur steigt. = Die Temperatur bleibt konstant. = Die Temperatur sinkt. Batterieanzeige Die Symbole erscheinen im LC-Display der Wetterstation, wenn die Batterien des Außenfühlers oder der Wetterstation schwach sind. - Page 114 Entfernen Sie solche Geräte aus der Reichweite der Wetterstation / des Außenfühlers, oder entnehmen Sie kurzzeitig die Batterien aus der Wetterstation / dem Außenfühler, wenn das Display Störungen anzeigt. Hindernisse wie z. B. Betonwände können auch dazu führen, dass der Empfang empfindlich gestört wird.
-
Page 115: Reinigung Und Pflege
Reinigung und Pflege Reinigen Sie das Gerät nur äußerlich mit einem weichen trockenen Tuch. Spritzen Sie den Außenfühler in keinem Fall, z. B. mit einem Gartenschlauch, ab. Der Außen- fühler ist nur gegen Regen von oben geschützt. Entsorgung Die Verpackung besteht aus umwelt- freundlichen Materialien, die Sie über die örtlichen Recyclingstellen entsorgen können. -
Page 116: Konformitätserklärung
Wir, OWIM GmbH & Co. KG, Stiftsbergstraße 1, D-74167 Neckarsulm, erklären in alleiniger Ver- antwortung, dass das Produkt: Temperaturstation, Modell-Nr.: Z31743A / Z31743B, Version: 03 / 2014, auf das sich diese Erklärung bezieht, mit den Normen / normativen Dokumenten der 1999 / 5 / EC übereinstimmt. -
Page 117: Garantie
Garantie Das Produkt wurde nach strengen Qualitätsrichtli- nien sorgfältig produziert und vor Anlieferung ge- wissenhaft geprüft. Im Falle von Mängeln dieses Produkts stehen Ihnen gegen den Verkäufer des Produkts gesetzliche Rechte zu. Diese gesetzli- chen Rechte werden durch unsere im Folgenden dargestellte Garantie nicht eingeschränkt. - Page 118 D-74167 Neckarsulm Model no.: Z31743A / Z31743B Version: 03 / 2014 Estado de las informaciones · Versione delle informazioni · Estado das informações · Last Information Update · Stand der Informationen: 01 / 2014 · Ident.-No.: Z31743A / B012014-5 IAN 96385...
Need help?
Do you have a question about the Z31743A and is the answer not in the manual?
Questions and answers