
Subscribe to Our Youtube Channel
Related Manuals for Unique UGP-30E OF1


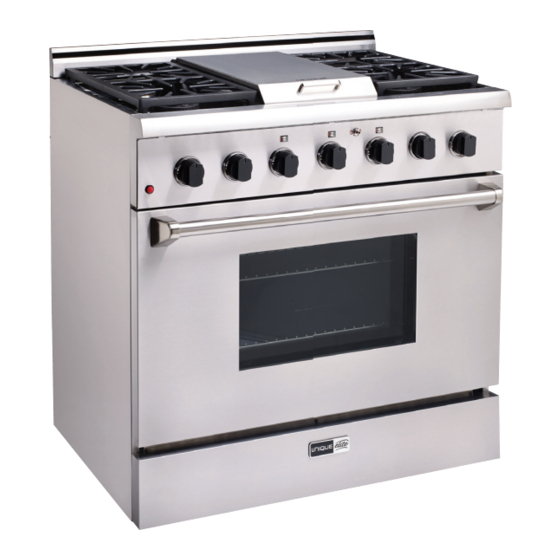
Summary of Contents for Unique UGP-30E OF1
- Page 1 OFF GRID PROFESSIONAL GAS RANGE UGP-30E OF1 UGP-36E OF1 OWNER’S GUIDE Read and save these instructions serial number: MAY 2015...
-
Page 2: Important Safeguards
30E & 36E MODELS OFF GRID GAS RANGE – LPG & NG CONVERTIBLE Installation and Owner’s Manual This manual contains information for: Important Safeguards Installation Use and Care Certain ranges come equipped with special features. Determine from a study of your range which of the instructions given in this booklet pertain to your range. - Page 3 M A N U F A C T U R E D A N D C E R T I F I E D Unique Gas Products Ltd 2245 Wyecroft Road Oakville, Ontario Canada L6L 5L7 Ph: 905-827-6154 Toll Free: 1-877-427-2266 Fax: 905-827-2027...
- Page 4 T able of Contents Contents Welcome & Congratulations Pages 1 thru 7 Dimensions and Clearances Pages 8 thru 12 Installation Instructions Pages 13 thru 17 First use of your new Range and Oven Pages 18 thru 19 Cooktop Use Pages 20 thru 25 Operation of Range Pages 26 thru 29 Care and Cleaning the Range...
- Page 5 It contains valuable information on how to properly maintain your new Unique gas range. We know you will enjoy your new range and Thank You for choosing Unique! We hope you will consider us for future purchases. PLEASE READ AND SAVE THESE INSTRUCTIONS This manual provides specific operation instructions for your model.
- Page 6 U N I Q U E E L I T E 3 0 E & 3 6 E READ ALL IMPORTANT SAFEGUARDS AND ALL INSTRUCTIONS BEFORE USING THE APPLIANCE. If you smell gas Open Windows Don’t touch electrical switches ...
- Page 7 U N I Q U E E L I T E 3 0 E & 3 6 E Notice: Never keep pet birds in the kitchen. Birds have a very sensitive respiratory system. Fumes released during cooking oil, fat, margarine or overheated non-stick cookware may be harmful or fatal to birds.
- Page 8 U N I Q U E E L I T E 3 0 E & 3 6 E USER SERVICING: Do not repair or replace any part of the appliance unless specifically recommended in this owner’s guide. All other servicing should be done only by a qualified technician.
- Page 9 U N I Q U E E L I T E 3 0 E & 3 6 E Do not use water or flour on grease fires. Smother the fire with a pan lid, baking soda or use a dry chemical or foam-type extinguisher. Operation of the Surface Burners.
- Page 10 U N I Q U E E L I T E 3 0 E & 3 6 E LITE position when igniting top burners. Then adjust the flame size so it does not extend beyond the edge of the cookware. Cookware handles should be turned inward and not extend over adjacent surface burners.
- Page 11 U N I Q U E E L I T E 3 0 E & 3 6 E Flexible Connectors: If the gas range/oven is connected to a gas supply with a metal flexible connector, move the range/oven with CAUTION for service or cleaning.
-
Page 12: Dimensions And Clearances
U N I Q U E E L I T E 3 0 E & 3 6 E Dimensions and Clearances All units must be installed in accordance to minimum rear and side wall clearance and clearances extended vertically above the cook top, specifics relating to minimum clearances are stated on the serial plate located at the back of the appliance near the gas inlet connection. - Page 13 U N I Q U E E L I T E 3 0 E & 3 6 E...
- Page 14 U N I Q U E E L I T E 3 0 E & 3 6 E UGP 36E Specs...
- Page 15 U N I Q U E E L I T E 3 0 E & 3 6 E The bottom of the hood should be a minimum of 30” to 36” above the counter top. This would typically result in the bottom of the hood being 66”...
- Page 16 U N I Q U E E L I T E 3 0 E & 3 6 E UGP 30E and 36E Cut-out Specs...
- Page 17 U N I Q U E E L I T E 3 0 E & 3 6 E To reduce the risk of tipping the appliance by abnormal usage improper door loading, the appliance must be secured by properly installing the anti-tip device packed with the appliance.
- Page 18 U N I Q U E E L I T E 3 0 E & 3 6 E GAS CONNECTIONS (All Units) NOTICE TO MASSACHUSETTS APPLIANCE DEALERS: Be sure this document is included in all gas range appliances sold to consumers in the State of Massachusetts.
- Page 19 U N I Q U E E L I T E 3 0 E & 3 6 E The appliance and its individual shut-off valve must be disconnected from the gas supply piping system during any pressure testing of that system at test pressures in excess of ½...
- Page 20 U N I Q U E E L I T E 3 0 E & 3 6 E orifices included in the packaging). When using this on NG gas, conversion must be made by a qualified NG installer before attempting to operate the range on that gas For correct operation, the pressure of natural gas supplied to the regulator should be between 4”...
- Page 21 U N I Q U E E L I T E 3 0 E & 3 6 E After installation: 1. Check ignition of cooktop burners. 2. Check ignition of oven burner. 3. Check ignition of broil burner 4. Check ignition of griddle burner (36E model only) 5.
- Page 22 U N I Q U E E L I T E 3 0 E & 3 6 E FIRST USE OF YOUR NEW RANGE & OVEN When using the appliance for the first time, the oven and broiler burners should be turned on to burn off the manufacturing oils.
- Page 23 U N I Q U E E L I T E 3 0 E & 3 6 E Inserting the shelves: 1. Hold both sides of the shelf firmly to keep it horizontal, with the front edge of the shelf closest to you. 2.
-
Page 24: Cooktop Use
U N I Q U E E L I T E 3 0 E & 3 6 E COOKTOP USE Cooktop Burner Operation Never leave the cooktop unattended when in use. Boil over causes smoking and greasy spills that may ignite. Take care when deep-frying. - Page 25 U N I Q U E E L I T E 3 0 E & 3 6 E Note: If the gas does not ignite within four seconds, turn off the valve and allow at least five minutes for any gas to dissipate. In the event the electronic ignition system fails, the top burners and oven pilots can be lit by holding a lighted match near the burner head and turning the appropriate top burner knob to “HI”...
-
Page 26: Oven Cooking Guidelines
U N I Q U E E L I T E 3 0 E & 3 6 E Cooktop Surface To prevent the cooktop from discoloring or staining, clean cooktop after each use, and wipe up acidic or sugary spills as soon as the cooktop has cooled. The sealed burners of your range are not sealed to your cooktop and are designed to be removed. -
Page 27: Oven Function
U N I Q U E E L I T E 3 0 E & 3 6 E Oven Function Natural Airflow Bake occurs when heat is transferred into the oven from the bake burners in the bottom of the oven cavity. Heat is then circulated by natural airflow. This is a traditional bake setting. - Page 28 U N I Q U E E L I T E 3 0 E & 3 6 E To Broil When broiling, the heat radiates downward from the oven broiler for even coverage. When broiling, use a roast pan with rack to allow fat and juices to drip down, away from the high heat of the oven broiler.
- Page 29 U N I Q U E E L I T E 3 0 E & 3 6 E UGP36E – Griddle Operation Before using the griddle for the first time, clean it thoroughly with warm, soapy water to remove dust and any remaining manufacturing residue. Rinse with clean water and wipe dry with a clean, lint-free cloth.
- Page 30 U N I Q U E E L I T E 3 0 E & 3 6 E OPERATION OF RANGE UGP30E Control Panel UGP36E Control Panel with Griddle Control Panel Legend High Flame/Ignition Burner Position ● Broil Burner Bake Burner Bake/Broil Toggle Switch Oven Light Griddle...
- Page 31 U N I Q U E E L I T E 3 0 E & 3 6 E Lighting the Top Burners/Griddle 1. To obtain a flame more easily, light the burner before placing a cooking utensil on the burner grate. 2.
- Page 32 U N I Q U E E L I T E 3 0 E & 3 6 E If the oven or broiler pilot does not ignite and maintain the flame, check the following: 1. The pilot burner has gone out. Relight the oven or broiler pilot 2.
- Page 33 U N I Q U E E L I T E 3 0 E & 3 6 E NEVER LEAVE THE CONTROL KNOBS IN ANY POSITION OTHER THAN "OFF" IF THE IGNITORS OR BURNERS AREN'T WORKING PROPERLY. If the oven is working, to determine if moisture was the problem, wait a few minutes and attempt to light the oven by turning the oven control dial on.
- Page 34 U N I Q U E E L I T E 3 0 E & 3 6 E Do not use any abrasive or harsh cleaners, cloths, scouring pads or steel wool on the exterior or interior of the range/oven. These will scratch and damage the appearance ...
- Page 35 U N I Q U E E L I T E 3 0 E & 3 6 E Oven Side Racks and Oven Shelves: Clean the oven side racks and oven shelves with a solution of mild detergent and warm water.
- Page 36 U N I Q U E E L I T E 3 0 E & 3 6 E 3. Blot the area dry with a clean, soft towel and allow to fully dry before using the oven. Stainless Steel Surfaces ...
- Page 37 U N I Q U E E L I T E 3 0 E & 3 6 E REMOVING OR REPLACING THE OVEN DOOR Do not lift the oven door by its handle. Doing so may damage the handle or the door. Before removing the door, make sure you have a flat, protected surface nearby on which to rest the oven door.
- Page 38 U N I Q U E E L I T E 3 0 E & 3 6 E To replace the oven door, proceed as follows: 1. Hold the door firmly in both hands. 2. Holding the oven door at approximately half-way open, insert the hinge tongues into the slots, making sure that the notches on both sides drop into place as shown.
- Page 39 U N I Q U E E L I T E 3 0 E & 3 6 E HOW TO GAIN ACCESS TO THE BATTERY COMPARTMENT Gaining access to the battery compartment: 1. Locate the kick plate at the front bottom of the range 2.
-
Page 40: Troubleshooting Guide
U N I Q U E E L I T E 3 0 E & 3 6 E Troubleshooting Guide - UGP Elite 30E & 36E Off Grid Symptom Possible Cause Solution BURNERS WILL Burner parts or Check that the burner parts are NOT LIGHT. igniters may be clean, dry and correctly wet, dirty or assembled. Check that the misaligned. ... - Page 41 U N I Q U E E L I T E 3 0 E & 3 6 E Symptom Possible Cause Solution BURNER FLAME Low gas pressure. Contact gas company. GOES OUT AT Air intake holes Remove obstruction from air LOW SETTING. around burners intake holes. are obstructed. TOP BURNER Failed Replace thermocouple WILL NOT STAY thermocouple LIT THE FLAMES A draft or spill has Turn the burners off, cleaning the ...
- Page 42 U N I Q U E E L I T E 3 0 E & 3 6 E Symptom Possible Cause Solution CONDENSATION Food has high Condensation is normal. Simply AROUND OVEN moisture content wipe the condensation off the (E.G. ON or local climate control panel. If there is frequent CONTROL (temperature, or excessive condensation, make PANEL OR TOP humidity) is sure that any cabinetry around OF OVEN contributing to the range is moisture proofed. DOOR.) ...
- Page 43 U N I Q U E E L I T E 3 0 E & 3 6 E Wiring Diagram – UGP30E OF1...
- Page 44 U N I Q U E E L I T E 3 0 E & 3 6 E Wiring Diagram – UGP36E OF1...
- Page 45 U N I Q U E E L I T E 3 0 E & 3 6 E Parts Diagrams UGP-30E OF1...
- Page 46 U N I Q U E E L I T E 3 0 E & 3 6 E UGP-36E OF1 – with Griddle...
-
Page 47: Parts List
U N I Q U E E L I T E 3 0 E & 3 6 E Parts List UGP‐30E OF1 Item # Description Part # 1 Electrode UGP‐HX10090095‐A0 2 Electrode UGP‐HX10090094‐A0 3 Thermocouple UGP‐HX10050091‐A0 4 Electrode UGP‐HX10090093‐A0 5 cooking grate UGP‐HX13010021‐A0 6 Electrode UGP‐HX10090092‐A0 ... - Page 48 UGP‐HX05030039‐A0 43 Door hinge, right UGP‐HX05030040‐A0 44 Door Handle Support, Left UGP‐HX12020012‐A0 45 Door Handle Support, Right UGP‐HX12020013‐A0 46 Door Handle UGP‐HX12010018‐A0 47 Door Frame, Outer UGP‐HX04020519‐A2 48 U‐shape Burner UGP‐HX10020016‐A1 49 Unique Logo UGP‐HX08020009‐A0 50 Kick Panel UGP‐HX04020697‐A0 51 9V Battery UGP‐HX07990178‐A0 52 battery holder UGP‐HX04020663‐A0 53 back panel UGP‐HX04040525‐A0 54 backsplash UGP‐HX20010114‐A0 55 Ignitor 1‐6 UGP‐HX07070185‐A0 ...
- Page 49 U N I Q U E E L I T E 3 0 E & 3 6 E UGP‐36E OF1 – Griddle Item # Description Part # 1 Electrode UGP‐HX10090086‐A0 2 Electrode UGP‐HX10090087‐A0 3 Thermocouple UGP‐HX10050091‐A0 4 Electrode UGP‐HX10090088‐A0 5 Electrode UGP‐HX10090089‐A0 6 Griddle Cover ...
- Page 50 UGP‐HX12020012‐A0 41 Door Handle UGP‐HX12010017‐A0 42 Door Frame, Outer UGP‐HX04020510‐A2 43 Door hinge, right UGP‐HX05030016‐A0 44 Door Handle ‐ Support, Left UGP‐HX12020013‐A0 45 U Shape Burner Assy UGP‐HX22990063‐A0 46 U‐shape Burner UGP‐HX10020016‐A1 47 Unique Logo UGP‐HX08020009‐A0 48 U Shape Burner ‐ Orifice UGP‐HX07120190‐A0 49 9V Battery UGP‐HX07990178‐A0 50 Kick Panel UGP‐HX04020668‐A0 51 backsplash UGP‐HX20010115‐A0 52 Grease Tray UGP‐HX04010093‐A0 53 Griddle UGP‐HX20990159‐A0 ...
- Page 51 3 0 E & 3 6 E 30” / 36” GAS RANGE 1 YEAR LIMITED WARRANTY* Unique Gas Products Ltd. warrants that this UNIQUE range is free from defects in material and workmanship under normal usage and service under the following terms: Parts Warranty This appliance has been designed for domestic household use. If properly installed, adjusted and ...
Need help?
Do you have a question about the UGP-30E OF1 and is the answer not in the manual?
Questions and answers