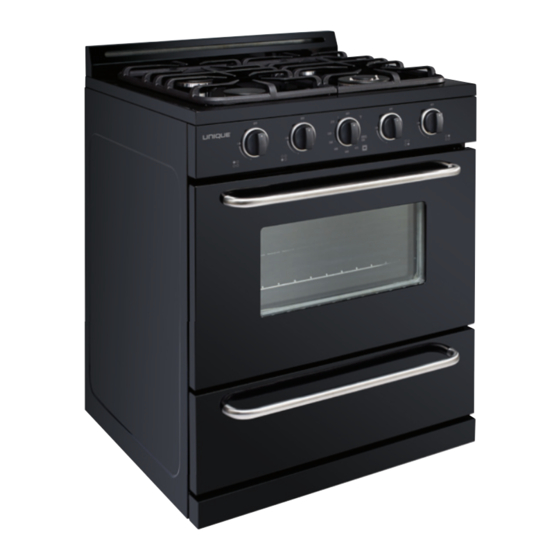
Unique UGP-30G OF1 Installation And Owner's Manual
30” (76.2 cm)
Hide thumbs
Also See for UGP-30G OF1:
- Installation and owner's manual (42 pages) ,
- Assembly/installation instructions (25 pages)
Advertisement
Table of Contents
Advertisement
Table of Contents

Subscribe to Our Youtube Channel
Related Manuals for Unique UGP-30G OF1


Summary of Contents for Unique UGP-30G OF1
- Page 1 CLASSIC GAS RANGE (LPG & NG convertible) INSTALLATION UGP-30G OF1 AND OWNERS MANUAL 30” (76.2 cm) SERIAL NUMBER: READ AND SAVE THESE INSTRUCTIONS APRIL 2015...
-
Page 2: Important Safeguards
UNIQUE 30G CLASSIC MODEL OFF GRID GAS RANGE – LPG & NG CONVERTIBLE Installation and Owner’s Manual This manual contains information for: Important Safeguards Installation Use and Care Certain ranges come equipped with special features. Determine from a study of your range which of the instructions given in this booklet pertain to your range. - Page 3 M A N U F A C T U R E D A N D C E R T I F I E D Unique Gas Products Ltd 2245 Wyecroft Road #5 Oakville, Ontario Canada L6L 5L7 Ph: 905-827-6154 Toll Free: 1-877-427-2266 Fax: 905-827-2027 www.UniqueOffGrid.com...
-
Page 4: Table Of Contents
T able of Contents Contents Important Safeguards Page 1 - 7 Energy Saving ideas Page 8 Installation Instructions Pages 9-12 Wall Clearances & Anti-Tip Location Page 13-14 NG Conversion Instructions Pages 15-17 Adjusting the Top Burner and Oven Flame Pages 18-19 Operation of Range Pages 20-22 Alignments and Adjustments... - Page 5 It contains valuable information on how to properly maintain your new Unique gas range. We know you will enjoy your new range and Thank You for choosing our Unique! We hope you will consider us for future purchases. PLEASE READ AND SAVE THESE INSTRUCTIONS This manual provides specific operation instructions for your model.
- Page 6 U N I Q U E U G P 3 0 G READ ALL IMPORTANT SAFEGUARDS AND ALL INSTRUCTIONS BEFORE USING THE APPLIANCE. If you smell gas Open Windows Don’t touch electrical switches Extinguish any open flame ...
- Page 7 U N I Q U E U G P 3 0 G Notice: Never keep pet birds in the kitchen. Birds have a very sensitive respiratory system. Fumes released during from cooking oil, fat, margarine or overheated non-stick cookware may be harmful or fatal to birds. PROPER INSTALLATION: Be sure your appliance is properly installed by a qualified technician in accordance with the National Fuel Gas Code ANSI Z223.1/NFPA54.
- Page 8 U N I Q U E U G P 3 0 G done only by a qualified technician. This will reduce the risk of personal injury and damage to the range. Storage in or on appliance: Flammable materials should not be stored in an oven, near surface burners or in the broiler section.
- Page 9 U N I Q U E U G P 3 0 G Operation of the Surface Burners. When the burners are operated for the first time, a small amount of smoke may be generated due to tape residue or manufacturing lubrication, this is not dangerous. Operate the burners for about five minutes to rid the burners of this material before cooking.
- Page 10 U N I Q U E U G P 3 0 G Cookware handles should be turned inward and not extend over adjacent surface burners. To reduce the risk of burns, ignition of flammable materials, and spillage due to unintentional contact with the cookware, the handle of a cookware should be positioned so that it is turned inward, and does not extend over adjacent surface burners.
- Page 11 U N I Q U E U G P 3 0 G Flexible Connectors: If the gas range/oven is connected to a gas supply with a metal flexible connector, move the range/oven with CAUTION for service or cleaning. Flexible connectors are not intended for repeated bending. Do not allow cleaners to make contact with flexible connectors.
-
Page 12: Energy Saving Ideas
U N I Q U E U G P 3 0 G ENERGY-SAVING IDEAS Surface Cooking Use lids when surface cooking. A lid traps steam and uses it to speed up the cooking process. If you have a pressure cooker or vegetable steamer, use it. You’ll waste fewer vitamins, save time and cut energy costs. - Page 13 U N I Q U E U G P 3 0 G To reduce the risk of tipping the appliance by abnormal usage improper door loading, the appliance must be secured by properly installing the anti-tip device packed with the appliance.
- Page 14 U N I Q U E U G P 3 0 G GAS CONNECTIONS (All Units) NOTICE TO MASSACHUSETTS APPLIANCE DEALERS: Be sure this document is included in all gas range appliances sold to consumers in the State of Massachusetts. NOTICE: Massachusetts law requires the following: ...
- Page 15 U N I Q U E U G P 3 0 G The appliance and its individual shut-off valve must be disconnected from the gas supply piping system during any pressure testing of that system at test pressures in excess of ½ psig. The appliance must be isolated from the gas supply piping system by closing its individual manual shut-off valve during any pressure testing of the gas supply piping system at test pressures equal to or less than 1/2 psig.
- Page 16 U N I Q U E U G P 3 0 G orifices included in the packaging). When using this on NG gas, conversion must be made by a qualified NG installer before attempting to operate the range on that gas. For correct operation, the pressure of natural gas supplied to the regulator should be between 4”...
- Page 17 U N I Q U E U G P 3 0 G WALL CLEARANCES All units must be installed in accordance to minimum rear and side wall clearance and clearances extended vertically above cooking top which are stated on the serial plate located at the back of the range.
- Page 18 U N I Q U E U G P 3 0 G Anti-Tip Bracket Location...
- Page 19 U N I Q U E U G P 3 0 G Gas Range Conversion and Adjustment Guide To Convert and/or Adjust to Natural Gas The range is set for use with Liquefied Petroleum (LP). The factory setting is indicated on the serial plate. When set for LP Gas operation, the pressure regulator will regulate the gas to 10 inches water column pressure.
- Page 20 U N I Q U E U G P 3 0 G 7. Replace the cap back on the regulator 8. Next you will remove the grates, burners and burner caps from the range to access the orifices. 9. You will need a 7mm wrench to remove the orifices. Each orifice can be accessed easily - the larger burner orifice is located on the burner wall.
- Page 21 U N I Q U E U G P 3 0 G 15. Temporally replace the lid, burners, burner caps and grates and recheck the flame. Once complete, reassemble the control panel and the lid. 16. Next, the oven orifice needs to be replaced. 17.
-
Page 22: Adjusting The Top Burner And Oven Flame
U N I Q U E U G P 3 0 G Adjusting the Top Burner and Oven Flame Top Burner Valves The top burners have orifices that are dedicated to the type of fuel to be used. These orifices are not adjustable. They must be changed completely to convert from one gas to the other. - Page 23 U N I Q U E U G P 3 0 G Top Burner Height Oven Valve The oven control has a flame safety device built into the body of the thermostat. Presence of a gas ignition source (pilot) is verified by a flame safety probe. This flame safety probe actuates the internal safety device to allow gas into the oven burner when the oven is turned on.
-
Page 24: Operation Of Range
U N I Q U E U G P 3 0 G OPERATION OF RANGE High Flame/Ignition Burner Position ● Oven Lighting the Top Burners 1. To obtain a flame more easily, light the burner before placing a cooking utensil on the burner grate. 2. - Page 25 U N I Q U E U G P 3 0 G Lighting the Oven 1. Depending on how long the gas line run is, it may take a while to light the oven pilot. It is suggested that you light a top burner first to ensure the gas is at the valve.
- Page 26 U N I Q U E U G P 3 0 G Hot Oven Restart If you turn off the oven but then decide to turn it back on before it has cooled to room temperature, the burner may not light properly. This is due to the thermostat still sensing “heated oven”...
-
Page 27: Alignments And Adjustments
U N I Q U E U G P 3 0 G Alignments and Adjustments Oven Burner Air Shutter Adjustment The oven burner flame should be a clean, blue flame with distinct inner cones. A soft, lazy flame with indistinct cones means too much gas or not enough air. A noisy lifting flame indicates too much air. - Page 28 U N I Q U E U G P 3 0 G Temperature Selection It is important to select to proper temperature setting. Imagine that the control has three sections: Warm, Bake, and Broil. Warming The broiler section of your range can function as a warming drawer to keep foods at serving temperature (175°F to 225°F).
- Page 29 U N I Q U E U G P 3 0 G Removable Oven Bottom First remove the racks from the oven. The oven bottom lifts from the rear. Grasp each side of the oven bottom and lift upward from the rear until the bottom is clear, lift it to remove from the front.
-
Page 30: Broiling
U N I Q U E U G P 3 0 G BROILING Preheat the broiler area and broil pan for a few minutes. No definite time can be given for broiling meats because of varying thickness, amounts of fat, and personal taste. Be careful when handling hot broiler pans;... -
Page 31: Cleaning The Range
U N I Q U E U G P 3 0 G CLEANING THE RANGE Always keep cleaning materials and chemicals in a safe place and away from children. Know what you are using. Make sure all parts of the range are COOL before cleaning. Be sure to replace the parts correctly. - Page 32 U N I Q U E U G P 3 0 G THE LIFE OF THE TOP in comparison to the general life expectancy of the range itself. It is very important that the burner be dry before replacing it in the range. A wet burner will not allow the gas to ignite properly.
-
Page 33: Lift-Off Doors
U N I Q U E U G P 3 0 G Repair Parts When repair parts are needed, contact the dealer from whom the range was purchased. In case your range was purchased from a source other than an appliance dealer, you may prefer to contact the manufacturer at the address shown in this manual. -
Page 34: How To Gain Access To The Battery
U N I Q U E U G P 3 0 G DO NOT ATTEMPT TO CLOSE THE DOOR UNTIL THIS STEP IS COMPLETE. THE HINGE OR DOOR COULD BE DAMAGED. HOW TO GAIN ACCESSTO THE BATTERY COMPARTMENT Gaining access to the battery compartment: 1. -
Page 35: Troubleshooting Guide
U N I Q U E U G P 3 0 G Troubleshooting Guide Problem Cause Correction 1. Surface burner fails to light a. Clogged burner ports a. Remove burners and clean out dirt and spider webs b. Battery dead b. -
Page 36: Wiring Diagram
U N I Q U E U G P 3 0 G Wiring Diagram... - Page 37 U G P 3 0 G UNIQUE UGP 30G RANGE 1 YEAR LIMITED WARRANTY* Unique Gas Products Ltd. warrants that this UNIQUE range is free from defects in material and workmanship under normal usage and service under the following terms: Parts Warranty This appliance has been designed for domestic household use. If properly installed, adjusted and ...
Need help?
Do you have a question about the UGP-30G OF1 and is the answer not in the manual?
Questions and answers