Table of Contents
Advertisement
Available languages
Available languages
BB-III 500-11-E
Z-RAY III 500 SERIES SPORTS BOAT
Instruction Manual
Important safety guide lines for sport boat use
Please read & understand prior to using your boat
ISO 6185 BOAT DESIGN CATEGORY C
BOAT DESIGN CATEGORY C – "INSHORE" :
BOAT DESIGNED FOR VOYAGES IN INSHORE WATERS ONLY. PLS
VOYAGE THE CRAFT IN COASTAL WATERS, LARGE BAYS,
ESTUARIES, LAKES AND RIVERS WHERE CONDITIONS UP TO, AND
INCLUDING, WIND FORECE 6 AND SIGNIFICANT WAVE HEIGHTS UP
TO, AND INCLUDING, 2 M MAY BE EXPERIENCED.
1
Advertisement
Chapters
Table of Contents

Subscribe to Our Youtube Channel
Related Manuals for Jilong Z-RAY III 500 SERIES


Summary of Contents for Jilong Z-RAY III 500 SERIES
- Page 1 BB-III 500-11-E Z-RAY III 500 SERIES SPORTS BOAT Instruction Manual Important safety guide lines for sport boat use Please read & understand prior to using your boat ISO 6185 BOAT DESIGN CATEGORY C BOAT DESIGN CATEGORY C – “INSHORE” : BOAT DESIGNED FOR VOYAGES IN INSHORE WATERS ONLY.
-
Page 2: Table Of Contents
CONTENTS INTRODUCTION------------------------------------------------------3 IMPORTANT WARNING------------------------------------------- 6 INFLATING THE BOAT ------------------------------------------- 7 OPERATING INSTRUCTION-------------------------------------11 MAINTENANCE AND STORAGE-------------------------------12 DISASSEMBLY------------------------------------------------------ 13 TROUBLE SHOOTING-------------------------------------------- 14 REPAIRS-------------------------------------------------------------- 14 WARRANTY---------------------------------------------------------- 15... -
Page 3: Introduction
INTRODUCTION Congratulations to the purchase of an inflatable boat. Please read this manual carefully before inflating, assembling or using your boat. Also study carefully the manual supplied with your outboard engine. Familiarise yourself with the features of the boat and the engine and ask for professional training if you are inexperienced in handling this type of boat. -
Page 4: Sketch Map
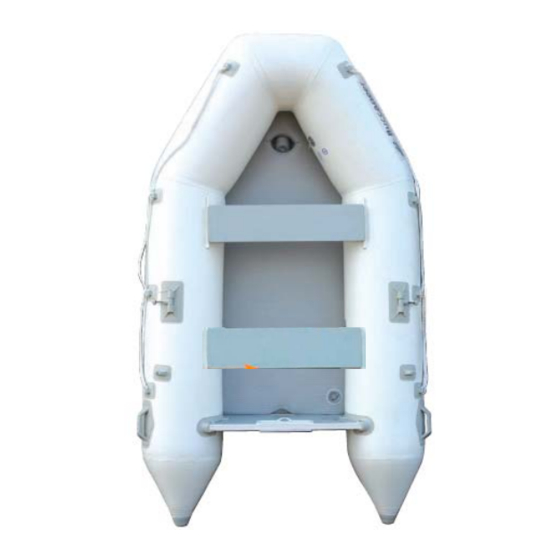
Sketch Map High Strength Nylon Safety Grab Rope High Pressure Inflatable Valve V-Keel Valve Quick assembly PVC-Anti-Bump Wooden Bench Protective Seat System Strake Heavy Duty PVC Swivel Oarlock Super fine, 3 layers fabric Compliance Plate Drain Valve Marine Ply Carrying Motor Transom Handle PVC Cone... - Page 5 Basic data Item No. JL007014-2N Z-ray Model No. 365 x 205cm Deflated Size (144˝ x 81˝) 360 x170 x 44cm Inflatable Size (106˝ x 60˝ x 17˝) Max. Power 9.9 HP of motor 7.4 kw Capacity (Person) Max. Load 600 kg Weight(kg) 1324Lbs Accessories...
-
Page 6: Important Warning
IMPORTANT WARNING: To enhance the enjoyment of your boat and protect the safety of passengers and operator using the boat, always strictly observe the following safety warning: This is not a life saving device. Use only under competent supervision. Never allow diving into this product. Never leave in or near the water when not in use. -
Page 7: Inflating The Boat
numbers as well as safety advisories and rules (such as “No jumping or Diving”) The total number of persons and total weight shall not exceed the information printed on the boat. Do not exceed the maximum recommended capacities. Overloading violates regulations. INFLATING AND DEFLATING THE BOAT: Inflating If the boat is inflated during cold weather or without direct sunlight on... - Page 8 Structure of the safety valve A. Valve cap B. Inflating mouth C. Deflation button D. protective sheath Unscrew the valve cap A. Assemble the inflation adaptor and air pressure meter with air pump.
- Page 9 Air Pressure Meter Assembled with Assembled with Inflating Mouth B Air Pump Caution: Do not over inflate, or use a high-pressure pump! Please inflate the boat by number sequence. Do not over inflate. Maximum pressure for air chambers 1 + 2 + 3 0.25 bar (3.63 PSI) 4 + 5 0.35 bar (5.08 PSI)
- Page 10 Installation of oars Insert the bolt on the swivel oarlock into the central hole on the oar shaft. Screw the retaining nut onto the end of the bolt and position the oar into the oar holder.
-
Page 11: Operating Instruction
OPERATING INSTRUCTION Preparation before departure Acquire necessary information and inform other passengers: 1. Get information on local laws, regulation and hazards related to water activities and boat operation. 2. Check weather forecast, local currents, tides and wind conditions. 3. Advise someone on land of the time you plan to be back. 4. -
Page 12: Maintenance And Storage
Rules to observe during navigation 1. Be responsible and strictly follow the safety rules. Do not neglect the safety rules, this could hazard your life and lives of others. 2. Learn to keep control of your boat. 3. Respect local regulations and practices. 4. -
Page 13: Disassembly
Make sure the boat is completely clean and dry before storing, otherwise the boat will be mouldy. Do not use solvents to clean the boat, solvents may damage material or plastic components in system. Store all boat accessories in a dry storage location with ventilation. Make sure that all parts are dry before storage. -
Page 14: Trouble Shooting
TROUBLE SHOOTING When you find the boat appears a bit soft, it might not definitely be because of a leak. Firstly you can check if valve caps are loose. If all valves are in good condition, you can consider if it is caused by temperature variation: If the boat was inflated in the day at higher temperature, say, 35 C (95 F), and air might cool down to 25 C (77 F) overnight, so that the pressure on the hull may lower down, and the... -
Page 15: Warranty
This limited warranty, furthermore, does not cover any unauthorized alterations to the product. Shanghai Jilong Plastic Products Co. Ltd. No. 460 Lanxue Road, Huanglou, Pudong Area, Shanghai, 201205, P.R. China el: +86-21-58942200 E-mail: info@jilong.com... - Page 16 Z-RAY III 500 SERIES SPORTS BOAT MANUEL D’INSTRUCTION Guide de sécurité importante pour l’usage du bateau. Avant d’utiliser le bateau on conseille de lire attentivement le manuel. ISO 6185 CONCEPTION DE BATEAUX DE CATÉGORIE C CONCEPTION BATEAU DE CATÉGORIE C – “USAGE CÔTIER” : BATEAU CONÇU POUR DES VOYAGES DANS LES EAUX CÔTIÈRES...
- Page 17 CONTENU PRÉFACE--------------------------------------------------------------18 DISPOSITIONS IMPORTANTES-------------------------------- 21 GONFLER LE BATEAU------------------------------------------- 22 INSTRUCTIONS USAGE------------------------------------------ 26 ENTRETIEN ET CONSERVATION----------------------------- 27 DÉMONTAGE-------------------------------------------------------- 28 SOLUTIONS PROBLÈMES-------------------------------------- 29 RÉPARATION-------------------------------------------------------- 29 GARANTIE------------------------------------------------------------ 30...
-
Page 18: Préface
PRÉFACE Félicitations pour avoir achète un bateau gonflable. Veuillez lire ce manuel attentivement avant de gonfler, assembler ou usage de votre bateau. Étudiez aussi très attentivement le manuel fourni avec votre moteur extérieur. Familiarisez-vous avec les dispositifs du bateau et du moteur et demandez de l’aide d’une personne professionnelle si vous êtes nexpérimenté... - Page 19 Schéma d'ensemble Corde de guirlande de sécurité en nylon haute résistance Vanne haute Vanne de quille en pression V gonflable Système de siège-banc en Virure de bois, assemblage protection rapide anti-choc PVC Verrouillage Aileron Pivotant PVC haute résistance Tissu/pvc 3 couches, super fins, fabriqués en Corée pour confort et support du poids...
- Page 20 Caractéristiques de base N° d'article JL007014-2N Z-ray N° modèle 365 x 205cm Taille dégonflée (144˝ x 81˝) 360 x170 x 44cm Taille gonflée (106˝ x 60˝ x 17˝) Puissance maxi. 9.9 HP du moteur 7.4 kw Capacité (Personne) Charge maxi. 600 kg Poids (kg) 1324Lbs...
-
Page 21: Dispositions Importantes
DISPOSITIONS IMPORTANTES Pour augmenter la joie et la sûreté dans l'emploie du bateau, nous conseillons de suivre les avis de sûreté rigoureusement - Ce bateau n'est pas un bateau de sauvetage . Employez seulement sous la surveillance compétente. Ne laissez jamais plonger dans ce produit. -
Page 22: Gonfler Le Bateau
AVERTISSEMENT : Il est la responsabilité de l'opérateur du bateau d'identifier et obéir toutes les lois du pays et d'état concernant la sûreté de bateau et l'équipement exigé de sûreté. Veuillez consulter vos autorités locales pour assurer la conformité. Ne permettez pas les enfants sans surveillance dans le bateau. Assurez-vous toujours qu'au moins un adulte responsable dirige tous les enfants et ceux qui ne savent pas nager à... - Page 23 Structure de la valve de sécurité. A Clapet de la valve B Entrée de l’aire C Purge de l’aire D Housse de protection Pour gonfler le canot vous devez premièrement dévisser le clapet de la valve A. Après il vous faut raccorder l’adaptateur et le baromètre au gonfleur et les mettre à...
- Page 24 Manomètre d'air Assemblé avec la bouche de Assemblage avec gonflage B le compresseur Les chambres d'air doivent être remplit en séquence numérique. Il est très important que la séquence numérique est suivi: pas suivi cette séquence peut suivre a un gonflage pas correctement du bateau. Vous pouvez utiliser une pompe à...
- Page 25 Composition de la pagaie Assemblez la section de la pagaie en enfonçant les sections de la pagaie, en utilisant la goupille, jusqu’a ce que les goupilles se ferment dans les trous de Stop. Fixation des rames Veuillez mettre le boulon à visser au trou central au mange de la dame de nage.
-
Page 26: Instructions Usage
INSTRUCTIONS USAGE Préparation avant le départ Procuré vous des informations successive et ensuite passer cette information aux passagers: 1. Informez vous successivement des lois locales, les règles et risques, que sont importante pour des activités en eau et la navigation d’un bateau. -
Page 27: Entretien Et Conservation
2. Apprenez vous de tenir toujours le bateau sous contrôle dans chaque situation. 3. Respecter les règles locales et les normes. 4. Naviguer seulement en eaux sûres. 5. Rappelez-vous que les conditions du temps peuvent changer dans un instant. Prenez toujours connaissance de la zone, pour assurer que vous trouvées et vous rejoigne une place sûre. -
Page 28: Démontage
Pour le nettoyer vous pouvez utiliser le tube flexible d'irrigation, une éponge et un savon léger. Le bateau doit être complètement sec avant de le conserver, pour éviter la formation de moisissure. N'employez pas les dissolvants pour nettoyer le bateau, les dissolvants peuvent endommager les matériels ou les components en plastique dans le système. -
Page 29: Solutions Problèmes
SOLUTIONS PROBLÈMES Dans le cas que le bateau vous semble trop douce, ça ne veut pas dire que nécessairement il devrait avoir un trou. Pour premier vous devez contrôler les couvercles des valves. Ils pourraient être pas fermé correctement. Les couvercles des valves sont ok. Il pourrait être une différence de température. -
Page 30: Garantie
Cette garantie imitée ne couvre pas non plus les modifications non autorisées du produit. Shanghai Jilong Plastic Products Co. Ltd. No. 460 Lanxue Road, Huanglou, Pudong Area, Shanghai, 201205, P.R. China el: +86-21-58942200 E-mail: info@jilong.com... - Page 31 BB-III 500-11-Deutsch Z-RAY III 500 SERIES SPORTS BOAT GEBRAUCHSANLEITUNG Wichtige Sicherheitsrichtlinien für die Nutzung des Sportbootes Bitte vor Gebrauch des Bootes sorgfältig durchlesen ISO 6185 BOOTSDESIGN KATEGORIE C BOOTSDESIGN KATEGORIE C – „IN KÜSTENNÄHE”: BOOT NUR FÜR FAHRTEN IN GEWÄSSERN NAHE DER KÜSTE AUSGELEGT.
- Page 32 INHALT VORWORT-------------------------------------------------------------33 WICHTIGE HINWEISE----------------------------------------------36 BOOT AUFPUMPEN UND ENTLEEREN--------------------- 37 BEDIENUNGSANLEITUNG---------------------------------------41 WARTUNG UND LAGERUNG----------------------------------- 43 ABBAU----------------------------------------------------------------- 43 PROBLEME LÖSEN------------------------------------------------43 REPARATUREN-----------------------------------------------------44 GARANTIE------------------------------------------------------------ 45...
-
Page 33: Vorwort
VORWORT Vielen Dank für den Kauf eines Z-Ray Boat. Bitte lesen Benutzung Bootes diese Bedienungsanleitung sorgfältig durch und bewahren Sie diese gut auf. Wenn noch Unklarheiten auftreten sollten, bitten wir Sie, sich in einem Yachtclub oder in einer Segelschule beraten zu lassen. Wichtig: Bewahren sie diese Bedienungsanleitung immer an einem trockenen Platz an Bord auf. - Page 34 Zeichnung Hochfestes Nylon- Sicherheitsseil Aufblasbarer V-Kiel Hochdruckventil (Ventil) Schnellaufbau- Antistoß-PVC- Holzsitze Beschichtung Hoch belastbare, drehbare PVC- Extra feines, 3- Paddelhalterung lagiges Text/PVC- Material aus koreanischer Herstellung; bequem und sicher Zertifizierungsplatte Ablaufventil Salzwasser- Tragegriff Motorhalterung PVC-Kegel Jedes Boot trägt eine CIN (Craft Identification Number) und eine Herstellerplakette.
- Page 35 Grundlegende Daten Artikel-Nr. JL007014-2N Z-ray Modell-Nr. 365 x 205cm Größe ohne Luft (144˝ x 81˝) 360 x170 x 44cm Aufblasbare Größe (106˝ x 60˝ x 17˝) 9.9 HP Max. Motorleistung 7.4 kw Kapazität (Person) Max. Gewichtslast 600 kg (kg) 1324Lbs Zubehör Beschreibung Abbildung...
-
Page 36: Wichtige Hinweise
WICHTIGE HINWEISE Um die Freude und die Sicherheit bei Benutzung des Bootes zu erhöhen, weisen wir darauf hin, die Sicherheitswarnungen strengstens einzuhalten. Dieses Boot ist kein Rettungsboot. Das Boot nur mit den Paddeln benutzen! Es sollte nicht in das Boot hineingesprungen werden. Lassen Sie das Boot nie unbeobachtet in der Nähe des Wassers liegen oder auf dem Wasser treiben. -
Page 37: Boot Aufpumpen Und Entleeren
Verteilen Sie das Gewicht der Passagiere, Utensilien etc. so, dass das Boot immer gerade auf dem Wasser liegt. Bei Vermutung eines Lochs oder Lecks im Boot, ist die Benutzung nicht erlaubt. Beachten Sie Wind und Strömungen. Die Anzahl der Personen und das Totalgewicht sollte niemals die Kapazität überschreiten, denn Überbelastungen verstoßen gegen die Vorschriften. - Page 38 Installation der Sitzbank Fixieren Sie die Sitzbank durch gleichzeitiges Einschieben in die Haltelaschen an den Enden der Bank (Abbildung E-H) Struktur des Sicherheitsventils A. Ventilkappe B. Lufteinlass C. Luftablass D. Schutzhülle Um das Boot aufzupumpen, müssen Sie zunächst die Ventilkappe A abschrauben.
- Page 39 Luftdruckmesser Montieren an Montieren an Aufpumpöffnung B Luftpumpe !!!! Benutzen Sie KEINEN Luftkompressor !!!! Bitte die Kammern in der numerischen Reihenfolge aufpumpen. Wenn Sie das Boot zu stark aufblasen, kann es platzen oder die Säume können kaputtgehen. !!! DER MAXIMALE LUFTDRUCK FÜR DIE LUFTKAMMERN !!! 1, 2 UND 3 0.25 bar (3.63 PSI)
- Page 40 Falls Sie den Luftablass stoppen möchten, drücken Sie das Ventil wieder nach unten und drehen es gegen den Uhrzeigersinn - wieder 90 °. Wenn das Ventil einhakt, wird der Luftablass gestoppt. Aufbau der Paddel Bauen Sie die Paddel zusammen, indem Sie den federgelagerten Stift niederdrücken und die beiden Teile einsetzen, bis die Stifte in ihren Haltelöcher sich verriegeln.
-
Page 41: Bedienungsanleitung
BEDIENUNGSANLEITUNG Vorbereitung vor Abfahrt Beschaffen Sie sich zusätzliche Informationen und informieren Sie auch die Passagiere: 1. Beschaffen Sie sich Informationen über die lokalen Gesetze, Regeln und Risiken, die im Zusammenhang mit Wasseraktivitäten und Bootbedienung stehen. 2. Checken Sie die Wettervorhersagen, lokale Strömungen und die Windbedingungen. - Page 42 Bitte beachten Sie folgende Regeln während der Navigation. 1. Bleiben Sie verantwortungsbewusst und befolgen Sie die Regeln. Gehen Sie nicht unachtsam mit den Sicherheitsregeln um, es könnte Sie und andere in Gefahr bringen. 2. Lernen Sie immer die Kontrolle über das Boot zu behalten. 3.
-
Page 43: Wartung Und Lagerung
WARTUNG UND LAGERUNG. Befolgen Sie die nächsten zwei Schritte, damit Ihnen das Boot viele Jahre Freude bereitet. 1. Nach jeder Fahrt sollten Sie das Boot reinigen, um Beschädigungen durch Sand, Salzwasser oder Sonne zu verhindern. Zur Reinigung können Sie einen Gartenschlauch, einen Schwamm und sanfte Seife benutzen. -
Page 44: Reparaturen
Sollte das Boot tagsüber aufgeblasen sein, bei einer Temperatur von z.B. 35°C, und nachtsüber kühlt es ab bis ca. 25°C, dann könnte der Druck abnehmen, und am nächsten Morgen wird sich das Boot weicher anfühlen. Sind die Ventile und Temperaturschwankungen nicht der Grund, dann sollten Sie suchen, wo ein Leck oder Loch sein könnte: Spritzen Sie auf die Stelle, an der das Loch sein könnte, eine Mischung aus Wasser und Seife. -
Page 45: Garantie
Wir haften nicht für Aufstellungs- und Installationskosten, Arbeitsaufwand oder Transportkosten zum Austausch von defekten Teilen. Darüber hinaus gilt diese eingeschränkte Garantie nicht bei nicht autorisierten Modifikationen des Produktes. Shanghai Jilong Plastic Products Co. Ltd. No. 460 Lanxue Road, Huanglou, Pudong Area, Shanghai, 201205, P.R. China el: +86-21-58942200 E-mail: info@jilong.com... - Page 46 BB-III 500-11-IT Z-RAY III 500 SERIES SPORTS BOAT MANUALE D’ISTRUZIONE Guida di sicurezza importante per l’uso del gommone. Prima di usare il gommone si consiglia di leggere attentamente questo manuale. ISO 6185 DESIGN BARCA CATEGORIA C BARCA DESIGN CATEGORIA C IDEATA PER NAVIGAZIONI SU ACQUE PROTETTE VICINE ALLA TERRAFERMA.
- Page 47 CONTENUTO PREFAZIONE--------------------------------------------------------48 DISPOSIZIONI IMPORTANTI----------------------------------- 51 GONFIARE IL GOMMONE---------------------------------------52 ISTRUZIONI D’USO----------------------------------------------- 56 MANUTENZIONE E CONSERVAZIONE---------------------57 SMONTAGGIO------------------------------------------------------58 SOLUZIONI PROBLEMI----------------------------------------- 59 RIPARAZIONI------------------------------------------------------ 59 GARANZI------------------------------------------------------------ 60...
-
Page 48: Prefazione
PREFAZIONE Congratulazioni all'acquisto di una barca gonfiabile. Legga prego con attenzione questo manuale, prima di gonfiare, di montare o di usare la vostra barca. Inoltre studi con attenzione il manuale fornito con il vostro motore esterno. Si consiglia di accertarsi con tutte le caratteristiche della barca e del motore e possibilmente fare una formazione professionale se siete inesperti nel maneggiare questo tipo di barca. - Page 49 Schema Resistente corda di sicurezza in nylon Valvola ad alta Chiglia a pressione V gonfiabile Sedile in legno facile da Rinforzo in PVC montare anti-dossi Perno dello scalmo in resistente PVC 3 strati di PVC Coreano di alta qualità per extra confort e maggior supporto Valvola di...
- Page 50 Informazioni Base JL007014-2N Articolo Z-ray Modello No. 365 x 205cm Mis. Sgonfiato (144˝ x 81˝) 360 x170 x 44cm Mis. Gonfiato (106˝ x 60˝ x 17˝) Max. potenza 9.9 HP Del motore 7.4 kw Capienza (persone) Max. Capienza 600 kg peso(kg) 1324Lbs Accessori...
-
Page 51: Disposizioni Importanti
DISPOSIZIONI IMPORTANTI: Per aumentare la gioia e la sicurezza nell’uso del gommone, vi consigliamo di seguire gli avvisi di sicurezza rigorosamente. Questo gommone non è un battello di salvataggio. Usare soltanto sotto controllo competente. Non concedere mai di tuffarsi nella barca. -
Page 52: Gonfiare Il Gommone
In caso si sospetta un buco o una perdita d’aria, l’uso della barca non è permesso. Prendete nota della fortezza del vento e le varie correnti. Queste condizioni potrebbero essere molto insicuri e pericolosi. Attenzione: È la responsabilità dell’operatore della barca di accertarsi sulle leggi locali e statali che bisogna seguire per la sicurezza della barca e l’apparecchiatura di sicurezza richiesta. - Page 53 Installazione della panca: Posizionare le barre nei tubolari della panca (E). Premere la panca in posizione, utilizzando i tubolari nelle scanalature che sono ai confini della panca. Fissate contemporaneamente le due parti (F) e (G). Portate la panca in posizione, in mezzo ai tubolari. Illustrazione per i dettagli della valvola A Coperchio di valvola B Entrata d'aria...
- Page 54 Manometro Montato con Montato con Bocchettone di Pompa dell’aria gonfiamento B Attenzione: NON gonfiate mai eccessivamente e in nessun caso usare un compressore d’aria! Dopo che l’adattatore e stato installato completamente, si può gonfiare il gommone in sequenza numerica. La pressione massima per le camere d'aria è come segue: 1 + 2 + 3 0.25 bar (3.63 PSI) 4 + 5...
- Page 55 Composizione della pagaia Riunite la sezione della pagaia inserendo le sezioni della pagaia, utilizzando lo spillo, fino a che gli spilli si chiudono nei fori di stop. Installazione della pagaia Utilizzate il bullone di fissaggio, nel foro centrale sulla pagaia. Avvitate la noce di stop sulla fine del bullone di fissaggio e portate la pagaia nella posizione.
-
Page 56: Istruzioni D'uso
ISTRUZIONI D’USO Preparazione prima della partenza Procuratevi successive informazioni e passare queste informazioni ai passeggeri: 1. Informatevi successivamente delle leggi locali, le regole e rischi, he sono importanti per le attività in acqua e la navigazione di barche. 2. Informatevi come sono le previsioni di tempo, i correnti locali e le ondizioni del vento. -
Page 57: Manutenzione E Conservazione
Per favore seguire le seguente regole durante la navigazione. 1. Rimanere sempre cosciente della vostra responsabilità e seguite le regole. Le regole di sicurezza seguire con molta attenzione, se lei è disattento potrebbe mettere in pericolo lei e gli altri. 2. -
Page 58: Smontaggio
Ogni volta che avete usato il gommone dovete pulirlo, per evitare danni causati dalla sabbia, acqua salata e il sole. Per la pulizia potete utilizzare il tubo flessibile d’irrigazione, una spugna e un sapone leggero. Il gommone deve essere completamente asciutto primo di conservarlo, per evitare formazione di muffa. -
Page 59: Soluzioni Problemi
SOLUZIONI PROBLEMI Nel caso che il gommone vi sembra troppo sottile, non vuol dire che necessariamente dovrebbe esserci un buco. Per primo dovete controllare i coperchi delle valvole. Potrebbero essere non chiusi correttamente. I coperchi delle valvole sono a posto. Potrebbe essere una differenza di temperatura. -
Page 60: Garanzia Limitata
Non possiamo essere ritenuti responsabili per i costi di installazione, manodopera o trasporto relativi alla sostituzione delle parti difettose. Questa garanzia limitata, inoltre, non copre alcuna modifica non autorizzata all’imbarcazione stessa. Shanghai Jilong Plastic Products Co. Ltd. No. 460 Lanxue Road, Huanglou, Pudong Area, Shanghai, 201205, P.R. China el: +86-21-58942200 E-mail: info@jilong.com... - Page 61 BB-III 500-11-NL Z-RAY III 500 SERIES SPORTS BOAT GEBRUIKSAANWIJZING Belangrijke Zekerheidsrichtlijnen voor het gebruik van de Sportboot. Gelieve voor het gebruik van de boot dit zorgvuldig door te lezen ISO 6185 BOOTONTWERP CATEGORIE C BOOTONTWERP CATEGORIE C – "KUST": BOOT ALLEEN VOOR TOCHTEN LANGS DE KUST ONTWORPEN.
- Page 62 INHOUD VOORWOORD-------------------------------------------------------63 BELANGRIJKE AANWIJZINGEN----------------------------- 66 BOOT OPPOMPEN------------------------------------------------ 67 GEBRUIKSAANWIJZING---------------------------------------- 71 ONDERHOUD EN BEWARING--------------------------------- 72 AFBOUW--------------------------------------------------------------73 PROBLEMEN OPLOSSEN-------------------------------------- 74 REPARATIES------------------------------------------------------- 74 GARANTIE----------------------------------------------------------- 75...
-
Page 63: Voorwoord
VOORWOORD Gelukwensen met de aankoop van een opblaasbare boot. Gelieve deze handleiding zorgvuldig te lezen alvorens uw boot op te blazen, op te bouwen of te gebruiken. Bestudeer ook zorgvuldig het handboek meegeleverd met uw buitenboordmotor. Maak u vertrouwd met de eigenschappen van de boot en de motor en vraag om professionele training indien u onervaren bent met het omgaan van dit type boot. - Page 64 Kort overzicht Zeer sterke nylon veiligheidsgrijplijn Oppompbare Hogedrukklep V-vormige kiel klep Snel te monteren PVC-stootwil houten bank Stevige draaibare uperfijn, drielaags in PVC-dol Korea gefabriceerd textiel/pvc-materiaal voor comfort en gewichtsondersteuning Afvoerklep Compliantieplaatje Marine laag Draaghandvat motorhek PVC-kegel Elke boot draagt een CIN (Craft Identification Number) en een fabrikatieplaquette.
- Page 65 Basisgegevens JL007014-2N Artikelnr. Z-ray Model nr. 365 x 205cm Luchtloze afmeting (144˝ x 81˝) 360 x170 x 44cm Opgeblazen afmeting (106˝ x 60˝ x 17˝) Max vermogen 9.9 HP van motor 7.4 kw Capaciteit (personen) Max belasting 600 kg Gewicht (kg) 1324Lbs Accessoires Ref.
-
Page 66: Belangrijke Aanwijzingen
BELANGRIJKE AANWIJZINGEN Om de vreugde en de zekerheid bij gebruik van de boot te verhogen, wijzen wij u er op om de zekerheidswaarschuwingen streng te bevolgen. - Deze boot is geen reddingboot. Gebruik slechts onder bekwame supervisie. Laat nooit toe dat men duikt in de boot. -
Page 67: Boot Oppompen
en uit te voeren. Gelieve de plaatselijke autoriteiten te raadplegen en om naleving ervan te verzekeren. Kinderen zonder begeleiding niet toelaten in de boot. Zorg altijd ervoor dat minstens één verantwoordelijke volwassene alle kinderen en zij die niet kunnen zwemmen controleert. Bewaar altijd het juiste materiaal voor de bootveiligheid in een gemakkelijk toegankelijke plaats in uw boot. - Page 68 Installatie van de zitbank Leg de stangen in de zitbuizen aan (E). Schuif de zit in positie, door de buishouders in de groeven te schuiven, die aan elk einde van de zitbank voorhanden zijn. Plaats de beide zijden (F) en (G) gelijktijdig. Breng de zit in positie, om het in het midden van de buishouders te bevinden.
- Page 69 Luchtdrukmeter Gemonteerd met Gemonteerd met Inflatie-opening B luchtpomp Nadat de Inflation Adapter volledig gemonteerd is, kan men de boot in nummerologische volgorde opblazen. Opgepast: NIET overbevullen en in geen enkel geval een luchtcompressor gebruiken ! M aximum druk voor de luchtkamers: 1 + 2 + 3 0,25 bar (3,63 PSI) 4 + 5...
- Page 70 Samenstelling van de pagaai Bouw de roeispaan samen, door de vederstift naar beneden te drukken en de staaf van de roeispaan erin te schuiven, tot de stift in het daarvoor voorziene gaatje zich vastzet. Installatie van de pagaai Neem de bout op de warteldol in het centrale gat op de roeispaanschacht op.
-
Page 71: Gebruiksaanwijzing
GEBRUIKSAANWIJZING Voorbereiding voor afvaart Verschaf u de aanvullende informaties en informeer hierover ook uw passagieren: 1. Informeer u uitvoerig over de lokale wetgeving, regels en risico’s, die met wateraktiviteiten en bootbediening in aanmerking komen. 2. Informeer u over de weersvooruitzichten, lokale stromingen en windomstandigheden. -
Page 72: Onderhoud En Bewaring
Gelieve deze volgende regels na te volgen tijdens de navigatie 1. Blijf steeds bewust over uw verantwoordelijkheid en volg de regels. Ga niet onachtzaam om met de zekerheidsregels, het kan u en andere in gevaar brengen. 2. Leer u aan, de controle van de boot te behouden. 3. -
Page 73: Afbouw
Na elke vaart zou u de boot moeten reinigen, om beschadigingen door sand, zoutwater of zon te vermijden. Voor de reiniging kan u een tuinslang, een spons en een zachte zeep gebruiken. De boot moet voor bewaring kompleet droog zijn, zodat zich geen schimmel vormen Gebruik geen oplosmiddelen om de boot schoon te maken, de oplosmiddelen kunnen materiaal of plastic componenten in het systeem beschadigen. -
Page 74: Problemen Oplossen
PROBLEMEN OPLOSSEN Indien voor u de boot zich als te zacht aanvoelt, moet er niet noodzakelijk een gat voorhanden zijn. Als eerste kan men nakijken of de ventielkappen te los zijn. Zijn de ventielkappen in orde, kan het aan temperatuurverschillen liggen. -
Page 75: Beperkte Garantie
Verder dekt deze beperkte garantie geen onbevoegde wijzigingen die aan het roduct zelf worden uitgevoerd. Shanghai Jilong Plastic Products Co. Ltd. No. 460 Lanxue Road, Huanglou, Pudong Area, Shanghai, 201205, P.R. China el: +86-21-58942200 E-mail: info@jilong.com... - Page 76 BB-III 500-11-ES Z-ray III 500 Manual de instrucciones NORMAS DE SEGURIDAD IMPORTANTES PARA EL USO DE EMBARCACIONES DEPORTIVAS Lea detenidamente esta información antes de usar la embarcación DISEÑO DE LA EMBARCACIÓN ISO 6185 CATEGORÍA C DISEÑO DE EMBARCACIÓN DE CATEGORÍA C – “COSTERA”: Embarcación diseñada solamente para navegar por aguas cercanas a la costa.
- Page 77 ÍNDICE Introducción..................78 Normas de seguridad importantes ............. 79 Croquis ....................81 Información (datos básicos y accesorios).......... 82 Instalación ..................83 Instrucciones de uso ................87 Mantenimiento general..............89 Desmontaje..................89 Reparaciones ..................90 Guía de solución de problemas ............90 Garantía .....................
-
Page 78: Introducción
Introducción Le agradecemos la compra de nuestra Z-ray serie. Creemos que le resultará fácil de instalar y podrá utilizarlo de forma eficaz. Lea detenidamente las siguientes instrucciones antes de utilizar esta embarcación inflable y conserve estas instrucciones para futuras referencias. Si revende la embarcación, entregue este manual al nuevo propietario. -
Page 79: Normas De Seguridad Importantes
Normas de seguridad importantes Lea detenidamente esta información antes de usar la embarcación Para garantizar el disfrute de su embarcación y proteger la seguridad de la persona que use el producto, CUMPLA ESTRICTAMENTE Y EN TODO MOMENTO los siguientes aspectos de seguridad importantes. Debe leerlos detenidamente antes de usar la embarcación 1. - Page 80 8. ADVERTENCIA: Tenga cuidado con los vientos terrales y las corrientes submarinas. Podrían ser peligrosos. 9. ADVERTENCIA: El número de personas y el peso total no deberá superar la cifra que aparece en la información impresa en la embarcación. No supere la capacidad máxima recomendada. La sobrecarga viola las normas 10.
-
Page 81: Croquis
Croquis Cabo de transporte de seguridad fabricado en nylon de alta resistencia Válvula de quilla Válvula de alta presión inflable en V Traca protectora Sistema de asientos contra impactos de madera de fabricada montaje rápido en PVC Material de alta Fijación giratoria para remos calidad fabricado en... -
Page 82: Información (Datos Básicos Y Accesorios)
Datos básicos Nº de elemento JL007014-2N Z-ray Nº de modelo 365 x 205cm Tamaño desinflado (144˝ x 81˝) 360 x170 x 44cm Tamaño inflado (106˝ x 60˝ x 17˝) Potencia máxima 9.9 HP del motor 7.4 kw Capacidad (personas) Carga máxima 600 kg Peso (kg.) 1324Lbs... -
Page 83: Instalación
Instalación 1. Encuentre una superficie plana y asegúrese de que en ella no hay ningún tipo de piedras, palos, objetos afilados u otros cuerpos extraños. 2. Despliegue con cuidado la embarcación, extendiendo las cámaras y el suelo para que estén lo más lisos posibles. NOTA: Para facilitar la instalación, es preferible que monte la embarcación en un día soleado y cálido. - Page 84 5. Infle las cámaras de la embarcación en el orden numerado (1), (2) y, a continuación, (3), (4) y (5). Es muy importante seguir el orden numerado: si no lo hace podría provocar que la embarcación se infle de forma incorrecta. Puede utilizar una bomba de aire que se accione con la mano o el pie, o una bomba eléctrica de baja presión para inflar la embarcación.
- Page 85 Contador de presión de aire Acoplar a la boca de Acoplar a la bomba de inflado B aire Una vez que haya acoplado totalmente el adaptador de inflado, puede inflar la embarcación siguiendo el orden numerado. No la infle en exceso. Después de inflar, enrosque manualmente la tapa de la válvula A hacia la derecha.
- Page 86 7. Instalación de los remos: Introduzca el perno del escálamo giratorio en el agujero central del mango del remo. Atornille la tuerca de contención al extremo del perno y coloque el remo en el soporte para remos. 8. Instalación del motor: Para colocar un motor en la placa del mismo siga las instrucciones del Manual de instalación del motor.
-
Page 87: Instrucciones De Uso
Instrucciones de uso I) Preparativos antes de salir: 1. Obtenga la información necesaria e informe a los demás pasajeros. A) Infórmese sobre las leyes, normativas y riesgos locales relacionados con actividades acuáticas y el uso de embarcaciones. B) Consulte el parte meteorológico, las corrientes locales, las mareas y las condiciones de viento. - Page 88 II) Normas que cumplir durante la navegación: 1. Sea responsable y siga estrictamente las normas de seguridad. No incumpla las normas de seguridad. Esto podría poner en peligro su vida y las de los demás pasajeros. 2. Aprenda a tener siempre el control de la embarcación. 3.
-
Page 89: Mantenimiento General
Mantenimiento general 1. En cuanto al uso de las piezas, conserve algunas de repuesto, y póngase en contacto con el representante local para recibir piezas oficiales de fábrica cuando el sistema se someta a alguna revisión. 2. Limpie la embarcación después de cada travesía para evitar posibles daños provocados por la exposición a la arena, agua salada, etc. -
Page 90: Reparaciones
Reparaciones Se pueden reparar agujeros o pinchazos de pequeñas dimensiones con el kit de reparación que se incluye en la embarcación. 1. En primer lugar localice la fuga en la embarcación. 2. Limpie a fondo la zona que rodea la fuga para eliminar toda la suciedad. 3. -
Page 91: Garantía
Esta garantía limitada tampoco cubre aquellas modificaciones realizadas sin autorización sobre el producto. Shanghai Jilong Plastic Products Co. Ltd. No. 460 Lanxue Road, Huanglou, Pudong Area, Shanghai, 201205, P.R. China Tel: +86-21-58942200 E-mail: info@jilong.com... - Page 92 BB-III 500-10-CN Z-ray III 500 说明手册 竞技型充气艇使用重要安全指南 使用充气艇前请仔细阅读并充分理解 ISO 6185 充气艇设计类别 C 充气艇设计类别C – “近海”: – : 船的设计适合在近岸水域航行。请航行在沿海水域,大海湾,河 口,湖泊和河流的适航位置;包括条件:风力 6级以下和重大浪高2米 以内。...
- Page 93 目录 简介 重要安全指南 示意图 信息(基本数据和配件) 安装说明 操作说明 一般维护 拆卸 维修 故障解决指南 保修 107...
- Page 94 简介 感谢您购买我们的Z-ray系列。相信您将发现它的安装和使用非常 方便快捷。使用本充气艇前,请仔细阅读以下说明,并保留说明 书以供参考。如果您将船只转售,请将此手册交给新的购买者。 Z-ray充气艇按照最高质量标准进行制造。包括以下特性: 安装和维护简便 维护和使用成本低 无噪音,质量性能上乘 建造质量认证 可靠、耐腐蚀和强化材料 设计优雅美观 冬季易于存放和压缩 GS认证 使用安全环保 本Z-ray充气艇手册将提供所有需要遵守的简易说明,以便轻松地 安装和操作。如果这是您的第一艘船,或者您不熟悉此类充气 艇,请一定在驾驶前经过处理和操作方面的培训。您的经销商或 国家航海联合会或游艇俱乐部非常乐意向您提供有关当地航海学 校或合格教练员的咨询。 除安装说明和操作指南以外,我们还提供若干非常重要的警告和 警示,涉及这款新型Z-ray充气艇的安全使用和驾驶享受。您必须 花时间阅读全部警告,并告知将享受本船使用的任何人。 首次使用前,请确保您阅读和理解本手册的全部内容。 请保留本手册以供将来参考!...
- Page 95 重要安全指南 使用充气艇前请仔细阅读并充分理解内容 为了提升您的充气艇享受乐趣并在产品使用期间保护操作者的安 全,随时严格遵守以下重要安全提示。以下内容应当在使用前予 以阅读和理解: 1. 警告:船只设计仅用于在安全水域的航行。此充气艇仅用于在 小型湖泊、河流和运河航行,风力最高4级,浪高最高0.5米。 2. 警告:这不是救生设备。只能在有资质的监督人员指导下方可 使用。禁止跳入或跃入此产品。在不使用时请勿将其留在水中 或水边。禁止使用其他任何船只拖曳。必须由成年人进行组装 和操作。 3. 警告:对产品的气室充气应遵守编号顺序,不得过度充气。产 品过量充气会导致气室爆裂,或损坏焊缝。 4. 警告:强烈建议使用者参加驾船安全课程,并从您的充气艇经 销商或当地驾船主管机构获得实地操作培训。定期检查所有安 全要求。不得单独出航。 5. 警告:每名乘客必须配备水上救生漂浮器(PFD)。儿童和不会 游泳的人尤其必须随时穿着水上救生漂浮器。儿童和不会游泳 的人使用水上救生漂浮器需要特别指导。 6. 警告:登上或爬入船时请小心谨慎。站在充气艇的中央,保持 最大的稳定性。均衡分配负载和配件的重量,使船的前后和左 右保持平衡。 7. 警告:如果怀疑出现刺孔或漏洞,请勿使用气艇。可能不安 全。...
- Page 96 8. 警告:注意水面风和水下暗流。可能存在不安全因素。 9. 警告:总人数和总重量不得超过充气艇上所印刷的规定信息。 不得超过最大建议载重量。超载违反法规。 10. 警告:充气艇操作者有责任确定并遵守有关充气艇以及规定安 全设备的所有当地和国家法律。请咨询当地主管机构,确保遵 守法规。 11. 禁止无人看护的儿童进入充气艇。随时确保至少一名成年人负 责监护所有儿童以及不会游泳的人。 12. 随时保证适当的充气艇安全设备放在船中易于取得的位置。明 确说明紧急电话号码以及安全指示和规则(如“不得跳跃或跳 水”)。 13. 充气艇可存放且具有季节性。如果您居住在温带地区,不能全 年使用充气艇,强烈建议您在航行淡季将船放气并彻底干燥, 并存放在受保护区域。这有助于延长充气艇使用寿命,并防止 充气艇未使用时出现安全危害。 14. 警告:某些家用清洁剂、化学品和其他液体(如蓄电池用酸、 油和汽油)可能损害PVC纤维。如果发生溢出或处理不当,您 应当搜寻漏洞并检查结构完整性。 15. 遵守这些规则以避免溺水、瘫痪或其他严重人身伤害。...
- Page 97 示意图 高强度尼龙 安全系索 充气式 V 形 高压充气阀 龙骨阀门 快速组装式 PVC 防撞 木质座椅 安全贴条 系统 耐磨型 PVC 旋转桨架 超精细 3 层 式纤维 放水阀 标识板 手提 木夹板 把手 发动机艉板 PVC 圆锥体 所有充气艇均有 CIN(船标识码)和制造商铭牌。不得更改、覆盖或消 除 CIN。否则会导致质保无效,并可能给您造成法律问题。请在本手册 《符合性声明》的指定位置记录充气艇的 CIN,并将其另外保存在安全 处。...
- Page 98 基本数据 项目号 JL007014-2N Z-ray 型号 365 x 205cm 未充气尺寸 (144˝ x 81˝) 360 x170 x 44cm 充气尺寸 (106˝ x 60˝ x 17˝) 9.9 HP 发动机最大功率 7.4 kw 容量(人) 600 kg 最大载重量(千克) 1324Lbs 配件 参考号 描述 示意图 数量 船体 维修工具包 手泵 船桨...
- Page 99 安装说明 1. 找一处平整区域,确保用于安装船只的地面无任何石块、棍 棒、锐利物体或其他异物碎屑。 2. 小心展开充气艇,铺开浮力管和地板,使其尽量平整。注:为 便于安装,适宜在暖和的晴天安装充气艇。如果时间允许,将 展开的充气艇在阳光下直接晾晒1小时或更久,使充气艇的材料 在安装过程中更加灵活。 警告:不得拖拉充气艇,否则可能划伤或造成其他损害。对于 处理不当或不遵守上述说明造成的充气艇损害,我们概不负 责。 3. 将充气底装入船舱底板上 4. 木质座椅安装: 将塑料(或木质)杆子插入座椅定位管(E)。将定位管插入座椅 端部的凹槽,使座椅就位。同时插入座椅的两端,见(F)和(G)。 将座椅放置在定位管的中部。...
- Page 100 5. 按照编号顺序(1)、(2)、(3) 、(4)、(5),对充气艇的气室充气。 必须遵守编号顺序:不遵守编号将导致充气不当。可使用由手 或脚操控的空气泵,或低压电动泵对船充气。不得使用高压空 气压缩机。按照编号顺序对每个气室充气,直至充满。警告: 每次不得过度充气;否则将损坏船体。过量充气会导致船只爆 裂,或损坏船体焊缝。 请参考以下有关内置式安全阀充气和放气操作的详细说明。 a) 充气: 充气接头 、空气压力表 拧开阀盖A,将 与充气口B 和 空气泵 组装在一起(请参考以下详细说明)。 压力表 同船上的气嘴 B 同气泵的打 部分连接 气管连接...
- Page 101 充气接头组装完成后,您可以按编号顺序对船充气。不得过度 警告:不得过度 充气。充气完成后,用手将阀盖A顺时针拧紧。 充气或使用高压泵。 气室(1),(2)和(3)的最大气压应为0.25bar (3.63PSI)。气室(4)和(5)的最大气压应为0.35bar(5.08PSI)。 b) 放气: 取下阀盖A,按下放气按钮C并将阀顺时针转动90°, 直至其锁定,放开阀门,空气将放出。如果要停止放气,按 下放气按钮C,并将其逆时针转动90°。松开阀门,放气将停 止。 6. 船桨组装: 组装船桨的方法是松开弹簧销,将船桨插入,直至弹簧销锁入 限位孔。 7. 船桨安装: 将旋转桨架上的螺栓插入桨轴的中部孔。将定位螺帽装入螺栓 顶部,把船桨放入桨座。...
- Page 102 8. 发动机安装: 《发动机安装手册》 要将发动机安装到发动机艉板,请遵守 的 说明。...
- Page 103 操作说明 I) 出发前准备: 1 . 获得必要的信息,并告知其他乘客: A) 了解当地法律、法规以及与水上活动和充气艇操作相关的危 害。 B) 查看天气预报、当地水流、潮汐和风力状况。 C) 向某人告知您计划返回的时间。 D) 向所有乘客说明基本的充气艇操作。 E) 确保至少一名乘客能在紧急情况下操作充气艇。 F) 了解如何确定您可以航行的距离,并注意可能影响此距离的 不利天气条件。 检 查充气艇和设备的使用条件: A) 检查充气压力。 B) 检查所有安全阀。 C) 检查负载在充气艇上均衡分配:前后和左右。 D) 本充气艇只建议使用表上所列规格的发动机驱动。(请参考 第7页上的建议发动机最大功率) 3. 检查必备的安全设备已在船上(了解驾船所在国或地区的法律 和法规): A) 每名乘客必须配备的水上救生漂浮器(PFD)。 B) 空气泵、船桨、维修工具包和工具箱。 C) 强制性设备。 D) 充气艇的各种文件以及您的驾船许可证(如适用)。...
- Page 104 II) 航行中须遵守的规则: 认真负责并严格遵守安全守则。不得忽视安全条例。否则可能 危害您和其他乘客的生命。 学习随时控制您的船。 遵守当地法规和惯例。 注意,天气条件可能会迅速恶化。随时确保可快速抵达庇护地 点。 船上所有人随时穿着水上救生漂浮器。 操作充气艇之前或过程中不得饮酒或使用药物。所有乘客在全 程应保持清醒。 禁止用火。不得在船上吸烟。 不得超出规定的乘坐人数或总重量。 确保乘客保持坐姿。充气艇停靠或低速航行时,乘客可坐在浮 力管上,并抓住充气艇周围的绳索。准备加速,处于危险水域 或急转弯时,所有乘客应坐在座椅中或地板上。 不得骑跨船头。骑跨船头在多数地区为非法,而且极度危险。 靠岸时尤其谨慎。将手脚伸出船外可能导致手脚受伤。 避开有跳水者或游泳者的水域。保持谨慎了望,尤其靠近岸边 和出航地点时。漂浮标志表示附近有跳水者。您必须保持足够 的距离(至少50米)。 避免高速急转弯,可能导致翻覆或将乘客落出船外。...
- Page 105 一般维护 根据零件的使用,保证部分备用零部件;维护系统时,所有零 件建议必须咨询船厂授权零件的当地代理商。 出航后清洁您的充气艇,防止沙石、咸水或日照损害。 不需要加润滑油或常规机械维护。 用软性清洁剂和水清洗充气艇外侧,或使用海绵和软性肥皂。 这样可清除多数污垢。 不得使用溶剂来清洁充气艇,溶剂可能损害系统的材料或塑料 部件。 确保充气艇在存放前完全清洁和干燥,否则霉菌累积,船将发 霉。 将所有的充气艇配件存放在通风的干燥存放地点。确保所有零 件在存放前干燥。 您可以将充气艇存放在干燥地点,并使用原装包装箱存放,以 便下次使用。不得存放在可能暴露于极端温度的地点。 拆卸 从充气艇上拆下所有配件(鱼竿、船桨、器具包等)。 打开所有阀门,将充气艇完全放气。 折叠充气艇。(确保充气艇清洁干燥。参考上文“一般维护” 章节)。 将充气艇和空气泵、船桨放入手提袋,以便存放。...
- Page 106 维修 较小的洞或刺孔可使用随船配置的维修工具包进行维修。 先找到船上的漏洞。 彻底清洁漏洞周围区域,消除任何污垢或污物。 剪出一块圆形维修材料,应大于受损部位。 使用铅笔轻轻描出补丁的轮廓。 将粘合剂涂在补丁底面以及需维修部位的周围。用胶水轻轻但 完全地涂盖住受影响部位。 将补丁放在受损部位上,并牢固按紧。 维修后放置12小时以便干燥。补丁干燥后,在边缘涂上胶水以 完全密封(4小时干燥)。 完成以上步骤,您的充气艇就可安全使用。 故障解决指南 如果发现充气艇变软,并非肯定是由于漏洞。首先检查内置式安 全阀(检查组装条件A、B、C和D)和其他阀门是否松脱。如果所 有阀门状况良好,您可以考虑是否由于温度变化导致:如果充气 艇是在白天温度较高时充气,夜间温度将下降。气室中的压力可 能降低,充气艇可能变软。 如果阀门和温度变化并非起因,您必须搜寻漏洞: 将船充气,查看和倾听漏洞。任何较大漏洞应清晰可见。 准确找到漏洞的位置:将软性肥皂水喷到可疑部位。漏洞将产 生气泡。 检查阀门的漏洞。...
- Page 107 有限质保 客户注意事项 - 请仔细阅读本声明,并始终妥善保管原始收据及本质保单。(原 始收据将作为你的购买凭证以及产品所有权期限证明) 自用户最初购买之日起720天内,在正常使用和维护条件下,我们担保本产品所含 的所有部件均无材料和工艺缺陷。若消费者自行更换、损坏或滥用造成产品出现 质量问题,则相应的质保将无效。此类情况下,您将被告知更换零件的成本和处 理说明。 若在质保期限内发现可验证的制造缺陷,只要出示相应的购买证明,我们将酌情 选择修理或更换质保范围内的任何产品。 如果将本产品用于商业目的,或者因事故、天灾、消费者滥用、疏忽或误用、破 坏、不当使用化学品、暴露于极端天气条件、产品设置或拆卸期间的疏忽而造成 损坏,则本有限质保无效。 对于因更换缺陷零件而产生的安装、劳工、运输费用,我们不承担任何责任。此 外,对产品进行的任何未经授权的改装亦不包含在本有限质保之列。 上海吉龙塑胶制品有限公司 中国上海市浦东新区黄楼镇栏学路460号,邮编201205 电话: +86-21-58942200 电子邮件: 网站: www.jilong.com...
Need help?
Do you have a question about the Z-RAY III 500 SERIES and is the answer not in the manual?
Questions and answers