Table of Contents
Advertisement
Advertisement
Table of Contents

Related Manuals for Wincor Nixdorf TH250


Summary of Contents for Wincor Nixdorf TH250
- Page 1 TH250 Thermal Printer User Manual Edition January 2016...
-
Page 2: Table Of Contents
Contents Introduction ................... 1 About this manual ................2 Certificates ..................3 Communautés Européennes (CE) ............ 3 Underwriters Laboratories .............. 3 Federal Communications Commission (FCC) Radio Frequency Interference Statement Warning............ 4 Important notes ................5 Warranty ..................6 General safety information ............7 Safety instructions ................ - Page 3 Printhead Setting ................27 Preventing overheating of the printhead........27 Troubleshooting the printer ............28 Paper and Supplies............... 34 Ordering from Wincor Nixdorf ............34 Ordering thermal paper ............34 Qualified paper grades ............34 Ordering miscellaneous supplies..........36 Technical Data................38 Standard features .................
-
Page 5: Introduction
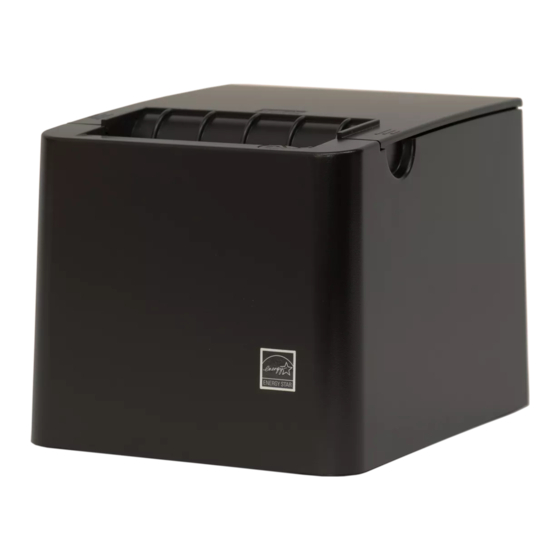
Introduction The TH250 two-color thermal receipt printer is easy to install, use, and maintain. Utilizing Clamshell design, simply snap open the top cover and drop the paper roll in place. You never need to change a printer ribbon or cartridge because it uses thermal print technology. -
Page 6: About This Manual
The type and scope of application programs depend on the customer’s own selection, therefore, software will not be discussed further in this manual. You will find a description for the programming of this POS printer in a separate manual (“TH250, Programmer’s Guide”). TH250 Thermal Printer User Manual... -
Page 7: Certificates
2006/95/EC "Low Voltage Directive" and RoHS directive 2011/65/EU. Therefore, you will find the CE mark on the device or packag- ing. Underwriters Laboratories In addition, the device has received the UL symbol and cUL symbol. TH250 Thermal Printer User Manual... -
Page 8: Federal Communications Commission (Fcc) Radio Frequency Interference Statement Warning
Wincor Nixdorf. The correction of interferences caused by such un- authorized modification, substitution or attachment will be the responsibil- ity of the user. -
Page 9: Important Notes
Make sure that only cables and devices may be connected which are admitted by Wincor Nixdorf. The user is responsible for any malfunctions that emerge from the actions mentioned before. -
Page 10: Warranty
Warranty Wincor Nixdorf generally guarantees a limited warranty engagement for 12 months beginning with the date of delivery. This warranty engagement covers all those damages which occur despite a normal use of the product. Damages because of improper or insufficient maintenance,... -
Page 11: General Safety Information
Connect the DC adapter to an appropriate grounding outlet. Disconnect the DC adapter when the printer is not used for a long time. TH250 Thermal Printer User Manual... - Page 12 The printer should only be repaired by a technician, who is certified by Wincor Nixdorf. Operate the printer only with power supplies and cables approved by Wincor Nixdorf. Keep this manual safe and at hand for your ready reference. TH250 Thermal Printer User Manual...
-
Page 13: Overview
Overview TH250 Thermal Printer User Manual... -
Page 14: Printer Controls
Use the reset button to reset the printer in case of a jam or fault condition. Use the back of a pencil eraser of something non-metallic to press the but- ton, which is located at the end of the hole opening marked ‘RESET’. TH250 Thermal Printer User Manual... -
Page 15: Setting Up The Printer
Setting up the printer Unpack the parts and check whether the delivery matches the details of the delivery note. TH250 Thermal Printer User Manual... -
Page 16: Load Or Change The Paper Roll
1. Open the top cover by pushing up evenly on each of the cover until it un- snaps (1). 2. Loading: Remove the test printout (2). Retain the test printout with the configuration listing until the printer is successfully installed Changing: Remove the used paper roll. TH250 Thermal Printer User Manual... -
Page 17: Adjusting Paper Low Setting
Note: This setting can be adjusted with the provided software utility. Changing the paper path width The TH250 can be adjusted to print on paper rolls with widths of 58 or 60 mm. To perform this adjustment, please refer to the Service Manual. A trained service technician must perform this adjustment. -
Page 18: Mounting The Printer On A Vertical Surface (Using Optional Kit)
Follow the instructions provided with wall-mount kit to attach the bracket to the vertical surface and the printer to the bracket. Caution: Attach the power and communication cables to the printer prior to attaching the printer to the bracket. TH250 Thermal Printer User Manual... -
Page 19: Connect The Cables
Plug the cable into the cash drawer connector located at the right side of the illustration. Note: If installing two cash drawers, you will need to obtain a Y-cable as shown in the illustration below. TH250 Thermal Printer User Manual... -
Page 20: Communication Cables
2. Attach the communication cable to the communication connector, shown in the illustration above. Tighten the screws to secure the cable and en- sure a stable connection. 3. Connect the cable to the host computer. TH250 Thermal Printer User Manual... - Page 21 2. Connect the cable to the USB port in the host computer. Again, make sure the USB symbol on the connector is face up when you plug it into the port. USB Cable Strain Relief USB Cable Bottom of printer TH250 Thermal Printer User Manual...
- Page 22 Make sure the connector snaps firmly in place. 3. After you have connected the printer, you may need to set the printer in- ternal parameters for Ethernet operation. See Appendix A: Ethernet Setup Guide. TH250 Thermal Printer User Manual...
-
Page 23: Test The Printer
If the printer is functioning normally, it will beep once. If it responds differ- ently, refer to chapter “Using the Printer, Troubleshooting the printer” or contact Wincor Nixdorf for technical support. The printer will arrive for installation pre-configured. The printer’s current configuration appears on the test (diagnostics) printout. - Page 24 3. Press and hold the paper feed button (3). 4. Close the top cover, continually holding the paper feed button until the configuration printout begins (4). For further instructions, see chapter “Using the printer, Configuring the printer”. TH250 Thermal Printer User Manual...
-
Page 25: Using The Printer
If you make adjustments to the configuration, be careful not to inadvertently change settings that may af- fect the printer’s performance. Wincor Nixdorf does not recommend that users change the printer configuration. Additional information on configuring the printer is found in the Program- mer’s Guide. - Page 26 5. Continue through your menu selections until you are asked, “Save New Parameters?” Select “Yes.” Reset the Printer. Open the top cover. Press and hold the paper feed button while closing the top cover. The diagnostic printout verifies your new settings. TH250 Thermal Printer User Manual...
- Page 27 TH250 Thermal Printer User Manual...
-
Page 28: Energy-Savings
Energy-savings The TH250 is an ENERGY STAR® qualified printer. This function makes it possible to set the number of minutes the printer will remain idle before entering a low-power (<0.5 watt) sleep mode. To set or to adjust the energy-savings timeout value: 1. -
Page 29: To Change The Print Density
Running at a higher energy level will reduce the printhead life. Consult your Wincor Nixdorf representative or Wincor Nixdorf technical sup- port if you have any questions. When the printer prints high-density color print lines (text or graphics), it automatically slows down. -
Page 30: Paper Roll Handling
Nixdorf power supply with PowerID. There are four levels of power, besides auto, that can be selected in the Hardware Options section of the Configuration menu: Auto (for Wincor Nixdorf power supplies with PowerID), fall back 48W TH250 Thermal Printer User Manual... -
Page 31: Printhead Setting
This may damage the print- head. To avoid this problem, do one or a combination of the following: Reduce the amount of coverage. Reduce the time of continuous solid printing. Reduce the ambient temperature. TH250 Thermal Printer User Manual... -
Page 32: Troubleshooting The Printer
The printer is simple and generally trouble-free, however unexpected con- ditions may arise. Use the charts below to diagnose and solve these printer conditions. To resolve complex issues, you may need to contact a service representative. TH250 Thermal Printer User Manual... - Page 33 Preventing mainder down overheating of the printhead”. If on power up, contact your au- thorized service repre- sentative. LED blinks quick, Invalid firmware Load new firm- steady (on pow- ware er up) TH250 Thermal Printer User Manual...
- Page 34 Receipt is not Paper is jammed Open the top cover, inspect the knife, and clear any jammed paper TH250 Thermal Printer User Manual...
- Page 35 Stop using the Contact your author- One side of This indicates a printer ized service repre- receipt is miss- serious condition sentative with the printer electronics TH250 Thermal Printer User Manual...
- Page 36 Note: If paper has been used which is not on the Wincor Nixdorf recommend paper list, resulting in a dirty printhead, the printhead may require cleaning prior to switching back to Wincor Nixdorf recommended paper. See Chapter “Paper and Supplies“ for a list. If non-recommended paper is used over an extended period, attempting to clean the printhead will have little effect on print quality.
- Page 37 Connect the after 5–20 sec- cables” onds, reconnect the data cable, reset the printer, and reboot the host computer; check that data cable are proper- ly connected on both ends TH250 Thermal Printer User Manual...
-
Page 38: Paper And Supplies
To place an order or get more non- technical information, call your Wincor Nixdorf representative. Wincor Nixdorf is able to provide paper in small lots to facilitate product evaluation and testing. Contact your Wincor Nixdorf representative for more information on ordering. - Page 39 Mitsubishi Int’l Corp. P–5035 T–8051 TP–8065 PP-5051 OJI Paper Company Ltd. KF–60 PD–170R PD–160R Wincor-Nixdorf International GmbH WN-T55 Website: http://www.wincor- nixdorf.com/mediaservice Two-color paper: Qualified manufacturers Paper grade Mitsubishi Int’l Corp. (USA) PB-770 (Blue and Black) TH250 Thermal Printer User Manual...
-
Page 40: Ordering Miscellaneous Supplies
Ordering miscellaneous supplies Cash drawers and cables Wincor Nixdorf compatible cash drawers: KA17, KA21, KA12-1 Cable Model number Part number KAxx cable 1.5m black CRKB-0981 01750082239 KAxx cable 3.0m black CRKB-0982 01750082240 KAxx cable 5.0m black CRKB-0984 01750267706 KA17 cable 1.5m black... - Page 41 English 01750275611 (Wincor Nixdorf certified service techni- German 01750275610 cians only-Contact a sales representative to order) * That document as PDF file and needed drivers can be downloaded from this web site: http://www.wincor- nixdorf.com/internet/site_EN/EN/Support/Downloads/POSLotter ySystems/poslotterysystems_node.html TH250 Thermal Printer User Manual...
-
Page 42: Technical Data
Options for 58 mm and 60 mm wide paper are also available Paper path 58 mm, 60 mm, 80.0 mm paper path width models Print resolution 8-dots/mm (203 dpi) Speed Up to 350 mm/second throughput (monochrome); up to 150 mm/second throughput (two-color). TH250 Thermal Printer User Manual... -
Page 43: Factory-Installed Options
25 Pin RS232/USB, Ethernet/USB or PoweredUSB. Cabinet color Black Mark Sensor Add-on options For part numbers and additional ordering information, refer to Chapter “Paper and Supplies”. Wall mount kit for printer Power supply Power cords TH250 Thermal Printer User Manual... -
Page 44: Appendix A: Ethernet Setup Guide
0.0.0.0. The net mask is used to determine if a gateway is needed to reach an address. Gateway a hardware or software set-up that translates between two dissimilar protocols. A gateway, even when the printer is on TH250 Thermal Printer User Manual... -
Page 45: Ethernet Default Setup
DHCP Enabled Default IP 192.0.0.192 (in use after 2 minute Bootp time-out) Net mask of 0.0.0.0 (causes default mask of selected IP to be used) HTTP Server Port 80 active Raw TCP/IP Port 9001 active TH250 Thermal Printer User Manual... - Page 46 See commands, beginning on the following page. Current Printer tallies are printed after the Diagnostic information and may vary To Enter Printer Cong Menu Press Feed Button Within the per printer use Next Two Seconds TH250 Thermal Printer User Manual...
-
Page 47: Ethernet Setup Commands
Default: 192.0.0.102 Sets the IP address value specified by the values of n1 to n4. Setting NetMask ASCII Hexadecimal Decimal Default: 0.0.0.0 Sets the Net Mask value specified by the values of n1 to n4. TH250 Thermal Printer User Manual... - Page 48 = 1: enabled Default: enabled Enables or disables the use of DHCP at power-up to obtain an IP address. If no ad- dress is found within two minutes, DHCP obtains the default IP address. TH250 Thermal Printer User Manual...
- Page 49 Low order byte of port # n1: HIgh order byte of port # Default: Port = 80 Sets the port where the HTTP server will listen. Setting port number to 0 disables HTTP communications. Get Ethernet configuration ASCII Hexadecimal Decimal TH250 Thermal Printer User Manual...
- Page 50 (1 record) and the rest is the record (08 01 00 01), where 08 is the id (DHCP), 01 00 is the size as s0 s1 (1 byte), and the final 01 is the data as d0...ds (enabled). TH250 Thermal Printer User Manual...
-
Page 51: Installing An Ethernet Printer On A Network With Windows Posready7 Or Newer
11. Go to the printers again and right click on the newly installed printer. Go to printer properties and print a test page. 12. If successful, you should now be able to use this printer from any Windows program. TH250 Thermal Printer User Manual... -
Page 52: Installing An Ethernet Printer On A Network With Windows Xp/Posready2009
11. Go to the printer group again and right click on the newly installed printer. Go to properties and print a test page. 12. If successful, you should now be able to use this printer from any Windows program. TH250 Thermal Printer User Manual... - Page 53 All brand and product names mentioned in this document are trademarks of their respective owners. Copyright © Wincor Nixdorf International GmbH, 2016 The reproduction, transmission or use of this document or its contents is not permitted without express authority. Offenders will be liable for damages. All rights, including rights created by patent grant or registration of a utility model or design, are reserved.
Need help?
Do you have a question about the TH250 and is the answer not in the manual?
Questions and answers