Mahlkonig K30 ES Operating Instructions Manual
Hide thumbs
Also See for K30 ES:
- Operating instructions manual (24 pages) ,
- Operating instructions manual (24 pages)
Table of Contents
Advertisement
Advertisement
Table of Contents

Related Manuals for Mahlkonig K30 ES


Summary of Contents for Mahlkonig K30 ES
-
Page 1: Operating Instructions
MAHLKÖNIG GmbH & Co. KG Operating Instructions K30 ES, K30 Vario, K30 Competition... - Page 2 Manual Dear customer / service personnel The ”Single Espresso Grinder K30ES ", is a fully automatic espresso coffee grinder of the proven MAHLKÖNIG quality. We have developed this product with over 80 years of experience in the manufacture of coffee grinders assuring you of high quality grinding of espresso and other types of coffee beans.
-
Page 3: Table Of Contents
Inhaltsverzeichnis 1. Safety 8. Cleaning 1.1 Symbols 8.1 Cleaning with GRINDZ™ Grinder Cleaner 1.2 Safety Instructions 8.2 Cleaning the Grinder Placement Surface 1.3 Usage Purpose 8.3 Cleaning the Grinder Casing 1.4 User Requirements 8.4 Cleaning of the Grinding Mechanism 2. Technical Data 9. -
Page 4: Safety
1.2 Safety Instructions Children cannot appreciate the dangers that can exist in the opera- Only whole roasted coffee beans may be ground in the K30 ES. tion of electrical grinders. For this reason, never leave children unsupervised with electronic appliances such as this grinder. -
Page 5: Usage Purpose
1.3 Usage Purpose 2. Technical Data Only whole roasted coffee beans may be ground in the K30 ES Type K30 ES, K30 Vario grinder. Never use the grinder to grind other products or objects. K30 Competition Voltage/Frequency 230-240V / 50/60Hz 1.4 Personnel Requirements... -
Page 6: Description
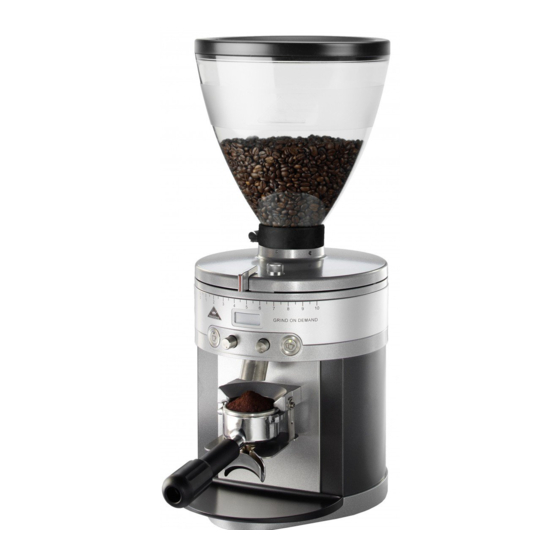
3. Description 3.1 Main Components and Operating Elements The main components and operating elements are pictured in the illustration. Pos. 1 Bean container with lid Pos. 2 Lock screw for bean container Pos. 3 Grinding fineness adjustment Pos. 4 Lock screw for grind adjustment lid Pos. -
Page 7: Safety Devices Of The Grinder
4. Safety Devices of the Grinder Pos. 18 Hopper slide Thermal overload circuit breaker Pos. 19 Main switch The motor of the grinder is protected by a thermal overload circuit Pos. 20 Trip switch breaker, which interrupts the motor's electric circuit in the event of Pos. -
Page 8: Set-Up And Basic Adjustment
5. Set-up and Basic Adjustment 5.3 Basic Adjustment A grinding test run is carried out on each grinder in the Once the device is ready to operate, a grinding test should be manufacturer's factory. This is why you may find ground material carried out. -
Page 9: Operation
6. Operation 6.1.2 Open the bean container. Pour whole, roasted espresso Only use the K 30 ES espresso grinder according to the purpose beans into the bean container from above. Never pour in coffee specified in 1.3. powder. Observe the safety instructions under 1.2! 6.1.3 Check whether the hopper slide (item 18) is open. -
Page 10: Display / Menue
6.1.6** Setting the grinding time (portion quantity). Simultane- 6.2 Display / Menue ously press both buttons for approx. 3 sec. MENU appears in the display. Scroll to menu option STI using the single button. 6.2.1 Calling up the menu To call the menu up, simultaneously press both buttons for 6.1.7** Use the Single shot timer, item 9, to set 2.0 sec. -
Page 11: Interruption Of Grinding
6.2.5 Continuous quantity indicator 7. Operating faults Scroll to menu option SC using the single button. The display Defect Cause Remedy shows e.g. SC 000127 – You have ground 127 single cup portions. The grinder The spout is Set grinding fineness to hums but does clogged. -
Page 12: Cleaning
7. Operating faults 8. Cleaning Defect Cause Remedy 8.1 Cleaning with GRINDZ™ Grinder Cleaner The grinder The mains plug Insert the mains plug into the We recommend cleaning your espresso grinder once a week and does not is not inserted. socket. -
Page 13: Cleaning The Grinder Casing
8.3 Cleaning the Grinder Casing 8.4.4 Now you can carefully vacuum out the grinder housing. 8.3.1 Clean the outside of the casing from time to time using a Please do not change any grinder settings! damp cloth. 8.3.2 Observe the safety instructions under 1.2! 8.4.5 During the reassembly please make sure that the grind adjustment lid is placed in a way that the 3 engaging cones fit into... -
Page 14: Maintenance And Repair
Disconnect the main plug. Close and remove the bean 10. Maintenance and Repair container. Place the grinder on its side and unscrew the fastening screws. Store the screws and washers in a safe place. Always pull the mains plug from the socket Re-position the grinder on its rubber feet. -
Page 15: Grinding Fineness Adjustment With The Grinder Switched On
10.2 Grinding fineness adjustment with the grinder switched ON It is important to ensure that no grinding disk "rattling" can be heard at the finest 10.2.1 Set the grinding fineness adjustment to the 0 detent. setting! Their service life will otherwise be significantly reduced! 10.2.2 Close and remove the bean container. -
Page 16: Spare Parts
10.2.19 Now make a test portion of espresso using your machine. If the result is unsatisfactory, repeat the adjustment steps as described in section 6.1.6 to 6.1.8, by varying the grinding time and grinding fineness. 11. Spare Parts Spare parts are usually ordered from your customer service centre or your local dealer. - Page 17 12. Wireing Diagram 200-230V 50/60Hz, 240V/50Hz...
- Page 18 12. Wireing Diagram 100-115V 50/60Hz...
-
Page 19: Certificate
13. Certificate 14. Warranty Conditions 1. The warranty period is 1 year from the date of purchase. 2. The warranty covers all damages that can be attributed to inferior materials or defective workmanship. Corresponding grinders will be repaired or replaced free-of-charge, with the exception of transport or freight charges. - Page 20 Manufacturer Name Plate MAHLKÖNIG GmbH & Co. KG Tilsiter Straße 142 D- 22047 Hamburg, Germany Tel.: 040 / 69 69 40-0 Fax: 040 / 69 39 721 office@mahlkoenig.de ; www.mahlkoenig.de August 2006 Subject to change without prior notice!!
Need help?
Do you have a question about the K30 ES and is the answer not in the manual?
Questions and answers