
Subscribe to Our Youtube Channel
Related Manuals for Gorenje IQ641AC


Summary of Contents for Gorenje IQ641AC
- Page 1 INSTRUCTIONS FOR USE, INSTALLATION AND CONNECTION GLASS-CERAMIC INDUCTION BUILT-IN COKING HOB www.gorenje.com...
- Page 2 Dear customer! Glass-ceramic hob is intended for use in households. Our products are packed in environment-friendly materials which can be recycled, disposed of, or destroyed without imposing any burden on the environment. Instructions for use Instructions for use are intended for the user. They describe the appliance and its operation.
-
Page 3: Table Of Contents
TABLE OF IMPORTANT WARNINGS ....................4 What you should pay attention to ..................4 Connection and repair ........................4 During use ............................4 Temperature safety ........................5 Cooking-time limiter ........................5 CONTROL UNIT .........................7 Control panel ........................... 7 Description ............................8 USE ............................9 Getting used to it..........................9 Pans.............................. -
Page 4: Important Warnings
IMPORTANT WARNINGS What you should pay Induction cooking is extremely safe. Various safety devices attention to have been incorporated in the hob such as a residual heat indicator and a cooking time limiter. There are nevertheless a number of precautions you should take. Connection and repair •... -
Page 5: Temperature Safety
• Never fl ambé food under the cooker hood. The high fl ames could cause a fi re, even if the cooker hood is switched off . • The ceramic top is extremely strong, but not unbreakable. A spice jar or pointed utensil falling on it, for example, could cause it to break. - Page 6 Setting The cooking zone switches automatically off after: 12 hours 8,5 hours 6,5 hours 5 hours 4 hours 3,5 hours 3 hours 2,5 hours 2 hours 1,5 hours 2 hours 2 hours The cooking-time limiter switches the cooking zones off if the time in the table has elapsed.
-
Page 7: Control Unit
CONTROL UNIT Control panel The number of cooking zones depends on the appliance model. 1. IQ - IQcook system (Controls are described in the separately attached instructions for use) --------------------------------------------------- 2. Hotplate power control a) decrease b) increase 3. P - Power boost 4. -
Page 8: Description
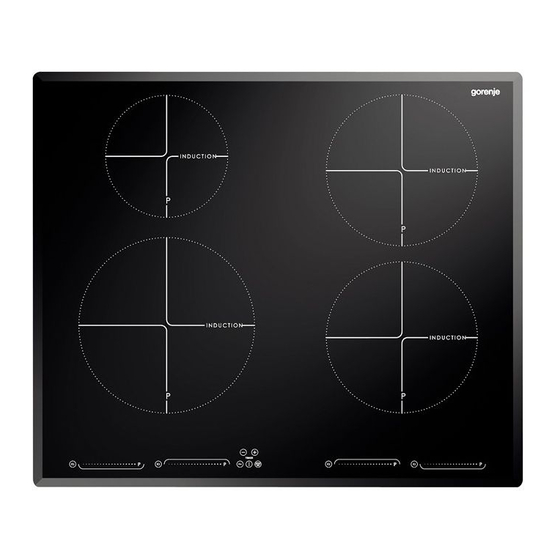
Description I N D U C T ION I N D U C T ION I N D U C T ION I N D U C T ION TIMER 1. Cooking zone Φ 145mm; 2,2kW 2. Cooking zone Φ 180mm; 3,0kW 3. -
Page 9: Use
Getting used to it... Using touch sensors The touch sensors only react to the light pressure of a fi ngertip. You do not have to apply any pressure. Do not operate the controls with any other objects. The hob will not switch on when your pet walks over it. -
Page 10: Pans
Induction cooking Induction cooking hob heats the food using a magnetic fi eld. When a pan with ferromagnetic metal bottom is placed on the hob, the magnetic fi eld generates eddy currents that heat up the pan. Coil (1) in the induction hob (2) generates magnetic fi... - Page 11 You can check for yourself whether your pans are suitable using a magnet. A pan is suitable if the base of the pan is attracted by the magnet. Suitable Unsuitable Special stainlesssteel pans Earthenware Class Induction Stainless steel Hard-wearing enamelled pans Porcelain Enamelled cast-iron pans Copper...
-
Page 12: Operation
OPERATION Switching on the hob The power has 9 settings. There is also a ‘boost’ setting, and setting the power which is indicated by the letter P in the display. 1. Put a pan on a hotplate. 2 Touch the On/Off button You will hear a short bleep and the display for each hotplate will show 0. -
Page 13: Automatic Heat-Up Function
Automatic heat-up The automatic heat-up function temporarily increases the function power (setting ‘9.’) to heat the contents of the pan faster. This function is available in all settings except the ‘Boost’ setting and setting ‘9.’ Switching on the automatic heat-up function The hob is switched on and a pan has been placed on the hotplate. -
Page 14: Switching Off The Hob
Switching off the boost function The boost function is switched on, and the display indicates ‘P’. 1. Touch the slide control sensor at any position. The display shows the selected power setting, the boost function is switched off . Or: 2. -
Page 15: Stand By Mode
Stand by mode Stand-by mode In stand-by mode, the display for each hotplate shows 0.. The hob is switched off and can be left unattended. You can switch to stand-by from 'Off ' mode, or by switching off the individual hotplates (by setting them to 0.). In stand-by mode, the hob automatically switches off if no other buttons are touched within 10 seconds. -
Page 16: Stop/Go Function
Switching on the child lock The hob is in stand-by mode. The display for each hotplate shows 0.. 1. Touch and hold the button to switch on the child lock. The red light to the right above the button and the On/Off Button are constantly illuminated. -
Page 17: Cooking Timer / Minute Minder
1. Switching off Stop / Go mode Press the button again within 10 minutes. The hob continues with the settings that were set before the Stop / Go. Cooking timer / Minute A cooking timer can be set for each cooking zone. All of minder the cooking timers can be used at the same time. -
Page 18: Switching Off The Timer/Minute Minder
Cooking timer must always be associated with an active hotplate. This means that this particular hotplate will be switched off when the preset time elapses. Cooking timer can be set at maximum 1h and 59 minutes. Switching on the cooking timer 1. -
Page 19: Cooking
Burning point of diff erent types of oil To ensure your food is fried as healthily as possible, Gorenje recommends choosing the type of oil according to the frying temperature. Each oil has a diff erent burning point at which toxic gasses are released. The below table shows the burning points for various types of oil. - Page 20 • Use setting 6 and 5 to: - complete the cooking of large quantities; - defrost hard vegetables; - fry thin slices of breaded meat. • Use settings 1-4 to: - simmer bouillon; - stew meats; - simmer vegetables; - melting chocolate; - melt cheese.
-
Page 21: Cleaning And Maintenance
CLEANING AND MAINTENANCE Cleaning After each use of the glass-ceramic hob, wait for it to cool down and clean it; otherwise, even the smallest food residue will be burnt onto the hot surface next time you use the appliance. For regular cleaning and maintenance of the glass-ceramic surface, use special conditioning agents which form a protective layer on the surface, shielding it from dirt. - Page 22 Sugar and sugar-laden food may permanently damage the glass-ceramic surface (Figure 5); therefore, they should be removed from the glass-ceramic surface as soon as possible, although the cooking zone may still be hot (Figure 4). Any change in the color of the glass-ceramic surface does not aff ect its operation or the stability of the surface.
-
Page 23: Troubleshooting
TROUBLESHOOTING The service department telephone number can be General found on the guarantee card provided. If you notice a crack in the glass top (however small), switch the hob off immediately, unplug the hob, turn off the (automatic) fuse switch(es) in the meter cupboard or, in the event of a permanent connection, set the switch in the power supply lead to zero.) Contact the service department. -
Page 24: Installation Instructions
SYMPTOM POSSIBLE CAUSE SOLUTION A fuse blows as soon as the The hob has been wrongly Check the electrical hob is switched on. connected. connections. The hob simply switches off . You accidentally touched Switch the hob back on. the On/Off button or touched two buttons at the same time. - Page 25 Clearance Suffi cient all-round clearance is essential to the safe use of the hob. Check that there is enough clearance. cooker hood cabinet side wall *SIVK 6 ... 61 cm *SIVK 7 ... 78 cm *SIVK 1 ... 112 cm Installation dimensions The dimensions and recesses are shown in the illustrations beneath.
- Page 26 • Cooking hobs can be installed into worktops that are 30 50 mm thick. • If the board is thicker than 40 mm, its inner edge should be trimmed, or ground. Thus, suffi cient air circulation will be provided. If the hob is wider than the cupboard, with a worktop less than 46 mm thick, saw a cut-out in both sides of the cupboard, so the appliance is detached from the cupboard.
- Page 27 A Lower kitchen cabinet with a drawer • An opening at least 140 mm high must be provided on the back wall of the cabinet, along its entire width. Furthermore, a minimum of 6 mm clearance must be provided at the front side, along the entire width of the cabinet.
- Page 28 B Lower kitchen cabinet with an oven • Installing the oven under an induction hob is possible with oven types EVP4.., EVP2.., which are fi tted with a cooling fan. Before installing the oven, the rear wall of the kitchen cabinet should be removed. Furthermore, a minimum of 6 mm clearance should be provided at the front side, along the entire width of the cabinet.
-
Page 29: Electrical Connection Sivk6, 7, 1
Electrical connection Common connection: SIVK6, 7, 1 • 2 phase and 1 zero connection (2 1N, 400 V~/ 50 Hz): - The voltage between the phases and the zeros is 230 V~. The voltage between the two phases is 400 V~. Fit a connecting bridge between connecting points 4-5. -
Page 30: Building In
The bridges on the connecting block can be used to create the required connections, as indicated in these illustrations. Building in Check that the cabinet and the cut-out meet the dimension and ventilation requirement Threat the sawn ends of wooden or synthetic worktops with sealing varnish if necessary, to prevent moisture causing the worktop to swell. - Page 32 INDUKCIJA_IQ en (08-14)
Need help?
Do you have a question about the IQ641AC and is the answer not in the manual?
Questions and answers