Advertisement
Quick Links
While Simmons makes every effort to provide the highest quality products, metal shavings and/or burrs occasionally remain as a by product
of the manufacturing process. To avoid injury, please use caution when adjusting clamps, or when working with pipe and screw ends.
Inside this package
Before assembly, please make sure that all the items listed below are present.
Cymbals
Single Zone 12" Cymbal Pad
(S1000CYM12SC)
Drum Pads
Dual Zone 9" Drum Pad
(S1000PAD9D)
Kick Pad
9" Bass Drum Pad
(S1000KIK9S)
Drum Module
MASTER
AUX IN
POWER
SD
PAGE
KIT
SONG
DEMO
SAVE / ENTER
EXIT
UTILITY
TEMPO
RIM
KICK
CARD
SNARE
HI-HAT
TOM 1
HI-HAT
QUICK
CONTROL
REC
PART
TOM 2
RIDE
REC
MUTE
TOM 3
CRASH 1
MENU
PLAY/
STOP
TOM 4
CRASH 2
MIXER
CLICK
(SD1000)
Simmons_SD1000_Assembly_Instructions.indd 1
The first name in electronic drums.
ASSEMBLY INSTRUCTIONS
Dual Zone 12" Cymbal Pad
Hi-hat Cymbal Pad
(S1000CYM12DC)
Single Zone 9" Tom Pads
(S1000PAD9S)
Hi-Hat Pedal
Drum Rack
Multi-position Foot
Controller
(S1000HHC1)
User Manual
The first name in electronic drums.
SD
electrOnic Drum Kit
Owner's manual
www.simmonsdrums.net
www.SimmonsDrums.net
CAUTION!
Accessories
Single Zone 10"
AC Adaptor
1 Pair
Drumsticks
(S1000HAT10S)
Multi-pin Cable Harness
Drum Key
4 L–Rods for Pads
Hi-Hat Arm (Short)
2 Cymbal Arms (Long)
5/9/13 3:24 PM
Advertisement

Summary of Contents for Simmons sd1000 kit
-
Page 1: Assembly Instructions
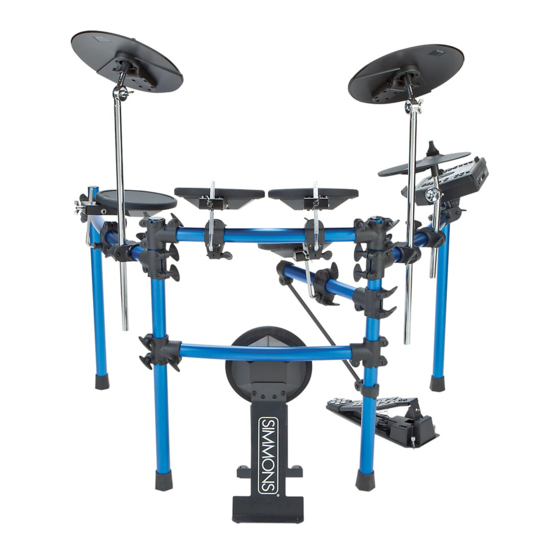
CAUTION! While Simmons makes every effort to provide the highest quality products, metal shavings and/or burrs occasionally remain as a by product of the manufacturing process. To avoid injury, please use caution when adjusting clamps, or when working with pipe and screw ends. - Page 2 The SD1000 Drum Rack comes preassembled with all clamps already in place. Once assembled, refer to the Simmons SD1000 Manual for instructions on how to hook up cabling, set up the sound module, connect to your computer, and more.
- Page 3 www.simmonsdrums.net Attaching Cymbals Insert each cymbal arm into the rack clamp. Insert short hi-hat arm on the left-side arm’s cymbal clamp. Remove wing nut and felt washer from cymbal tilter. Place cymbal pad on tilter assembly. Re-attach the felt washer and wing nut. Tighten wing nut.
- Page 4 Snare Pad Kick Pad Hi-Hat Control Pedal congratulations You’ve successfully assembled your new Simmons SD1000 Electronic Drum Kit. For connection instructions and more information on your new kit, please refer to the User Manual, or visit www.simmonsdrums.net Simmons_SD1000_Assembly_Instructions.indd 1 5/9/13 3:24 PM...


Need help?
Do you have a question about the sd1000 kit and is the answer not in the manual?
Questions and answers