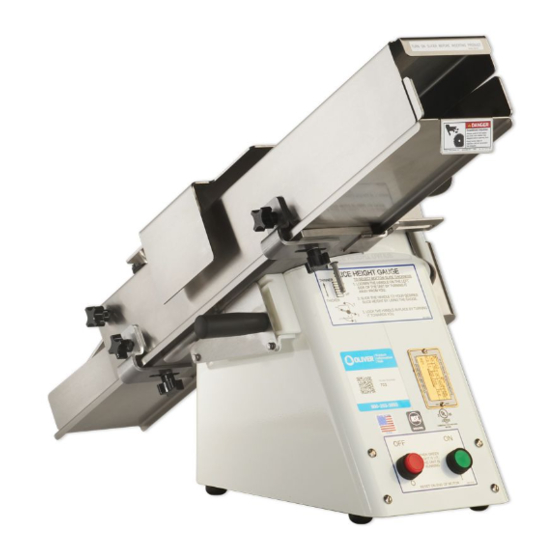
Summary of Contents for Oliver 723
- Page 1 Walker, Michigan, U.S.A. 49534-7564 USER’S OPERATING AND INSTRUCTION MANUAL MODEL 723 BUN SLICER 0702S20000-CVR...
- Page 2 SAFETY INSTRUCTIONS................0723S20003 ADJUSTMENTS..................0723S20004 OPERATING INSTRUCTIONS..............0723S20005 MAINTENANCE/CLEANING/LUBRICATION..........0723S20006 CHANGING THE BLADE................0723S20007 TROUBLE SHOOTING................0723S20008 ASSEMBLY DRAWING MODEL 723 SLICER.…........0723S20009 WIRING DIAGRAMS ................. 0723S20010 WARRANTY....................GEN 040225 RETURNED PARTS POLICY……............. GEN 040226 SLICER WARRANTY PROCEDURE............GEN 040227 0723S20001...
-
Page 3: Specifications
These bun slicers have welded steel frames and stainless steel chutes. They are compact, durable slicers for counter top use in slicing a variety of buns with speed and economy. SPECIFICATIONS Machine dimensions: Model 723 Weight: Approximately 70 lbs. Standard Electrical Service: 1/3 HP, 1725 RPM, 1-60-115 Volts AC, 6 Amps. -
Page 4: Safety Instructions
SAFETY INSTRUCTIONS Every effort has been made by Oliver Products Company to provide you with a safe machine. It is essential; however, that machine operators and maintenance personnel observe the following safety precautions. 1. Before attempting to operate your slicer read this manual. Never allow an untrained person to operate this machine. - Page 5 ADJUSTMENTS WARNING NEVER ATTEMPT TO ADJUST OR SERVICE THIS MACHINE UNTIL YOU ARE SURE THE BLADE HAS STOPPED. OUTSIDE SIDE GUIDE This guide is used to determine the amount of "Hinge" left on the product and can be adjusted from leaving approximately a 1/2" hinge to a complete sever. The guide is adjusted by loosening the two knobs which are below and to the outside of the table and by sliding the guide in or out to generate the desired amount of hinge.
- Page 6 If it seems necessary to adjust this guide loosen the two knobs which are on the top and to the inside of the table, then slide the guide in or out to conform with product width. Make a liberal adjustment to allow for product variances. Re-tighten the knobs to secure it in the desired position.
- Page 7 OPERATING INSTRUCTIONS After adjustments for product width and bottom slice height have been made, (see adjustment section), you are ready to begin slicing your product. Start the motor by pressing the green pushbutton, the button will become illuminated. This means the machine is running. Place the product on the chute and allow it to slide into the blade, (do not throw the product into the machine).
-
Page 8: Maintenance
MAINTENANCE/CLEANING/LUBRICATION WARNING NEVER ATTEMPT TO CLEAN OR SERVICE THIS MACHINE UNTIL IT HAS BEEN DISCONNECTED FROM THE POWER SUPPLY AND YOU ARE SURE THE BLADE HAS STOPPED. ALSO REMEMBER TO USE CARE WHENEVER YOU ARE WORKING NEAR THE BLADE. MAINTENANCE Other than normal cleaning and occasional blade replacement little other regular maintenance is required. - Page 9 CLEANING (continued) The BLADE should be cleaned at least daily and may be cleaned in place, the maintenance person should wear cut resistant gloves to prevent injury. More frequent cleaning of the BLADE is required when cutting fruity or sticky breads. Below is a picture of how the clean-in-place feature can be carried out.
-
Page 10: Changing The Blade
CHANGING THE BLADE WARNING NEVER ATTEMPT TO CLEAN OR SERVICE THIS MACHINE UNTIL IT HAS BEEN DISCONNECTED FROM THE POWER SUPPLY AND YOU ARE SURE THE BLADE HAS STOPPED. ALSO REMEMBER TO USE CARE WHENEVER YOU ARE WORKING NEAR THE BLADE. CHANGING THE BLADE •... -
Page 11: Troubleshooting
TROUBLE SHOOTING WARNING NEVER ATTEMPT TO CLEAN OR SERVICE THIS MACHINE UNTIL IT HAS BEEN DISCONNECTED FROM THE POWER SUPPLY AND YOU ARE SURE THE BLADE HAS STOPPED. THE SLICER MOTOR WILL NOT START OR WAS RUNNING BUT SUDDENLY STOPPED. •... -
Page 12: Assembly Drawing
ASSEMBLY DRAWING 0723S20009... -
Page 13: Parts List
PARTS LIST *ITEM NOT SHOWN 0723S20009... -
Page 14: Wiring Diagram
WIRING DIAGRAM 0723S20010...


Need help?
Do you have a question about the 723 and is the answer not in the manual?
Questions and answers