Table of Contents
Advertisement
Advertisement
Table of Contents

Related Manuals for Redsail C series


Summary of Contents for Redsail C series
- Page 1 1.1.1.140508_PRO Redsail Tech Co., Ltd www.hflaser.com...
-
Page 2: Table Of Contents
Connecting the Cutter to a Computer ................ 19 Installing the Pen Carriage ................21 Installing a New Blade ................22 Replacing a Worn Blade ................23 Preparing for Cutting Specifications ..................29 Troubleshooting ..................31 Stand Installation ................. 33 Redsail Tech Co., Ltd www.hflaser.com... -
Page 3: Welcome
You can post on the RESASIL Cutter forums at www.hflaser.com, submit a request for support on the support website at www.hflaser.com, or call customer service at 86-531-86516855. We hope you enjoy your experience with the RS series cutters and the REDSAIL Cutter family. Redsail Tech Co., Ltd... -
Page 4: Cutter Parts
Contains the Power Cable Port, Power Switch and Fuse Left Side Cover Cartridge for the cutter. Shown in detail on page 7. Contains the USB and Serial cable ports for the cutter. Right Side Cover Shown in detail on page 6. Redsail Tech Co., Ltd www.hflaser.com... -
Page 5: Detail Of Carriage Arm
1.1.1.140508_PRO Detail of Carriage Arm Blade/Pen Carriage Slot Holds the Blade/Pen Carriage in place. Allows access to the Blade/Pen Carriage Locking Knob Slots for exchanging/replacing Carriages. Redsail Tech Co., Ltd www.hflaser.com... -
Page 6: Right Side View
Used to connect a serial cable from the cutter to a Serial (COM) Cable Port computer. Only one of the connection cables should be used to connect the cutter to a computer. Not both. Redsail Tech Co., Ltd www.hflaser.com... -
Page 7: Left Side View
Left Side View Used to connect a power cable from the cutter to a wall Power Cable Port outlet or surge protector. Main power switch for turning the power of the cutter Power Switch on(1) or off(0). Redsail Tech Co., Ltd www.hflaser.com... -
Page 8: Back View
1.1.1.140508_PRO Back View Holds the media tightly to the feed roller below. Back view shown Pinch Rollers in detail on next page. Redsail Tech Co., Ltd www.hflaser.com... -
Page 9: Detail Of Pinch Roller (Back View)
Allows you to release Pinch Rollers (either so they Pinch Roller Release Lever can be moved from side to side or to allow media to be easily fed below them) by pulling up on the Release Levers. Redsail Tech Co., Ltd www.hflaser.com... -
Page 10: Control Panel
The main screen of the cutter allows you to set the main settings of the cutter including the cutting speed and cutting force options. It also allows you to cut a test pattern or check the amount of force that is currently set. Redsail Tech Co., Ltd www.hflaser.com... - Page 11 Press “Online” button when online, then it will be Offline. Press “Online” button when offline, then it will be Online. Press “Online” button when the machine working, then the machine will stop working. Press “Online” button again, recover the last work. ONLINE Redsail Tech Co., Ltd www.hflaser.com...
- Page 12 You can use this to determine the proper force and speed setting needed for different materials without wasting large amount materials from cutting full designs. Press “TEST” button when offline, the machine will make self-test. TEST Redsail Tech Co., Ltd www.hflaser.com...
- Page 13 The amount of force used should be enough to fully penetrate the material to be cut while not enough to cut through the backing material. For moving the carriage arm to the right position when offline. Redsail Tech Co., Ltd www.hflaser.com...
- Page 14 When working with larger and less detailed images, a higher speed can be used to shorten the operation time. For moving Y axis to the front position when offline. OK Button For confirming your operation. Redsail Tech Co., Ltd www.hflaser.com...
- Page 15 1.1.1.140508_PRO Redsail Tech Co., Ltd www.hflaser.com...
-
Page 16: Setting Up
COM port is being used in your software setup (see Finding Your COM Port on the page 18), but for most users the COM port will be COM1. Redsail Tech Co., Ltd www.hflaser.com... - Page 17 3. If Windows finds and downloads your needed drivers then the process is complete. Repeat the previous steps again for the second needed driver. If Windows does not find and download the needed drivers proceed to the next step. Redsail Tech Co., Ltd www.hflaser.com...
- Page 18 Click Start, “Control Panel”---Click Device Manager Expand the section labeled “Ports (COM & LPT)”. Make a note of which number COM Port is associated with “USB Serial Port”. You will need this information to properly install your software. Redsail Tech Co., Ltd www.hflaser.com...
-
Page 19: Installing The Pen Carriage
To install the pen carriage: Loosen the locking knob Drop the pen attachment Tighten the locking knob on the carriage arm. into place in the slot of on the carriage arm. the carriage arm. Redsail Tech Co., Ltd www.hflaser.com... - Page 20 Slide the spring onto the pen from the top and insert it back into the pen carriage. Replace the carriage cap and screw into place. Once you are familiar with the cutter and its basic functions, install the blade carriage. Redsail Tech Co., Ltd www.hflaser.com...
-
Page 21: Installing A New Blade
1/64 of an the cap in inch. place during operation Loosen the locking knob Place Blade carriage into the Tighten the locking knob on on the carriage arm. carriage arm. the carriage arm. Redsail Tech Co., Ltd www.hflaser.com... -
Page 22: Replacing A Worn Blade
Replacing a Worn Blade Press up on the release button (located on the bottom of the blade carriage) to raise the blade and remove it. Follow the remaining steps from “Installing a New Blade” on the previous page. Redsail Tech Co., Ltd www.hflaser.com... -
Page 23: Preparing For Cutting
If you are going to cut from a scrap or single sheet instead of a roll, then skip the next step on placing a vinyl roll. All other steps will be the same. Place the roll on the top of the stand rollers Redsail Tech Co., Ltd www.hflaser.com... - Page 24 1.1.1.140508_PRO Release the Pinch Rollers by pulling up on the Pinch Roller Release Levers. Redsail Tech Co., Ltd www.hflaser.com...
- Page 25 1.1.1.140508_PRO Feed the vinyl underneath the pinch rollers (if working from a single sheet instead of a roll, the vinyl can also be feed from the front). Redsail Tech Co., Ltd www.hflaser.com...
- Page 26 (one cutter with 3 or more rollers, one roller near the center). Avoid lowering a pinch roller to the gap between the two feed rollers. Leave a gap of between ½”-1 ½” from the edge of the roller and the edge of the vinyl on both sides. Redsail Tech Co., Ltd www.hflaser.com...
- Page 27 If the cutter is not already on, turn it on now Adjust the vinyl to the position where you want to make your cutting start by using the Up and Down Arrow Keys on the Control Panel. Redsail Tech Co., Ltd www.hflaser.com...
- Page 28 If you make any adjustments to your cutter, make sure that you return to the main screen before you attempt to cut. If you are unsure how to do this, refer to the Control Panel section of the manual on page 10. Redsail Tech Co., Ltd www.hflaser.com...
-
Page 29: Specifications
Media Size (mm) 1120 1360 Cutting size (mm) 1000 1200 Cutting speed 600mm/s Cutting force 50-500 g Lcd display English Resolution 1000 DPI Repeatability(mm) 0.01 Command HPGL Interface 232/USB Power 90~240V / 50~60Hz Warranty 12 Months Redsail Tech Co., Ltd www.hflaser.com... - Page 30 1600 1780 2000 Cutting size (mm) 1500 1680 1900 Cutting speed 600mm/s Cutting force 50-500 g Lcd display English Resolution 1000 DPI Repeatability(mm) 0.01 Command HPGL Interface 232/USB Power 90~240V / 50~60Hz Warranty 12 Months Redsail Tech Co., Ltd www.hflaser.com...
-
Page 31: Troubleshooting
If a serial cable connection is not available on your computer, you can try a third party USB Redsail Tech Co., Ltd www.hflaser.com... - Page 32 Other troubleshooting solutions may be found by visiting the Customer Forums or Technical Support Website, or by calling the Technical Support Line (Web page addresses and Phone number on the specifications page, 3). Redsail Tech Co., Ltd www.hflaser.com...
-
Page 33: Stand Installation
1.1.1.140508_PRO Stand Installation (For the cutters with stand) Redsail Tech Co., Ltd www.hflaser.com... - Page 34 K(x1) ‐ Left Column C(x4) ‐ Bolt B(x4) ‐ Bolt Cap Attaching the Left Roller Arm to the outer side of the Left Column (outer side will have a curved edge and will have larger hole openings) Redsail Tech Co., Ltd www.hflaser.com...
- Page 35 1.1.1.140508_PRO Assembled right side (roller arm, column) D(x4) ‐ Long Screw M(x1) ‐ Foot Attaching a Foot on the right side Redsail Tech Co., Ltd www.hflaser.com...
- Page 36 1.1.1.140508_PRO Assembled left side (roller arm, column) D(x4) ‐ Long Screw M(x1) ‐ Foot Attaching a Foot on the left side Redsail Tech Co., Ltd www.hflaser.com...
- Page 37 E(x2) ‐ Screw Sleeve Cap Adding the Center Crossbeam to the right side (Some larger models will have more than one Center Crossbeam. If your model has 2 Crossbeams, repeat this step, attaching both to the right side) Redsail Tech Co., Ltd www.hflaser.com...
- Page 38 E(x2) ‐ Screw Sleeve Cap Adding the Left Side to the completed right side (Some larger models will have more than one Center Crossbeam. If your model 2 Crossbeams, repeat this step, attaching the left side to both) Redsail Tech Co., Ltd www.hflaser.com...
- Page 39 1.1.1.140508_PRO Completed stand L(x2) ‐ Rollers Adding the Rollers Redsail Tech Co., Ltd www.hflaser.com...
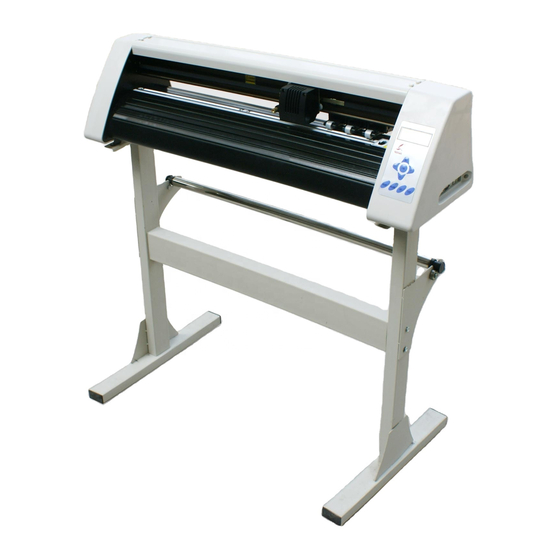
- Page 40 1.1.1.140508_PRO Completed stand with rollers C series Cutter Adding the Cutter to the completed Stand Redsail Tech Co., Ltd www.hflaser.com...
- Page 41 All the information to check carefully make sure accurate. Products are subject to change without notice. Thank you for choosing Redsail Products ! REDSAIL TECHCO., LTD Redsail Tech Co., Ltd www.hflaser.com...
Need help?
Do you have a question about the C series and is the answer not in the manual?
Questions and answers