Table of Contents
Advertisement
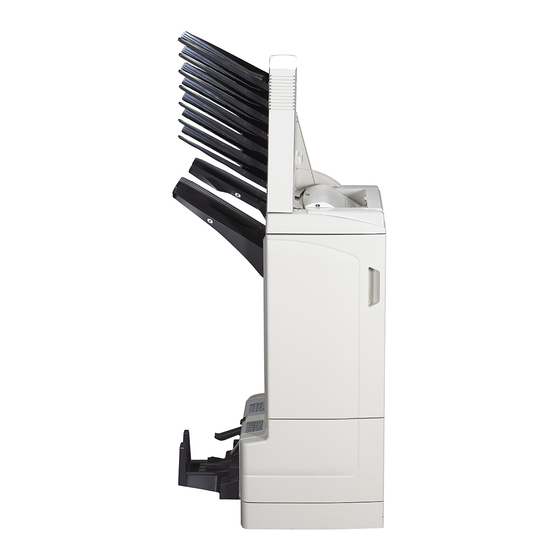
INSTALLATION GUIDE FOR DOCUMENT FINISHER
INSTALLATION GUIDE FOR DOCUMENT FINISHER
GUIDE D'INSTALLATION DU RETOUCHEUR DE DOCUMENT
GUIDE D'INSTALLATION DU RETOUCHEUR DE DOCUMENT
GUÍA DE INSTALACIÓN PARA EL FINALIZADOR DE
GUÍA DE INSTALACIÓN PARA EL FINALIZADOR DE
DOCUMENTOS
DOCUMENTOS
EINBAUANLEITUNG FÜR DOKUMENT-FINISHER
EINBAUANLEITUNG FÜR DOKUMENT-FINISHER
GUIDA ALL'INSTALLAZIONE DELLA FINITRICE DI DOCUMENTI
GUIDA ALL'INSTALLAZIONE DELLA FINITRICE DI DOCUMENTI
ドキュメントフィニッシャ設置手順書
ドキュメントフィニッシャ設置手順書
DF-710/AK-710
Advertisement
Table of Contents

Related Manuals for Kyocera DF-710


Summary of Contents for Kyocera DF-710
- Page 1 GUIDE D’INSTALLATION DU RETOUCHEUR DE DOCUMENT GUÍA DE INSTALACIÓN PARA EL FINALIZADOR DE GUÍA DE INSTALACIÓN PARA EL FINALIZADOR DE DOCUMENTOS DOCUMENTOS EINBAUANLEITUNG FÜR DOKUMENT-FINISHER EINBAUANLEITUNG FÜR DOKUMENT-FINISHER GUIDA ALL’INSTALLAZIONE DELLA FINITRICE DI DOCUMENTI GUIDA ALL’INSTALLAZIONE DELLA FINITRICE DI DOCUMENTI ドキュメントフィニッシャ設置手順書 ドキュメントフィニッシャ設置手順書 DF-710/AK-710...
-
Page 3: Table Of Contents
AK-700 F Base slider A ........... 1 M Internal tray cover ........1 English G Base slider B ........... 1 N Sponge ............ 1 Supplied parts H Plate foot R ..........1 A Document finisher........1 I M4 × 10 tap Tight S screw ...... 9 For installing the document finisher to a mono- B Tray A ............ -
Page 4: Be Sure To Remove Any Fixing Tapes Or Cushion
AK-710 When installing the document finisher to a full- T Shoulder screw ........1 Y M4 × 10 tap Tight S screw ...... 9 color machine, parts (P), (Q), (R) and eight out U Guide plate ..........1 Z M4 × 10 hexagon head screw ....1 of nine (S) supplied with the job separator are When installing the document finisher to a full- needed. -
Page 5: A ドキュメントフィニッシャ
Installation Procedure Before installing the document finisher, make Removing the fittings sure that the MFP’s main power switch is Install the job separator and then install the 1. Open the front cover of the document fin- turned off and that its power cord is unplugged document finisher to the full-color machine. - Page 6 Removing the slider fixing pin 4. Open the right cover of the document fin- 5. Remove the screw (4) to remove the slider isher (A). fixing pin B (5). 3. Remove the fixing tape from the slider of the inner tray and remove the slider fixing pin A (3).
- Page 7 Installing the internal tray cover Removing the fixing pin Installing the staple cartridge 6. Pull the internal tray out. 8. Turn the fixing pin (6) counterclockwise to 10. Remove the fixing tape from the staple car- 7. Install the internal tray cover (M) using the remove it.
- Page 8 Installing the trays 14. Fit the right and left projections (5) of the tray 15. Follow each procedure below depending on B (C) onto the document finisher (A) from its monochrome or full-color machine. For full color machine only. Follow step 27 top.
-
Page 9: Lors De L'installation Du Retoucheur De Document Sur
[When installing the document fin- 3. Fit the curl eliminator (O) to the eject cover Installing the connecting plate (1) such that the projections (4) on the cover isher to the monochrome machine] 5. Install the connecting plate (D) to the left side fit into the two ends of the curl eliminator (O). - Page 10 Assembling the base slider 7. Place base slider B (G) onto base slider A (F). 8. Follow each procedure below suitable for the paper feeder type 6. Install plate foot R (H) to base slider A (F) using M4 × 10 tap Tight S attached to your MFP.
- Page 11 When using two paper feeders of 500 sheets 12.Insert the base slider A (F), and then the base slider B (G) into the lower left of the MFP. Installing the base slider 13.Fix base slider B (G) with M4 × 10 tap Tight S screw (I). 9.
-
Page 12: M4 × 10 Tap Tight Screw
When using paper feeder of 3000 sheets 18.Open the right cover of the document finisher (A). 19.Insert base slider A (F) under the document finisher (A) and hook the Installing the base slider tabs (5). 16. Insert the base slider A (F), and then the base slider B (G) into the 20.Fix base slider A (F) with four M4 ×... - Page 13 [When installing the document finisher to the full-color machine] Before adjusting the document finisher height Installing the fixing and connecting plates 4. Remove the screw (1) from the left side of the assembly base (X), insert M4 × 10 hexagon head screw (Z) into the right side hole to 1.
- Page 14 Disassembling the base slider Reassembling the base slider 7. Follow each procedure below suitable for the paper feeder type attached to your MFP. 5. Remove the two screws (2) from the base 6. Put base slider B (G) onto base slider A (F). When using two paper feeders of 500 slider A (F) to remove the stay foot (3).
- Page 15 Installing the base slider 9. Fix base slider A (F) with four M4 × 10 tap Tight S screws (I) and fix base slider V (W) with four M4 × 10 tap Tight S screws (Y) respectively. When using two paper feeders of 500 sheets 8.
-
Page 16: S M4 × 10 Passstift-Verbundschraube
10. Insert base slider A (F) and base slider B (G) into the lower left of the 12.Fix base slider B (G) with M4 × 10 tap Tight S screw (I) and fix base MFP. slider B (V) with M4 × 10 tap Tight S screw (Y) respectively. 11. - Page 17 When the paper feeder of 3000 sheets is used 16.Fix base slider B (G) with M4 × 10 tap Tight S screw (I) and fix base slider B (V) with M4 × 10 tap Tight S screw (Y) respectively. 14. Insert base slider A (F) and base slider B (G) into the lower left of the Put M4 ×...
- Page 18 17. Insert base slider A (F) that was disassem- Removing the cover 22. Remove four screws (7) to remove the back bled in step 5 and base slider V (W) under cover (8) from the document finisher (A). 19. Open the front cover of the document fin- the assembly base (X) and hook the tabs (4).
- Page 19 Installing the assembly base (Be sure to perform step 23 by two service personnel) 23. Align the projection (9) on the assembly base (X) with the hole of the document finisher (A) and place the document finisher (A) on the assembly base (X).
- Page 20 Installing the cover Installing the tray 25. Use four screws (7) removed from the docu- 27. Install tray A (B) and tray B (C) to the docu- ment finisher in step 22 to reinstall the back ment finisher (A). Refer to steps 13 and 14 cover (8).
- Page 21 Installing the sponge [Installing the document finisher and Connecting the signal line 1. Clean the sheet metal section under the the MFP] 4. Connect the signal line (1) of the document upper cover (13) of the document finisher (A) finisher (A) to the connector (2) at the back 3.
- Page 22 [Adjusting the document finisher height] When using a monochrome machine 1. Open the right cover of the document finisher (A). 2. Remove the screw (1) from the left bottom of the document finisher (A) and install the document finisher to the right hole using M4 × 10 tap Tight S Screw (I). The more tightening M4 ×...
- Page 23 [When using the full-color machine] [Checking the curl] 1. Tighten M4 × 10 hexagon head screw (Z), which was temporarily tight- 1. Plug the MFP into a power outlet, and turn on its main power switch. ened in step 4 on page 11, using a spanner. 2.
- Page 24 Checking the curl 3. Close the front cover of the document finisher (A). 4. Perform a test copy. If the copy sample curl is tightly turning down: 5. Repeat steps 2 to 4 until the paper becomes straight. 1. Open the front cover of the document finisher (A). 2.
- Page 25 If the copy sample curl is tightly turning up: 4. Perform a test copy. 5. Repeat steps 2 to 4 until the paper becomes straight. 1. Open the front cover of the document finisher (A). 2. Pull the pressure roller top adjusting knob E2 to your side and turn the knob by 1 scale in increasing order.
- Page 26 MEMO...
- Page 27 MEMO...
- Page 28 2006. 2 303JY56710 Rev.1.0...
Need help?
Do you have a question about the DF-710 and is the answer not in the manual?
Questions and answers