
Subscribe to Our Youtube Channel
Related Manuals for Wind Crest PCG36S


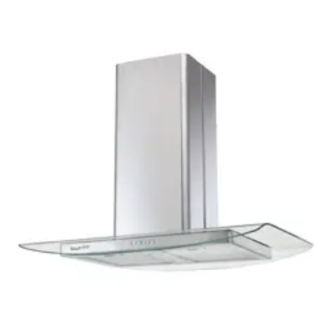
Summary of Contents for Wind Crest PCG36S
- Page 1 PCG36S PCG42S Model number: Serial Number: Date of Purchase: Sales Dealer: MAR12.0401 Copyright © 2011 CNP Industries, Inc. READ AND SAVE THESE INSTRUCTIONS...
- Page 2 www.windcrestcnp.com...
-
Page 3: Table Of Contents
SAFETY NOTICE ..............LIST OF MATERIALS ............INSTALLATION Ducting Calculation Sheet ........Mounting Height & Clearance ........ Ducting Options ............Hood Specifi cations ........... Mounting the Hood 9-12 ............. FEATURES & CONTROLS Touch Controls ............. Charcoal Filter Change Reminder ....... Mesh Filter Clean Reminder ........ - Page 4 www.windcrestcnp.com READ AND SAVE THESE INSTRUCTIONS WARNING TO REDUCE THE RISK OF FIRE OR ELECTRIC SHOCK, DO NOT USE THIS FAN WITH ANY SOLID-STATE CONTROL DEVICE. WARNING TO REDUCE THE RISK OF FIRE ELECTRIC SHOCK, OR INJURY TO PERSONS, OBSERVE THE FOLLOWING: a.
- Page 5 15 or 20 ampere circuit breaker or time delay fuse. Wiring must be 2 wire with ground. Please also refer to Electrical Diagram on product. A cable locking connector (not supplied) might also be required by local codes. Check with local requirements, purchase and install appropriate connector if necessary. PCG36S & PCG42S - MAX 400 Watts, 3.3 Amps...
-
Page 6: Installation
MODELS: PCG36S & PCG42S PARTS SUPPLIED 1 - Top support frame Front of Hood Cut-Out Shaded Area 1 - Paper ceiling 2 - Top duct covers template 2 - Thick trim pieces 1 - Square support frame bracket 2 - Bottom duct covers... - Page 7 Equivalent number Equivalent number Duct pieces Duct pieces length x used T otal length x used T otal 3- 1/ 4” x 10” 1 Ft. 6”- 8” Round 30 Ft. Rect., wall cap straight with damper 7” Round, 1 Ft. 6”- 8”...
- Page 8 www.windcrestcnp.com Minimum mount height between range top to hood bottom should be no less than 26”. Maximum mount height should be no higher than Min. ducted 28” 34”. Min. recirc. 32” Max. 50” It is important to install the hood at the proper mounting height.
-
Page 9: Ducting Options
WARNING FIRE HAZARD NEVER exhaust air or terminate duct work into spaces between walls, crawl spaces, ceiling, attics or garages. All exhaust must be ducted to the outside, unless using the recirculating option. Ductless or recirculating installations require an accessory kit. Turn to page 20 for part number and ordering information. - Page 10 www.windcrestcnp.com 11” 11-1/4” Min. Ducted - 28” Min. Recirc. - 32” Maximum - 50” 8-1/4” FRONT SIDE 4-1/8” 8-1/4” 9” TOP SUPPORT FRAME (top view) 35-7/16” or 42” 24-7/16” 1-11/16” 9-3/8” TOP of HOOD Bottom of HOOD...
- Page 11 WARNING: Electrical wiring must be done by a qualified person(s) in accordance with all applicable codes and standards. This range hood must be properly grounded. Turn off electrical power at service entrance before wiring. PAPER TEMPLATE Front of Hood Ceiling Joists Cut-Out Shaded Area Wood Blocking Top Support Frame...
- Page 12 www.windcrestcnp.com FIG. C FIG. D 3. The support frame has cut off arms to allow for swinging the lower grid into position with the upper grid. Once the grids are set into position, add the lateral support brackets to the two top support frame cut off arms and their corresponding bottom support frame arms.
- Page 13 CAUTION: At least two installers are required due to the weight and size of the hood. ELECTRONICS MOUNTING BRACKET FIG. G FIG. F FIG. H 7. Remove tape securing electronics mounting bracket to hood. (FIG. F, #1) Remove (3) screws from top of hood body and set screws aside.
- Page 14 www.windcrestcnp.com cut trim piece if necessary Top support frame Top duct covers Thick trim piece (top) Thin trim piece (bottom) Bottom duct covers Bottom support frame FIG. J 12. *Secure top duct covers (with louver holes) to top support frame using (2) M4 x 8 screws. (FIG. J, #1). Note: If using hood in “ducted mode”...
- Page 15 Display (speed level, delay of f, filter clean/replace) Blower On/Off Lights Normal/Dim/Off Speed Selection 15 Min Delay Off Blower On/Off By pressing , the blower is switched On and Off. When switched On, the blower will operate at the last setting before it was switched Off. When switched Off the entire hood powers Off, including the lights.
-
Page 16: Charcoal Filter Change Reminder
www.windcrestcnp.com Charcoal Filter Change Reminder (charcoal filter, if installed) When your hood is installed as a recirculating unit, it is fitted with a set of charcoal filters to purify exhaust and fumes from cooking, then re-circulates the air within the home. These charcoal filters are required to be replaced after every 120 hours of use. - Page 17 Metal Filter Clean Reminder (metal mesh filter) Whether your hood is installed as an exhaust or purifying unit, a set if metal mesh filters are fitted by the factory, These metal mesh filters are intended to filter out residue from cooking. They need not be replaced on a regular basis but are required to be kept clean.
-
Page 18: Lights
www.windcrestcnp.com SURFACE MAINTENANCE: Clean periodically with hot soapy water and clean cotton cloth. Do not use corrosive or abrasive detergent, or steel wool/scouring pads which will scratch and damage surface. For heavier soil use liquid degreaser. After cleaning it is recommended that you use non-abrasive stainless steel polish/cleaners such as Stainless Steel Magic®, to polish and buff the stainless luster and grain. - Page 19 REPLACING LIGHT BULBS CAUTION: Light bulb becomes extremely hot when turned on. DO NOT touch bulb until switched off and cooled. Touching hot bulbs could cause serious burns. Make sure all power is turned off and bulbs are not hot. Remove by turning bulb counter clockwise.
-
Page 20: Troubleshooting
www.windcrestcnp.com TROUBLESHOOTING PROCEDURES FOR PCG Issue Cause What to do After installation, 1. The power source is not turned ON. 1. Make sure the circuit breaker and the unit’s the unit doesn’t power is ON. work. 2. The power line and the cable locking connector 2. -
Page 21: Wiring Diagrams
Wiring diagram label located through metal mesh fi lter opening on under side of unit body. - Page 22 www.windcrestcnp.com DESCRIPTION PART# Replacement Parts Light Bulb GU-10 50W (each) 11690.00 Metal Mesh Filter (each) 11692.00 Replacement Charcoal Filter (each) CF11688.00 Suction Cup S11557.00 Optional Accessories Recirculating Kit RECKITPCG Duct Cover Extension (up to 12’ ceiling) 12PCGEXT To order parts, visit us online at www.windcrestcnp.com or call us at 1.877.387.6721...
- Page 23 7.) Service to replace consumable parts (i.e. Light Bulbs, Heat Lamps, Filters). 8.) Expenses for travel and transportation if appliance is located in a remote area. You may also write to us at: Wind Crest™ by CNP Industries, Inc. 351 Thor Place Brea, CA 92821 (877) 387-6721 This warranty applies to appliances used in residential applications only.
Need help?
Do you have a question about the PCG36S and is the answer not in the manual?
Questions and answers