Table of Contents
Advertisement
Quick Links
Advertisement
Table of Contents

Related Manuals for Paslode IM200Li


Summary of Contents for Paslode IM200Li
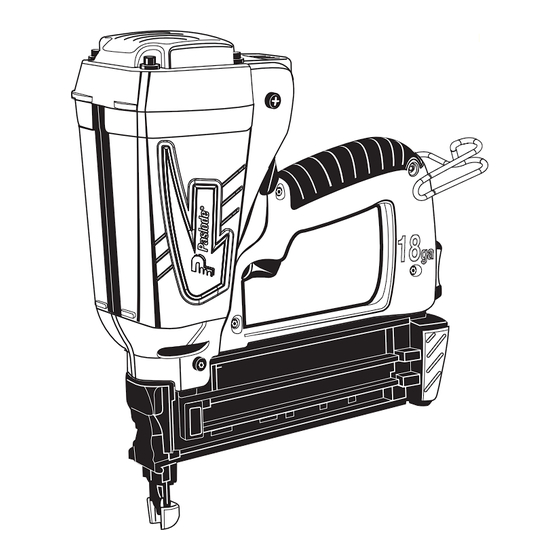
- Page 1 Part No. 918000 IM200Li 18 Gauge Cordless Brad Nailer OPERATING MANUAL IMPORANT! DO NOT DESTROY It is the customer's responsibility to have all operators and service personnel read and understand this manual. Printed in U.S.A. © 2016 Illinois Tool Works Inc.
-
Page 3: Table Of Contents
Contents Introduction and Warranty..........2 An Overview of Paslode Cordless 18 Gauge Brad Nailer ..................3 Safety Instructions ............4 Battery and Charger ............7 Fuel Cell and Metering Valve .......... 9 Preparing the Paslode Cordless 18 Gauge Brad Nailer for Use ................12 Paslode Cordless18 Gauge Brad Nailer Operation .. -
Page 4: Introduction And Warranty
WARRANTY STATEMENT parts and accessories will be free from defects in material and Paslode's sole liability hereunder will be to replace any part or accessory workmanship for the period shown below, after the date of which proves to be defective within the specific time period. Any replacement delivery to the original user. -
Page 5: An Overview Of Paslode Cordless 18 Gauge Brad Nailer
An Overview of the Paslode Cordless 18 ga. Brad Nailer Specifications Description Dimensions: Weight- 4 lbs 14oz. with battery The Paslode Cordless 18 ga. Brad Nailer is a self-contained, Height 11-1/2 inches fully portable nailer that uses liquid hydrocarbon fuel to... -
Page 6: Safety Instructions
The following safety instructions have been included in this booklet to provide you with basic information necessary for WARNING safe operation of the Paslode Cordless 18 ga. Brad Nailer. DO NOT ATTEMPT TO OPERATE THIS TOOL UNTIL YOU HAVE READ AND UNDERSTAND ALL SAFETY Do not expose the tool to PRECAUTIONS AND MANUAL INSTRUCTIONS. - Page 7 EAR safety gear when until it is completely against the work surface. working with or in the NEVER operate the tool if the work contacting element vicinity of the Paslode is not working properly. Cordless 18 ga. Brad Nailer. 8. ALWAYS...
- Page 8 Battery Disposal: The Paslode lithium-ion batteries contain lithium and must be recycled or disposed of properly. It is illegal in some areas to place a lithium-ion battery into the trash or solid waste stream. You may contact your local recycling information on where to return the spent battery or call 877-646-4025 for information on lithium-ion battery recycling in your area.
-
Page 9: Battery And Charger
This charging system is stable surface. A green light will come on to indicate the only one that will work with the Paslode the power is on and the charger circuit is ready. lithium-ion batteries. The first step in preparing a new tool for operation is to fully charge the battery. - Page 10 Battery and Charging System Battery Indicator Light On the right side of the handle is a small plastic lens. This is the battery indicator light. When you insert a fully-charged battery into the tool, you will see a blinking green light. If the indicator light blinks red, recharge the battery.
-
Page 11: Fuel Cell And Metering Valve
Never inhale the spray. NOTE: Altitude Restriction Keep out of the reach of children. Paslode Cordless technology is powered by an Store fuel cell(s) in well-ventilated areas only. internal combustion engine and are effected by altitude. The tool may lose power or not cycle... - Page 12 The valve is now completely seated onto the fuel can and can be inserted into the tool. NOTE: Paslode Cordless fuel cells are marked with an expiration date on the bottom of the can. For maximum performance use fuel before expiration date.
- Page 13 Fuel Cell and Metering Valve Inserting Fuel Cell As you slide the metering valve/fuel cell assembly into the Cordless Brad Nailer, you will notice a yellow adapter at the Inserting the metering valve/fuel cell assembly into the top of the cylinder pocket. As shown in the illustration, this Cordless Brad Nailer is very simple.
-
Page 14: Preparing The Paslode Cordless 18 Gauge Brad Nailer For Use
18 gauge fasteners designed to be used with the tool. Use the Cordless Brad Nailer outdoors, in dry weather, The use of fasteners that do not meet Paslode standards when the nailer, fuel cell, and battery are between could cause tool damage and will void all warranty 20°F (-7°C) and 120°F (49°C). -
Page 15: Paslode Cordless18 Gauge Brad Nailer Operation
Paslode Cordless 18 ga. Brad Nailer Operation Operation: PRESS WORK – CONTACTING ELEMENT AGAINST THE WORK SURFACE. Fan motor starts, fuel is injected into combustion chamber and Turn mixed with air by adjustment the fan. wheel in either direction SQUEEZE... -
Page 16: Fasteners And Applications
Paslode 18 Gauge Brad Nails. Fasteners are collated into strips of 50 for easy loading. Paslode fasteners are designed to be used in Paslode tools, use of other fasteners may cause damage to the tool or injury to the tool operator. -
Page 17: Servicing
Nailer, clearing a jammed fastener is easy: DANGER 1. Remove the battery. Never attempt any maintenance of a Paslode Cordless 2. Pull the latch, releasing front guide. Pivot front guide tool without first removing the fuel cell and battery. forward. - Page 18 Paslode Cordless Tool Cleaner - Part No. 219086 Battery Charger Kit - Part No. 902667 Paslode Cordless Brad Nailer Case - Part No. 902445 Paslode Cordless Trim Tool Tune - Up Kit- Part No. 219304 End-of-Workday Routine Contact your Paslode representative for additional ®...
-
Page 19: Troubleshooting
Spark wire out of spark plug. Remove cap and check spark lead, insert in spark plug and replace cover. Spark plug is dirty. Clean tool cylinder head. No spark is generated. Return tool to authorized Paslode dealer for ® service. -
Page 20: Paslode
Work-contacting element is bent, or is dirty. element. tool cycles. ® If tool will not operate after following the above service directions, return the tool to an authorized Paslode representative for service. To purchase parts, visit our website at www.itwconstructionparts.com. An Illinois Tool Works Company...
Need help?
Do you have a question about the IM200Li and is the answer not in the manual?
Questions and answers