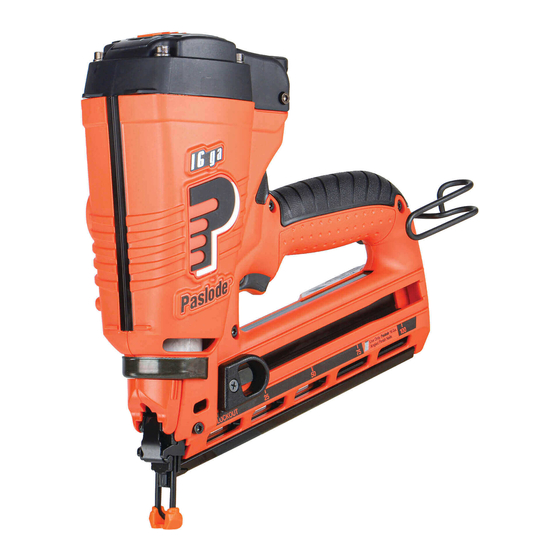
Paslode IM250A Li Operating Manual
Li-lon angled bradder
Hide thumbs
Also See for IM250A Li:
- Operating manual (19 pages) ,
- Quick reference manual (3 pages) ,
- Cleaning procedure (12 pages)
Summary of Contents for Paslode IM250A Li
- Page 1 Impulse Part No. B20721 Model IM250A Li OPERATING MANUAL IMPORTANT! DO NOT DESTROY Read all instructions before use. www.paslode.com.au www.paslode.co.nz...
-
Page 2: Table Of Contents
Subject Page Introduction ..................................Warranty ..................................4 An Overview of the Paslode Impulse 16 Gauge Li-Ion Angled Bradder ................5 Safety Instructions ................................6 Battery and Charger System ............................9 Fuel Cell/Cartridge System ............................10 Preparing the Paslode Impulse 16 Gauge Li-Ion Angled Bradder for Use.............. -
Page 3: Introduction
This manual is designed to help you get the maxi- Please contact your local Paslode representative if you mum performance from your new Impulse Bradder. have any questions about your Paslode Impulse Brad- der or wish to obtain additional copies of this manual. -
Page 4: Warranty
(a) Paslode makes no warranty, express or implied, relating to merchantability, fitness or otherwise, except as stated above; (b) Paslode’s liability as stated above is in lieu of all other warranties arising out of, or in connection with, the use and performance of the tool and/or equipment;... - Page 5 Cycle Rate: Intermittent Operation – 2 to 3 nails shooting tips. per second The Paslode Impulse 16 gauge Li-Ion Angled Bradder is an Exceeding the recommended cycle rates may cause NOTE: internal combustion design. To keep your Li-Ion Angled the tool to overheat, reduce performance or damage Bradder operating at its best you will need to ensure regular the tool.
-
Page 6: Safety Instructions
Safety Instructions The following safety instructions provide the information necessary for the safe operation of the Paslode Impulse WARNING 16 Gauge Li-Ion Angled Bradder. 49° 120° Do not expose the tool to DO NOT ATTEMPT TO OPERATE THIS TOOL UNTIL... - Page 7 Refer to the servicing or troubleshooting section of this when it is in contact with manual to correct the problem. If the problem cannot the work surface. When be corrected, stop using the tool and contact Paslode. ® fastening thin materials such as plywood, be sure to position the tool so that 6.
- Page 8 Safety Instructions 12. NEVER DRIVE FASTENERS INTO AREAS WITH 15. PROPERLY STORE FUEL CELL. CONCEALED HAZARDS. Always check the area behind the work surface for WARNING electrical wiring, gas pipes, water pipes, sewer drains Always store fuel cells or other potential hazards. where they will not be 13.
-
Page 9: Battery And Charging System
The charging system is stable surface and insert wall mount transformer unique to Paslode Li-Ion batteries. The first step in unit’s round plug into the plug receptacle on the preparing a new tool for operation is to fully charge bottom of the charger (see picture). - Page 10 Battery and Charging System Battery Indicator Light On the right side of the handle is a small plastic lens. This is the battery indicator light. When you insert a fully-charged battery into the tool, you will see a blinking green light. If the indicator light blinks red, recharge the battery.
-
Page 11: Fuel Cell/Cartridge System
60°C (140°F). 3. Paslode Impulse fuel cells are marked with a "Best Use Before" date on the bottom of the can. For Never puncture or attempt to open the fuel cell; it is maximum performance use fuel before the "Best Use... - Page 12 ™ Fuel Cell Inserting ™ Fuel Cell A. When loading a fuel cell, lift the tool off of the work C. Release the adapter so it is centered on the fuel cell. surface so the work contact element (WCE) is not depres- sed.
- Page 13 Loading Fasteners STEP 1: Align the heads of the Paslode 16 Gauge Angled Brads to the silver brad channel in the rear of the magazine and insert one or two strips. Push the nails strips forward.
- Page 14 Preparing the Paslode Impulse 16 Gauge Lithium-Ion Angled Bradder Operation Operation: PRESS WORK – CONTACT ELEMENT AGAINST THE WORK SURFACE. Fan motor starts, fuel is injected into combustion Turn chamber and adjustment mixed with air wheel by the fan. in either...
-
Page 15: Fasteners And Applications
The Paslode Impulse 16 Gauge Li-Ion Angled Bradder drives Paslode 16 Gauge Angled Brads. Fasteners are collated into strips of 50 for easy loading. Paslode fasteners are designed to be used in Paslode tools, use of other fasteners may cause damage to the tool or injury to the tool operator. -
Page 16: Servicing
. To clear a jammed fastener: CAUTION 1. Remove the battery,fuel and fasteners. Never attempt any maintenance of a Paslode Impulse 2. Pull the latch, releasing front guide. Pivot front guide tool without first removing the fuel cell and battery. - Page 17 filter to a "like new" condition. 3. Remove and clean the filter every two days. 4. Check work contact element to ensure it is operating freely. GRILLE Paslode Impulse Tool Accessories a l i Impulse 16 Gauge Lithium-Ion Angled Bradder: FILTER Product Description...
-
Page 18: Troubleshooting
Spark wire out of spark plug. Remove cap and check spark lead, insert in spark plug and replace cover. Spark plug is dirty. Clean tool cylinder head. No spark is generated. ® Return tool to authorised Paslode dealer for service. -
Page 19: Paslode
Work contact element is bent, or is dirty. tool cycles. ® If tool will not operate after following the above service directions, return the tool to an authorised Paslode representative for service. For technical support contact Paslode: Australia: 1-800-PASLODE (727-563) | www.paslode.com.au... - Page 20 New Zealand PO Box 100 303 NSMC PO Box 914 Auckland Ingleburn 1890 Australia New Zealand www.paslode.co.nz www.paslode.com.au Printed in U.S.A. 903508-1 ©2012, Illinois Tool Works Inc. 08/12...


Need help?
Do you have a question about the IM250A Li and is the answer not in the manual?
Questions and answers