
Subscribe to Our Youtube Channel
Related Manuals for Sole Fitness 16868352


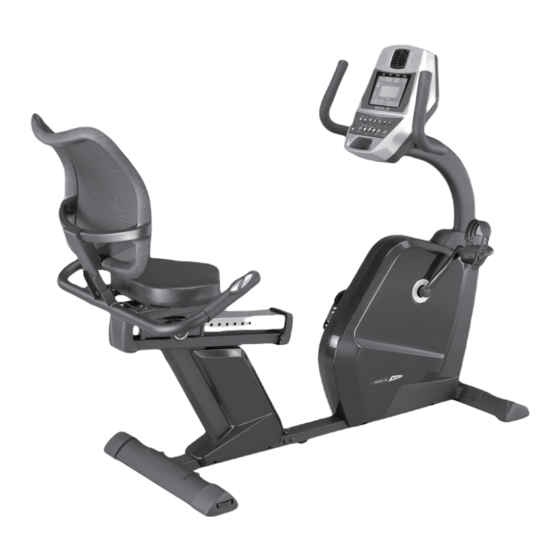
Summary of Contents for Sole Fitness 16868352
- Page 1 Model : 16868352 OWNER’S MANUAL PLEASE CAREFULLY READ THIS ENTIRE MANUAL BEFORE OPERATING YOUR NEW RECUMBENT!
-
Page 2: Table Of Contents
TABLE OF CONTENTS Product Registration Important Safety Instructions Important Electrical Information Important Operation Instructions Assembly Instructions Operation of Your New Fitness Bike Programmable Features Using Heart Rate Monitor General Maintenance Exploded View Diagram Parts List Manufacturer's limited warranty ATTENTION THIS FITNESS BIKE IS INTENDED FOR RESIDENTIAL USE ONLY AND IS WARRANTED FOR THE APPLICATION. -
Page 3: Product Registration
CONGRATULATIONS ON YOUR NEW RECUMBENT AND WELCOME TO THE SOLE FAMILY! Thank you for your purchase of this quality Sole recumbent from Dyaco Canada Inc. Your new recumbent has been manufactured by one of the leading fitness manufacturers in the world and is backed by one of the most comprehensive warranties available. -
Page 4: Important Safety Instructions
IMPORTANT SAFETY INSTRUCTIONS WARNING - Read all instructions before using this appliance. Do not operate fitness bike on deeply padded, plush or shag carpet. Damage to both carpet and fitness bike may result. Keep children away from the fitness bike. There are obvious pinch points and other caution areas that can cause harm. -
Page 5: Important Electrical Information
IMPORTANT ELECTRICAL INSTRUCTIONS WARNING! NEVER remove any cover without first disconnecting AC power. If voltage varies by ten percent (10%) or more, the performance of your fitness bike may be affected. Such conditions are not covered under your warranty. If you suspect the voltage is low, contact your local power company or a licensed electrician for proper testing. - Page 6 ASSEMBLY PACK CHECKLIST HARDWARE STEP 1 #32. 5/16" × 3/4"_Button #33. 5/16" × 18 × 1.5T_ #34. 5/16" × 19 ×1.5T_ Head Socket Bolt (6 pcs) Flat Washer (10 pcs) Curved Washer (1 pc) #41. M5 × 12L_Phillips #35. 5/16" × 1.5T_Split #112.
- Page 7 HARDWARE STEP 3 #55. M6 × 35L_Phillips #61. 3/8" × 1-3/4"_Button Head Screw (4 pcs) Head Socket Bolt (4 pcs) #62. 3/8" × 19 × 1.5T_ #63. 3/8" × 7T_ #60. 3/8" × 3/4"_ Flat Washer (6 pcs) Nyloc Nut (6 pcs) Button Head Socket Bolt (2 pcs) #58.
-
Page 8: Assembly Instructions
ASSEMBLY TOOLS #68. Combination M5 Allen #92. L Allen Wrench Wrench & Phillips Head Screw Driver #69. 14.15m/m_Wrench ASSEMBLY INSTRUCTIONS PRE-ASSEMBLY Using a razor knife (Box Cutter) cut the outside, bottom, edge of box along the dotted Line. Lift Box over the unit and unpack. Carefully remove all parts from carton and inspect for any damage or missing parts. - Page 9 STEP HARDWARE STEP 1 #32. 5/16" × 3/4"_Button Head Socket Bolt (6 pcs) #33. 5/16" × 18 × 1.5T_ Flat Washer (10 pcs) #34. 5/16" × 19 ×1.5T_ Curved Washer (1 pcs) #41. M5 × 12L_Phillips Head Screw (4 pcs) #35.
- Page 10 STEP HARDWARE STEP 2 #32. 5/16" × 3/4"_ Button Head Socket Bolt (4 pcs) #33. 5/16" × 18 × 1.5T_ Flat Washer (4 pcs) #35. 5/16" × 1.5T_ Split Washer (4 pcs) #112. 5/16" × 3/4"_ Socket Head Cap Bolt (4 pcs) L Allen Wrench(92) to tighten front and rear stabilizers...
- Page 11 STEP HARDWARE STEP 3 #55. M6 × 35L_Phillips Head Screw (4 pcs) #61. 3/8" × 1-3/4"_ Button Head Socket Bolt (4 pcs) #62. 3/8" × 19 × 1.5T_ Flat Washer (6 pcs) #63. 3/8" × 7T_ Nyloc Nut (6 pcs) #60.
-
Page 12: Operation Of Your New Fitness Bike
Operation of Your Console Console COOLING FAN SPEAKER DOT MATRIX PROGRAM BUTTONS FAN POWER SWITCH AUDIO IN JACK (MP3, CD, OR SMARTPHONE) Power Up The fitness bike is supplied with an external power supply. When power is connected to the fitness bike, the console will automatically power up. If there is no input to the console for 30 minutes, the console will go to stand-by mode to save energy. -
Page 13: Console Operation
Console Operation Quick Start Mode This is the quickest way to start a workout. After the console powers up you just press the Start key to begin. In Quick Start the Time will count up from zero and the workload may be adjusted manually by pressing the Up or Down keys. - Page 14 Programming The Console Each of the programs can be customized with your personal information and changed to suit your needs. Some of the information asked for during programming is necessary to ensure the readouts are correct. You will be asked for your age and weight. Entering your age is necessary during the Heart Rate Program to ensure the correct settings are entered in the program.
-
Page 15: Programmable Features
Manual Program The Manual program works as the name implies, manually. This means that you control the workload yourself and not the computer. Press the Manual program button then press the Enter key. The message window will ask you to enter your Weight. You may adjust the weight setting using the Level Up/Down keys, then press Enter to continue. -
Page 16: Preset Programs
Preset Programs The has seven different programs that have been designed to provide a variety of workouts.These seven programs have factory preset profiles for achieving different goals. P-1 Sunrise The Sunrise program simulates going up and down a gentle hill early in the morning. The resistance in the pedals will steadily increase and then decrease during the program. - Page 17 Xtreme The Xtreme program is designed to increase muscular strength in your lower body with extreme resistance. This program will steadily increase in resistance to a high level and then keeps you there. This is designed to strengthen and tone your legs and glutes.
-
Page 18: Using Heart Rate Monitor
User Programs The User Programs allow you to build and save your own workout. You can build your own custom program by following the instructions below. Select the User Program (User 1 or User 2) also then press Enter. The message will ask R un Program? i f there is already a program stored. -
Page 19: Heart Rate
Heart Rate The old motto, “no pain, no gain”, is a myth that has been overpowered by the benefits of exercising comfortably. A great deal of this success has been promoted by the use of heart rate monitors. With the proper use of a heart rate monitor, many people find that their usual choice of exercise intensity was either too high or too low and exercise is much more enjoyable by maintaining their heart rate in the desired benefit range. -
Page 20: Rate Of Perceived Exertion
Rate of Perceived Exertion Heart rate is important but listening to your body also has a lot of advantages. There are more variables involved in how hard you should workout than just heart rate. Your stress level, physical health, emotional health, temperature, humidity, the time of day, the last time you ate and what you ate, all contribute to the intensity at which you should workout. - Page 21 USING HEART RATE TRANSMITTER (Optional) How to wear your wireless chest strap transmitter: 1. Attach the cycle to the elastic strap using the locking parts. 2. Adjust the strap as tightly as possible as long as the strap is not too tight to remain comfortable.
- Page 22 HEART RATE CONTROL PROGRAM OPERATION Both programs operate the same, the only difference is that HR1 is set to 60% and HR2 is set to 80% of the maximum heart rate. They both are programmed the same way. To start an HRC program follow the instructions below or just select the HR1 or HR2 program, then the Enter button and follow the directions in the Message Window.
-
Page 23: General Maintenance
General Maintenance Wipe down all areas in the sweat path with a damp cloth after each workout. If a thump, clicking or wobbly feeling develops, the main cause is usually the pedals and/or crank arms being loose. Engineering Mode The console has built in maintenance/diagnostic software. The software will allow you to changes to the console settings such as changing units from English to Metric and turn off the beeping of the speaker when a key is pressed. -
Page 24: Exploded View Diagram
EXPLODED VIEW DIAGRAM Dyaco Canada Inc. 2013 customerservice@dyaco.ca... -
Page 25: Parts List
PARTS LIST KEY NO. PART NO. Description Q’TY 6835201 Main Frame 6835202 Console Mast 6835204 Seat Carriage 6835205 Front Stabilizer 6835206 Rear Stabilizer 6835207 Seat Handle Bar 6835208 Crank Axle 6835209 Idler Bracket 6835210 Idler Wheel 6835211 Crank Arm (L) 6835212 Crank Arm (R) 6835213... - Page 26 KEY NO. PART NO. Description Q’TY 6835252 Backrest 6835253 Backrest Bracket 6835254 Backrest Cover 6835255 M6 × 35L_Phillips Head Screw 6835257 5/16" × 1-1/4"_Hex Head Bolt 6835258 1/4" × 13 × 1T_Flat Washer 6835259 1/4" × 1"_Phillips Head Screw 6835260 3/8"...
- Page 27 KEY NO. PART NO. Description Q’TY 68352109 Console Mast End Cap 68352111 5 × 19L_Tapping Screw 68352112 5/16" × 3/4"_Socket Head Cap Bolt 68352113 Ø8 × M16 _ Locking Knob 牙 68352120 Axle 68352121 Ø19 × Ø12.4 × 0.5T_Flat Washer 68352122 Ø12_C Ring 68352123...
-
Page 28: Manufacturer's Limited Warranty
MANUFACTURER’S LIMITED WARRANTY Dyaco Canada Inc. warrants all its fitness bike parts for a period of time listed below from the date of retail sale, as determined by sale receipt, or in the absence of a sales receipt eighteen (18) months from the original factory shipping date. Dyaco Canada Inc.’s responsibilities include providing new or remanufactured parts, at Dyaco Canada Inc.’s option, and technical support to our independent dealers and servicing organizations.
Need help?
Do you have a question about the 16868352 and is the answer not in the manual?
Questions and answers