Table of Contents
Advertisement
Rating:
Amperes:
Variable speed:
Weight:
Need Assistance?
Call us on our toll free customer support line:
1-800-689-9928
Technical questions
Replacement parts
Parts missing from package
Imported by Mastercraft Canada Toronto, Canada M4S 2B8
PRODUCT SPECIFICATIONS
120 V, 60 Hz AC
2.5 A
10,000–18,500 OPM (no load)
3 lb (1.35 kg)
AC MULTI-CRAFTER
Owner's Manual
054-1266-4
Advertisement
Table of Contents

Related Manuals for MasterCraft 054-1266-4


Summary of Contents for MasterCraft 054-1266-4
-
Page 1: Product Specifications
10,000–18,500 OPM (no load) Weight: 3 lb (1.35 kg) Need Assistance? Call us on our toll free customer support line: 1-800-689-9928 Technical questions Replacement parts Parts missing from package Imported by Mastercraft Canada Toronto, Canada M4S 2B8... -
Page 2: Table Of Contents
TABLE OF CONTENTS Product specifications ………….……………………………………………………. Table of contents ……………………………………………………………………... General safety warnings …………………………………………………………….. 3–4 Eye, ear & lung protection …………………………………………………………… 3–4 Electrical safety ………………………………………………………………………. Power tool safety ……………………………………………………………………... 5–6 General safety rules ………………………………………………………………….. Work area ………………………………………………………………….………….. Electrical safety ………………………………………………………………………. Personal safety ……………………………………………………………………….. -
Page 3: General Safety Warnings
GENERAL SAFETY WARNINGS WARNING: Before using this tool or any of its accessories, read this manual and follow all Safety Rules and Operating Instructions. The important precautions, safeguards and instructions appearing in this manual are not meant to cover all possible situations. It must be understood that common sense and caution are factors which cannot be built into the product. -
Page 4: Electrical Safety
GENERAL SAFETY WARNINGS WEAR A DUST MASK THAT IS DESIGNED TO BE USED WHEN OPERATING A POWER TOOL IN A DUSTY ENVIRONMENT. WARNING: Dust that is created by power sanding, sawing, grinding, drilling, and other construction activities may contain chemicals that are known to cause cancer, birth defects, or other genetic abnormalities. -
Page 5: Power Tool Safety
POWER TOOL SAFETY WARNING Read all safety warnings Damaged or entangled cords increase the and instructions. Failure to follow the risk of electric shock. warnings and instructions may result in electric shock, fire and/or serious injury. When operating a power tool outdoors, use an extension cord suitable for Save all warnings and instructions for outdoor use. -
Page 6: Use And Care Of Power Tools
POWER TOOL SAFETY PERSONAL SAFETY – cont’d Maintain power tools. Check for misalignment or binding of moving Do not overreach. Keep proper footing parts, breakage of parts and any other and balance at all times. This enables condition that may affect the power tool’s operation. -
Page 7: Specific Safety Rules
SPECIFIC SAFETY RULES Secure workpiece. Use clamps or a vice to WARNING: Know your multi- hold the workpiece. It is safer than using crafter. Do not plug the tool into the your hand and it frees both hands to power source until you have read and operate the tool. -
Page 8: Symbols
SYMBOLS WARNING: Some of the following symbols may appear on the multi- crafter. Study these symbols and learn their meaning. Proper interpretation of these symbols will allow for more efficient and safer operation of this tool. Direct current Volts Amperes No load speed Alternating or direct Hertz... -
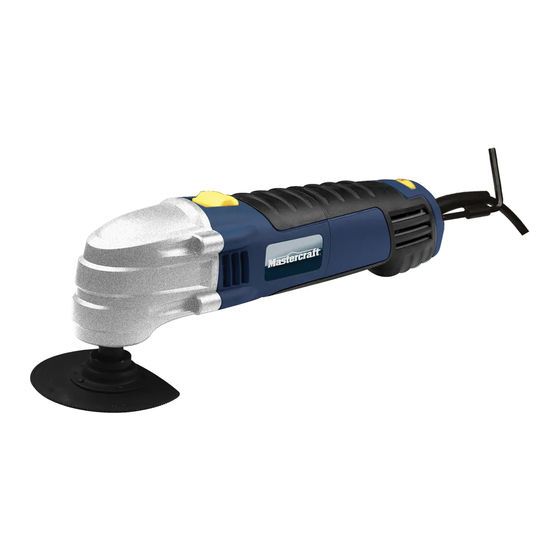
Page 9: Know Your Multi-Crafter
KNOW YOUR MULTI-CRAFTER ON/OFF switch Speed control wheel Hex key Air vents Accessory holder ACCESSORIES AVAILABLE ACCESSORIES Before using any accessory, carefully read the instructions or the owner’s manual for WARNING: Use only accessories the accessory. that are recommended for this multi- Saw blades ... -
Page 10: Contents
CONTENTS CONTENTS Carefully unpack the multi-crafter. Compare the contents against the “MULTI- CRAFTER COMPONENTS” chart below. NOTE: See illustration of the multi-crafter on Page 11. WARNING: To avoid fire or toxic reaction, never use gasoline, naphtha, acetone, lacquer thinner or similar highly volatile solvents to clean the tool. - Page 11 CONTENTS...
-
Page 12: Assembly And Operating
ASSEMBLY AND OPERATING ASSEMBLY AND OPERATING ASSEMBLY AND OPERATING INSTALLING ACCESSORIES All accessories are installed on the multi- crafter in a similar manner. For the purposes of describing the accessory installation, the semicircular blade is used. DANGER: Always remove the plug from the power source before installing or removing accessories or sandpaper. -
Page 13: Installing Sandpaper
ASSEMBLY AND OPERATING INSTALLING ACCESSORIES – cont’d NOTES: Check to make sure the convex curve of the washer (9) is facing the head of the screw. Make sure the alignment holes in the blade or sanding pad are still mated with the alignment pins in the accessory holder. -
Page 14: On/Off Switch
ASSEMBLY AND OPERATING ON/OFF SWITCH To turn the tool ON, slide the ON/OFF switch (1) toward the front of the tool (Fig. 5). To turn the tool OFF, slide the ON/OFF switch toward the rear of the tool. SPEED CONTROL WHEEL The speed of the tool can be adjusted to run the tool at speeds varying between Fig. - Page 15 ASSEMBLY AND OPERATING Project Accessory Speed Drywall Semicircular Maximum blade Restoring Semicircular Medium windows blade Door jamb Wood blade Maximum Door casing Wood blade Med / max Wood Wood blade Maximum dowels Floor vent Wood blade Med / max Copper pipe Wood blade Maximum PVC pipe...
-
Page 16: Flush Cutting A Door Jamb And Casing For Installing Flooring
ASSEMBLY AND OPERATING FLUSH CUTTING A DOOR JAMB AND CASING FOR INSTALLING FLOORING The multi-crafter can be used to flush cut a door jamb and casing to allow space for the new flooring to fit neatly under the door jamb and casing. For the purpose of demonstrating the procedure, floor tile is being used. -
Page 17: Cutting A Hole In Wood Flooring To Install A Heating Vent
ASSEMBLY AND OPERATING FLUSH CUTTING A DOOR JAMB AND CASING FOR INSTALLING FLOORING – cont’d Continue to make several plunge cuts until the bottom of the door jamb and casing are completely cut off and the loose pieces can be easily removed. Follow the same basic procedure for installing carpet, using a thicker spacer that is the same thickness of the carpet... -
Page 18: Cutting A Hole In Drywall For Installing An Electrical Outlet Box
ASSEMBLY AND OPERATING CUTTING A HOLE IN WOOD FLOORING TO INSTALL A HEATING VENT – cont’d While holding the tool tightly, slowly plunge the corner of the blade into the flooring until it cuts through the flooring. Once the plunge cut is complete, set the tool to its highest speed and complete the cut to the corner of the rectangle. - Page 19 ASSEMBLY AND OPERATING CUTTING A HOLE IN DRYWALL FOR INSTALLING AN ELECTRICAL OUTLET BOX – cont’d NOTE: The blade should be centred on the tool housing and NOT installed in the 90° position. Place the outlet box on the drywall and use a soft lead pencil to trace the required rectangular hole (1) on the drywall (Fig.
-
Page 20: Using The Detail Sander Attachment
ASSEMBLY AND OPERATING CUTTING A HOLE IN DRYWALL FOR INSTALLING AN ELECTRICAL OUTLET BOX – cont’d NOTE: Do NOT use the saw blade to pry the cut-out from the drywall. You will break the blade. If the cut-out is not easy to pry from the drywall, check to make sure each line is cut completely into the corner of the rectangle. -
Page 21: Using The Scraper Blade
ASSEMBLY AND MAINTENANCE OPERATING USING THE SCRAPER BLADE GENERAL Install the scraper blade on the multi- WARNING: When servicing, use crafter as outlined on Pages 12 & 13, only identical replacement parts. The Fig. 1 & 2. use of any other part may create a hazard or cause product damage. -
Page 22: Exploded View
EXPLODED VIEW... -
Page 23: Parts List
PARTS LIST ® WARNING: When servicing, use only Mastercraft replacement parts. The use of any other parts may create a safety hazard or cause damage to the multi-crafter. Any attempt to repair or replace electrical parts on this multi-crafter may create a safety hazard unless repairs are performed by a qualified technician. - Page 24 PARTS LIST Key # Part # Part Name Quantity 1210160006 Magnetic tube 4010010035 Ball bearing 627-2Z 2030070015 Brush holder 4030010026 Screw ST2.9X9 1230010075 Carbon brush assembly 2050020025 Brush spring 1010210003 Rotor 4010010036 Ball bearing 608-2Z 2020130027 Bearing support 3140020049 O ring 26.5X2.65 4010050002 Bearing 625 4100050001...
-
Page 25: Warranty
3-Year Limited Warranty This Mastercraft product is guaranteed for a period of 3 years from the date of original retail purchase against defects in workmanship and materials, except for the following components: Component A: Batteries, chargers and carrying cases, which are guaranteed for a period of 2 years from the date of original retail purchase against defects in workmanship and materials;... - Page 26 Mastercraft is a superior line of products selected for their workmanship and materials. These products are designed to meet rigorous quality and performance standards, and are approved by our Quality Assurance laboratory.
Need help?
Do you have a question about the 054-1266-4 and is the answer not in the manual?
Questions and answers