Table of Contents
Advertisement
Available languages
Available languages
Quick Links
Download this manual
See also:
Instruction Manual
Advertisement
Chapters
Table of Contents

Related Manuals for Videotec Verso


Summary of Contents for Videotec Verso
- Page 1 VERSO / VERSO COMPACT / VERSO POLAR Side opening polycarbonate housing English - Instructions manual Italiano - Manuale di istruzioni Français - Manuel d'instructions Deutsch - Bedienungslanleitung...
- Page 3 VERSO / VERSO COMPACT / VERSO POLAR Side opening polycarbonate housing English - Instructions manual...
-
Page 5: Table Of Contents
9.1 VERSO ..................................11 9.1.1 General .....................................11 9.1.2 Mechanical .....................................12 9.1.3 Electrical ....................................12 9.1.4 Environment ..................................12 9.1.5 Certifications ..................................12 9.2 VERSO COMPACT ..............................12 9.2.1 General .....................................12 9.2.2 Mechanical .....................................12 9.2.3 Electrical ....................................12 9.2.4 Environment ..................................12 9.2.5 Certifications ..................................12 9.3 VERSO POLAR .................................13 9.3.1 General .....................................13... -
Page 6: Technical Drawings
9.3.3 Electrical ....................................13 9.3.4 Environment ..................................13 9.3.5 Certifications ..................................13 10 Technical drawings ....................13... -
Page 7: About This Manual
1 About this manual 3 Safety rules Before installing and using this unit, please read this The manufacturer declines all responsibility manual carefully. Be sure to keep it handy for later for any damage caused by an improper use reference. of the appliances mentioned in this manual. Furthermore, the manufacturer reserves 1.1 Typographical conventions the right to modify its contents without any... -
Page 8: Identification
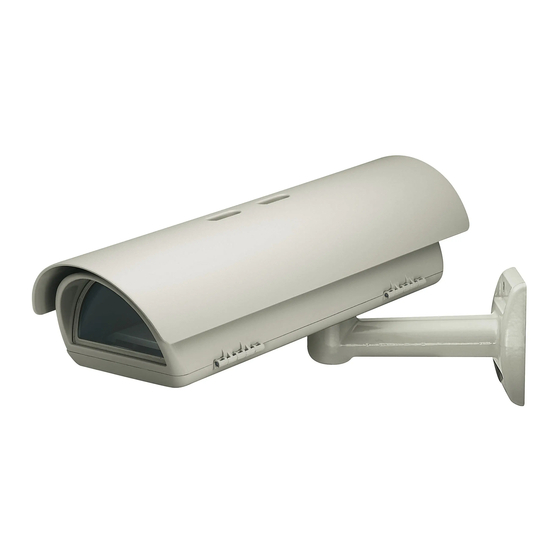
• Spacers cameras and lenses. • Cable glands A specific version of VERSO with a very efficient cooling system is available for installation with IP • Screws and washers cameras and for high environmental temperature. -
Page 9: Installing And Assembling
6 Installing and assembling Only specialised personnel should be allowed to install and assemble the device. The housing where this device is installed must be powered by 12Vdc or 24Vac voltage. Turn off the power before performing any operations. Fig. 02 Reposition the internal slide by tightening the 6.1 Installation previously loosened screws. -
Page 10: Attaching The Housing
J4 - OUT J3 - IN J1 - Camera J6 - Blower Fig. 06 VERSO COMPACT. Reposition the internal support slide and close the housing. The circuit is also able to provide the Fig. 03 power supply for a camera. While powering Pass the heating wire into the provided seatings. -
Page 11: How To Install The Camera Power Supply
6.1.5 How to install the camera power When the circuit is powered by an external source care must be taken to the type supply of voltage used and, depending on Not applicable to housings with installed requirements, to the correct power supply cooling device. -
Page 12: 100-240Vac Power Supply
6.1.6.1 100-240Vac power supply To guarantee the IP44 weatherproof, install the housing on the support following the inclination Install the camera power supply supplied with the limits as shown in the picture. blower kit as described in the chapter "6.1.5 How to install the camera power supply", page 9. -
Page 13: Configuration For Low Temperatures
J7 - IN J10 - OUT 230Vac/24Vac 230Vac/24Vac 9 Technical specifications Fig. 15 9.1 VERSO 9.1.1 General Entirely constructed from technopolymer (polycarbonate) Sunshield in ABS RAL9002 Colour Stainless steel external screws Supplied with instruction manual, desiccant bag,... -
Page 14: Mechanical
9.2 VERSO COMPACT 9.1.2 Mechanical 3xM16 cable glands 9.2.1 General Polycarbonate window (WxH): 105x64mm (4.1x2.5in) Entirely constructed from technopolymer Internal usable area (WxH): 70x70mm (2.7x2.7in) (polycarbonate) Internal usable length with and without accessories: Sunshield in ABS 270mm (10.6in) RAL9002 Colour Unit weight: 1.5kg / 3.3lb... -
Page 15: General
9.3 VERSO POLAR 9.3.4 Environment Indoor / Outdoor 9.3.1 General Operating temperature with heater: -55°C / +60°C (-67°F Entirely constructed from technopolymer / +140°F) (polycarbonate) Very good resistance to the following chemical agents: Sunshield in ABS basics, alcohols, gasses, hydrocarbon... - Page 16 USABLE USABLE AREA AREA A - A B - B Fig. 17 VERSO COMPACT USABLE USABLE USABLE AREA USABLE AREA AREA AREA A - A B - B Fig. 18 VERSO POLAR VIDEOTEC S.p.A. www.videotec.com Printed in Italy MNVCHPVB_1006_EN...
- Page 17 VERSO / VERSO COMPACT / VERSO POLAR Custodia in policarbonato ad apertura laterale Italiano - Manuale di istruzioni...
- Page 19 9 Dati tecnici ........................11 9.1 VERSO ..................................11 9.1.1 Generale ....................................11 9.1.2 Meccanica ....................................12 9.1.3 Elettrico ....................................12 9.1.4 Ambiente....................................12 9.1.5 Certificazioni ..................................12 9.2 VERSO COMPACT ..............................12 9.2.1 Generale ....................................12 9.2.2 Meccanica ....................................12 9.2.3 Elettrico ....................................12 9.2.4 Ambiente....................................12 9.2.5 Certificazioni ..................................12 9.3 VERSO POLAR .................................13 9.3.1 Generale ....................................13...
- Page 20 9.3.3 Elettrico ....................................13 9.3.4 Ambiente....................................13 9.3.5 Certificazioni ..................................13 10 Disegni tecnici ......................13...
-
Page 21: Informazioni Sul Presente Manuale
(magneto termico) bipolare, che deve comprendere un interruttore bipolare di tipo automatico che preveda anche la protezione della corrente di guasto verso terra (magneto termico + differenziale) con distanza minima tra i contatti di 3mm. • Gli apparecchi installabili all'interno della custodia... -
Page 22: Identificazione
• Distanziali telecamere ed ottiche. • Pressacavi È disponibile una versione della VERSO con un sistema di ventilazione altamente efficiente per • Viti e rondelle applicazioni con telecamere IP e per temperature •... -
Page 23: Installazione E Assemblaggio
6 Installazione e assemblaggio L'installazione e l'assemblaggio vanno eseguiti solo da personale specializzato. Le versioni di custodia munite di questo dispositivo possono essere alimentate solo con tensioni di 12Vdc o 24Vac. Prima di eseguire qualsiasi operazione ricordarsi di togliere tensione al prodotto. Fig. -
Page 24: Fissaggio Della Custodia
J4 - OUT J3 - IN J1 - Camera J6 - Ventilatore Fig. 06 VERSO COMPACT. Riposizionare la slitta interna di appoggio e chiudere la custodia. Nel circuito c’è anche la possibilità Fig. 03 di prelevare l’alimentazione per una Passare il filo del riscaldamento nelle sedi telecamera. -
Page 25: Installazione Dell'alimentatore Per Telecamera
6.1.5 Installazione dell’alimentatore Alimentando il circuito da una sorgente esterna è necessario prestare attenzione al per telecamera tipo di tensione utilizzata e a seconda delle Non applicabile nelle custodie munite di esigenze, il kit di alimentazione corretto. sistema per il raffreddamento installato. Per montare l’opzione alimentatore non è... -
Page 26: Tensione Di Alimentazione Custodia 100-240Vac
6.1.6.1 Tensione di alimentazione custodia Al fine di garantire il grado di protezione IP44, installare la custodia al supporto rispettando i limiti di 100-240Vac inclinazione riportati in figura. Installare l’alimentatore fornito con il kit di ventilazione come descritto nel capitolo "6.1.5 Installazione dell’alimentatore per telecamera", pagina 9. -
Page 27: Configurazione Per Basse Temperature
Centro di raccolta o in un'Ecostazione. Nell'Unione Europea esistono sistemi di raccolta differenziata per prodotti elettrici ed elettronici. 9 Dati tecnici J10 - OUT J7 - IN 9.1 VERSO 230Vac/24Vac 230Vac/24Vac Fig. 15 9.1.1 Generale Costruita in resistente tecnopolimero (policarbonato) Tettuccio in ABS... -
Page 28: Meccanica
9.2 VERSO COMPACT 9.1.2 Meccanica 3 pressacavi M16 9.2.1 Generale Finestra policarbonato (WxH): 105x64mm Costruita in resistente tecnopolimero (policarbonato) Dimensioni utili interne (WxH): 70x70mm Tettuccio in ABS Lunghezza utile interna con e senza accessori: 270mm Colore RAL9002 Peso unitario: 1.5kg Viteria esterna in acciaio Inox 9.1.3 Elettrico... -
Page 29: Verso Polar
9.3 VERSO POLAR 9.3.4 Ambiente Interno / Esterno 9.3.1 Generale Temperatura d’esercizio con riscaldamento: -55°C / +60°C Costruita in resistente tecnopolimero (policarbonato) Resistenza molto buona ai seguenti agenti chimici: basi, Tettuccio in ABS alcoli, gas, idrocarburi Colore RAL9002 Resistenza buona: acidi organici e inorganici, olii... - Page 30 AREA AREA UTILE UTILE A - A B - B Fig. 17 VERSO COMPACT AREA AREA UTILE UTILE A - A B - B Fig. 18 VERSO POLAR VIDEOTEC S.p.A. www.videotec.com Printed in Italy MNVCHPVB_1006_IT...
- Page 31 VERSO / VERSO COMPACT / VERSO POLAR Caisson en polycarbonate à ouverture latérale Français - Manuel d'instructions...
- Page 33 9.1 VERSO ..................................11 9.1.1 Généralités ....................................11 9.1.2 Mécanique ....................................12 9.1.3 Électrique ....................................12 9.1.4 Environnement ..................................12 9.1.5 Certifications ..................................12 9.2 VERSO COMPACT ..............................12 9.2.1 Généralités ....................................12 9.2.2 Mécanique ....................................12 9.2.3 Électrique ....................................12 9.2.4 Environnement ..................................12 9.2.5 Certifications ..................................12 9.3 VERSO POLAR .................................13 9.3.1 Généralités ....................................13...
- Page 34 9.3.3 Électrique ....................................13 9.3.4 Environnement ..................................13 9.3.5 Certifications ..................................13 10 Dessins techniques ....................13...
-
Page 35: À Propos De Ce Mode D'emploi
1 À propos de ce mode 3 Normes de securité d’emploi Le producteur décline toute responsabilité pour les dommages éventuels dus à une Avant d’installer et d’utiliser cet appareil, veuillez utilisation non appropriée des appareils lire attentivement ce mode d’emploi. Conservez-le à mentionnés dans ce manuel. On réserve portée de main pour pouvoir vous y reporter en cas en outre le droit d’en modifier le contenu de besoin. -
Page 36: Identification
Le matériel d’emballage est entièrement composé et le contact d’alarme anti-ouverture (seulement de matériaux recyclables. Le technicien chargé de VERSO). Des kits de montage sont inclus pour faciliter l’installation est tenu de l’éliminer conformément aux l’ installation. dispositions en matière de collecte sélective et selon les normes en vigueur dans le pays d’utilisation. -
Page 37: Installation Et Assemblage
6 Installation et assemblage L’installation et l’assemblage doivent exclusivement être effectués par un personnel spécialisé. Les versions de caisson équipées de ce dispositif peuvent exclusivement être alimentées avec des tensions de 12Vdc ou 24Vac. Fig. 02 Avant d’effectuer toute opération, il est Replacer la glissière interne en fixant les vis indispensable de couper l'alimentation. -
Page 38: Fixation Du Caisson
J4 - OUT J3 - IN J1 - Camera J6 - Ventilateur Fig. 06 VERSO COMPACT. Replacer la glissière d’appui interne et fermer le caisson. Dans le circuit, il est aussi possible de prélever l’alimentation pour une caméra. En alimentant le circuit à partir d’une source Fig. -
Page 39: Installation De L'alimentateur Pour Caméra
6.1.5 Installation de l’alimentateur En alimentant le circuit à partir d’une source externe, il faut faire attention pour caméra au type de tension utilisée et, selon les Non applicable pour les caissons équipés de exigences, au bon kit d’alimentation. système pour le refroidissement installé. Pour monter l’option alimentateur, il n’est nécessaire d’enlever aucun composant déjà... -
Page 40: Alimentation 100-240Vac
6.1.6.1 Alimentation 100-240Vac: Pour garantir un degré de protection IP44, installer le caisson au support en respectant les limites Installer l’alimentateur fourni avec le kit de ventilation d'inclinaison selon la figure. comme cela est décrit dans chapitre "6.1.5 Installation de l’alimentateur pour caméra", page 9. Fermer le caisson. -
Page 41: Configuration Pour Basses Températures
électroniques usagés. J7 - IN J10 - OUT 230Vac/24Vac 230Vac/24Vac 9 Données techniques Fig. 15 9.1 VERSO 9.1.1 Généralités Construction en technopolymère de haute résistance (polycarbonate) Toit pare-soleil en ABS Couleur RAL9002 Visserie extérieure en acier Inox Livré avec manuel d’instructions, sachet déshydratant, accessoires destinés au montage de la caméra et de... -
Page 42: Mécanique
9.2 VERSO COMPACT 9.1.2 Mécanique 3 presse-étoupes M16 9.2.1 Généralités Fenêtre en polycarbonate (WxH): 105x64mm Construction en technopolymère de haute résistance Surface intérieure utile (WxH): 70x70mm (polycarbonate) Longueur utile du caisson avec accessoires: 270mm Toit pare-soleil en ABS Poids net: 1.5kg Couleur RAL9002 9.1.3 Électrique... -
Page 43: Certifications
9.3 VERSO POLAR 9.3.4 Environnement Intérieur / Extérieur 9.3.1 Généralités Température d’exercice avec chauffage: -55°C / +60°C Construction en technopolymère de haute résistance Très bonne résistance aux agents chimiques suivants: (polycarbonate) bases, alcools, gaz, hydrocarbures Toit pare-soleil en ABS Bonne résistance: acides organiques et inorganiques,... - Page 44 SURFACE SURFACE UTILE UTILE A - A B - B Fig. 17 VERSO COMPACT SURFACE SURFACE UTILE SURFACE UTILE UTILE A - A B - B Fig. 18 VERSO POLAR VIDEOTEC S.p.A. www.videotec.com Printed in Italy MNVCHPVB_1006_FR...
- Page 45 VERSO / VERSO COMPACT / VERSO POLAR Polykarbonat- Gehäuse mit Seitenöffnung Deutsch - Bedienungslanleitung...
- Page 47 9.1 VERSO ..................................11 9.1.1 Allgemeines ...................................11 9.1.2 Mechanik ....................................12 9.1.3 Elektrik ......................................12 9.1.4 Umgebung .....................................12 9.1.5 Zertifizierungen ..................................12 9.2 VERSO COMPACT ..............................12 9.2.1 Allgemeines ...................................12 9.2.2 Mechanik ....................................12 9.2.3 Elektrik ......................................12 9.2.4 Umgebung .....................................12 9.2.5 Zertifizierungen ..................................12 9.3 VERSO POLAR .................................13 9.3.1 Allgemeines ...................................13...
- Page 48 9.3.3 Elektrik ......................................13 9.3.4 Umgebung .....................................13 9.3.5 Zertifizierungen ..................................13 10 Technische Zeichnungen ..................13...
-
Page 49: Allgemeines
1 Allgemeines 3 Sicherheitsnormen Lesen Sie bitte vor dem Installieren und dem Der Hersteller lehnt jede Haftung für Verwenden dieses Gerätes die Bedienungsanleitung eventuelle Schäden ab, die aufgrund sorgfältig durch. Bewahren Sie sie zum späteren unsachgemäßer Anwendung der in diesem Nachschlagen auf. -
Page 50: Identifizierung
Lage, die meisten Kombinationen aus Kameras • Gehäuse und Optiken aufzunehmen. • Lieferumfang für Gehäuses: Das VERSO Gehäuse ist auch in der Version mit einem • Innensechskantschlüssel sehr effizienten Luftrad verfügbar für Anwendungen • Abstandsstücke mit IP Kamera und für hohe Temperaturen. -
Page 51: Installation Und Zusammenbau
6 Installation und Zusammenbau Installation und Zusammenbau sind Fachleuten vorbehalten. Die mit dieser Einrichtung ausgestatteten Gehäuse-versionen können nur mit Spannungswerten von 12Vdc oder 24Vac versorgt werden. Vor allen Eingriffen immer den Netzstecker Fig. 02 aus der Steckdose ziehen. Bringen Sie nun den internen Schlitten wieder an seine Position und fixieren ihn mit den vorher 6.1 Installation gelockerten Schrauben. -
Page 52: Befestigung Des Gehäuses
Wärme richtig verteilt wird. J4 - OUT J3 - IN J1 - Camera J6 - Lüfter Fig. 06 VERSO COMPACT. Jetzt den internen Auflageschlitten wieder positionieren und das Gehäuse schließen. Die Schaltung bietet daneben die Fig. 03 Möglichkeit, die Stromversorgung für Befestigen Sie das Heizungs-Kit an den vorgesehenen eine Kamera abzugreifen. -
Page 53: Installation Des Netzteil Für Kamera
6.1.5 Installation des Netzteil für Wenn der Schaltkreis von einer externen Energiequelle gespeist wird, muß auf die Kamera Versorgungsspannung geachtet werden. Nicht anwendbar in Gehäusen mit Verwenden Sie das für den Einzelfall installiertem Kühlsystem geeignete Netzgerät. Für den Einbau des Zusatzspeisers braucht keine vorinstallierte Dieser Abschnitt befaßt sich mit der Installation Kom-ponente entfernt zu werden. -
Page 54: Betriebsspannung 100-240Vac
6.1.6.1 Betriebsspannung 100-240Vac Das Gehäuse auf der Halterung gemäß den Neigungsbegrenzungen des Bildes installieren, um Installieren Sie das mit dem Belüftungs- Kit gelieferte den IP44- Schutzgrad zu garantieren. Netzteil, wie im Kapitel "6.1.5 Installation des Netzteil für Kamera", Seite 9. Das Schutzgehäuse schließen. -
Page 55: Niedertemperaturausführung
Sammelsysteme für Elektrik- und Elektronikgeräte. J10 - OUT J7 - IN 230Vac/24Vac 230Vac/24Vac 9 Technische Daten Fig. 15 9.1 VERSO 9.1.1 Allgemeines Hergestellt aus hochfestem Technopolymer (Polykarbonat) Sonnenschutzdach aus ABS Farbe RAL9002 Externe Schrauben aus rostfreiem Stahl Im Lieferumfang enthalten Betriebsanleitung, Beutelchen mit Salz, Montagezubehör für Telekamera... -
Page 56: Mechanik
9.2 VERSO COMPACT 9.1.2 Mechanik 3xM16-Kabelschellen 9.2.1 Allgemeines Polykarbonatfenster (WxH): 105x64mm Hergestellt aus hochfestem Technopolymer Innere Nutzabmessungen (WxH): 70x70mm (Polykarbonat) Nutzlänge des Gehäuses mit oder ohne Zubehör: Sonnenschutzdach aus ABS 270mm Farbe RAL9002 Einheitsgewicht: 1.5kg Externe Schrauben aus rostfreiem Stahl 9.1.3 Elektrik... -
Page 57: Verso Polar
9.3 VERSO POLAR 9.3.4 Umgebung Für innere / äußere Installationen 9.3.1 Allgemeines Betriebstemperatur mit Heizung: -55°C / +60°C Hergestellt aus hochfestem Technopolymer Sehr gute Chemikalienbeständigkeit gegen: Basen, (Polykarbonat) Alkohol, Gas, Kohlenwasserstoffe Sonnenschutzdach aus ABS Gute Beständigkeit gegen: anorganische Säuren, Farbe RAL9002 organische Säuren, Öle... - Page 58 NUTZ- NUTZFLÄCHE FLÄCHE A - A B - B Fig. 17 VERSO COMPACT NUTZ- NUTZ- NUTZFLÄCHE NUTZFLÄCHE FLÄCHE FLÄCHE A - A B - B Fig. 18 VERSO POLAR VIDEOTEC S.p.A. www.videotec.com Printed in Italy MNVCHPVB_1006_DE...
- Page 60 VIDEOTEC S.p.A. www.videotec.com Printed in Italy MNVCHPVB_1006...
Need help?
Do you have a question about the Verso and is the answer not in the manual?
Questions and answers