Table of Contents
Advertisement
Quick Links
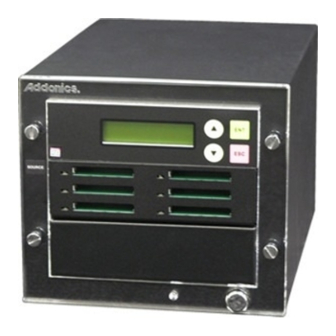
1:5 CF or CFAST Duplicator
Technical Support
If you need any assistance to get your unit functioning properly, please have your
product information ready and contact Addonics Technical Support at:
Hours: 8:30 am - 6:00 pm PST
Phone: 408-453-6212
Email: http://www.addonics.com/support/query/
T E C H N O L O G I E S
User Guide
(CFASTD5 / CFD5)
www.addonics.com
E N T
E S C
v8.1.11
Advertisement
Table of Contents

Related Manuals for Addonics Technologies CFASTD5


Summary of Contents for Addonics Technologies CFASTD5
- Page 1 T E C H N O L O G I E S E N T E S C User Guide 1:5 CF or CFAST Duplicator (CFASTD5 / CFD5) www.addonics.com v8.1.11 Technical Support If you need any assistance to get your unit functioning properly, please have your...
-
Page 2: Front View
Diagram Scroll Up Duplicator Panel Executes Function Cancels Function Scroll Down Front View E N T Source Slot (CF or CFAST) E S C Target Slot 1 Target Slot 3 Target Slot 4 Target Slot 2 Target Slot 5 Power Switch Flash Reader LEDs Power LED www.addonics.com... - Page 3 Functions The copy controller has 11 functions in total, with the 11 th (Adv Setup) being a hidden system function that only appears when the E S C key is pressed fo r 2 seconds until there is a beep. These are shown below.
-
Page 4: Async Copy Hdd
Cop y HDD Copy HDD copies data directly from the source hard disk to the target hard disk. Please make sure that the capacity of the target hard disk is equal or larger than the source hard disk. Choose option 1 from the menu: 1. -
Page 5: Async Compare
3. Compare HDD HDD: 11 232.9GB Press ENT to begin the comparison. The LCD will display the following info. Comp-23MB/s 0% 232.9GB 00: 0 0:00 Once the comparison is complete the LCD will display the following info as well as the amount of data on the source hard disk. -
Page 6: Rescan Bus
ReScan Bus ReScan Bus allows swapping the source or target in and out without having to reboot the system. Choose option 6 from the menu: 6. ReScan BUS Press ENT to re-scan hardware. The LCD will display the following info: Re-Sc a n BUS NOW? When the scan is complete the LCD will display the following info: Bus re- scan OK ! - Page 7 Overwrite Overwrite is used to overwrite the data of the hard disk, it will erase all HDDs connected to the duplicator (including Source HDD). There are 3 sub-options: One pass, 3 pass and 7 pass. Choose option 9 from the menu: 9.
-
Page 8: Startup Menu
Copy Size This option is used to specify the size of the source hard disk for simplifying further copying operations. 10-02. Setup Copy Size Press ENT and the LCD will display a detailed list of options as shown below Copy Size 100%~1% (*MB) Use the Up and Down arrow keys to choose different copy sizes. -
Page 9: Device Info
Device Info This option is used to display the details of all hard disks connected to the copy controller. 10-06. Setup Device Info Press ENT and the LCD will display each hard disk' information in order as shown below. 0 Source CH: 0 Hitachi 232.9GB System Info This option displays system information . -
Page 10: Quick Compare
Press ENT to enter the following figure. The default is 0. Use the Up and Down arrow keys to choose 5 Sec-50 Sec. Auto Start Timer Tolerance Size This option is used to set the tolerance in terms of percentage difference between the source and target capacity. -
Page 11: Advance Setup
Advance Setup Adv Setup offers expert users access to more advanced system settings. To access this option, hold down the ESC key for two seconds until it appears. 11. Adv Setup Read Error Skip This function sets the system to ignore any errors during the copying process. Normally if there is an error during copying a warning is displayed on the LCD. - Page 12 Press ENT again and the LCD will prompt you to confirm t he er ase operation . All data w ill be lost,Erase? No Fu ll Erase HDD This function is used to full erase all data on the HDD. Please backup any important data before using this function.
-
Page 13: Load Default
Load Default Press ESC to return to the main menu then use the ENT butt on to select. This function resets all settings to their factory default. This function helps th e system recover from errors caused by an illegal operati o n. 11-07.Adv Setup Load Default Press ENT to enter the following screen. -
Page 14: Troubleshooting
Troubleshooting If the LCD display is blank after the device is turned on, check if the power cable is properly connected and that the power supply is on. Error Message If an operation is manually terminated by pressing ESC while the system is running a copy operation or hardware diagnostics, an error message will show up on the LCD. -
Page 15: Lcd Messages
LCD Messages Connecting with a HDD: No Valid HDD! The system cannot find a hard disk. All data will be lost, format? All data will be lost. Confirm formatting. Partition Damage The partition is damaged. Delete Image in Partition xx? Confirm the deleting of data image in partition xx. - Page 16 CONTACT US www.addonics.com Phone: 408-573-8580 Fax: 408-573-8588 Email: http://www.addonics.com/sales/query/...
Need help?
Do you have a question about the CFASTD5 and is the answer not in the manual?
Questions and answers