Table of Contents
Advertisement
Quick Links
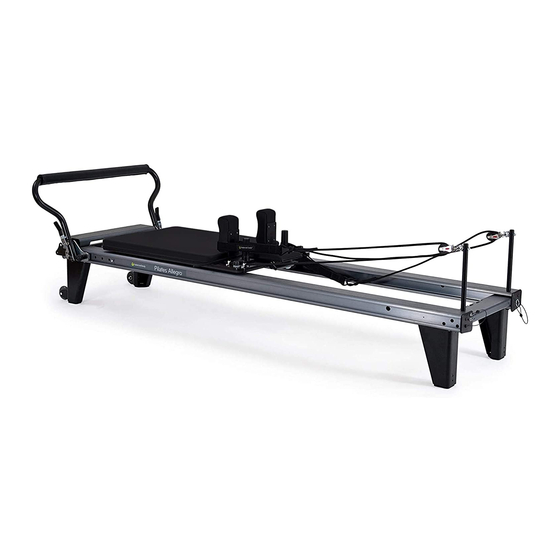
The Balanced Body
Allegro
Allegro
Instructions in document subject to change. Please consult pilates.com/instructions for most current version.
Reformer
®
Tower System
®
EMERGO EUROPE
EC
REP
Molenstraat 15
2513 BH, The Hague
The Netherlands
Balanced Body, Inc
Sacramento, CA
001-916-388-2838
EC
REP
Balanced Body, Inc
Sacramento, CA
001-916-388-2838
Advertisement
Table of Contents

Related Manuals for Balanced Body Allegro Reformer


Summary of Contents for Balanced Body Allegro Reformer
- Page 1 The Balanced Body Allegro Reformer ® Allegro Tower System ® Instructions in document subject to change. Please consult pilates.com/instructions for most current version. EMERGO EUROPE Balanced Body, Inc Molenstraat 15 Sacramento, CA 2513 BH, The Hague 001-916-388-2838 The Netherlands Balanced Body, Inc...
- Page 3 » If you are setting up an Allegro Reformer with no Leg Kit, proceed with these Reformer instructions beginning on page 9. » If you are setting up an Allegro Reformer with with Leg Kit, install the legs first, see page 13, then set up the Reformer beginning on page 9.
- Page 4 Features of the Balanced Body® Allegro® System HEADREST HORIZONTAL FOOTBAR ADJUSTMENTS The headrest is used to optimally support the user’s head, neck The Allegro is equipped with an adjustable footbar that can be and shoulders while lying in a supine position. The Allegro has moved in order to accomodate users of different heights.
- Page 5 On the Allegro, spring tension is adjusted by attaching different combinations of springs to the pegs under the standing platform. These color codes are standard for Balanced Body Machines To safely adjust the springs make sure the carriage is in the home position.
- Page 6 Always return the Push-through Bar to a safe height if it has been moved. The Allegro Tower consists of a metal frame that attaches to the head of the Allegro Reformer. Eyebolts in the frame provide attachment points for the springs. Loops, handles or a wooden SAFETY NOTE: Roll-down Bar can be attached to the springs creating a wide variety of exercises.
- Page 7 If the hook shows a lot of wear, discontinue using the spring to the quality of the equipment. This guide was created to help immediately and call Balanced Body to replace spring or snap. you use and maintain your equipment for optimum safety. Please See Figure 2.
- Page 8 PTB holes. If you up and cause wheel failure. Use tweezers to remove hair from notice wear on the T-pins, please call Balanced Body to replace. the wheels. If the T-pin is squeaking, remove the T-pin by depressing the button on the head of the T-pin and place a drop of 3-in-1 oil Lubrication.
- Page 9 (they are reddish-brown in color). date and place of purchase, and the manufacturer. All of this information should appear on the invoice. Figure 7. If your chair is a Balanced Body Split-step Pedal Chair (Combo Chair), please consider upgrading to the Cactus 2.
- Page 10 MAINTENANCE SCHEDULE REPLACEMENT PARTS To order replacement parts, or if you have any questions, please All Equipment Wk. Mo. Qtr. call: Inspect springs for gaps & kinks ✓ ✓ From U.S. and Canada: 1-800-PILATES (1-800-745-2837) Inspect snaps for wear ✓ From United Kingdom and South Africa: 00 800 7220 0008 Inspect nuts &...
- Page 11 How to assemble the Allegro® Reformer PARTS LIST Part number Description IMPORTANT PRECAUTIONS: 950-002 Complete footbar PLEASE READ WARNING 950-020 Pivot bolts and washers 1 kit To reduce the risk of serious injury, read the following 950-228 Shoulder rest with brackets 1 pair important precautions before using the Allegro.
- Page 12 INSTALL THE SHOULDER RESTS 1. Note the two protruding studs on the bottom of the shoulder rests. Lower the shoulder rest studs into the keyholes and slide away from the carriage pad. See Figure A. Note: The shoulder rests can be installed in two positions. One position is wider, and more comfortable for broad shoulders.
- Page 13 Be sure to go through the chrome eyestraps on both sides of the cam cleats. Always push Call Balanced Body technical support at 1-800-745-2838 the rope firmly down into the cleats to ensure a good grip.
- Page 15 How to Install the Allegro Legs Kit ® PARTS INCLUDED: 1. If you have a Tower Of Power installed, remove the ropes, loosen the 4 tower knobs, and remove the tower. Item No. Part Number Description 2. Using the included shorter allen wrench, remove the 4 screws 618-030 Allegro Leg, A holding the head end cover plates and riser pins in place.
- Page 16 4. Remove the 4 rubber feet from the bottom of the Reformer 9. With the risers still in place to locate the leg nut plates, place frame by grasping them firmly with your hand and turning two of the legs onto the frame rail at the head end of the counter-clockwise.
- Page 17 NOTE: If you will be installing a Tower System next, leave the head end rail cover plates off. 14. Your legs are installed and you may now carefully lift and turn your Allegro Reformer back over onto the legs. Re-install your shoulder rests, risers, and ropes.
- Page 19 Prior to assembly, check the parts and components received against the following list. If you are missing any parts, contact the Bal- anced Body customer service department at 1-800-PILATES (1-800-745-2837) in the U.S. and Canada, or +1-916-388-2838 (interna- tional). PREPARE YOUR ALLEGRO REFORMER PARTS LIST Part Number Description If you have purchased an Allegro 14”...
- Page 20 2. Screw the spacer into the predrilled hole in the side of the NOTE: If you have an original version of the Allegro with the frame. Repeat on the other side. See Figure B. angled corner joints (Serial Number less than 36396), follow these instructions.
- Page 21 Bracket ledge Figure D Figure F 7. Install the adjustable pulleys by assembling the components 5. Re-install the plastic rail end caps on the same side you as shown in Figure G with the pulley on the inside of the removed them from.
- Page 22 MOVING AND STANDING AN ALLEGRO WITH TOWER REPOSITION THE T-PIN Note: Always exercise caution when moving, lifting, or storing an For shipping purposes, the Allegro or an Allegro with Tower. Use proper lifting technique to Tower is packaged with the avoid injury.
- Page 23 - it will not fit. drilled hole with the screwdriver until the shaft of the eyebolt IMPORTANT: Balanced Body is not responsible for any damage or is completely within the wall. injury caused by improper wall mount installation, or the use of incorrect or improper wall mounting equipment.
- Page 24 HUNDRED, ALL LEVELS Sets: 10 Springs: 1 – 3 Bar: None Loops: Regular Headrest: Up Focus » Percussive breathing - in for 5, out for 5 » Stable pelvis – imprinted or neutral » Hollow abdominals » Abdominal strength » Shoulders down »...
- Page 25 FEET IN STRAPS, LEVEL 1 Reps: 6 Set up: 2 springs Bar: Any Loops: Regular Focus » Breath - exhale out/inhale in or inhale out/exhale in Starting Positions - Leg Lowers 1 Leg Lowers 2 » Spine to mat or neutral spine »...
- Page 26 ARM WORK, LEVEL 1 - 2 4 - 10 reps Springs: 1-2 Box: long, short or none Loops: very short, short or regular Focus » Breath – inhale pull/exhale release Biceps » Biceps, triceps, pectoralis and deltoid strengthening » Scapular stabilization »...
- Page 27 FOOTWORK, ALL LEVELS Reps: 10 Springs: 2—4 springs Bar: Middle or High Head rest: Up Focus » Breathing – exhale out/inhale in, or inhale out/exhale in » Neutral spine Heels Toes » Pelvic stability » Hip, leg and ankle alignment »...
- Page 28 Allegro® Tower Exercises DEFINITION OF EXERCISE SET-UP TERMS » Level: The level of expertise needed to undertake exercise. » Precautions: Physical conditions that may limit or exclude a participant. Exercises may need to be modified for people with » Reps: How many times the exercise is performed. these conditions.
- Page 29 FEET IN STRAPS, LEVEL 1 Springs: Long springs from middle or high position Reps: 6-10 Loops around arches Focus » Breath - exhale out/inhale in or inhale out/exhale in » Neutral spine Leg Lowers » Hollow abdominals » Pelvic stability »...
- Page 30 FEET IN STRAPS SIDELYING – ADDUCTOR PULL, LEVEL 1-3 Springs: Long springs from middle position Loops: Around arches Reps: 10 Focus » Breath - exhale down/inhale up » Correct side-lying position (waist up, hips and shoulders in line) » Hollow abdominals »...
- Page 31 FOOT AND LEGWORK, LEVEL 1 Springs: 2 long purple springs from the bottom on Push-through Bar Reps: 10 Safety Strap: On Focus » Breath – inhale push, exhale return Plies » Spine to mat or neutral spine » Leg, ankle and foot alignment »...
- Page 32 Contact Us 1-800-PILATES | +1-916-388-2838 pilates.com | info@pilates.com 400-328 | version 08.03.15...
Need help?
Do you have a question about the Allegro Reformer and is the answer not in the manual?
Questions and answers