Table of Contents
Advertisement
Quick Links
Advertisement
Table of Contents

Related Manuals for Charnwood LA 30iB


Summary of Contents for Charnwood LA 30iB
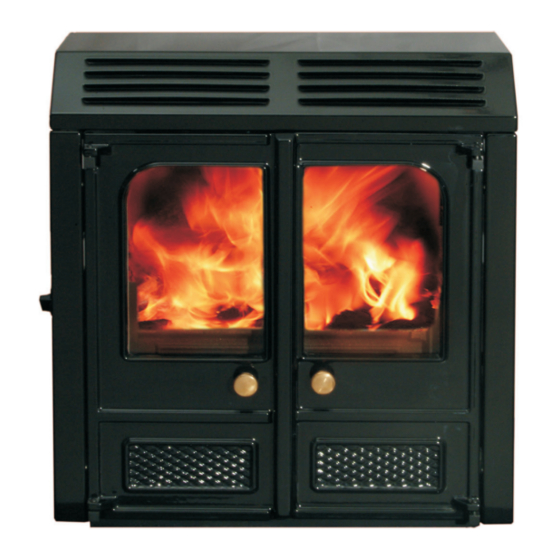
- Page 1 ® charnwood Operating & Installation Instructions...
-
Page 3: Table Of Contents
Health & Safety Precautions Performance Specification Co Alarms Chimney Hearth Preparation of Fireplace Central Heating System 10-11 System Controls Fitting the Fire Flue Connection and Infilling Thermostat Assembly Pre Lighting Check Commissioning Freestanding Kit Dimensions Parts Lists Certification Ref.LA 30iB 03/15 Issue L... -
Page 4: General Points
OPERATING INSTRUCTIONS ® GENERAL POINTS fuels are not to be used on this appliance. Before lighting the fire, check with the installer that the work DOOR OPERATION and checks described in the installation instructions have been Use the spanner type tool to open and close the doors. Turn... -
Page 5: Controlling The Fire
Fig. 1. This is linked to a thermostat which controls the boiler To make ash removal easier there is a special Charnwood ash temperature. The number at the top of the knob is the carrier available. -
Page 6: Refuelling
OPERATING INSTRUCTIONS ® suitable for the particular fuel used and the draw on the Fig. 3. Grate Operation chimney. To revive the fire, open the thermostat control to maximum. When the fire is burning well load on more fuel as necessary and move the thermostat control to the desired setting. -
Page 7: Maintenance
Cleaning the Glass by the Manufacturer or their approved agents. Use only The glass in the doors is a special ceramic glass which is able to genuine Charnwood replacement parts. withstand high temperatures. Before cleaning the glass open CHIMNEY SWEEPING the doors and allow them to cool. -
Page 8: Trouble Shooting
OPERATING INSTRUCTIONS ® fuel, and scrape the boiler faces clean. Lift out the deepening d) the fire is not fitted onto a heating system which is too bar and front firebar. Fit the brick into the fire with the thick large. -
Page 9: Co Alarm
‘Warning note’ above. IF YOU NEED FURTHER HELP If you need further help with your Charnwood then your Installer will be able to provide the answers to most questions. Your Local Charnwood Premier Dealer has a great deal of experience and will also be able to provide helpful advice. -
Page 10: Installation Instructions
INSTALLATION INSTRUCTIONS ® HEALTH AND SAFET Y PRECAUTIONS The heat output to the room is directly proportional to the Please take care when installing the appliance that the heat output to water as shown in Fig. 4. This means that if the... -
Page 11: Co Alarms
INSTALLATION INSTRUCTIONS ® CO ALARMS positioning of the appliance and the size of the hearth are governed by building regulations for Class 1 appliances. These Building regulations require that whenever a new or building regulations state that the hearth must extend in front... -
Page 12: System Controls
INSTALLATION INSTRUCTIONS ® All pipework in the primary circuit must be 28 mm diameter Fig. 7. Limiting Dimensions of Surround and Opening and the gravity flow pipe must rise continuously from the boiler to the open vent. Two typical systems are shown in... -
Page 13: Fitting The Fire
INSTALLATION INSTRUCTIONS ® Fig. 9 Typical Central Heating & Hot Water System Using 4 Connect the heating system to the boiler ensuring that the Tappings primary flow pipe rises from the fire. Fill the system with water and check for leaks. -
Page 14: Thermostat
INSTALLATION INSTRUCTIONS ® ASSEMBLY Fig. 11 Typical Installation Flaunching Fit the side panels, hood and top grid onto the appliance. Instructions for this are enclosed with the panel pack. Take Flue Pipe Up To Narrowest Part Of Chimney Replace any internal parts previously removed. -
Page 15: Dimensions
COUNTRY 4 DIMENSIONS (MM) LA 30iB DIMENSIONS (MM) ® ® Boiler tappings are 1" B.S.P. female. Two each side. FLUE 150°... -
Page 16: Parts Lists
Model, Part No. and Description. In case of difficulty contact the manufacturer at the address shown. charnwood BISHOPS WAY, NEWPORT, ISLE OF WIGHT PO30 5WS, UNITED KINGDOM T:+4 4 (0)1983 537799 • F:+4 4 (0)1983 537788 • SPARES@CHARNWOOD.COM • WWW.CHARNWOOD.COM ®... -
Page 17: Certification
A.J WELLS & SONS LTD A.J WELLS & SONS LTD Bishops Way, Newport, Isle of Wight PO30 5WS, United Kingdom A Division of A.J.Wells & Sons Limited Registered in England No. 03809371 EN13229:2001 ROOMHEATERS FIRED BY SOLID FUEL EC certificate of conformity no: AV44 - CPD - 2015 Minimum distance to... - Page 20 BISHOPS WAY, NEWPORT, ISLE OF WIGHT PO30 5WS, UNITED KINGDOM T : + 4 4 ( 0 ) 1 9 8 3 5 3 7 7 7 7 • F : + 4 4 ( 0 ) 1 9 8 3 5 3 7 7 8 8 • C O N T A C T U S A T W W W . C H A R N W O O D . C O M ®...
Need help?
Do you have a question about the LA 30iB and is the answer not in the manual?
Questions and answers