
Related Manuals for Logik LCHOBTC14


Summary of Contents for Logik LCHOBTC14
-
Page 1: Ceramic Hob
Instruction Manual Built-in Electric Ceramic Hob LCHOBTC14 Image for indication only. -
Page 2: Table Of Contents
Contents Safety Warnings ..........................3 Unpacking ............................. 5 Product Overview ......................... 6 Top View ..................................6 Control Panel ................................6 Before Using Your New Ceramic Hob ..................7 Choosing the Right Cookware ..................... 7 Using the touch controls ......................8 - Covering the controls...........................8 Using your ceramic hob ....................... -
Page 3: Safety Warnings
Safety Warnings IMPORTANT SAFETY INSTRUCTIONS READ CAREFULLY AND KEEP FOR FUTURE REFERENCE • It is recommended that this appliance is installed by a qualified electrical engineer. The manufacturer is not responsible for any damage caused by incorrect installation. • Check whether there is any damage to the appliance after you have unpacked it. - Page 4 • Children should be supervised to ensure that they do not play with the appliance. • The appliance and its accessible parts become hot during use. Young children should be kept away. • During use the appliance becomes hot. Care should be taken to avoid touching the cooking zones.
-
Page 5: Unpacking
Unpacking Remove all packaging from the unit. Retain the packaging. If you dispose of it please do so according to local regulations. The following items are included: The Main Unit Screws x4 Fixing Bracket x4 If items are missing, or damaged please contact Partmaster (UK only). Tel: 0844 800 3456 for assistance. -
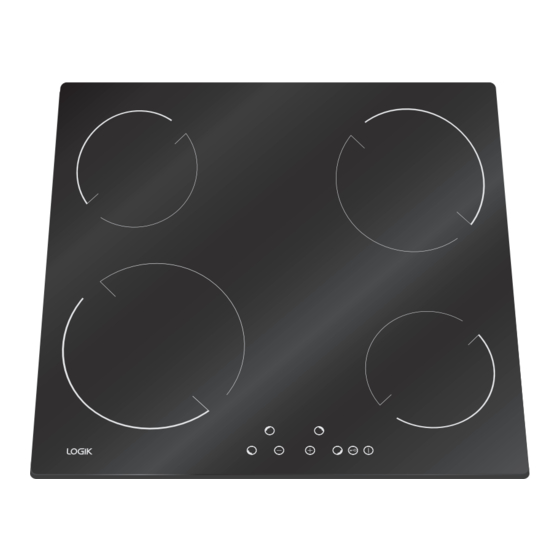
Page 6: Product Overview
Product Overview Top View 145mm diameter zone 145mm diameter zone 180mm diameter zone Control panel 210mm diameter zone Control Panel 145mm diameter zone control 145mm diameter zone control and power level indicator and power level indicator 180mm diameter zone control Child lock indicator and power level indicator Power level controls... -
Page 7: Before Using Your New Ceramic Hob
Before Using Your New Ceramic Hob • Remove all protective film that may be still on your ceramic hob. • Clean the glass ceramic surface with a damp cloth. Do not use aggressive detergents such as abrasive cleaners that can scratch the surface, abrasive dishwashing sponges, or stain removers. Choosing the Right Cookware Do not use cookware with jagged edges or a curved base. -
Page 8: Using The Touch Controls
Using the touch controls • The controls respond to touch, so you don’t need to apply any pressure. • Use the ball of your finger. • You will hear an audible tone each time a touch is registered. • Make sure the controls are always clean and dry, and that there is no object (e.g. -
Page 9: Selecting A Cooking Zone
Selecting a cooking zone Your ceramic hob has 4 cooking zones: two small 145mm diameter zones, one medium 180mm diameter zone and one large 210mm diameter zone. Touch the desired cooking zone control to select the cooking zone. The zone active indicator will flash for 8 seconds to show that the zone is ready for you to select a power level. -
Page 10: Automatic Shut Off
Automatic shut off For improved safety your hob is designed to shut off after a pre set maximum time for each power level. Even though the hob will automatically switch off, this will not prevent food from over cooking and burning. This is to prevent the hob accidentally being left on. -
Page 11: Residual Heat Indicator
Residual Heat Indicator The heating zones will still be hot once switched off. A warning symbol will appear on the display to indicate that it is still hot: ‘H‘ on the display indicates that the temperature of the heating zone is above 60°C ‘h’... -
Page 12: Cleaning And Maintenance
Cleaning and Maintenance Before attempting any cleaning make sure the hob is switched off and has cooled down. What? How? Important! Everyday soiling 1. Switch the power to the ceramic • When the power to the ceramic hob on glass (fingerprints, hob off. -
Page 13: Installing The Hob
Installing the hob Measurements shown in the diagram are minimum distances. If the hob is going to be installed on the top of a built in oven without forced air cooling the proper air vents must be installed to guarantee adequate ventilation. Oven without forced air cooling ventilation... -
Page 14: Fitting The Hob Into The Work Surface
Fitting the hob into the work surface The hob can be installed into a work surface of a depth between 28-38mm. Cut a hole in the work surface 560mm(w) x 490mm(D). Ensure that the work surface is clear of debris and dust before placing the hob into the hole. -
Page 15: Attaching The Fixing Brackets
Attaching the fixing brackets Slide the hob into the hole in the work surface. Then from underneath loosely attach the 4 fixing brackets to the underside of the hob using the 4 screws provided. Do not tighten at this stage. Option 1 : Attach the clips at the front Option 2 : Attach the clips at the side of and back of the hob. -
Page 16: Wiring The Hob
Wiring the hob • If the mains cable is damaged and needs to be replaced, this should be done by a qualified person using the proper tools, so as to avoid any accidents. • The ceramic hob must be connected directly to the mains supply, an omnipolar circuit breaker must be installed with a minimum gap of 3mm between the contacts. -
Page 17: Specifications
Specifications Model LCHOBTC14 Rated Voltage 230 – 240 V Rated Frequency 50 Hz Power Consumption 1200 W Hotplate: 2 x 145mm diameter Hotplate: 1 x 180mm diameter 1800 W Hotplate: 1 x 210mm diameter 2300 W Net Weight 7.8 kg... - Page 18 For general information about this appliance and handy hints and tips, please visit www.knowhow.com/knowledgebank or call 0344 5611234. Visit Partmaster.co.uk today for the easiest way to buy electrical spares and accessories. With over 1 million spares and accessories available we can deliver direct to your door the very next day. Visit www.partmaster.co.uk or call 0844 800 3456 (UK customers only).
Need help?
Do you have a question about the LCHOBTC14 and is the answer not in the manual?
Questions and answers
Dimensions
The Logik LCHOBTC14 has the following dimensions:
- External Width: 576 mm
- External Depth: 518 mm
- Internal Width: 552 mm
- Internal Depth: 482 mm
This answer is automatically generated