
Related Manuals for Rheavendors Group XX OC


Summary of Contents for Rheavendors Group XX OC
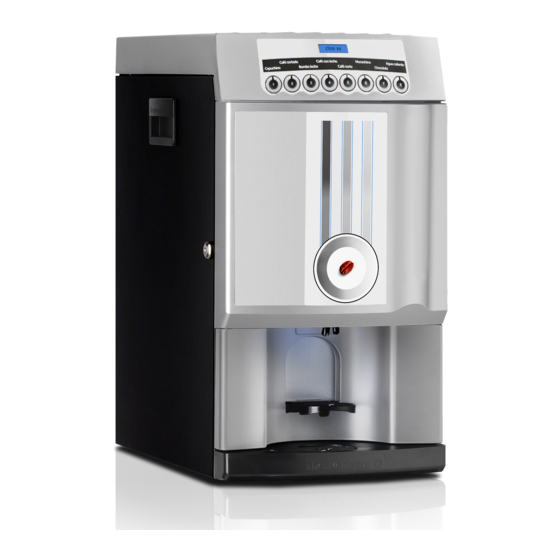
- Page 1 XX) Installation and maintenance manual This manual must be kept next to the machine MAN1910117 Vers. 7 - 15/11/2012 www.rheavendors.com...
- Page 2 TOP DOOR REAR DOOR COVER DISPLAY KEYBOARD WATER TANK (VERSION A) CANISTERS SLIDES COIN-MECH PROTECTION MIXING BOWLS FRONTAL DOOR PIPES SUPPORT WASTE LIQUID BUCKET MAN1910117 V.7 – 15/11/2012...
-
Page 3: Table Of Contents
INDEX TECHNICAL DATA AND DECLARATION OF CONFORMITY ................4 INTRODUCTION ................................5 DESCRIPTION OF THE EQUIPMENT .......................... 5 ADVICE FOR THE INSTALLER ............................. 6 BASIC OPERATING PRINCIPLES ..........................7 TRANSPORTATION ................................7 UNPACKING ..................................8 POSITIONING ..................................8 CONNECTION TO THE MAINS WATER SUPPLY AND TO THE ELECTRICAL SUPPLY ........ 8 HOW TO ACTIVATE OR DEACTIVATE THE MACHINE .................. -
Page 4: Technical Data And Declaration Of Conformity
Technical Data and Declaration of Conformity DIMENSIONS WEIGHT Height 555 mm From 20 Kg to 24 Kg according to version Width 300 mm Depth 455 mm CONNECTION TO THE MAINS WATER SUPPLY (version without autonomous water tank) Water inlet pressure between 0,1 MPa and 0,8 MPa (1 - 8 bar); Mains water connection 3/8”... -
Page 5: Introduction
Description of the Equipment The semi-automatic vending machine xx oc (xx office coffee), in its different versions, is an appliance meant for general use (non professional). The semi-automatic vending machine is supposed to supply beverages automatically, mixing ingredients with water. -
Page 6: Advice For The Installer
The XX OC vending machine, that you have bought, has been manufactured according to the norms and regulations related to the non-toxicity of those parts coming in contact with foodstuffs and electric insulation. -
Page 7: Basic Operating Principles
Basic Operating Principles The powered machine is normally in the stand-by mode. When a button is pressed, a vend cycle starts. If a sale price is preset, before pressing the selection the required amount of money must be inserted by means of coins. According to the selection required and to the version of the machine, the vend cycle is composed by some of the following procedures. -
Page 8: Unpacking
(e.g. synthetic laminate). This is to protect the floor and also prevent it to get dirty for the accidental spilling of beverages. The xx oc support base, supplied as optional, can contain cups, sugar bags and stirrers. -
Page 9: How To Activate Or Deactivate The Machine
Version with water independent tank (vers. A) LEVEL Fill the internal independent water tank using drinking water. If it is necessary demand a laboratory certification to a specific analysis laboratory. To fill in water, lift the water refilling cover or extract the tank from the machine and pour drinking water inside the tank. -
Page 10: Start-Up Operations
Only during the First Installation, at this point, the machine makes some specific operations. They are described in the paragraph “Start up operations”. At the end of all tests the display shows the message: rheavendors xx oc place your cup Start-up operations 11.1 First installation phase... - Page 11 XX OC LX V1A 14 04 06 (only in case RFID reader is connected) rheacard reader connected Please wait The machine starts to make automatically the First Installations operations. The display shows: water refilling The machine starts automatically loading the water tank and the boiler. The boiler is filled up in about 5 min. At the end of this phase the machine starts to test the Damian Snack as described at the paragraph “Diagnostics cycle...
- Page 12 11.2.1 Washing and disinfecting of components in contact with foodstuff. With the vending machine switched on, make sure that the display shows: rheavendors xx oc place your cup Open the door. Insert the plastic key into the safety switch. The display shows:...
- Page 13 immerse all parts in the solution previously prepared. Remove the liquid waste bucket, remove the product pipes, remove the pipes support, remove the mixing bowls, the mixing fan. MAN1910117 V.7 – 15/11/2012...
- Page 14 and the aspiration drawers. Immerse all parts in the solution. Using a cloth soaked in the solution, proceed to clean also the attachment bases of the mixers, which remain fixed to the machine. The time of permanence in the solution, in order to obtain a full disinfecting, is stated on the packaging of the chemical. At the end of the disinfecting, recover all the disassembled parts, dry them very carefully (using compressed air, a hair dryer or perfectly clean and sterile cloths) and reassemble them in the machine in opposite sequence with respect to disassembly.
-
Page 15: Programming Of The Machine
Programming of the machine 12.1 Memory The machine is controlled by a program stored in the microprocessor of the FLASH memory, installed on the CPU board. The program stored in the memory (master file) can be updated with Rhea black flash card programmed with the Rheaction Program. - Page 16 Programming EAROM data Programming • Switch off the machine. • Extract the flash card. 12.3 How to enter and exit from the programming mode To modify the operation parameters of the machine it is necessary to enter in the programming mode. To enter press the internal key P on the display board inside the machine.
- Page 17 PROGRAMMING - - - - - BUTTON 6 - - - - - - - PROGRAMMING - - - - - PRICES - - - - - - - - - - PROGRAMMING -SPECIAL PRICES - - - PROGRAMMING - - - - - COINS - - - - - - - - - - - PROGRAMMING - - - - -TEMPERATURE - - - -...
- Page 18 PROGRAMMING- - - - - -BUTTON 1- - - - - - - - Enter 2 to visualise one of the following functions: FUNCTIONING INHIBITED Scroll the functions entering 4 and 5. To inhibit the button, which is going to be programmed, confirm INHIBITED entering 1.
- Page 19 Entering respectively 4 and 5 increase or decrease the number of breaks during the dispensing of the product. The maximum number of programmable breaks is 2. I.e: If you want that products is dispensed into two phases program this parameter at 1. Entering again 2 the video shows: WATER 1 time 0=inhib.
- Page 20 otherwise if you select one of the available selection names the display will show: selection name preparing Press button 1 to programme the following button. Enter 1 to programme next button. All the settings described in this and in following paragraphs can be set in an easier way using rheaction software.
- Page 21 2=DATA 4=CLEAN 5=MAINT. TEST At this point the machine is able to dispense any selection, without charge. Selection sales in the selection test mode are counted in a separate counter (see "Reading of sales data"). To exit from the selection test mode, press the key P on the display board inside the machine.
- Page 22 Entering 4 and 5 set the value. The maximum programmable temperature is 95° C. At the end of programming, press button 1and key P to confirm the set data. Pressing button 2 the display shows: DEF. FIRST COFFEE Minutes Use this parameter to obtain drinks made with coffee beans at a right temperature also after long periods of inactivity of the coffee group.
- Page 23 To protect all the data set into the PROGRAMMING mode and the access to the free-vend modality, it is possible to introduce a 3 digits secret code; the machine requests this code every time somebody tries to enter into PROGRAMMING mode or FREE-VEND mode pressing the key on the display board inside the machine and then 1 or 3.
- Page 24 12.5.8 Diagnostics programmes In the programming mode, a certain number of diagnostics programmes can be carried out in order to test the correct operation of some components of the machine. To modify the parameters, in the programming mode, enter 1 until the sub-menu DIAGNOSTICS - - - - - - - - - - - - - - - - - - - - - - is visualised.
- Page 25 PARTIAL N TESTS XXXXXXXX This value indicates the partial number of beverages in the selection test mode (free-vend: see "Pre-setting of normal sale prices") starting from the last reset operation. Total loaded card XXXXXXXX This value indicates the total amount charged on RFID card. This parameter cannot be reset.
- Page 26 PROGRAMMING - - - - CLOCK - - - - - - - - - - - is videoed. Enter 2 and 3 and choose the function, which requires to be altered. Enter 4 and 5 and modify the value of the videoed function.
- Page 27 12.5.11 Storing of OUT OF ORDERS The machine stores the last 20 OUT OF ORDERS. To read them on the video, enter 1 until the video shows: STORING OUT OF SEVICES Entering 2, the video shows hour, day, month and year of the last 20 OUT OF ORDERS. n.
-
Page 28: Water Filter
set product To set again the data in sale mode keep pressed for at least 8 seconds the key P on the display board inside the machine, until the display shows the message: set product 12.5.13 Maintenance A new MAINTENANCE menu has been introduced to have the possibility to improve maintenance operations. Press the key P on the display board inside the machine. - Page 29 and reset the counter keeping pressed key P. Press 1 and exit from MAINTENANCE. Coffee brewer cleaning Pressing button 2 the display will show the second maintenance option: cnt. brewer cof [200] Use button 4 and 5 to increase or decrease the number of the selections that the machine has to dispense before the message that the coffee brewer should be cleaned appears on the display.
-
Page 30: Installation Of The Coin-Mechanism Support Unit
12.5.14 Setting of RFID CARD The vending machine can work with RFID pre-paid cards. To proceed at the setting of this parameter enter in PROGRAMMING mode, press 1 until the display shows: PROGRAMMING RFID CARD Entering 2, the video shows max. - Page 31 5. Connect the dialogue cable to CPU board on the rear side of the machine; 6. Switch on the machine. The machine is now ready to use the payment system . MAN1910117 V.7 – 15/11/2012...
-
Page 32: Cleaning And Loading Operations
Cleaning and loading operations WARNING: The personnel in charge of the loading of the ingredients must own a valid certificate of good health following local and NATIONAL NORMS. Furthermore, compliance with any other domestic or local regulations must be checked. WARNING: Given the sensitivity of some ingredients used in the machine to excessive temperature and humidity, some malfunctions may occur if the machine is operated at temperature higher than 30°... - Page 33 14.3 Refilling of consumption products When required, proceed to the following loading operations. ATTENTION: the loading operation of ingredients must be carried out only with machine off. 14.3.1 Refilling of ingredients Read on the canister the indication of the ingredient to be loaded into the machine. Fill up the canister of the ingredients, after having removed the cover.
-
Page 34: Machine Out Of Service
Machine out of service 15.1 Monthly maintenance 15.1.1 Disinfecting of components in contact with ingredients WARNING: during the ordinary and prevention maintenance operations the technical personal can be in contact with moving parts. Maintenance operations include cleaning, refilling of products, electronic programming and so on. During these operations the personal in contact with the machine should have all necessary protections. - Page 35 2=DATA 4=CLEAN 5=MAINT. Make the cleanings of the mixing bowls pressing 4; the display shows: CLEANINGS 1-2- - - - - - - - - Press 1 and 2. With all these three buttons use about 3 litres of water altogether. This will remove any possible trace of dirt from the boiler.
- Page 36 Remove the liquid waste bucket, remove the product pipes, remove the pipes support, remove the mixing bowls, the mixing fan. and the aspiration drawers. Immerse all parts in the solution. Using a cloth soaked in the solution, proceed to clean also the attachment bases of the mixers, which remain fixed to the machine.
-
Page 37: Machine Out Of Service
Machine out of service 16.1 Temporary out of service Should a long period be foreseen in which the machine will not operate, the following operations must be carried out: Enter in the programming mode (see section "Enter and exit from the programming mode"): - entering 1 choose the programming sub-menu: PROGRAMMING TEMPERATURE... -
Page 38: Troubleshooting
Troubleshooting 18.1 Alarms visualised by the machine The problems described in this section are shown by an error message on the display of the machine. WARNING: to reset the machine after an alarm please switch off it using the main interrupter. SYMPTOM PROBABLE CAUSE REMEDY... - Page 39 display shows Loss of programming standard Enter into the programming mode, reset the pre- "OFF10": the machine data settings of all functions until they show plausible is out of order values and then exit from the programming mode. display shows Too many drinks have been Check and replace if it is necessary the water "OFF14": the machine...
- Page 40 CPU board if there is tension and the TRIAC control led is switched off. Check that the ohmic value of the heating element is settled at 44 Ohm for heating elements of 1200W 230V and 33 Ohm for heating elements of 1600W. Otherwise replace the Instant boiler heating element.
Need help?
Do you have a question about the XX OC and is the answer not in the manual?
Questions and answers