Table of Contents
Advertisement
Quick Links
INSTALLER: Leave this manual with party responsible for use and operation.
OwNER: Retain this manual for future reference.
NOTICE: DO NOT discard this manual!
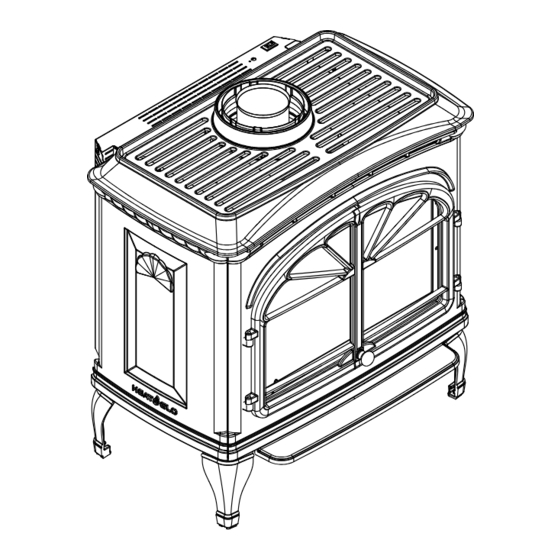
Models:
TIARII-BK-IPI
TIARII-BR-IPI
TIARII-CES-IPI
This appliance may be installed as an OEM installation
in manufactured home (USA only) or mobile home and
must be installed in accordance with the manufacturer's
instructions and the manufactured home construction
and safety standard, Title 24 CFR, Part 3280 or Standard
for Installation in Mobile Homes, CAN/CSA Z240MH, in
Canada.
This appliance is only for use with the type(s) of gas
indicated on the rating plate.
1
Heat & Glo • TIARII-BK-IPI, TIARII-BR-IPI, TIARII-CES-IPI Installation Manual • 2340-980_R9 • 06/15
Installation Manual
Installation and Appliance Setup
wARNING: If the information in these
instructions is not followed exactly, a fire or
explosion may result causing property damage,
personal injury, or death.
- DO NOT store or use gasoline or other flammable
vapors and liquids in the vicinity of this or any other
appliance.
- what to do if you smell gas
• DO NOT try to light any appliance.
• DO NOT touch any electrical switch; do not use any
phone in your building.
• Immediately call your gas supplier from a neighbor's
phone. Follow the gas supplier's instructions.
• If you cannot reach your gas supplier, call the fire
department.
- Installation and service must be performed by a qualified
installer, service agency, or the gas supplier.
DANGER
!
HOT GLASS wILL cAuSE
BuRNS.
DO NOT TOucH GLASS
uNTIL cOOLED.
NEVER ALLOw cHILDREN
TO TOucH GLASS.
A barrier designed to reduce the risk of burns
from the hot viewing glass is provided with
this appliance and shall be installed for the
protection of the children and other at-risk
individuals.
In the Commonwealth of Massachusetts installation must be
performed by a licensed plumber or gas fitter.
See Table of Contents for location of additional Commonwealth
of Massachusetts requirements.
Advertisement
Table of Contents

Subscribe to Our Youtube Channel
Related Manuals for Heat & Glo TIARII-BR-IPI


Summary of Contents for Heat & Glo TIARII-BR-IPI
- Page 1 In the Commonwealth of Massachusetts installation must be performed by a licensed plumber or gas fitter. See Table of Contents for location of additional Commonwealth of Massachusetts requirements. Heat & Glo • TIARII-BK-IPI, TIARII-BR-IPI, TIARII-CES-IPI Installation Manual • 2340-980_R9 • 06/15...
-
Page 2: Table Of Contents
A. Top to Rear Vent Conversion ..... . 32 B. Securing and Leveling the Appliance ....35 Heat & Glo • TIARII-BK-IPI, TIARII-BR-IPI, TIARII-CES-IPI Installation Manual • 2340-980_R9 • 06/15... -
Page 3: Installation Standard Work Checklist
_____________________________________________________________________________________ _________________________________________________________________________________________________ _________________________________________________________________________________________________ Comments Communicated to party responsible ____________________ by ______________________on ___________ (Builder / Gen. Contractor/) (Installer) (Date) = Contains updated information. 2340-982 6/14 Heat & Glo • TIARII-BK-IPI, TIARII-BR-IPI, TIARII-CES-IPI Installation Manual • 2340-980_R9 • 06/15... -
Page 4: Product Specific And Important Safety Information
• A 110-120 VAC circuit for this product must be protected with ground-fault circuit-interrupter protection, in compliance with the applicable electrical codes, when it is installed in locations such as in bathrooms or near sinks. Heat & Glo • TIARII-BK-IPI, TIARII-BR-IPI, TIARII-CES-IPI Installation Manual • 2340-980_R9 • 06/15... -
Page 5: Requirements For The Commonwealth Of Massachusetts
(1/2) in. in size, “GAS VENT DIREcTLY connection section additional BELOw. KEEP cLEAR OF ALL OBSTRucTIONS”. commonwealth of Massachusetts requirements. Heat & Glo • TIARII-BK-IPI, TIARII-BR-IPI, TIARII-CES-IPI Installation Manual • 2340-980_R9 • 06/15... -
Page 6: Getting Started
Non-corrosive leak check solution 1/2 - 3/4 in. length, #6 or #8 Self-drilling screws Caulking material (300ºF minimum continuous exposure rating) One 1/4 in. female connection (for optional fan). Heat & Glo • TIARII-BK-IPI, TIARII-BR-IPI, TIARII-CES-IPI Installation Manual • 2340-980_R9 • 06/15... -
Page 7: Framing And Clearances
27-1/2 21-5/8 15-3/4 NOTE: Diagrams show gas appliance equipped without optional Blower, Part #GFK-160A. Installation of optional blower does not affect overall dimensions. Figure 3.1 Appliance Dimensions Heat & Glo • TIARII-BK-IPI, TIARII-BR-IPI, TIARII-CES-IPI Installation Manual • 2340-980_R9 • 06/15... -
Page 8: Clearances To Combustibles
*B and *C Dimensions. Model Top of Side of (MAX.) pipe pipe 5-1/4 36-3/4 Inches TIARAI-IPI 1676 1016 Millimeters Figure 3.2 Appliance Locations Heat & Glo • TIARII-BK-IPI, TIARII-BR-IPI, TIARII-CES-IPI Installation Manual • 2340-980_R9 • 06/15... -
Page 9: Termination Location And Vent Information
Over 14/12 to 16/12 ..........6.0 Over 16/12 to 18/12 ..........7.0 Over 18/12 to 20/12 ..........7.5 Over 20/12 to 21/12 ..........8.0 Figure 4.1 Minimum Height From Roof To Lowest Discharge Opening Heat & Glo • TIARII-BK-IPI, TIARII-BR-IPI, TIARII-CES-IPI Installation Manual • 2340-980_R9 • 06/15... -
Page 10: Chimney Diagram
• Vinyl protection kits are suggested for use with vinyl siding. Figure 4.3 Minimum clearances for Termination Heat & Glo • TIARII-BK-IPI, TIARII-BR-IPI, TIARII-CES-IPI Installation Manual • 2340-980_R9 • 06/15... -
Page 11: Approved Pipe
• Roof flashing and a storm collar are required when venting passes through the roof. • Follow instructions provided with the venting for installation of these items. Heat & Glo • TIARII-BK-IPI, TIARII-BR-IPI, TIARII-CES-IPI Installation Manual • 2340-980_R9 • 06/15... -
Page 12: Use Of Elbows
(flange of termination cap) (see Figure 4.3). • Vertical terminations are measured to bottom of termination cap. • Horizontal pipe installed level with 1/4 inch rise per foot. Heat & Glo • TIARII-BK-IPI, TIARII-BR-IPI, TIARII-CES-IPI Installation Manual • 2340-980_R9 • 06/15... -
Page 13: Venting Guidelines For Horizontal Runs
If the vent configuration has a total vertical of 20-40 feet, an exhaust restrictor may be needed. The exhaust restrictor can be located in the appliance manual bag. Heat & Glo • TIARII-BK-IPI, TIARII-BR-IPI, TIARII-CES-IPI Installation Manual • 2340-980_R9 • 06/15... - Page 14 8 ft., 10 in. 2.7 m 32 ft. 9.8 m 6 ft., 4 in. 2.0 m 36 ft. 11.0 m 3 ft., 10 in. 1.2 m Figure 4.8 Heat & Glo • TIARII-BK-IPI, TIARII-BR-IPI, TIARII-CES-IPI Installation Manual • 2340-980_R9 • 06/15...
- Page 15 24 ft. 7.3 m 8 ft., 4 in. 28 ft. 8.5 m 5 ft., 10 in. 32 ft. 9.8 m 3 ft., 4 in. INSTALLED HORIZONTALLY Figure 4.9 Heat & Glo • TIARII-BK-IPI, TIARII-BR-IPI, TIARII-CES-IPI Installation Manual • 2340-980_R9 • 06/15...
- Page 16 20 ft. 6.1 m 7 ft., 10 in. 24 ft. 7.3 m 5 ft., 4 in. 28 ft. 8.5 m 2 ft., 10 in. 864 mm Figure 4.10 Heat & Glo • TIARII-BK-IPI, TIARII-BR-IPI, TIARII-CES-IPI Installation Manual • 2340-980_R9 • 06/15...
- Page 17 No Elbow = 40 ft. Max. (12.2 m) Note: As vertical pipe increases, a flue restrictor may be required. = 6 ft. Min. (1.8 m) Figure 4.11 Heat & Glo • TIARII-BK-IPI, TIARII-BR-IPI, TIARII-CES-IPI Installation Manual • 2340-980_R9 • 06/15...
- Page 18 32 ft., 6 in. 9.9 m 5 ft., 10 in. 1.8 m 32 ft. 9.8 m 36 ft., 3 in. 11.0 m 3 ft., 4 in. 1.0 m Figure 4.12 Heat & Glo • TIARII-BK-IPI, TIARII-BR-IPI, TIARII-CES-IPI Installation Manual • 2340-980_R9 • 06/15...
- Page 19 33 ft., 3 in. 10.1 m 5 ft., 4 in. 1.6 m 28 ft. 8.5 m 37 ft., 3 in. 11.4 m 2 ft., 10 in. 864 mm Figure 4.13 Heat & Glo • TIARII-BK-IPI, TIARII-BR-IPI, TIARII-CES-IPI Installation Manual • 2340-980_R9 • 06/15...
- Page 20 5 ft., 10 in. 1.8 m 14 in. 356 mm 32 ft. 9.8 m 6 in. 152 mm 3 ft., 4 in. 1.0 m 14 in. 356 mm Figure 4.14 Heat & Glo • TIARII-BK-IPI, TIARII-BR-IPI, TIARII-CES-IPI Installation Manual • 2340-980_R9 • 06/15...
- Page 21 5 ft., 4 in. 1.6 m 28 ft. 8.5 m 6 in. 152 mm 14 in. 356 mm 2 ft., 10 in. 864 mm INSTALLED HORIZONTALLY Figure 4.15 Heat & Glo • TIARII-BK-IPI, TIARII-BR-IPI, TIARII-CES-IPI Installation Manual • 2340-980_R9 • 06/15...
- Page 22 VENTING STRAIGHT OuT THE REAR wITHOuT VERTIcAL RISE IS PROHIBITED Minimum Maximum Minimum Maximum 6 in. 152 mm 14 in. 356 mm 6 ft. 1.8 m 40 ft. 12.2 m Figure 4.16 Heat & Glo • TIARII-BK-IPI, TIARII-BR-IPI, TIARII-CES-IPI Installation Manual • 2340-980_R9 • 06/15...
- Page 23 356 mm 2 ft., 10 in. 864 mm 37 ft., 3 in. 11.4 m CAUTION VENTING STRAIGHT OuT THE REAR wITHOuT VERTIcAL RISE IS PROHIBITED Figure 4.17 Heat & Glo • TIARII-BK-IPI, TIARII-BR-IPI, TIARII-CES-IPI Installation Manual • 2340-980_R9 • 06/15...
-
Page 24: Class A Metal Chimney
7. The connection between the appliance and the retro connector may be completed with sections of direct vent pipe. Heat & Glo • TIARII-BK-IPI, TIARII-BR-IPI, TIARII-CES-IPI Installation Manual • 2340-980_R9 • 06/15... -
Page 25: Existing Masonry Chimney
4 ft. (1m) of 3 in. (76mm) Flex Liner Air Intake Section Co-Axial to Co-Linear Connector (Included in Chimney Liner Termination Kit) (Part 46DVA - GCL) Figure 4.22 Heat & Glo • TIARII-BK-IPI, TIARII-BR-IPI, TIARII-CES-IPI Installation Manual • 2340-980_R9 • 06/15... - Page 26 Connect the flex to the coupler by using four sheet metal screws for each side. See Figure 4.25. Heat & Glo • TIARII-BK-IPI, TIARII-BR-IPI, TIARII-CES-IPI Installation Manual • 2340-980_R9 • 06/15...
- Page 27 See Figure 4.27. Redrill larger holes on connector as needed. Be careful to ensure that the connector is centered in the opening and the mounting holes line up with the masonry wall. Heat & Glo • TIARII-BK-IPI, TIARII-BR-IPI, TIARII-CES-IPI Installation Manual • 2340-980_R9 • 06/15...
- Page 28 • May impair safe operation of this appliance or other appliances connected to the flue. • Vent this appliance directly outside. • Use separate vent system for this appliance. Heat & Glo • TIARII-BK-IPI, TIARII-BR-IPI, TIARII-CES-IPI Installation Manual • 2340-980_R9 • 06/15...
-
Page 29: Vent Clearances And Framing
Top: 2-1/2 in. (64 mm) Bottom: 1/2 in. (13 mm) Sides: 1 in. (25 mm) Figure 5.1 Horizontal Venting clearances To combustible Materials Heat & Glo • TIARII-BK-IPI, TIARII-BR-IPI, TIARII-CES-IPI Installation Manual • 2340-980_R9 • 06/15... -
Page 30: Wall Penetration Framing/Firestops
FROM FLOOR Inches 59-3/4 70-1/4 59-3/4 70-1/4 1518 1784 1518 1784 *As dimensions “E” and “F” change, dimensions “A” and “B” must change accordingly. Figure 5.2 wall Penetration Heat & Glo • TIARII-BK-IPI, TIARII-BR-IPI, TIARII-CES-IPI Installation Manual • 2340-980_R9 • 06/15... -
Page 31: Ceiling Firestop/Floor Penetration Framing
INSTALL ATTIC INSULATION SHIELDS BEFORE OR AFTER INSTALLATION OF VENT SYSTEM CEILING FIRESTOP CEILING FIRESTOP INSTALLED BELOW CEILING INSTALLED ABOVE CEILING Figure 5.4 Installing the Attic Shield Heat & Glo • TIARII-BK-IPI, TIARII-BR-IPI, TIARII-CES-IPI Installation Manual • 2340-980_R9 • 06/15... -
Page 32: Appliance Preparation
See Figure 6.2. Save the screws. (If gasket breaks, apply high-temp sealant to bottom of collar before installing as shown in Figure 6.8.) REMOVE KNOcKOuT Figure 6.4 Figure 6.2 Heat & Glo • TIARII-BK-IPI, TIARII-BR-IPI, TIARII-CES-IPI Installation Manual • 2340-980_R9 • 06/15... - Page 33 Remove the two screws that hold the burner to the rear firebox wall. See Figure 6.12. Remove burner from appliance. Figure 6.7 Remove Screws under Rear Access Plate Heat & Glo • TIARII-BK-IPI, TIARII-BR-IPI, TIARII-CES-IPI Installation Manual • 2340-980_R9 • 06/15...
- Page 34 Explosion Risk • Pilot must be reattached to burner. • Delayed ignition or an explosion may occur if the pilot is not attached to the burner shield. Heat & Glo • TIARII-BK-IPI, TIARII-BR-IPI, TIARII-CES-IPI Installation Manual • 2340-980_R9 • 06/15...
-
Page 35: Securing And Leveling The Appliance
Normally, only one is required on the leg not touching the floor. Figure 6.16 2. Slide assembled nuts and bolts into slots on legs with the nuts on the bottom. Heat & Glo • TIARII-BK-IPI, TIARII-BR-IPI, TIARII-CES-IPI Installation Manual • 2340-980_R9 • 06/15... -
Page 36: Venting And Chimneys
Use care when removing termination cap from slip pipe. If slip section seals are broken during removal of the termination cap, vent may leak. Heat & Glo • TIARII-BK-IPI, TIARII-BR-IPI, TIARII-CES-IPI Installation Manual • 2340-980_R9 • 06/15... -
Page 37: Assemble Slip Sections
• Only outer pipes are sealed, sealing the inner flue is not required. • All unit collar, pipe, slip section, elbow and cap outer flues shall be sealed. Heat & Glo • TIARII-BK-IPI, TIARII-BR-IPI, TIARII-CES-IPI Installation Manual • 2340-980_R9 • 06/15... -
Page 38: Secure The Vent Sections
Figure 7.7 Rotate Seams for Disassembly point to appliance. 120º Figure 7.5 Securing Vertical Pipe Sections Figure 7.8 Align and Disassemble Vent Sections 120º Figure 7.6 Securing Horizontal Pipe Sections Heat & Glo • TIARII-BK-IPI, TIARII-BR-IPI, TIARII-CES-IPI Installation Manual • 2340-980_R9 • 06/15... - Page 39 2 in. (51 mm) MIN. BELOW FINISHED CEILING CUT HOLE 1/8 in. (3 mm) GREATER IN SIZE THAN PATTERN OF SUPPORT BOX AS IT IS PROJECTED ONTO ROOF LINE Figure 7.9 Heat & Glo • TIARII-BK-IPI, TIARII-BR-IPI, TIARII-CES-IPI Installation Manual • 2340-980_R9 • 06/15...
-
Page 40: Vertical Termination Requirements
• Caulk the perimeter of the flashing where it contacts the roof surface. See Figure 7.12. • Caulk the overlap seam of any exposed pipe sections that are located above the roof line. Heat & Glo • TIARII-BK-IPI, TIARII-BR-IPI, TIARII-CES-IPI Installation Manual • 2340-980_R9 • 06/15... - Page 41 • Tighten nut and make sure the collar is tight against the Caulk pipe section. • Caulk around the top of the storm collar. See Figure 7.15. Figure 7.15 Heat & Glo • TIARII-BK-IPI, TIARII-BR-IPI, TIARII-CES-IPI Installation Manual • 2340-980_R9 • 06/15...
-
Page 42: Horizontal Termination Requirements
• Rest the small leg on the extended heat shield on top of the pipe section to properly space it from the pipe section. Important Notice: Heat shields may not be field constructed. Heat & Glo • TIARII-BK-IPI, TIARII-BR-IPI, TIARII-CES-IPI Installation Manual • 2340-980_R9 • 06/15... - Page 43 Heat Shield or Heat Extended Heat Shield Shield SLIP SECTION CAN BE EXTENDED Wall Shield Firestop WALL Figure 7.17 Venting through the wall Heat & Glo • TIARII-BK-IPI, TIARII-BR-IPI, TIARII-CES-IPI Installation Manual • 2340-980_R9 • 06/15...
-
Page 44: Electrical Information
Verify proper operation after servicing. WARNING! Risk of Shock! Replace damaged wire with type 105º C rated wire. Wire must have high temperature insulation. Heat & Glo • TIARII-BK-IPI, TIARII-BR-IPI, TIARII-CES-IPI Installation Manual • 2340-980_R9 • 06/15... -
Page 45: Wiring Requirements
IGNITER SENSE TO JUNCTION BOX (110V) TO JUNCTION MODULE BOX (110V) FLAME MODULATION RC100 RC200 RC300 (OPTIONAL CONTROLS) BATTERY PACK 6V DC Figure 8.1 IPI wiring Diagram Heat & Glo • TIARII-BK-IPI, TIARII-BR-IPI, TIARII-CES-IPI Installation Manual • 2340-980_R9 • 06/15... - Page 46 Minimum 14-3 AWG with Ground Black Black White White Green Green Junction Box Power Switch Box Supply Wires Knockout Figure 8.2 Junction Box wired to wall Switch or Bc10 Heat & Glo • TIARII-BK-IPI, TIARII-BR-IPI, TIARII-CES-IPI Installation Manual • 2340-980_R9 • 06/15...
-
Page 47: Optional Fan Installation
3. Slide temperature sensor switch/bracket assembly onto the 10-32 screw located on the underside of the appliance. Secure the bracket assembly with the wing nut provided. See Figure 8.4. Heat & Glo • TIARII-BK-IPI, TIARII-BR-IPI, TIARII-CES-IPI Installation Manual • 2340-980_R9 • 06/15... -
Page 48: Gas Information
1/2 in. (13 mm) control valve inlet. • If substituting for these components, please consult local codes for compliance. Heat & Glo • TIARII-BK-IPI, TIARII-BR-IPI, TIARII-CES-IPI Installation Manual • 2340-980_R9 • 06/15... -
Page 49: Air Shutter Setting
• Slide the wing nut to the left to open the air shutter. • Tighten the wing nuts. NOTICE: If sooting occurs, provide more air by opening the air shutter. wING NuTS FOR SHuTTER ADJuSTMENT Figure 9.1 Air Shutter Heat & Glo • TIARII-BK-IPI, TIARII-BR-IPI, TIARII-CES-IPI Installation Manual • 2340-980_R9 • 06/15... -
Page 50: Appliance Setup
2. Install door knob from the manual pack with a phillips screwdriver. c. clean the Appliance Clean/vacuum any sawdust that may have accumulated inside the firebox or underneath in the control cavity. Figure 10.1 Remove casting Heat & Glo • TIARII-BK-IPI, TIARII-BR-IPI, TIARII-CES-IPI Installation Manual • 2340-980_R9 • 06/15... -
Page 51: Install The Refractory
Do not attempt to push the brick flat against the outer wall of the firebox. Panels should rest against the refractory tabs. REFRAcTORY TAB Figure 10.8 Refractory Installed Figure 10.5 Place Right Side Refractory Heat & Glo • TIARII-BK-IPI, TIARII-BR-IPI, TIARII-CES-IPI Installation Manual • 2340-980_R9 • 06/15... -
Page 52: Install The Log Assembly
Figure 10.9 Log Bracket Position - Propane LOG BRAcKET MOVED FORwARD FOR NG NO GAP Figure 10.12 Place Log #2 and Log #3 Figure 10.10 Log Bracket Position - NG Heat & Glo • TIARII-BK-IPI, TIARII-BR-IPI, TIARII-CES-IPI Installation Manual • 2340-980_R9 • 06/15... -
Page 53: Mineral Wool
Do not overtighten. See Figure 10.1 and 10.2 for reference. Reinstall front casting by setting in place and tightening the thumb screw. • Reinstall safety barrier Heat & Glo • TIARII-BK-IPI, TIARII-BR-IPI, TIARII-CES-IPI Installation Manual • 2340-980_R9 • 06/15... -
Page 54: Reference Materials
1219 SLP6A 2 - 6 51 - 152 SLP12A 2 - 12 51 - 305 SLP-FLEX-2 SLP-FLEX-3 SLP-FLEX-5 1524 SLP-FLEX-10 3048 Figure 11.1 SLP Series Vent components Heat & Glo • TIARII-BK-IPI, TIARII-BR-IPI, TIARII-CES-IPI Installation Manual • 2340-980_R9 • 06/15... - Page 55 14-7/16 in. 660 mm 367 mm 2-5/16 in. DVP-HSM-B 14-7/16 in. 59 mm Extended Heat Shield 367 mm SLP-WT-BK Wall Thimble-Black Figure 11.2 SLP Series Vent components Heat & Glo • TIARII-BK-IPI, TIARII-BR-IPI, TIARII-CES-IPI Installation Manual • 2340-980_R9 • 06/15...
- Page 56 356 mm 10-3/4 in. 273 mm 14 in. 7-1/2 in. 356 mm 192 mm 12 IN. 305 mm SLP-FLEX-TRAP Horizontal Termination Kit Figure 11.3 SLP Series Vent components Heat & Glo • TIARII-BK-IPI, TIARII-BR-IPI, TIARII-CES-IPI Installation Manual • 2340-980_R9 • 06/15...
- Page 57 17-7/8 IN. 454 mm 14 IN. 356 mm SLP-TB1 12 IN. Horizontal Termination cap 305 mm STOVEDV-BK Simpson Duravent Pipe Adapter collar Figure 11.4 SLP Series Vent components Heat & Glo • TIARII-BK-IPI, TIARII-BR-IPI, TIARII-CES-IPI Installation Manual • 2340-980_R9 • 06/15...
- Page 58 VENTING DV-46DVA-GcL coaxial/colinear Appliance connector 768-380A LINK-DV30B Stainless Steel Flex Pipe Flex Liner Kit LINKSQC-DV30 (COPPER) LINKSQB-DV30 (BLACK) Figure 11.5 SLP Series Vent components Heat & Glo • TIARII-BK-IPI, TIARII-BR-IPI, TIARII-CES-IPI Installation Manual • 2340-980_R9 • 06/15...
- Page 59 3” x 35’ Flex Extension 3DFA-35 4” x 35’ Flex Extension 4DFA-35 45° Elbow, Galvanized SLP45M 45° Elbow, Black SLP45-BK See Swivel 45° Elbow, Swivel, Galvanized 46DVA-E45 Heat & Glo • TIARII-BK-IPI, TIARII-BR-IPI, TIARII-CES-IPI Installation Manual • 2340-980_R9 • 06/15...
- Page 60 NOTES: BEFORE CUTTING ANY hOLES ChECK PIPE MANUFACTURERS CURRENT INSTRUCTIONS. EACh PIPE MANUFACTURER hAS ThEIR OWN LIST OF PARTS FOR KITS. SL IS NOT INTERChANGEABLE WITh SLP. Heat & Glo • TIARII-BK-IPI, TIARII-BR-IPI, TIARII-CES-IPI Installation Manual • 2340-980_R9 • 06/15...
- Page 61 Heat & Glo • TIARII-BK-IPI, TIARII-BR-IPI, TIARII-CES-IPI Installation Manual • 2340-980_R9 • 06/15...
-
Page 62: Accessories
Please contact your Heat & Glo dealer with any questions or concerns. For the location of your nearest Heat & Glo dealer, please visit www.heatnglo.com. Printed in U.S.A. - Copyright 2014 Heat & Glo • TIARII-BK-IPI, TIARII-BR-IPI, TIARII-CES-IPI Installation Manual • 2340-980_R9 • 06/15...
Need help?
Do you have a question about the TIARII-BR-IPI and is the answer not in the manual?
Questions and answers