Advertisement
Quick Links
Model No. : WLICVRW24810.1
Serial No ___________
Serial number decal
Write the serial number in the
space above for reference.
QUESTIONS ?
If you have questions, or if there are
missing parts, please contact us:
UK
Call: 08457 089 009
From Ireland: 053 92 36102
Website: www.iconsupport.eu
E-mail: csuk@iconeurope.com
Write:
ICON Health & Fitness, Ltd.
c/o HI Group PLC
Express Way
Whitwood, West Yorkshire
WF10 5QJ
UK
CAUTION
Read all precautions and instruc-
tions in this manual before using
this equipment. Keep this manual
for future reference.
USERʼS MANUAL
Visit our website
www.iconsupport.eu
Advertisement

Subscribe to Our Youtube Channel
Related Manuals for Weslo WLICVRW24810.1


Summary of Contents for Weslo WLICVRW24810.1
- Page 1 USERʼS MANUAL Model No. : WLICVRW24810.1 Serial No ___________ Serial number decal Write the serial number in the space above for reference. QUESTIONS ? If you have questions, or if there are missing parts, please contact us: Call: 08457 089 009 From Ireland: 053 92 36102 Website: www.iconsupport.eu...
-
Page 2: Table Of Contents
TABLE OF CONTENTS WARNING DECAL PLACEMENT........IMPORTANT PRECAUTIONS. - Page 3 IMPORTANT PRECAUTIONS WARNING : To reduce the risk of serious injury, read all important precautions and instructions in this manual and all warnings on your bike before using it. ICON assumes no responsibility for personal injury or property damage sustained by or through the use of this product.
-
Page 4: Warning Decal Placement
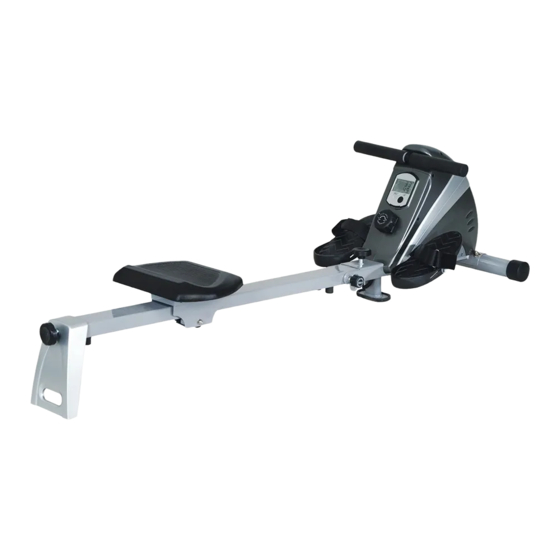
Le vélo est l’ un des moyens les plus efficaces The model number is WLICVRW24810.1 and the pouThe exercice bike provides an array of fea- location of the serial number decal are shown on tures designed to make your workouts at home the front cover of this manual. -
Page 5: Assembly
ASSEMBLY Assembly requires two persons. Place all parts of the elliptical exerciser in a cleared area and re- move the packing materials. Do not dispose of the packing materials until assembly is completed. In addition to the included tool(s), assembly requires a Phillips screwdriver an adjustable wrench. - Page 6 STEP 1 Attach the front foot (33) to the main structure (1) using bolts (30), arc washers (31) and round nuts (32). STEP 2 Unscrew the seat stop bumpers (24), the screws (45) and the plate (44) and slide the sliding seat (18) onto the main frame (22).
- Page 7 STEP 3 Tighten the rail bracket (29) to its guard (28) using the screws (27) and then attach the assembly to the main frame (22) using the bolt (2). Then, slide the hex head bolt (25) between 2 washers (8) into the main frame (22) and tighten it with a nut (9). STEP 4 Attach the connecting cables (46) and (36) and then attach the main frame (22) to the structure (1) using a hex head bolt (14), 2 washers (8) and a nut (9).
- Page 8 HOW TO FOLD THE ROWING MACHINE After use, you can fold your rowing machine. To do so, unscrew the clamping bolt¬ (15) and (2). Then fold the main frame (22) and fix it on the main structure using the washer (35) and the clamping bolt (2).
- Page 9 HOW TO USE THE ROWING MACHINE Sit on the seat, facing the pedals. Place your feet in Remember to breathe normally as you row—never the pedals and adjust the straps to fit your feet. Hold hold your breath. the handle with an overhand grip. Correct rowing form consists of three phases: 1.
- Page 10 CONSOLE FEATURES HOW TO USE THE CONSOLE Make sure that the console has batteries (see page MAINTENANCE AND TROUBLESHOOTING). If there is a sheet of clear plastic on the face of the console, remove it. 1. Turn on the console To turn on the console, press any button on the console or simply begin pedaling.
- Page 11 MAINTENANCE AND TROUBLESHOOTING Inspect and tighten all parts of the exercice bike small amount of mild detergent. regularly. Important: To avoid damaging the console, keep Replace any worn parts immediately. liquids away from the console and keep the console To clean the elliptical, use a damp cloth and a out of direct sunlight.
-
Page 12: Suggested Stretches
SUGGESTED STRETCHES The correct form for several basic stretches is shown at the right. Move slowly as you stretch—never bounce. 1. Toe Touch Stretch Stand with your knees bent slightly and slowly bend forward from your hips. Allow your back and shoulders to relax as you reach down toward your toes as far as possible. -
Page 13: Exercise Guidelines
EXERCISE GUIDELINES Burning Fat—To burn fat effectively, you must exer- WARNING: cise at a low intensity level for a sustained period of time. During the first few minutes of exercise, your Before beginning this or any exercise pro- body uses carbohydrate calories for energy. Only af- gram, consult your physician. - Page 14 EXPLODED DRAWING—Model No. WLICVRW24810.1...
-
Page 15: Part List
PART LIST—Model No. WLICVRW24810.1 Item Description Qty. Item Description Qty. Main frame Steel bushing M10*25 Clamping bolt Bearing Handlebar end cap Caster wheel plastic handlebar cover Sleeve 2 Handlebar Plate Counter M6*20 Screw resistance knob Connecting cable D10x2.0x20 Flat washer... -
Page 16: Ordering Replacement Parts
ORDERING REPLACEMENT PARTS To order replacement parts, please see the front cover of this manual. To help us assist you, be prepared to provide the following information when contacting us: • the model number and serial number of the product (see the front cover of this manual) •...
Need help?
Do you have a question about the WLICVRW24810.1 and is the answer not in the manual?
Questions and answers