Table of Contents
Advertisement
Assembly Instructions and Parts List
Please read and save these instructions. Read carefully before attempting to assemble, install, operate or maintain the product described.
Protect yourself and others by observing all safety information. Failure to comply with instructions could result in personal injury and/or prop-
erty damage! Retain instructions for future reference.
Specifications
Max Pressure with
Model
Standard Lance
PW1345
1300 psi
PW1346
1300 psi
PW1350
1300 psi
PW1375
1300 psi
PW1376
1300 psi
Assembly Instructions
Figure 1
Garden Hose Connection
GARDEN HOSE CONNECTION
INSTRUCTIONS
1. Attach nipple adapter to inlet fit-
ting on the unit (this may already be
attached to the pump).
2. Attach quick connect fitting to
garden hose.
3. Pull side "A" of quick connect fit-
ting toward garden hose and push
onto nipple adapter.
© 1999 Campbell Hausfeld
PW1345, PW1346, PW1350 , PW1375, and PW1376
Effective Pressure
Maximum
w/Turbo Lance
Capacity
—
1.8 GPM
—
1.8 GPM
—
1.8 GPM
1750 psi
1.8 GPM
1750 psi
1.8 GPM
4. Push side "A" of quick connect fit-
ting towards nipple adapter and
release.
"A"
Nipple
Adapter
Figure 2 - Garden Hose Connection
For parts, product & service information
visit www.campbellhausfeld.com
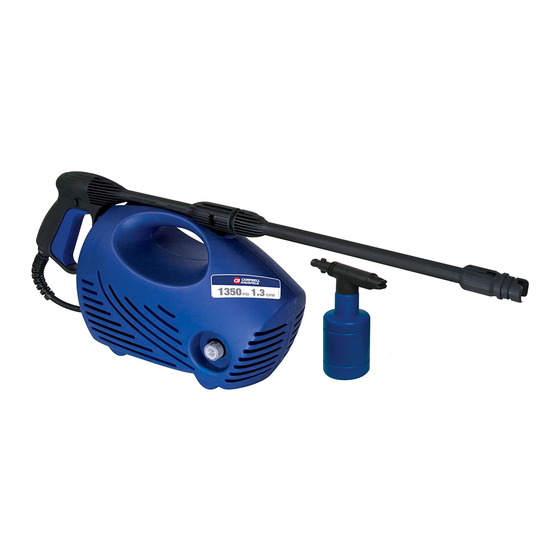
Electric Pressure
Washer
NOTE: REFER TO PRODUCT MANUAL FOR
ALL SAFETY INSTRUCTIONS
Motor Power
(Single Phase)
13 Amps
13 Amps
13 Amps
13 Amps
13 Amps
Quick Connect Fitting
Garden Hose
Maximum Inlet
Voltage
Water Temperature
120V
100˚F
120V
100˚F
120V
100˚F
120V
100˚F
120V
100˚F
! IMPORTANT !
This pressure washer maybe
equipped with a microswitch sensi-
tive to water flow. This Instant
Start/Stop switch (ISS) senses water
flow in the pump. When the trigger
is released, water stops flowing
through the pump. The ISS then
automatically turns the motor off to
protect pump from overheating.
OPERATION
1. Turn the "ON/OFF" switch to
"ON".
2. Pull trigger on gun to begin
spraying water.
3. Release trigger. The pressure
washer motor will stop running.
4. To spray again, pull trigger and
motor and pump will restart.
Note: Occasionally the motor may
run for a short time to bring fresh,
cool water into the pump even if
trigger is released. This is part of
normal operation and will not dam-
age the unit.
Always turn the
"ON/OFF" switch
to "OFF" then trigger gun to release
hose pressure before unplugging
power cord.
Risk of Injection.
Unit will start
spraying when trigger is squeezed if
on/off switch is in "ON" position.
Always point gun in safe direction.
Call 1-800-330-0712
for Technical Service
Approved
IN456800AV 10/99
U L
#7P64
Unit
Weight
25 lbs.
25 lbs.
25 lbs.
25 lbs.
25 lbs.
Advertisement
Table of Contents

Related Manuals for Campbell Hausfeld PW1345


Summary of Contents for Campbell Hausfeld PW1345
-
Page 1: Assembly Instructions
PW1345, PW1346, PW1350 , PW1375, and PW1376 Assembly Instructions and Parts List Please read and save these instructions. Read carefully before attempting to assemble, install, operate or maintain the product described. Protect yourself and others by observing all safety information. Failure to comply with instructions could result in personal injury and/or prop- erty damage! Retain instructions for future reference. -
Page 2: System Connection
PW1345, PW1346, PW1350, PW1375, and PW1376 Assembly Instructions and Parts List System Connection GFCI Outlet Power Switch Outlet 1. Insert lance into the gun and turn clockwise to positive stop as shown in Figure 3. Figure 3 - Gun/Lance Connection... -
Page 3: Instructions De Montage
PW1345, PW1346, PW1350, PW1375, et PW1376 Instructions de Montage et Liste de Pièces de Rechange Si’il vous plaît lire et conserver ces instructions. Lire attentivement avant de monter, installer, utiliser ou de procéder à l’entretien du produit décrit. Se protéger ainsi que les autres en observant toutes les instructions de sécurité, sinon, il y a risque de blessure et / ou dégâts matérials? Conserver ces instructions comme référence. -
Page 4: Branchement Du Système
PW1345, PW1346, PW1350, PW1375, et PW1376 Instructions de Montage et Liste de Pièces de Rechange Pistolet Branchement du Interrupteur Interrupteur Général Système DDFT Sortie vers le tuyau d’arrosage et le pouss- er sur le raccord intermédiaire. 4. Pousser le côté “A” du raccord rapi-... - Page 5 PW1345, PW1346, PW1350, PW1375, et PW1376 Instructions de Montage et Liste de Pièces de Rechange Pour Pièces de Rechange, S’il vous plaît fournir l’information suivante: Correspondance: -Numéro de Modèle The Campbell Group / Parts Dept. -Numéro de Série (si applicable)
-
Page 6: Instrucciones De Montaje
PW1345, PW1346, PW1350, PW1375, y PW1376 Instrucciones de montaje y lista de piezas Sírvase leer y conservar estas instrucciones. Léalas cuidadosamente antes de intentar armar, instalar, operar o efectuar mantenimiento al pro- ducto descrito. Protéjase a sí mismo y a los demás observando toda la información de seguridad. ¡El no cumplir con las instrucciones podría ocasionar lesiones personales y/o daños materiales! Conserve estas instrucciones para futura referencia. -
Page 7: Lista De Repuestos
PW1345, PW1346, PW1350, PW1375, y PW1376 Instrucciones de montaje y lista de piezas Tomacorrientes con Conexión de la Pistola dispositivo de Manugera de Jardín Interruptor conexión a tierra contra cortocircuitos Salida 3. Hale el extremo "A" del conector rápido hacia la manguera de jardín y conéctelo al niple. - Page 8 PW1345, PW1346, PW1350, PW1375, y PW1376 Instrucciones de montaje y lista de piezas Para ordenar repuestos, sírvase llamer al 1-800-330-0712 (En los Estados Unidos, o llame a su distribuidor local) Sírvase proporcionar la siguiente información: Dirija su correspondencia sobre repuestos a: -Número de modelo...
- Page 9 Universal Motor/Pump Serviceable Components BUILT TO LAST Models PW134500AV, PW134501AV, PW134599AV, PW135000LE, Replacement Parts List PW136500AV, PW137500AV, PW137501AV, PW137599AV, & PW1380000AV PW138000AV only PW138000AV only PW134599AV, PW138000AV, PW137599AV, & PW135000LE only PW134599AV, PW138000AV, 22 23 PW137599AV, & PW135000LE only PW134500AV, PW134501AV, PW136500AV, PW137500AV &...
Need help?
Do you have a question about the PW1345 and is the answer not in the manual?
Questions and answers